 |
| The original mat colour was darker than I wanted |
Painting twenty four square feet of wargaming mat has to be one of the biggest hobby related painting projects I have ever undertaken. As stated a few days ago my Mat-o-War arrived and on the whole I am very pleased with it. However it was a little darker than I would have liked and as various websites suggested painting it I put out a request for advice here on
BLMA and over at
TMP. The feedback received was very useful and so this weekend I attacked my new wargaming mat with several cans of spray paint!
The method suggested by those in the know, and adopted my me, was relatively simple:
- Lay the mat out in a well ventilated area (in my case, the Garden)
- Apply several light dusting's of spray paint in short bursts from about 18 inches range
- Base: Desert Yellow (Humbrol) and Dark Yellow (Tamiya)
- Secondary: Sand (Humbrol) and Light Sand (Tamiya)
- Highlight: Ivory (Halfords)
- Allow to dry for several hours before handling
The aim is not to create any specific features (although you could do that, adding roads of instance), but merely to break up the uniformity of the mats basic colour By keeping the can at a distance the paint only adheres to the surface of the fabric and doesn't soak all the way through. This means you could paint the other side a different colour if you so wished.
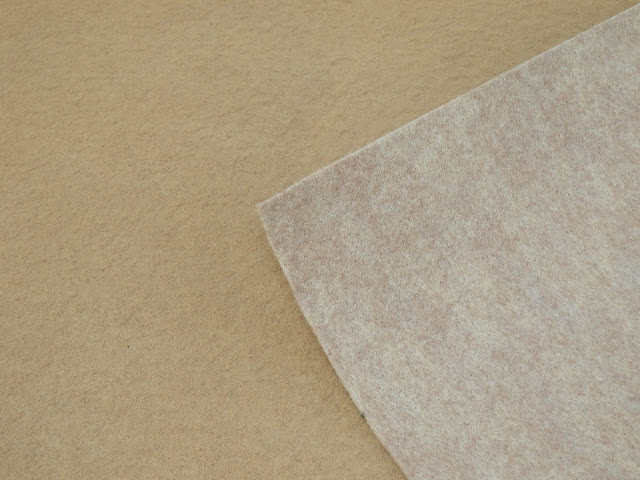 |
| The unpainted mat is on the right and the base painted colour is on the left |
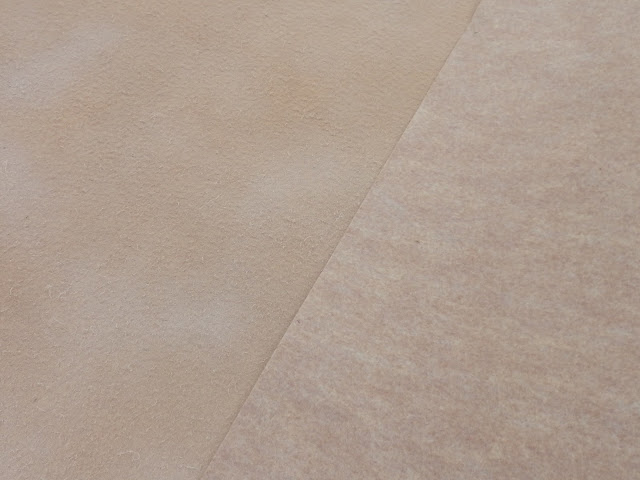 |
| Again the unpainted mat is on the right and the final highlighted mat on the left |
The above picture doesn't do the finished effect justice because it really does look much better than the unpainted mat. The overall effect is much less uniform, significantly lighter in tone and compliments the basing of my particular models.
 |
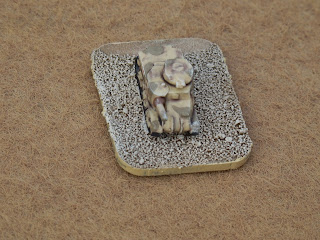
| British Heavy Tank Squadron and an Infantry Tank Company on my newly painted mat |


Very nice Lee, looking forward to seeing how FoW works out in 6mm now!
ReplyDeleteNow that I have the mat I really have no excuse not to get a few test games in.
DeleteHi Lee,
ReplyDeleteCan you email me on roguejedi@btinternet.com as I have some desert related items you may be interested in?
The mat looks a whole lot better and blends in really well with the model bases - how are you tacking ridges and such like?
All the best,
DC
Ok, I've emailed you. I'm intrigued now!
DeleteSo far I haven't got any terrain items like hills and ridges. I have a few buildings but that's it at the moment. I'm going to Cavalier next week (with the Rejects) and will be looking out for suitable products.
It looks really good with the figure and vehicle bases on top. You must be pleased...
ReplyDeleteI am....I was anxious that I'd ruine my mat when I started with the spray paints, but I'm pretty happy with the end result.
Delete"ruine"....?!? How did I miss that spelling error? LoL
DeleteGreat result Lee. I guess you could do the other side to reflect the coastal plain with some patches of green to represent cultivation
ReplyDeleteWell done Lee. I like the mottled effect.
ReplyDeleteCheers
PD
This is really starting to come together.
ReplyDeleteThanks, I'm pretty happy with my progress. And with the convention season for me about to kick off (with Cavalier next weekend) I'm gearing up towards a summer of 6mm related retail therapy!
DeleteNice work Lee, the mat does look a lot better with a lick of paint!
ReplyDeleteFab, Lee!
ReplyDelete