Sunday 28 September 2014

Finished LRDG Chevy's

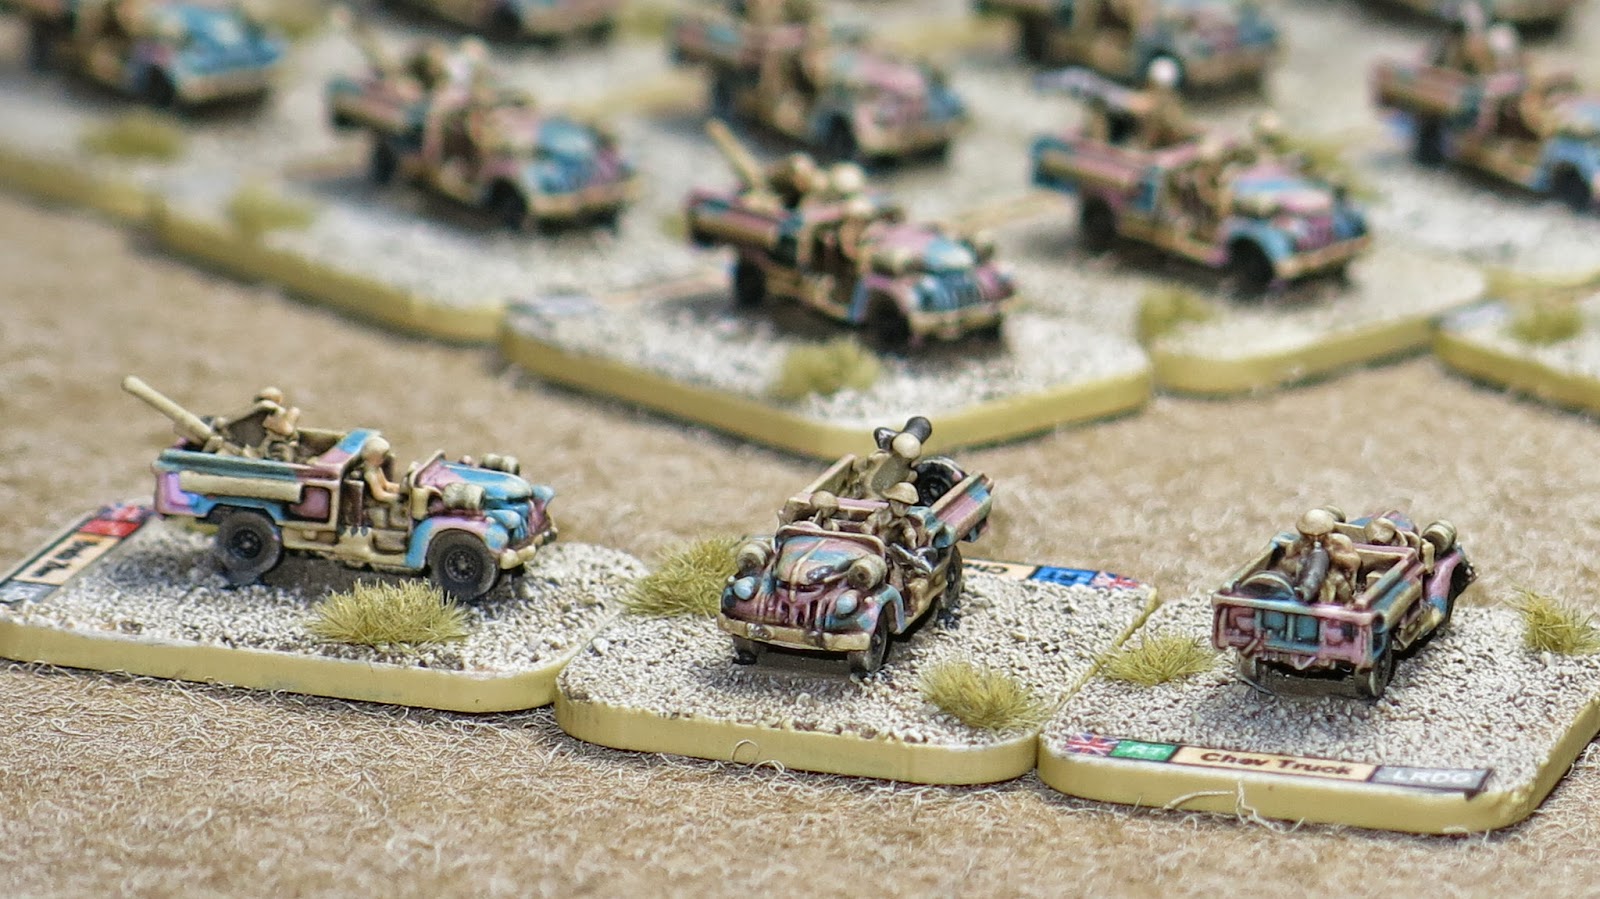
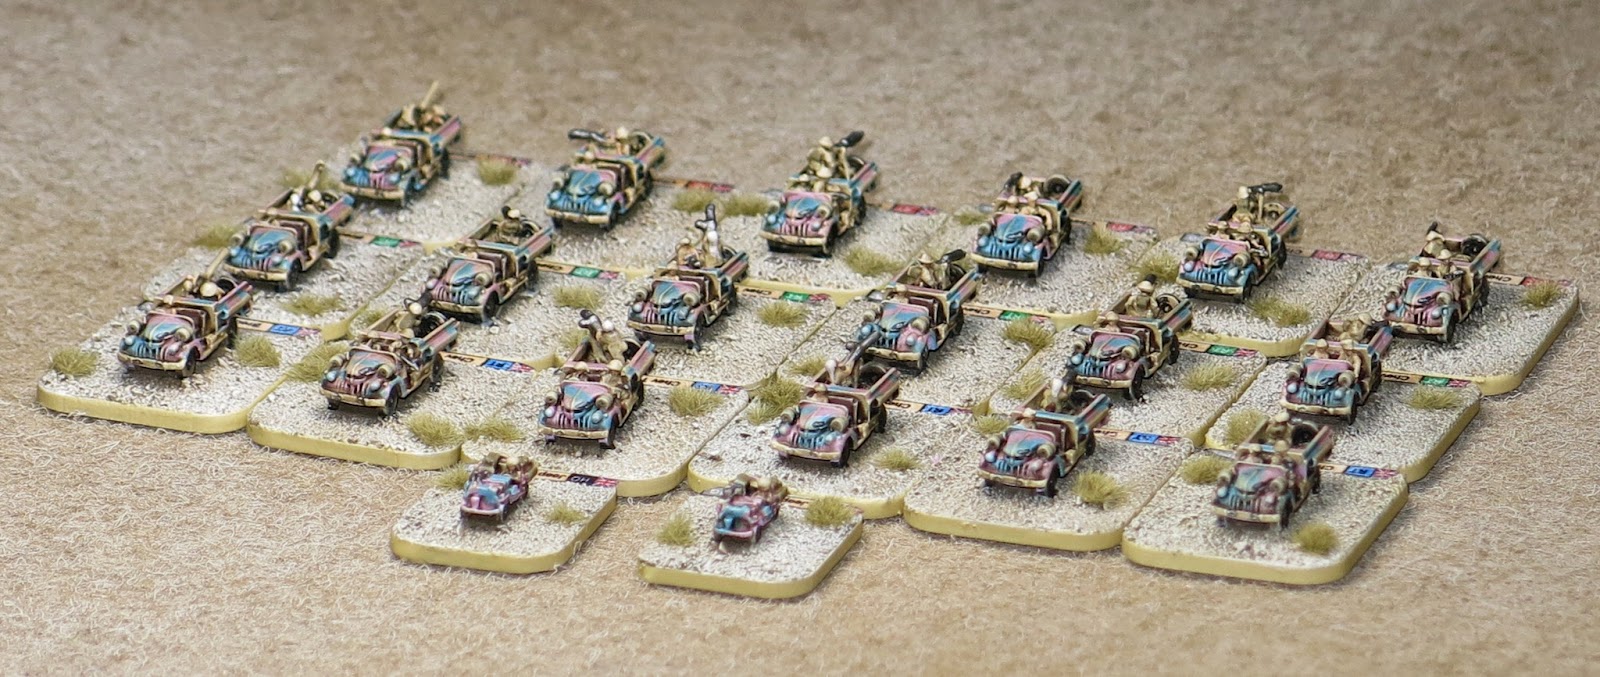
As mentioned last week I have been working on some LRDG vehicles for my 6mm 1942 North Africa Project. I bought the models several months ago but I wasn't going to rush into painting them until I was happy I had a good colour scheme for them and a clear idea of how I was going to use them in future games. As I mentioned on Friday I found several excellent websites and a back copy of an article from Model Military International that I found very inspiring and helped me decide on a daring - even risky - hard edged camouflage pattern consisting of Desert Pink and Pale Blue. As you can see from the following pictures I have finished, and personally I really like the way these have turned out. 

Three Half Patrols with two Jeeps as the HQ Section.

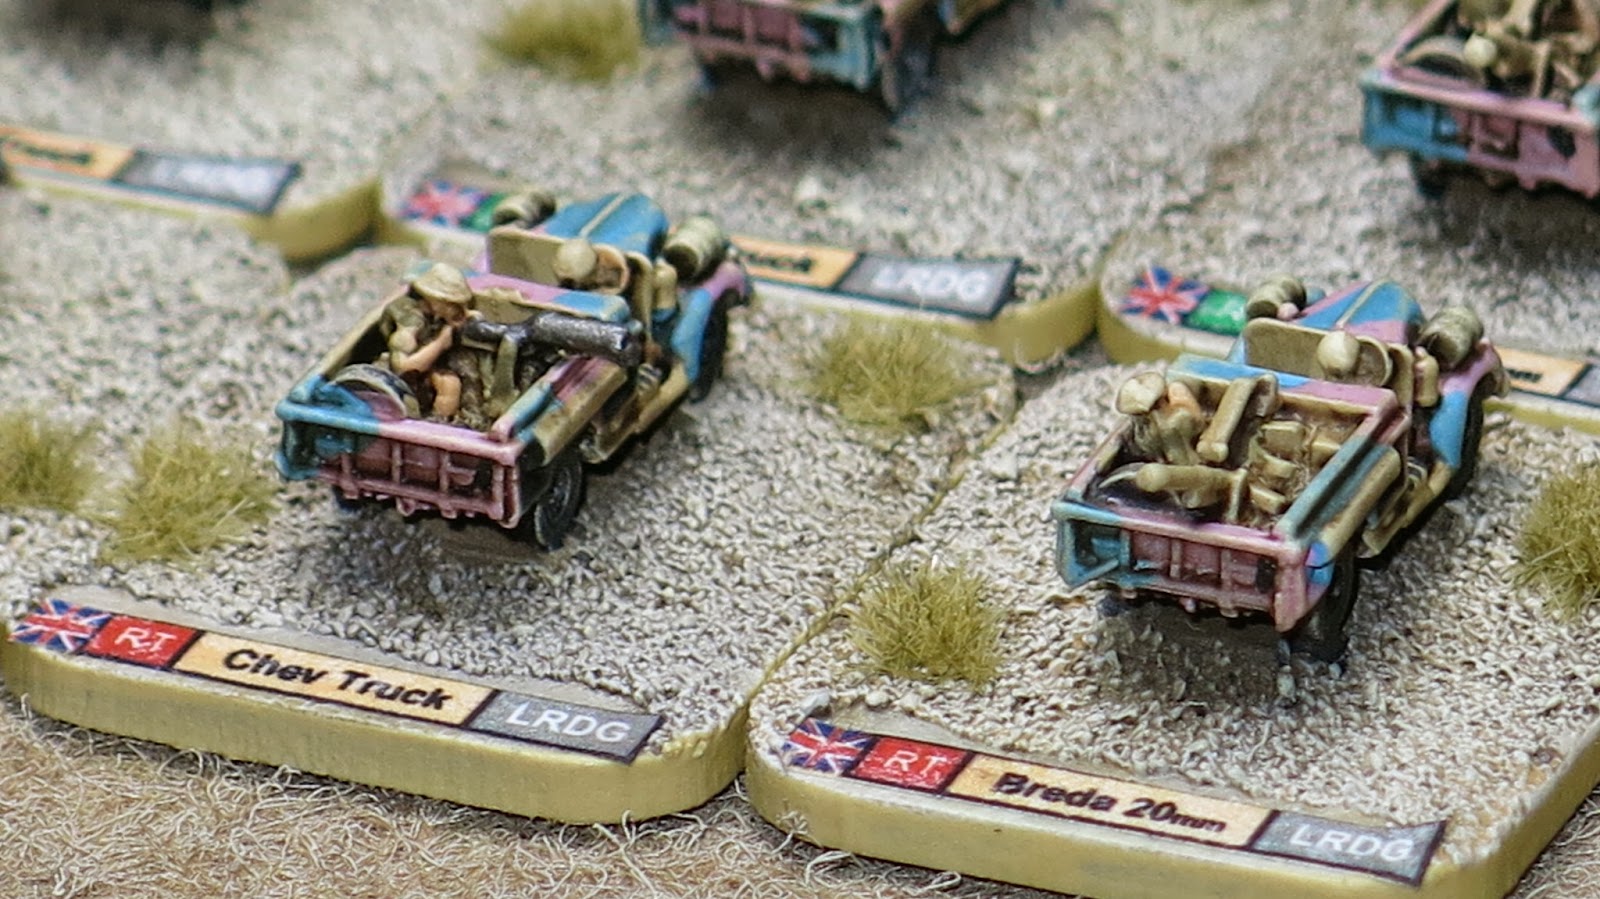
A close up showing the side front and rear of these Chevy trucks. The truck on the left has a captured 20mm Breda anti-aircraft gun mounted in the back. In a moment of madness I also added small painted details such as the black strip of paint on the front nearside hood which would have had the name of the truck painted in white. 

As usual I have labeled all the bases although fitting these longer labels on was a tight squeeze.

The models come in one piece with just the machine guns separate. But the guns were far too fragile to stand up to rough handling and the lack of extra crew (other then a driver) really bothered me. In the end I raided my 'bitz-box' and found some suitable artillery crew, HMG's and officers to mount in various positions within the trucks. A lot of clipping and filing later the new crew fitted well and mean each truck is different to the next. 

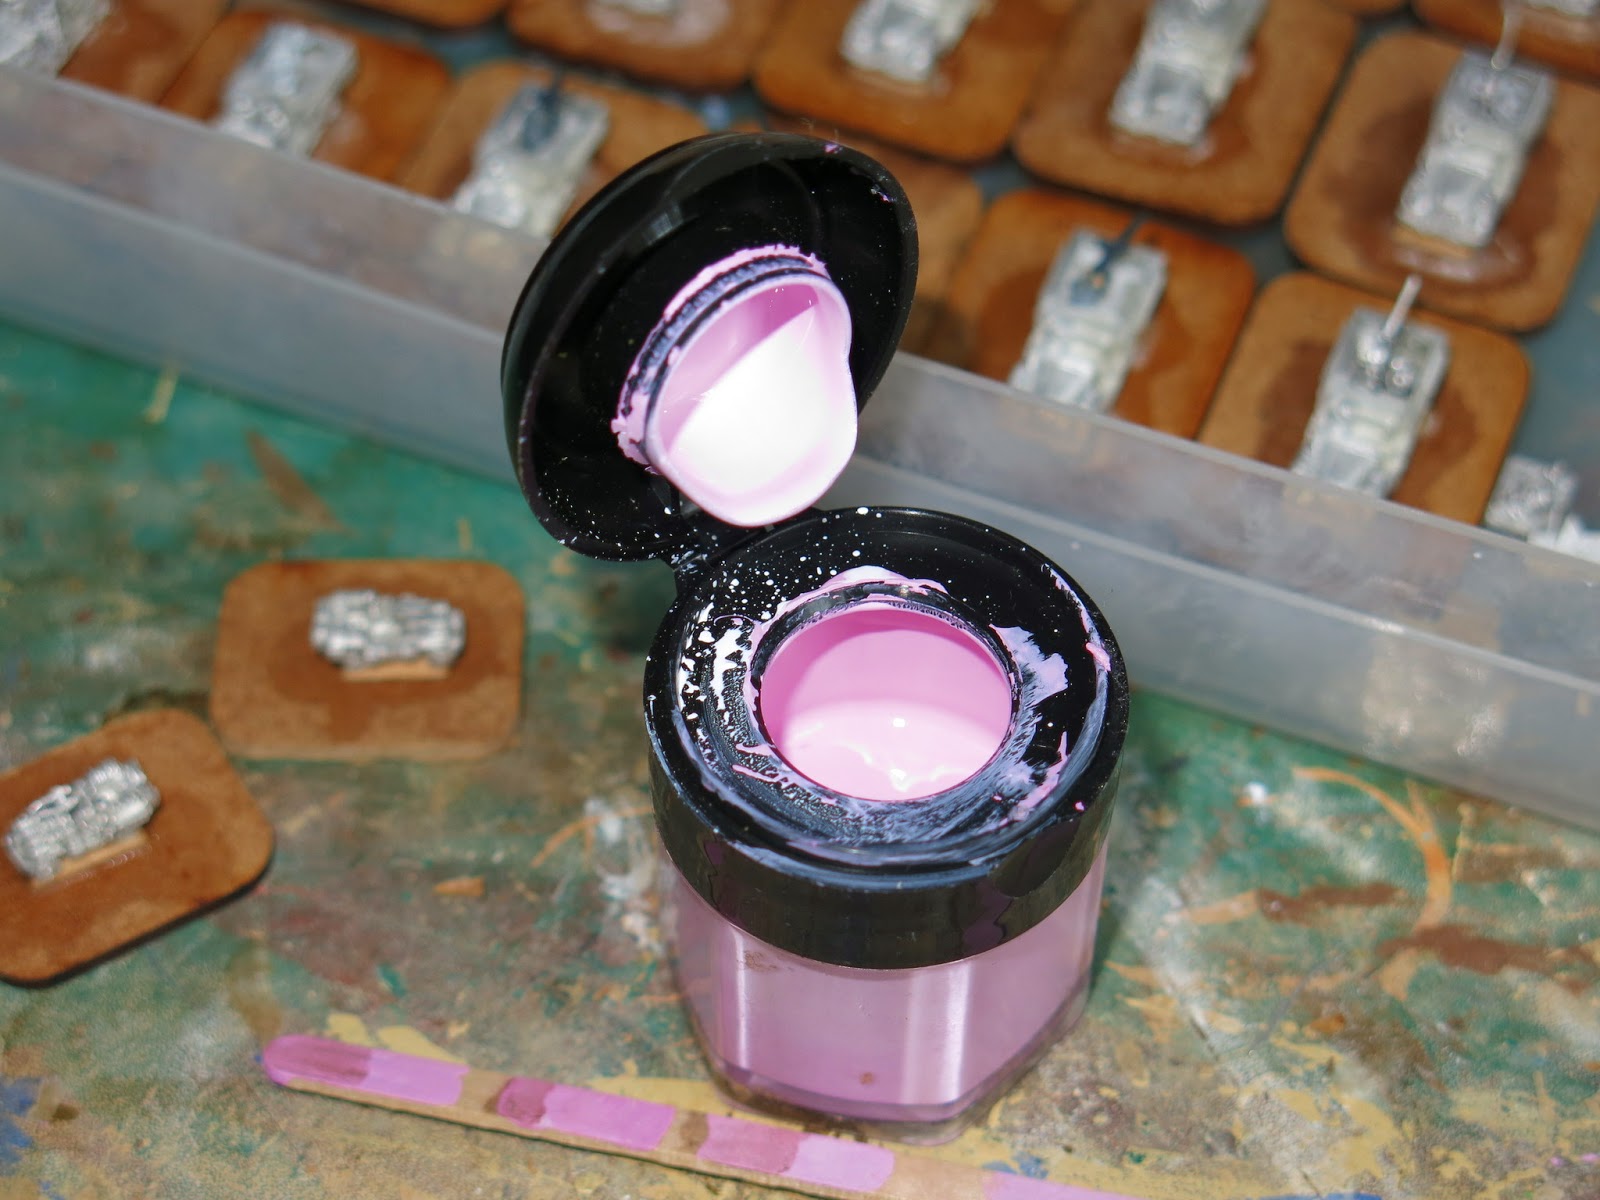
Mixing the right shade of desert pink was difficult. I used some old Squid Pink (from the Vallejo Game Colour Range) and added white until I had the shade I wanted. It needed to be much lighter than the finished look to allow for the dark ink wash I would apply to the model after base coating. 

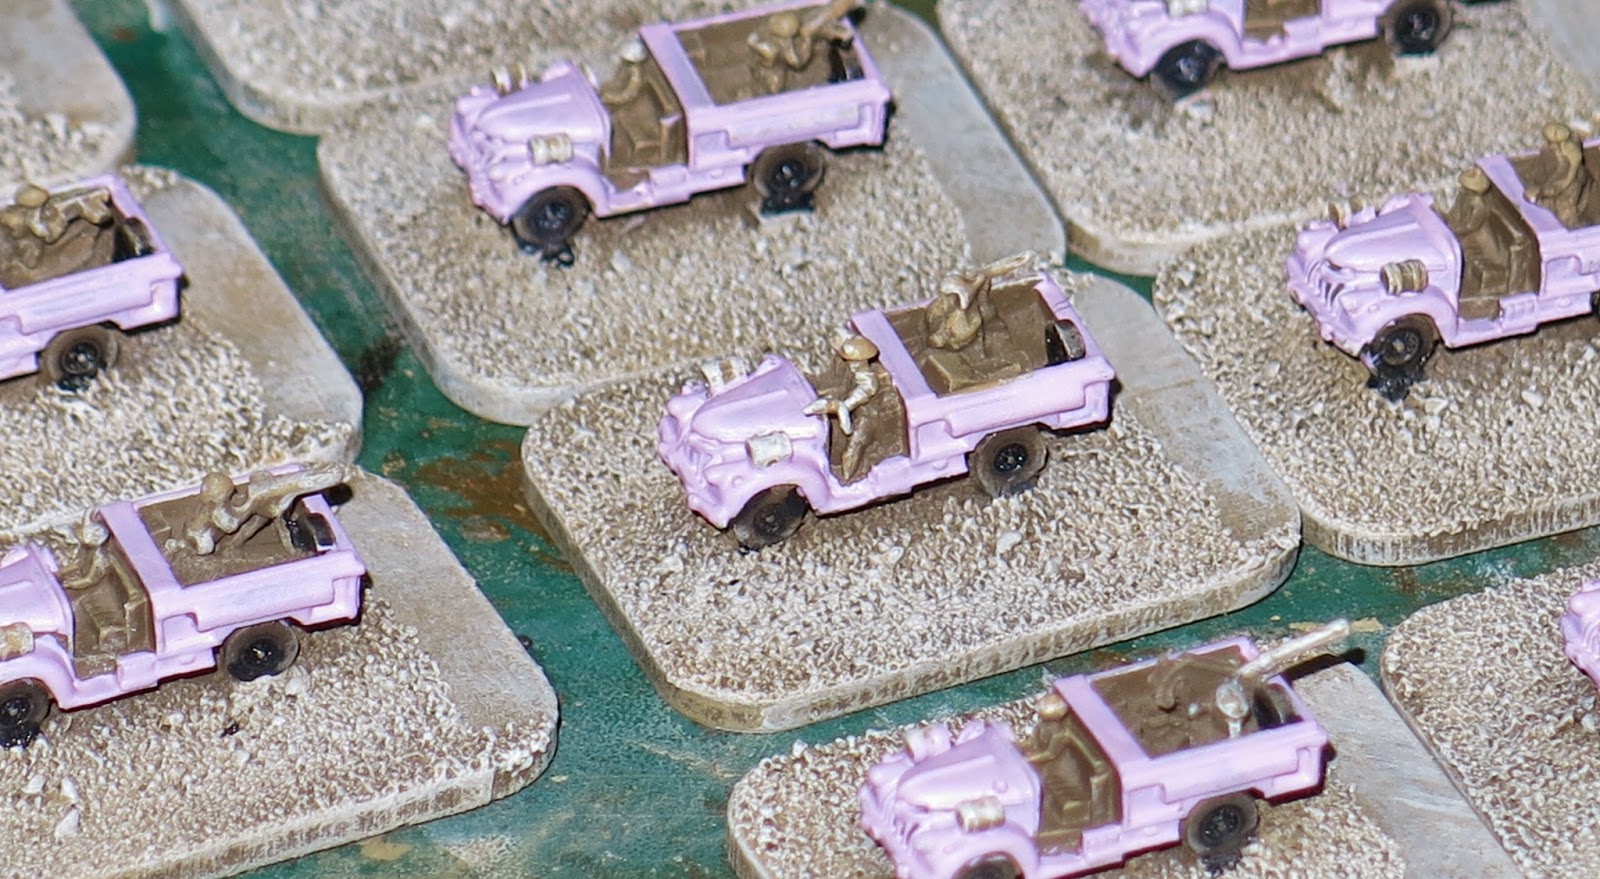
The pink base coat still looked scarily bright (this picture just doesn't show that well). After I had added the light blue camo pattern and dusted the whole model with weathering the brightness was brought under control. The final ink wash completed the process so the finished models don't look 'neon-pink' on the games table!
I have to say these trucks were great fun to paint. The models were very well detailed without a single flaw or piece of flash on any of the castings. The lack of additional crew was a little bit of a disappointment but I had great fun finding suitable models for a bit of micro conversion work. And painting these was great fun as well, albeit a little nerve wracking when I applied that first coat of pink. I'm really happy with how these turned out and I can't wait to use them in a game... now I just need to build myself an Axis airfield for these guys to attack! 

Friday 26 September 2014

Painting an LRDG Patrol

I have been wanting to put together a patrol of the famed Long Range Desert Group for some time. Made up of hardened desert soldiers, former explorers and adventurers the LRDG was a bold and daring reconnaissance and combat force that could seemingly attack axis forces anywhere behind the lines, almost at will. I have opted to build a Mid-War patrol so that it remains compatible with my current 1942 forces. Using the MW LRDG list from the Burning Empires book I have taken every upgrade I could to give this small and compact unit some real punch.


 Confident  Veteran 
LRDG Patrol (MW)
British Mid-War
Platoon
Qty
Unit
Points
Headquarters
Patrol HQ (MW)
2
LRDG Jeep with extra hull-mounted MG
80
Combat Platoons
LRDG Half Patrol (MW)
1
5
5
Chev Truck with Breda 20mm SP
Chev Truck with Twin AA MG
Extra hull-mounted MG on any trucks
235
LRDG Half Patrol (MW)
1
5
5
Chev Truck with Breda 20mm SP
Chev Truck with Twin AA MG
Extra hull-mounted MG on any trucks
235
LRDG Half Patrol (MW)
1
5
5
Chev Truck with Breda 20mm SP
Chev Truck with Twin AA MG
Extra hull-mounted MG on any trucks
235
Company Points:
785


There is still room for expansion of this force with the possibility of adding Commando Platoons and additional transport vehicles to give it more flexibility in its missions. I can also add in a few Stuart Light Tank platoons from the list, although I haven't yet read anything to suggest these were used extensively by the LRDG. I know that some Stuarts were trialed by the Group but they were quickly found to be unreliable and unsuitable for the sort of missions this unit was created for. Another option is to build an SAS Patrol as they worked closely with the LRDG throughout the war. 

For this special unit I opted for the expensive option and bought all the models I needed from GHQ in the States. By the time I paid for airmail from the US and import taxes in the UK each vehicle works out four times as expensive as the equivalent from H&R... but the detailing and quality of these models is truly outstanding and worth every penny.

Deciding on a suitable colour scheme for these vehicles proved to be more difficult than I first anticipated. All the sources I have read have revealed that there was no official policy for camouflage and that individual Patrol commanders had considerable latitude with regards to colours and patterns. Most trucks were probably supplied in a sandy coloured paint scheme but few stayed that way for long. Common examples of camouflage included a hard-edged splinter camouflage in a dark grey, another utilised a randomly applied scheme of pink and light blue. One garish example that often gets mentioned consisted of a random vivid arrangement of pink, yellow and green! However the desert sun quickly faded the colours and the weathering the effects of dust and sand eventually resulted in a much more muted paint job.


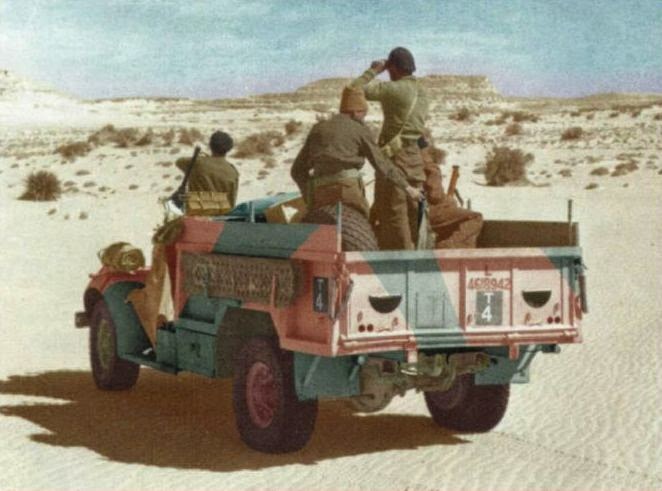
A colourised picture showing the colour scheme and camo pattern I want to recreate. 
(Source: Tobias Gibson - Issue 43 of Model Military International)

In the end I have opted for a hard edged splinter pattern in faded Desert Pink and Pastel Blue with various items of equipment retaining their Dark Sand (947) base colour. I couldn't find a suitable Pink or Blue, so in the end I blended my own based on various pictures and how I wanted the finished models to look. I won't give a blending recipe because I think this is a matter of judgement and personal taste rather than being an accurate historical shade. I think the results are quite striking and look very authentic when compared to period photo's and the many of the colour schemes I have seen online and in print.

I've been working away on these for a week now and I'm really happy with how they are turning out. The colours are not as bright as they at first appear, especially after weathering and ink effects have been added. I have just a few things to finish and I'll post pictures of the models sometime next week.

The pink looks a bit alarming at this stage! 


The best sources I have found for colour schemes and other information about the LRDG are:

Long Range Desert Group site by Sven Schwarz - http://www.lrdg.de/main.htm
L.R.D.G. by Tobias Gibson - http://blindkat.hegewisch.net/lrdg/lrdg.html
LRDG Truck Camouflage, Markings and Names on the FOW Website - http://www.flamesofwar.com
Issue 43 of Model Military International (Nov 2009) also has an excellent article on the camo and colour schemes of LRDG Chevy's. 

Wednesday 24 September 2014

A little Skirmish

I made a flying visit to the Skirmish Toy Soldier Show in Sidcup on Sunday morning and I dragged my long suffering wife ('The Wargaming Widow') along with me. My youngest daughter was away for a Girls Brigade camp weekend and my eldest had other plans so the wife and I had a rare day to ourselves. So we made a flying visit to the Sidcup show before going on to Eltham Palace which is one of our favourite English Heritage properties. We even managed to fit in a quick stop off at a small military museum on the way home so all in all we had a pretty busy but enjoyable day.

Skirmish Wargames put on a Skirmish Wargame at Skirmish (!) - Up Sidcup Creek without a Paddle

Skirmish Wargames - Up Sidcup Creek without a Paddle

Rainham (Medway) Wargames Club - Colonial Sudan with a very nice paddle steamer in the foreground

Rainham (Medway) Wargames Club - Colonial Sudan

Privateers of London - Ancient Naval Game

Ashford Model Club playing a game of Bolt Action I think

Lots of tanks in a very small area..

Old Guard - Songs of Blades and Heroes

Old Guard - Songs of Blades and Heroes

Hornchurch Heroes

Medway Wargames with some very nice 'Tripod' models

Medway Wargames

The guys from Crush the Kaiser playing a WWII game
As usual a nice little show with just enough to wet the appetite. I didn't spend anything this time partly because I'm on an economy drive (unemployment does that) and partly because I'm an idiot and forgot that I needed some Varnish! As always I spent almost as much time chatting with friends and acquaintances as I did looking at the stalls. All of which makes this a very friendly and easy going little event which neatly fills an hour or two on a Sunday morning. Even the wife seemed to enjoy the show. Surrounded by all those wargaming geeks I was sure she would be a bit uncomfortable but she seemed pretty relaxed in the company of my gaming buddies... Maybe after all these years she's getting used to our strange ways?!

Tuesday 16 September 2014

The 2nd Battle of the Corunna Road - January 1937

Over the weekend Reject Clint put on a cracking game set during the Spanish Civil War. Seven of us gathered in the Shed-o-War using a set of rules written by Clint the day before (allegedly)! The rules worked very well and made for a quick and easy game that flowed quickly and smoothly throughout. 

Setup
The Battle of Madrid in November 1936 had been fought to a standstill, with the Nationalists under Franco failing to take the city. They then started to besiege it, aiming to cut its links to the rest of Spain. Franco decided to attack the city from the North-West in order to cut off water and electricity supplies from the Sierra de Guadarrama and encircle the city. After a failed offensive in November, the Nationalists summoned a force of 17000 men, led by General Orgaz, with four mobile brigades (led by Garcia Escamez, Baron, Saenz de Buruaga and Monasterio), backed by heavy artillery and JU-52 Bombers. The Republican army had a few battalions led by Luis Barcelo.

Towards the end of December, Orgaz received reinforcements and decided to relaunch the offensive on 3rd January. This offensive becoma known as the Battle of the Fog. The Republican high command redeployed their units in the Pozuelo-Brunete sector. The Republicans had an army corps led by the Miaja with five divisions (led by Nino Nanetti, Modesto, Colonels Perea, Adolfo Prada and Galan) but had little ammunition or supplies. 

The Nationalists offensive started with a heavy artillery bombardment on the 14th December and Franco's troops occupied the town of Boadilla del Monte. Now in January a second big push is underway. This game will only deal with a very small part of the battle as the whole engagement lasted over a month. 

Republican Briefing - Maintaining the existence of this supply road into Madrid is vital to the City. This road must be maintained at all costs. It is thought that the Nationalists will want to capture the road and deprive the city of troops and supplies.  It is Vital that the road be held. You will be out numbered but I expect that you will do your duty and hold the road open. “No Pasan!”

Nationalist Briefing - Your troops will be attacking an undefended section of the road network Therefore you must advance your forces across the road and create a firm bridgehead secure from counterattack. It is not sufficient to merely push them back but to advance strongly and push the traitors back to where they are unable to support the road with rifle or artillery fire. The road must be uncontested and securely held.  While you out number and out gun the traitorous Republicans in this area they are not to be taken lightly. Your mission this day is to take and hold the Corunna Road in order to deprive the city of supplies and support.

All the players were also issued with individual mission objectives that were known only to them. These included things like holding a particular building or making sure your allies took more casualties than you! These represented the many competing factions within both sides and added a little extra dimension to our individual actions. 

Order of Battle
The arrival and deployment of forces in this game was quite fluid with both sides requesting and receiving reinforcements of various kinds throughout the game. Listing forces is therefore quite difficult because not everything available turned up. For example my side, the Republicans, requested reinforcements (some T26 light tanks) but we left it too late and they didn't arrive before the battle ended.

Action
Opening positions...the Republicans (Myself, Ray and John) are positioned along the road in cover. The Nationalists (Smiffy, Postie and Surj) are on the far edge of the table.

Republican troops along the road. The Cavalry in the top left of the picture soon dismounted and were crucial to holding the center of the line.

My troops held the left flank and soon occupied the buildings at the road junction. The Nationalists were not able to capture the village and lost a lot of men trying. Right of these I had another unit on the road. These guys used slingshots to throw dynamite at the enemy!

In the distance the Nationalists advance towards my troops in the Village

The Cavalry in the center have dismounted and now hold the road and a crucial building. 

The rather unedifying sight of our opponents trying to 'help' with the re-positioning of a Republican artillery template which has landed short. It took all three several minutes to work out how to minimise their own casualties, but they got there in the end!!

Boom! Boom! Boom! Oh look at that, we missed, what a surprise!!

Republican reinforcements arrive and bolster the defence of the town on my flank

Contractual Postie shot.

The Fascists target my reinforcements with artillery. Very unsporting in my humble opinion.  

We (the Republicans) return artillery fire targeting their Armoured Car but narrowly miss yet again.

Later we redirected our fire against the Nationalist artillery and thankfully managed to eliminate them.

Surjit, John and Ray

In the distance Surjits troops advance cautiously towards Johns troops. There appeared to be some mis-communication among the Nationalist Generals because he insisted he had been told not to attack but later they claimed no such order had been given. With dissension in the ranks of the Nationalists and their attack delayed the Republicans sense things may be going their way. 

Meanwhile in the center, long range rifle file is slowly weakening our units there.

The Nationalists advance slowly but methodically towards their objective

From the Nationalist side their advance looks very strong against a very thin line of Republicans

The Republicans on the road are very thin on the ground

Ray (on right) wonders how he will be able to hold the center. He has requested reinforcements but the runner carrying the message has a long way to travel. To request reinforcements Ray had to detach a stand and either send it off the table (which would have taken at least four turns) or pass the message along the line, unit to unit, until it reached me, when I would send a stand off table with the message. This took three turns. Then Ray had to roll to see if his request had been answered. Lets just say he rolled 'badly'.

Ray re position's his dismounted cavalry and exchanges fire across the fields at the Nationalists

Meanwhile I have occupied the village in strength and the battered Nationalists have retreated to safety behind a hill. Any attempt to move by either party would have been severely punished and both sides settled into a stalemate. 

Beyond the central farmhouse Republican troops under John attempt to take the battle to the Nationalists. Accurate fire from the enemy and poor moral among his own troops saw one unit retreat and the other get bogged down and unable to advance. 

The stalemate on the flank means I have achieved my objectives and secured the road but it also ties down my troops. I try to shift some stands to reinforce my left flank (towards the center of the Republican line) but it has little effect on the outcome of the battle.

A big hole in the Center of the Republican line is now developing. Soon the Nationalists will have cut the road. The only hope now for the Republicans are those reinforcements (T26 Tanks!!) we requested hours ago... but the message never got through (or the messenger ran away) and the tanks never arrive. 

Republican artillery makes the Nationalists pay dearly for the road but ultimately they were unable to keep this vital supply line open. 

Analysis
A brilliant game and a great set of rules. The game flowed well and the mechanics were quickly picked up by all the players. Despite being outnumbered by the nationalists, and not receiving all our reinforcements, we put up a stiff fight and made the Fascists pay dearly for the road. I believe Clint is working out the final points for the game to take into account individual objectives etc.

For a set of rules supposedly written the day before these worked amazingly well. One innovation in particular that I think we were all impressed with, was the measuring method for firing and movement. This involved folding an A4 sheet in half and half again thereby providing us with four simple basic measurements: A4 Long Side (effective shooting range); A5 Long Side (Running); A5 Short side (close range); A6 Short side (movement when crossing an obstacle like a hedge or wall). The A4 sheet also had the basic rules printed on them so when folded we had a rules booklet and a measuring device in one handy package. A simple yet brilliant idea. 

Very well done to Clint for putting on such a great game and I'm sure this won't be the last time we play these rules and this period in the Rejects Shed-o-War. 
Tuesday 9 September 2014

Sea of Sand

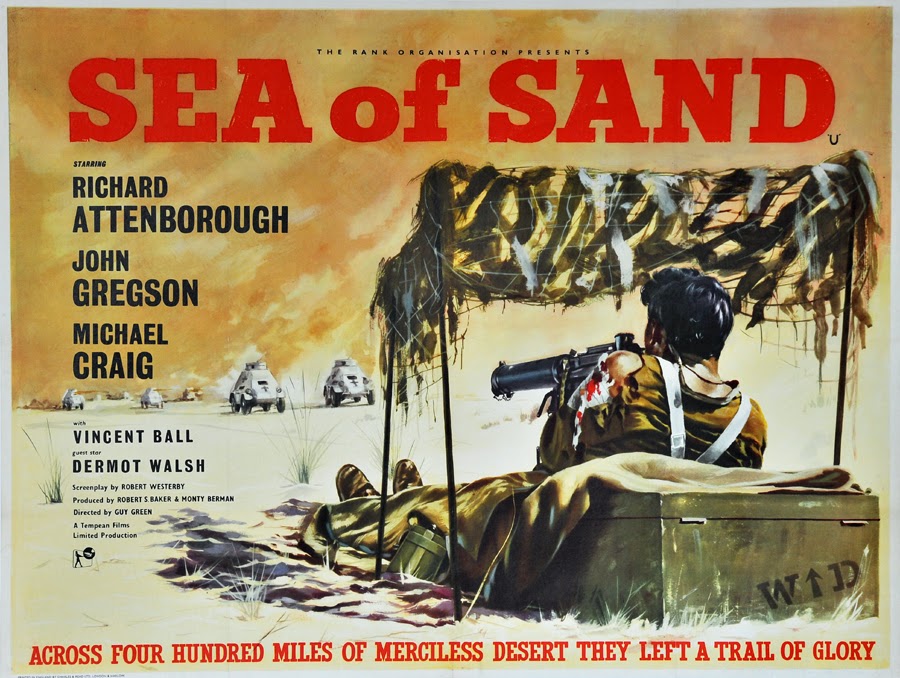
Earlier in the year I put in an order with GHQ and bought all the vehicles I need to build a mid war LRDG patrol. Before I get started on them though I have been doing some research and hunting online for inspiration. In the process I came across this 1958 film, "Sea of Sand" (released in the US as "Desert Patrol"). 


Set in the days before the launch of Operation Lightfoot (the opening of 2nd Alamein) the film depicts one of many LRDG patrols sent out to destroy German supply dumps before the British offensive commences. The movie stars the late Richard Attenborough, John Gregson and Michael Craig and was filmed on location in Lybya.


I love a good war film and this is a pretty good movie. The films Technical Adviser was an ex LRDG man and this is reflected in the script and most of the equipment used. For instance the trucks are all Chevrolet 30 cwt WB trucks mounted with Vickers machine guns, which is accurate, but the British use Sten Guns which were not generally used by the LRDG. Also the German half trucks depicted are actually American half trucks, but on the whole the film is pretty accurate for the time when it was made. Well worth an hour and a half of your time if you haven't seen this film before.

Thursday 4 September 2014

Imperial War Museum London

It's been a few years since I have visited this excellent museum and I have been eagerly awaiting the reopening after its two year long refurbishment and enlargement. While I enjoyed the old building in its previous layout I'm not one of these people that clings to the past and rejects change. I loved the transformation of the British Museum in 2000 into the bright, modern and visually stunning space it is now and I have to say I'm equally impressed with the new interior of IWM London. Many of the old and much loved exhibits previously on display have been returned and the new space truly does them justice. 

So in the last few days of the kids summer holidays I took my youngest daughter along. I didn't take as many pictures as I usually do, partly because photography isn't allowed in some areas and partly because many of the Galleries are rather poorly lit and with many exhibits behind glass trying to get a good photo was quite hard.

The Naval guns outside the entrance are iconic

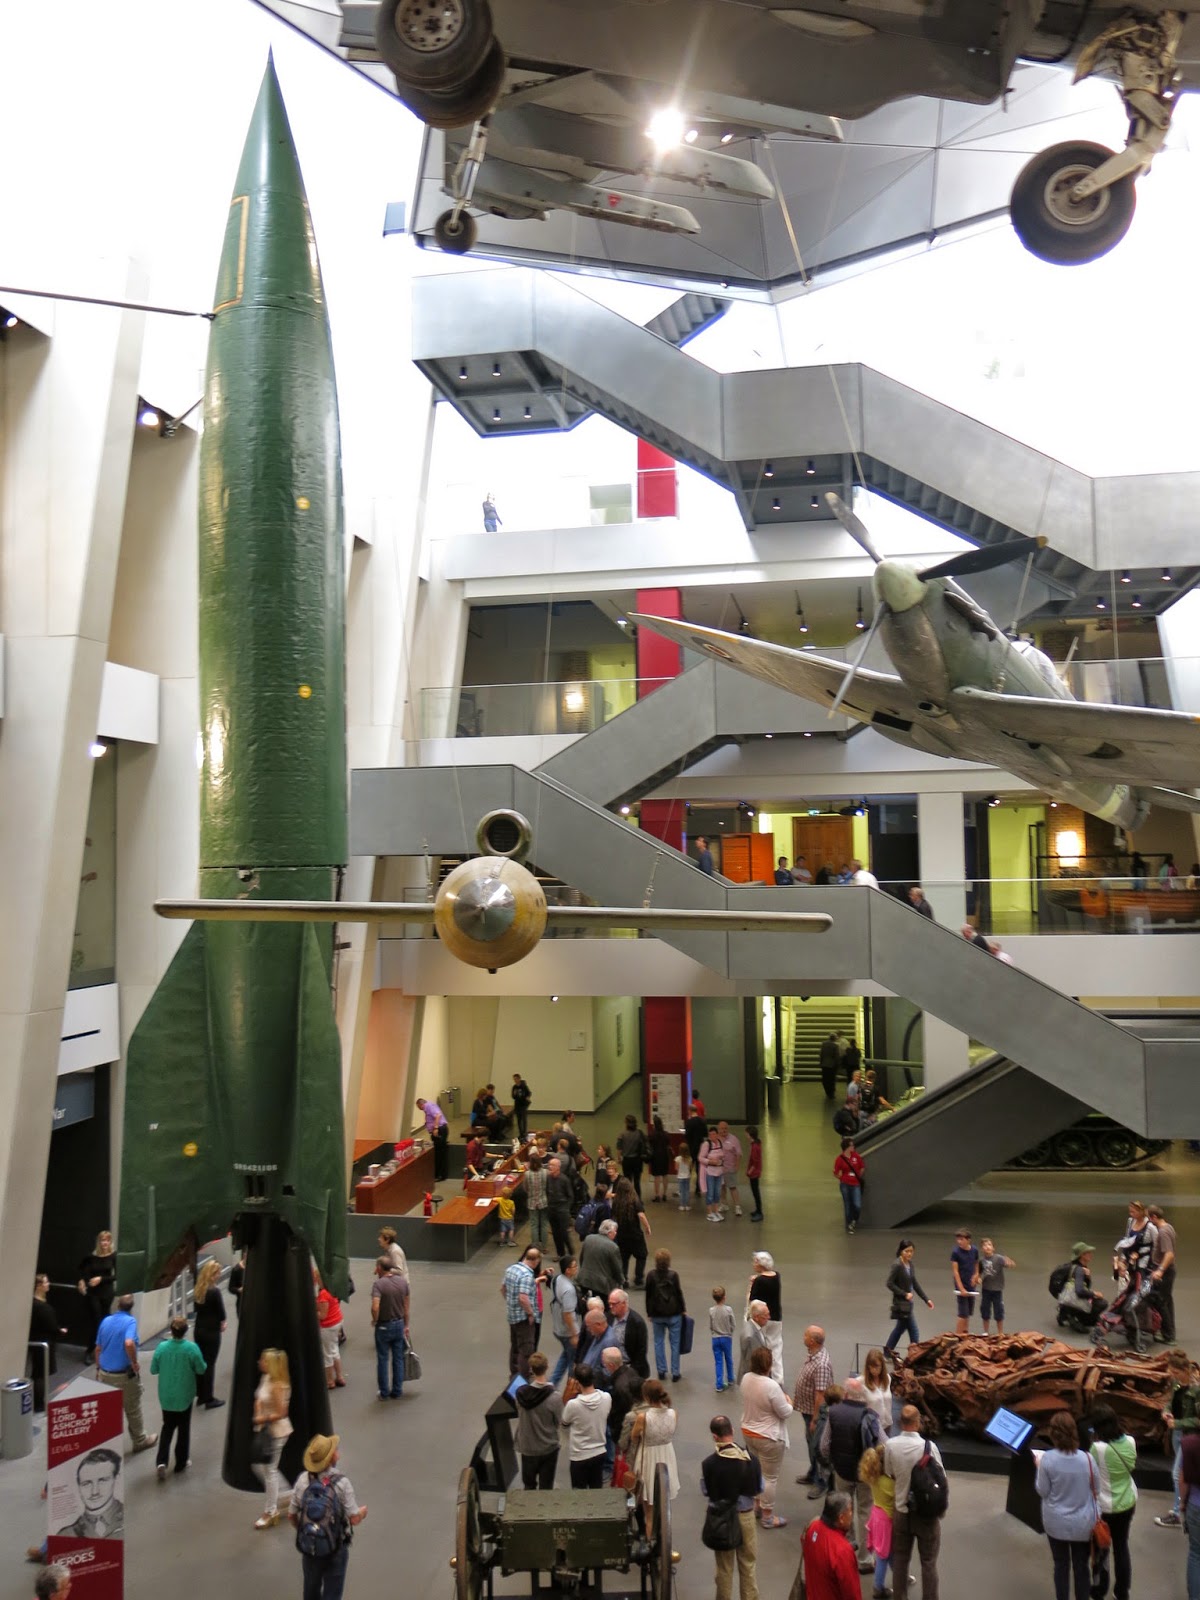
Inside the new and enlarged entrance foyer

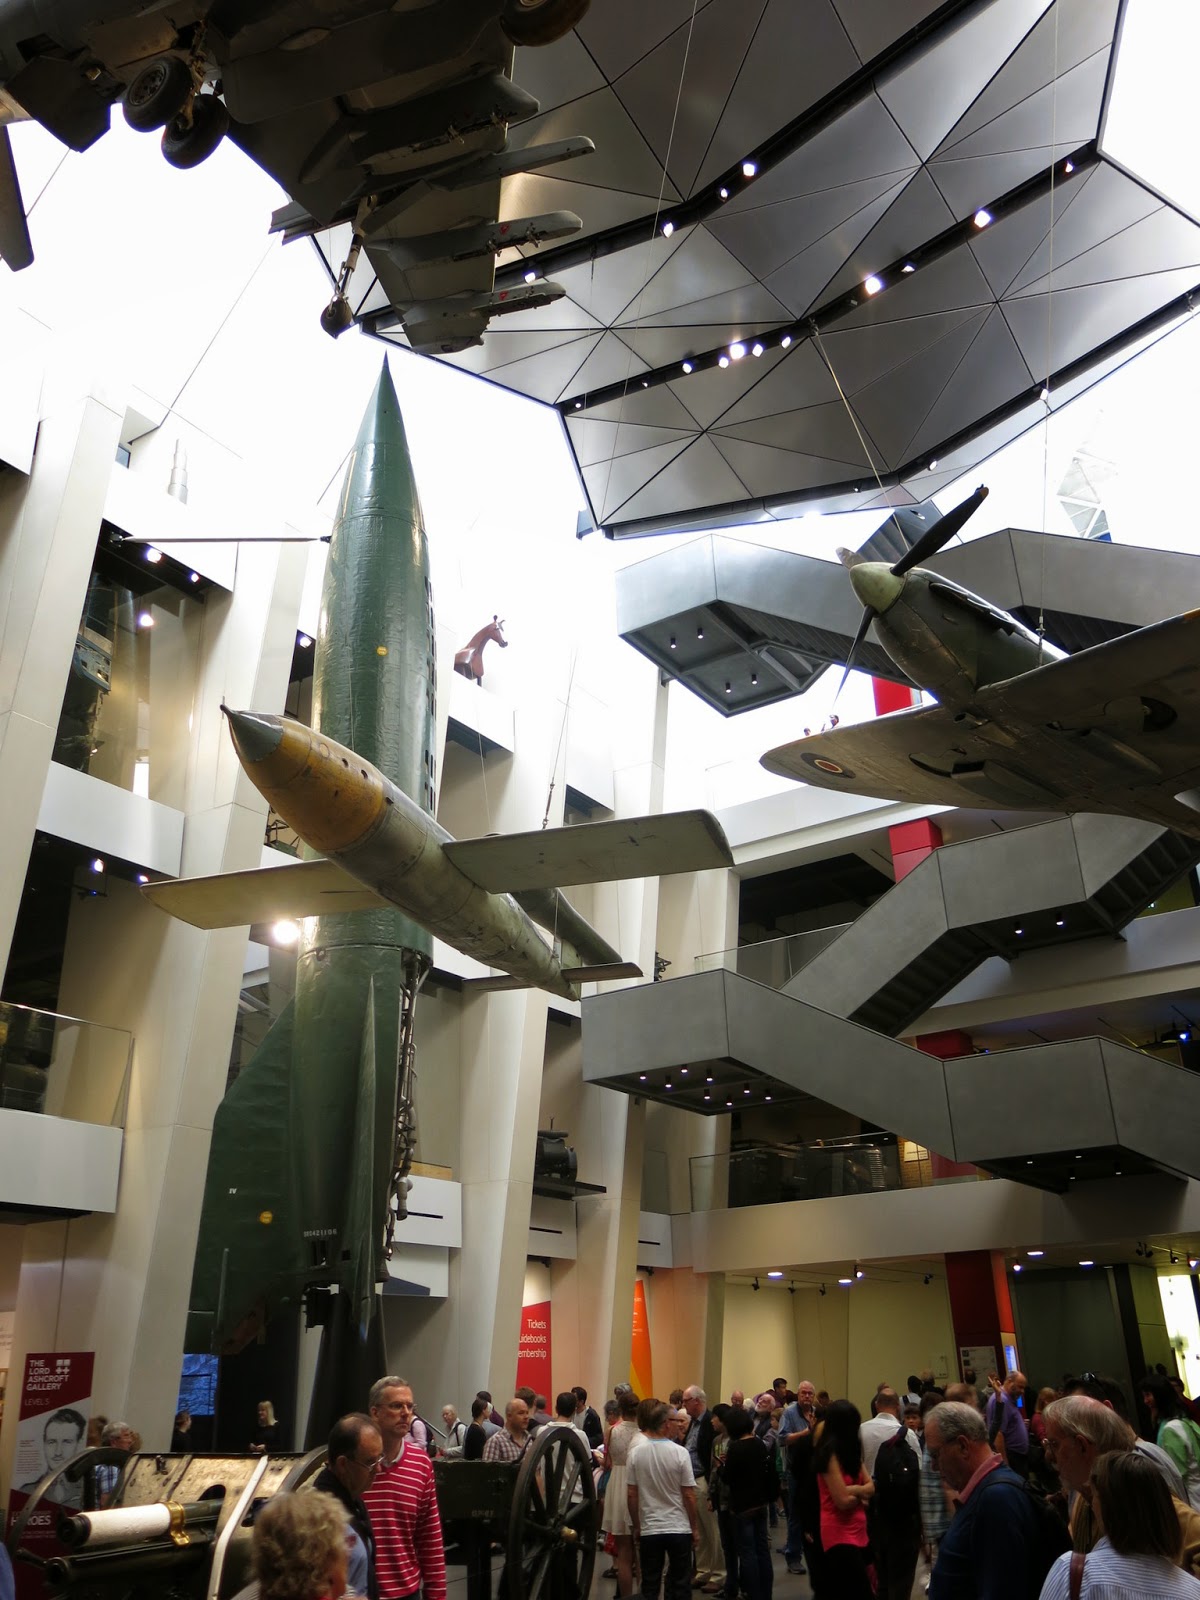
Another view of the entrance

Many of the large items such as the Spitfire and V2 are old favourites

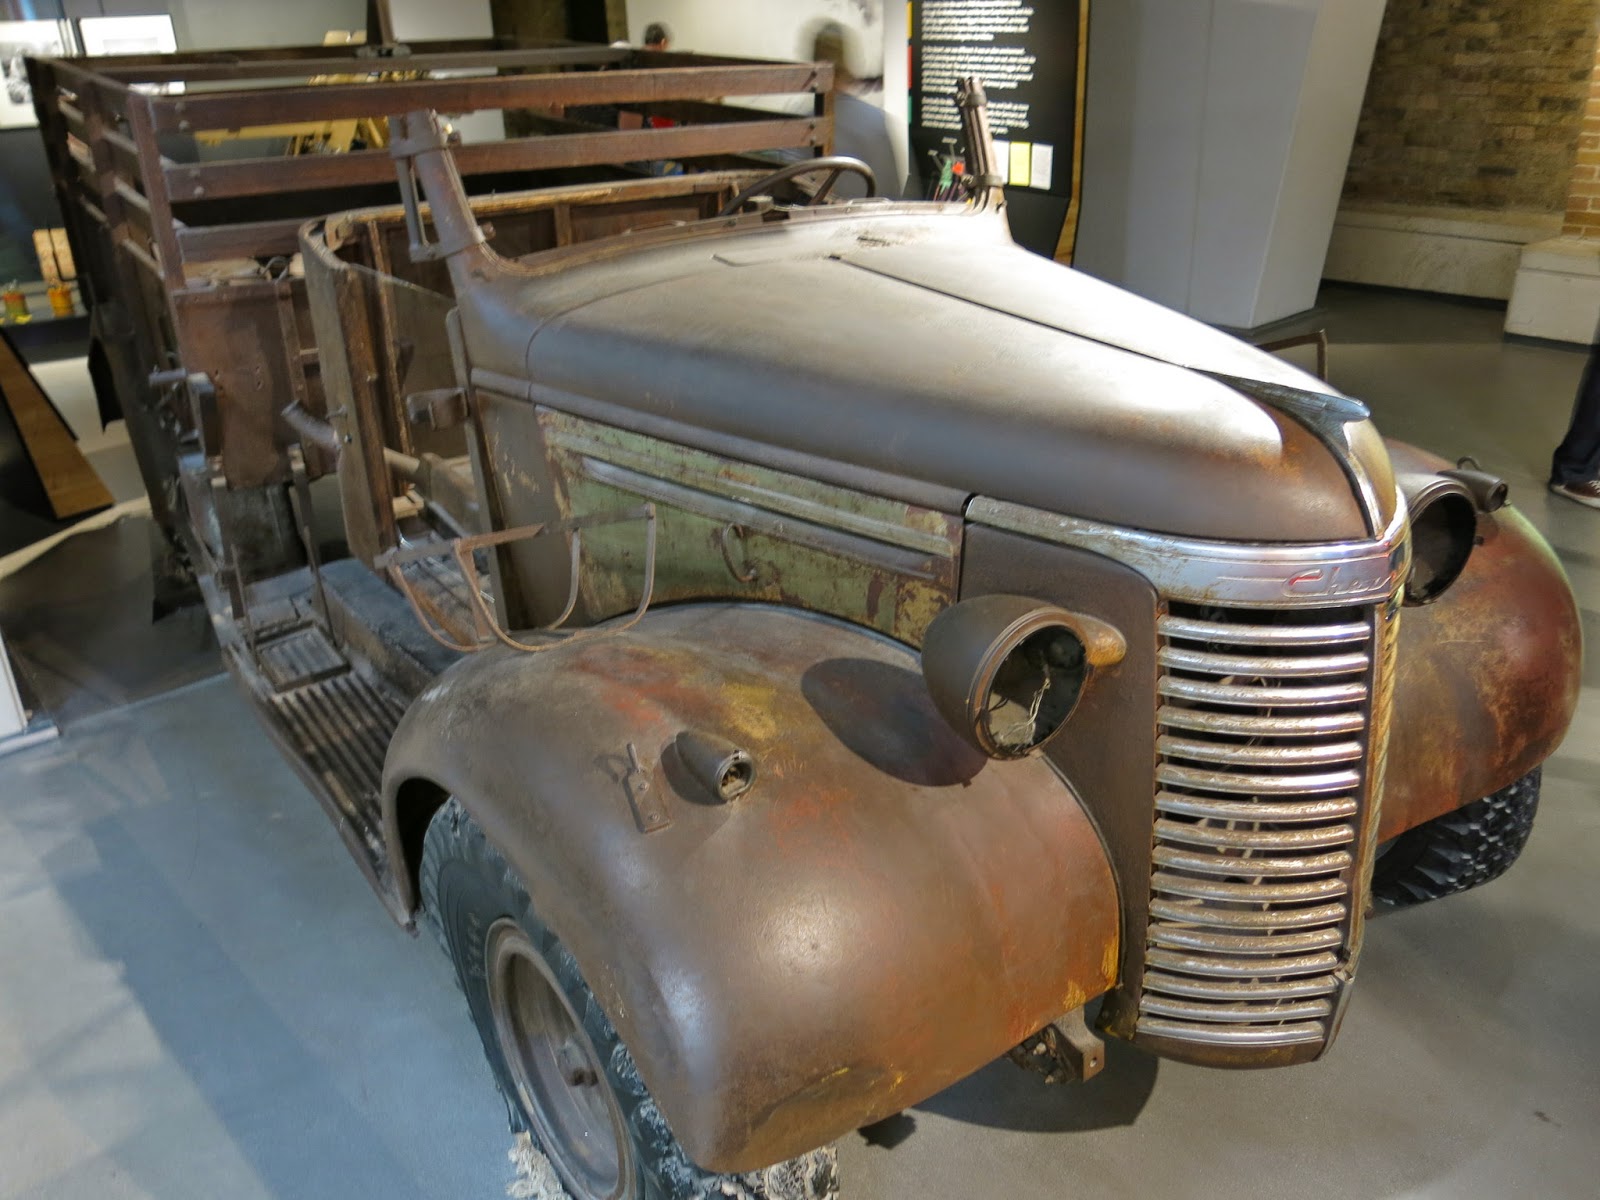
A LRDG Chevrolet truck found in the Egyptian desert in 1980

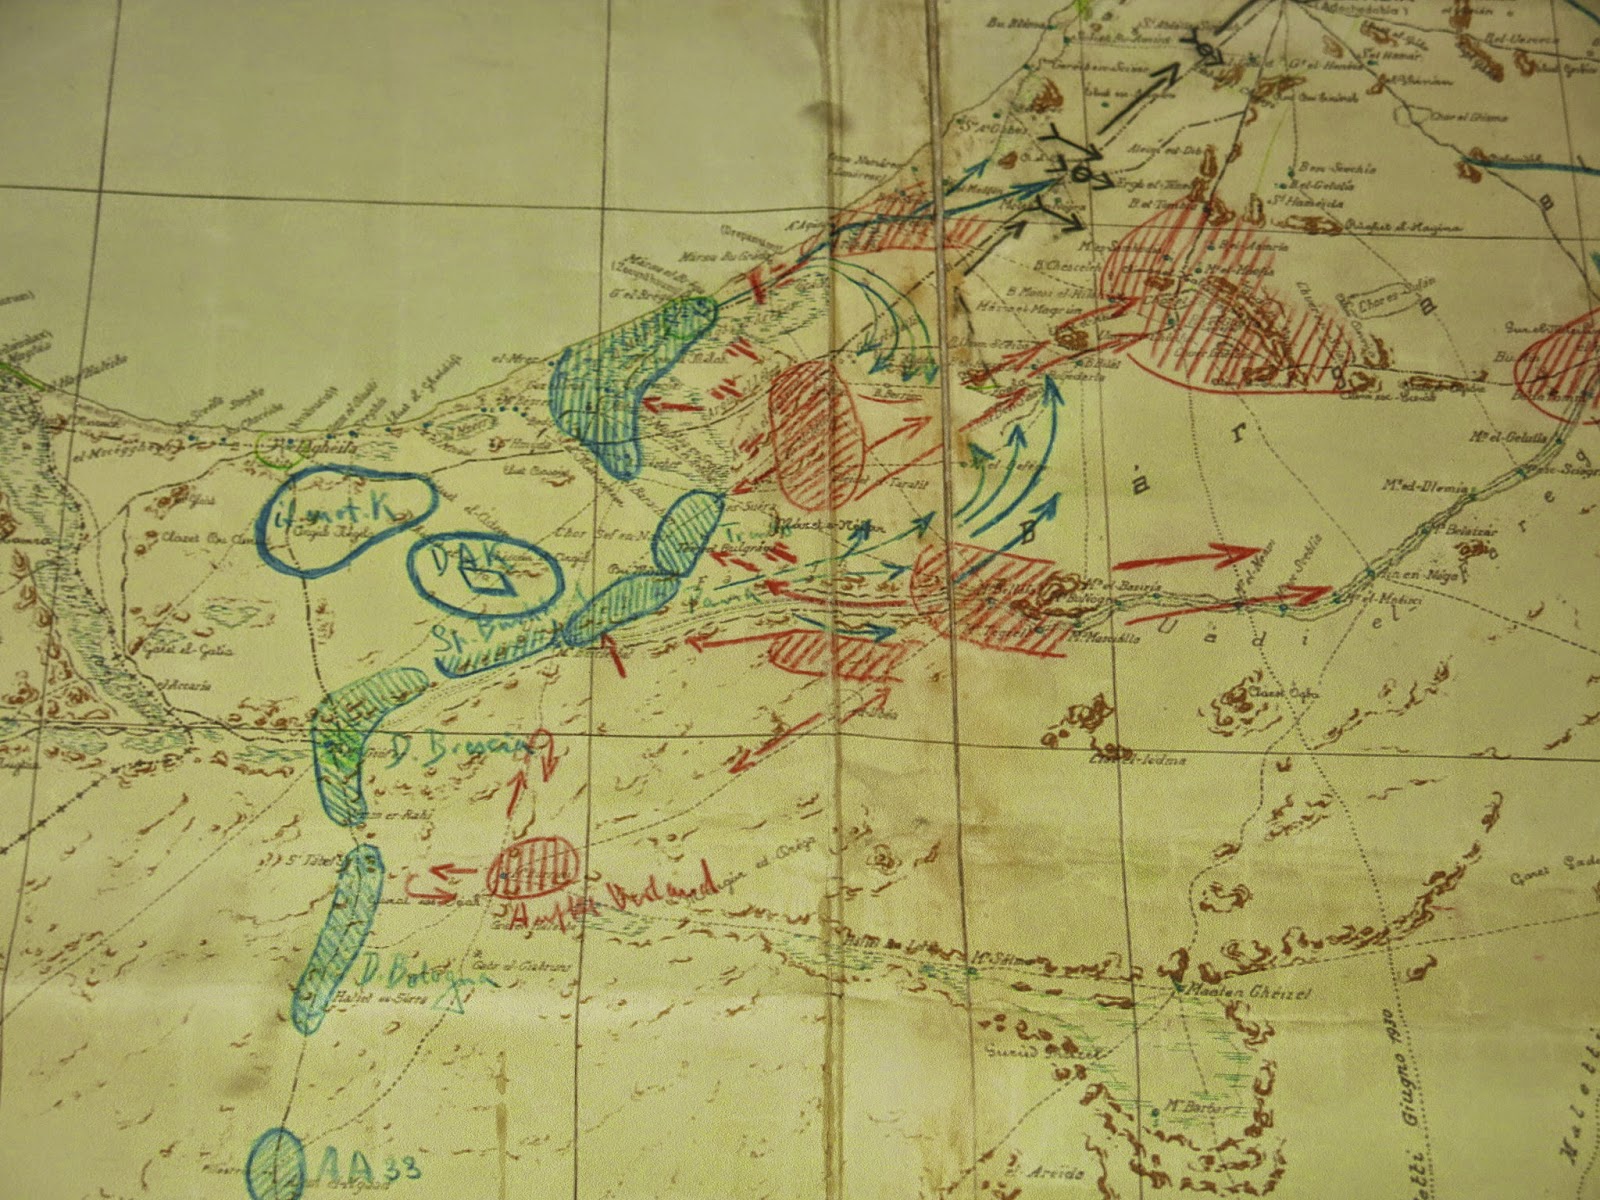
A campaign map from North Africa

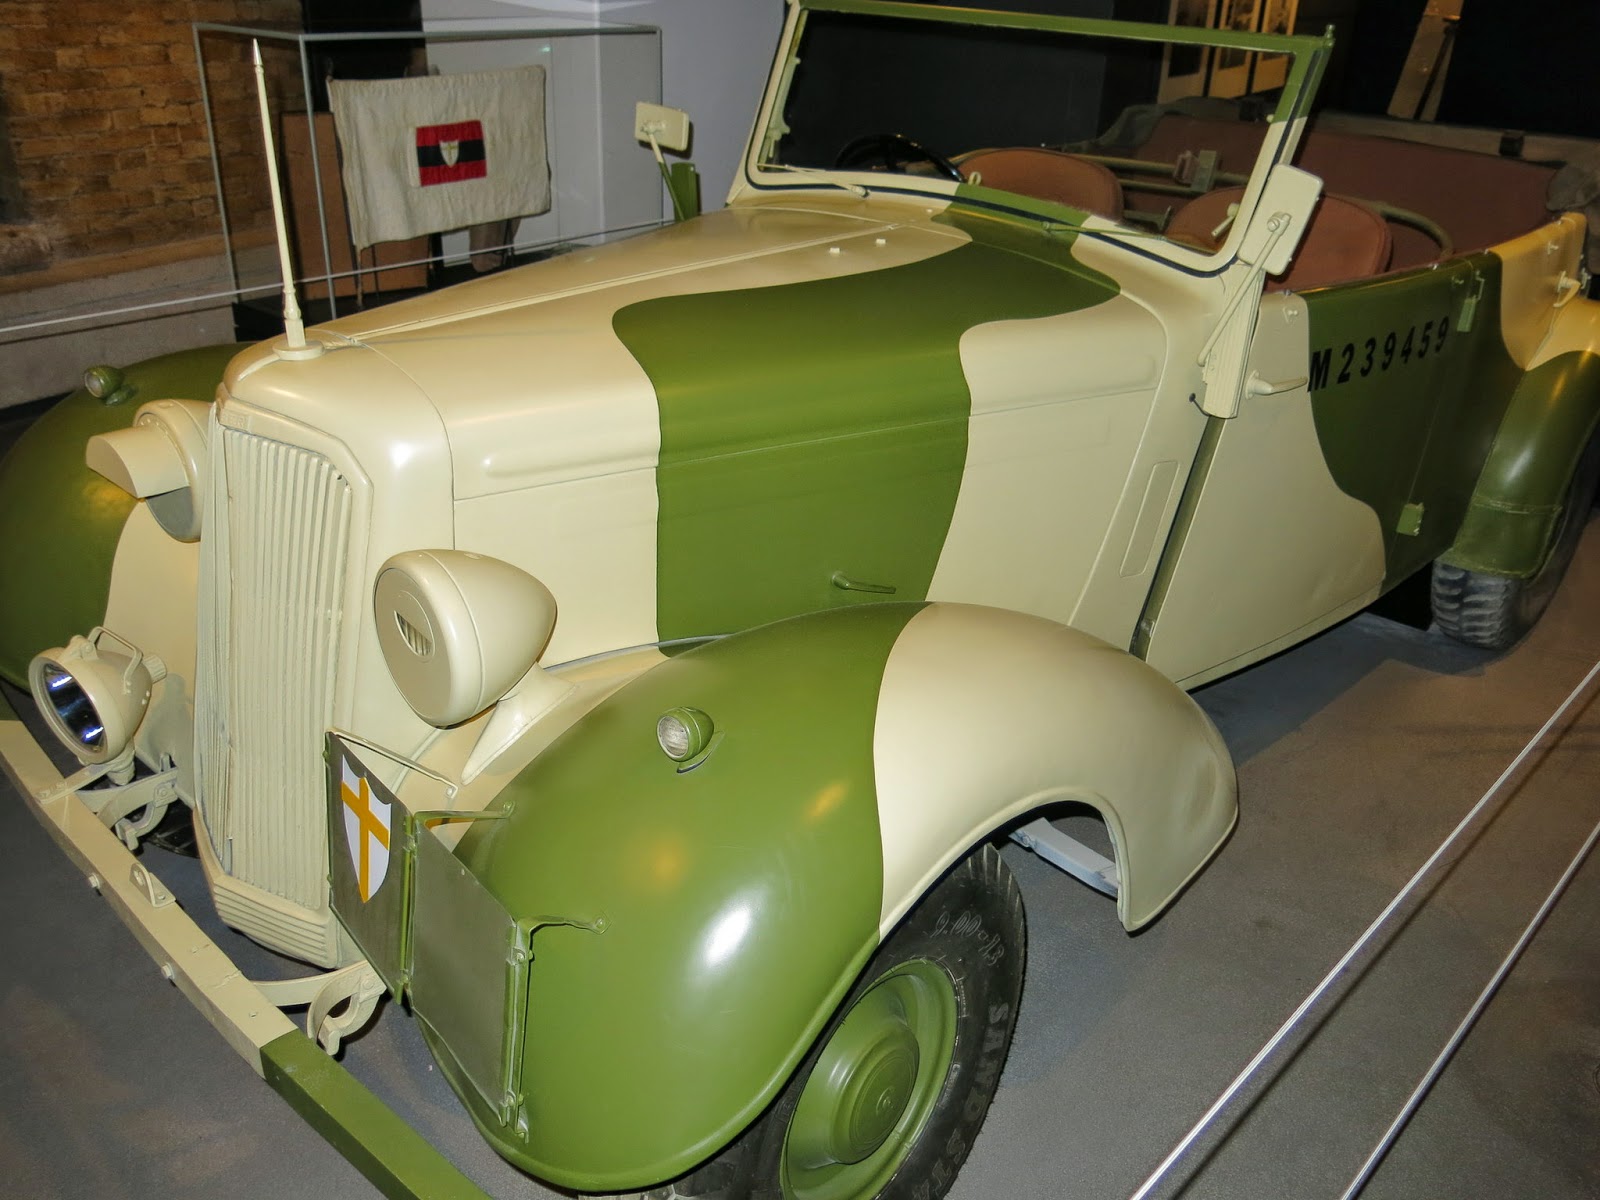
Monty's Staff Car

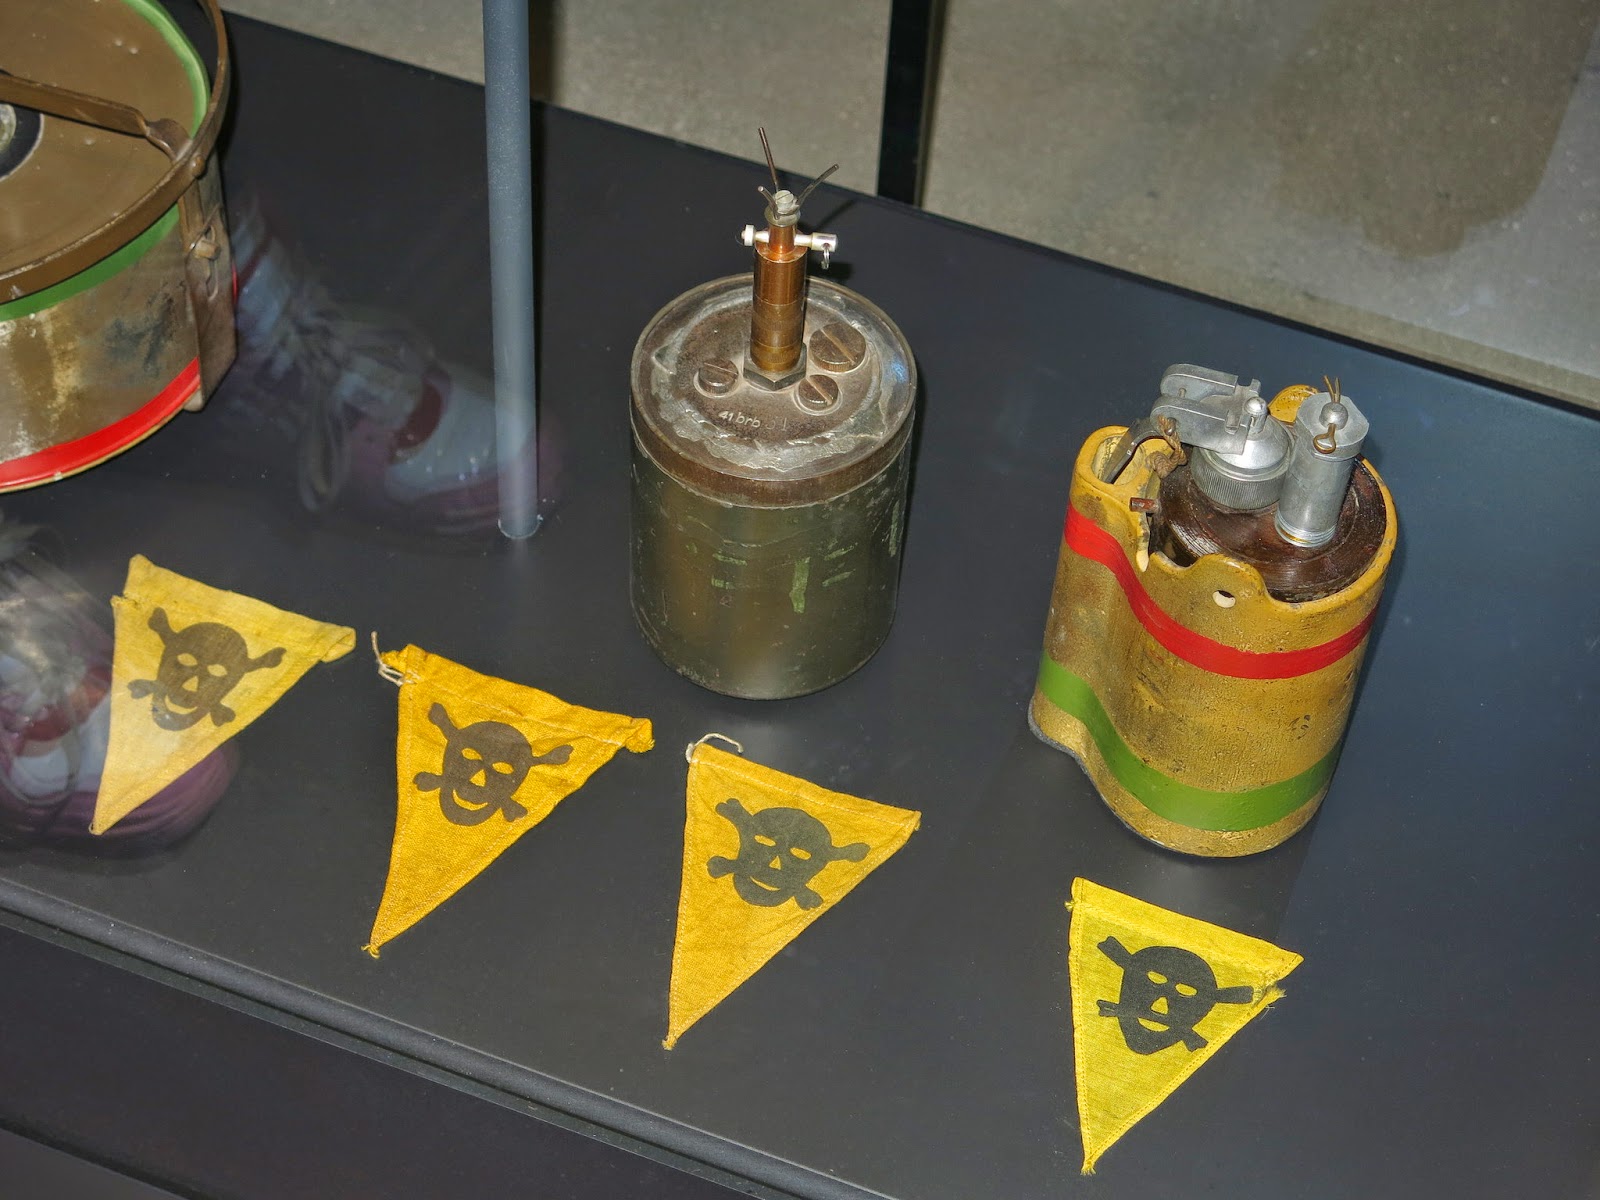
Anti Personnel Mines from the desert campaign

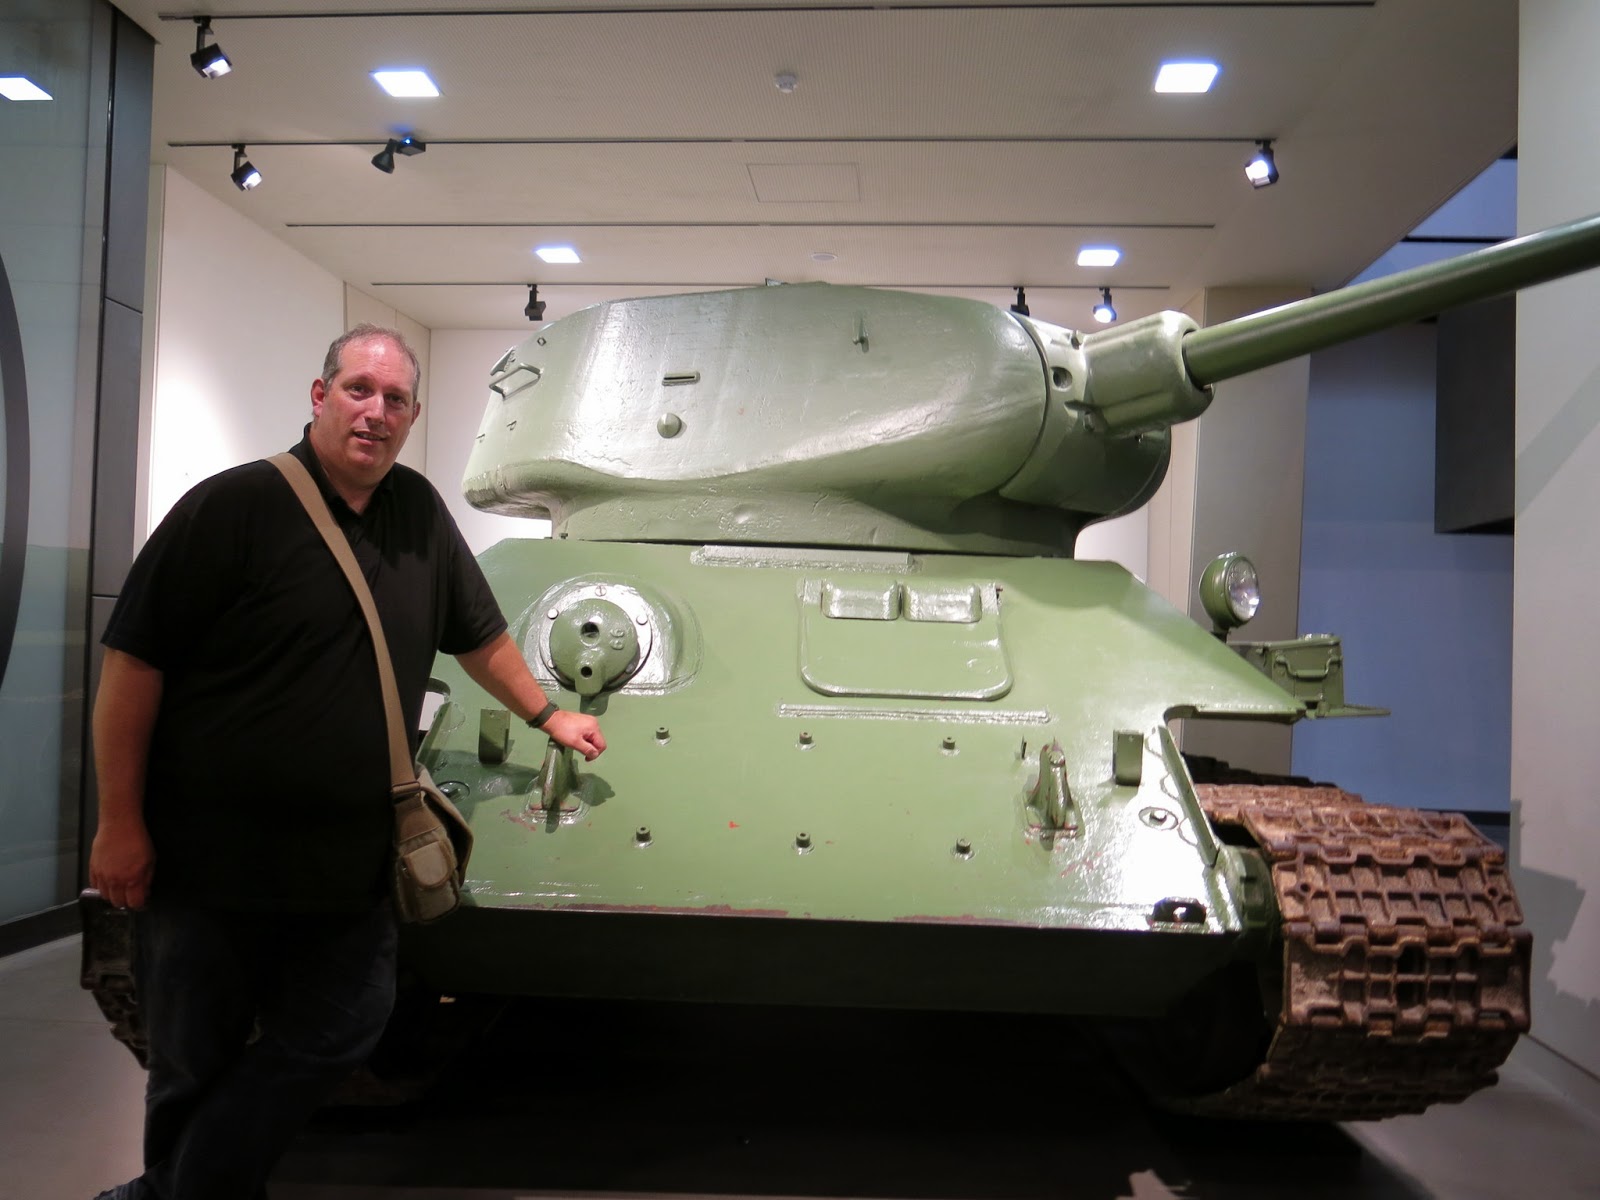
The T34 - The other tanks (Monty's Grant and the Jagdpanther) are no longer here and have presumably been moved to the Land Warfare hall at Duxford.
We had a great day at IWM London but there were a few things that I was disappointed about that are worth mentioning. Firstly I didn't find the museum map very helpful and I'm sure there were lots of things that we missed as a result. I'm not sure if this is a case or a poorly designed map or a ploy to get visitors to buy the guide book (I'm ever the cynic) but I do think it makes it harder for visitors to find and explore those areas and artifacts that most interest and engage them. Also, as already mentioned, Photography isn't allowed in some areas - a policy I don't understand or agree with - and I didn't feel the signage alerting visitors to this was very clear. I was 'told off' twice for taking pictures in prohibited areas because I hadn't seen the no-photography sign, and in other galleries where I probably could have taken photo's I felt too intimidated to do so. A great pity, and I'm sure the staff have better things to do than police the photography rules.

Having said all this I can't stress enough that if you get a chance you really need to visit this museum for yourself. The collection is second to none and I found many of the new displays were exceptionally well laid out with a good interactive element. I really like the interior redesign and I thought the exhibitions and new displays were very good, albeit limited in scope because of space constraints. The WWI exhibition is particularly good and very interesting but be warmed some of the images are rather graphic and my be unsuitable for small children. Also this gallery in particular is very dimly lit making photography without a flash nigh on impossible.