Thursday 31 December 2015

6mm Roman Ballistari

I've been tinkering with some more 6mm Romans over Christmas but other than this I haven't got a lot done (The food coma made any effort impossible!). These miniatures are listed as Bolt Throwers by Baccus and represent my Balista units. The Republican Roman army list only allows 0-2 of these but I had enough models for four bases so that's what I painted. 


The ballista were a highly accurate weapon and had a maximum range was over 500 yards (460 m) so these will keep those pesky Carthaginian Elephants under control!


I'll start on some more infantry soon and I'll put together a step-by-step guide (as requested!) on my method for painting these.

Tuesday 29 December 2015

Christmas

I hope all my friends out in the blogosphere have had a great Christmas break. Its been an 'odd' holiday for me this year (for reasons I won't go into here) and in some ways I'm rather glad to get it all over with. Don't get me wrong, I had a great Christmas day with my family - watching the kids enjoying their presents, eating ourselves into a food coma, watching TV, playing games and having a drink or two - but in many ways its been an exhausting time of year. Work has been particularly hectic in the run up to Christmas and while its nice to have four days off I can't help wishing it had been a couple of weeks instead! 

My stocking was stuffed with goodies this year.

Monday 21 December 2015

6mm Republican Roman Equites

I'm not taking part in the Analogue Painting Challenge this year and I'm half kicking myself for not putting my hat in the ring, especially as progress with my 6mm Punic War figures is going so well. I think I'll keep an 'unofficial' points tally of my painting progress during the period of the Challenge so I can kick myself when it ends! Anyway here's my next batch of completed bases for my Roman army. Two units of Equites Romani and one of Equite Extrodinari.


Thursday 17 December 2015

TtS! game mat

I have a 'well developed' game mat collection including two of the old Games Workshop mats. I've never used either of them and decided that one would make an ideal To the Strongest! game mat...with the careful use of some dressmaking scissors and a marker pen! I was all ready for this to become a highly technical disaster but in the end it took just 15 minutes, a little patience and a bit of swearing under my breath. 


I have done nothing with the material other than mark the grid pattern out with dots which was a lot simpler than I had anticipated. I will make another mat at a later date with some patterning on it but for now this simple game mat will let me play test the rules with my growing collection of Punic War figures. 

All my models are based on 30x60 bases so I have opted for a 2 ft x 3 ft playing surface divided into 3" squares. Each square can accommodate two stands of small or light troops easily.


Monday 14 December 2015

Roman Velites

I have been busy painting more Baccus 6mm miniatures for my Punic War project and contrary to what I have said before this next batch are not cavalry! Instead I have painted six stands of light infantry skirmishers, otherwise known as Velites. They were armed with short thrusting swords - a weapon that would later develop into the Gladius - but their primary weapon was the light javelin. Typically these were the poorest soldiers in the army and went into battle with little or no armour other than a small wooden shield. They did however wear a headdress or cloak made from wolf-skin which gives these troops a very distinctive look. 


Being light infantry their primary role was to act as a skirmish screen in front of the Hastati, Principes and Triarii. They would break up advancing infantry formations with well timed javelin throws and would also be the first troops to see off war elephants and chariots. 

Tuesday 8 December 2015

Bowing to the Inevitable

Time moves ever onward and I'm not getting any younger, so its not entirely surprising that my eyesight is starting to let me down. Over the last year or so I have increasingly needed the assistance of cheap shop bought reading glasses for close up work like painting and reading. I did try using a magnifying headset a few years ago but it was too heavy and was soon discarded.

This weekend I finally accepted the inevitable and went to the opticians for an eye test. Not surprisingly I have been told I need reading glasses. My prescription is fairly mild and otherwise my eye health is very good so I should be happy, but there is something quite depressing about ones body letting the side down. I've ordered my glasses and should have them in a week or two. When the kids stop laughing at me I'll put a deposit down on a mobility scooter and a zimmer frame!

Friday 4 December 2015

Carthaginian Spearmen

My latest 6mm Punic Wars troops are Carthaginian (African) Spearmen. These Hoplite units are certainly a colourful bunch and were really enjoyable to paint with lots of detail and lots of varied shields. I used my new waterproof ink pen on the designs and I'm really happy with how they turned out. 


My only (self criticism) of these is that after I had finished I realised that my 'African' spearmen had a distinctly Caucasian look about them! While I would expect a Carthaginian unit like this to have a high proportion of fair skinned troops amongst them (they are from modern Tunisia after all) I really ought to have included a reasonable proportion of darker faces in the ranks. Terribly un-pc of me and something I will address when I paint my next batch of these. 

I'm taking advantage of the flexible basing options available in the TtS! rules and while infantry come in various sizes in these rules I have decided that where possible I will base all on 20x60mm bases as my standard. So I have opted to base Regular sized units like these spearmen twelve men abreast, in three ranks. Small units, such as the Republic Roman Principes I painted a few weeks ago, will be based in two ranks and Deep formations will be based in four or five ranks. 

So what next? Well my main order of Republic Romans has arrived so I may have a go at some Auxiliary Cavalry next...watch this space!

Monday 30 November 2015

Churchill III Tank in Tunisia

I have been clearing up a few old projects that have sat neglected on my desk for a while, one of which is this Churchill Tank. Its a hangover from my 15mm collection of figures that I found in storage and decided was too nice not to paint up as a display model. This will sit rather nicely next to my 15mm Tiger Tank that I painted for the Analogue Challenge a couple of years ago.


The Churchill first saw action in North Africa in 1942 when a small number were sent for evaluation purposes. These formed what became known as 'Kingforce' and saw action at 2nd Alamein. It was during this action that the Churchill's reputation for toughness was first seen, with all the tanks in the troop being hit with AT rounds multiple times for the loss of only 2 of the six tanks (one destroyed, the other immobilised).


The Churchill really came into its own when the Allied fought the DAK in the rugged terrain of Tunisia where its hill climbing ability surprised both sides. Armed with the powerful OQF 6 pdr gun the British finally had a tank that could take on the German vehicles. Indeed it was a round from a Churchill that disabled Tiger 131 - the worlds only running example of its type - now housed at the Tank Museum in Bovington.

Saturday 28 November 2015

Waterproof Ink Pen

Last weekend I took my wife to a hobby and craft show at Excel. Most of the traders there were selling stuff I wasn't interested in (Papercraft, Knitting, Crochet, Jewelry making etc) but there were a handful of stalls selling painting accessories. In an ironic twist - despite this being a day out for my wife - I ended up buying more than she did... a fact not lost on her! A regular attendee at these sort of shows is ArtMaster from whom I have bought brushes and other accessories many-a-time. I picked up a new water bowl, a brush rack, yet more brushes (doh) and best of all, a waterproof ink pen.


The pen cost just a couple of pounds but it looked like a great way of drawing fine lines on miniatures, especially as the tip is just 0.05mm! Potentially very useful for drawing intricate designs on 6mm shields and other flat surfaces. The question was, would it write on an acrylic surface and would the ink bleed when varnished? I decided to run some tests and in the end I thought it worth sharing my results here so you can draw your own conclusions,

And the winner is....


Ink from this pen can be applied directly on top of acrylic paint. It adheres cleanly and when dry remains waterproof enough to allow brushed or spray gloss varnish to be applied over it (top row of the picture above). However the best results seem to be obtained with a coat of brushed on gloss varnish over the ink (top left). Once this has dried Matt/Dullcoat can be applied over the top if that is your preferred finish. 

The bottom row in the picture shows some tests using the ink on top of already varnished surfaces (Matt on the left and Gloss on the right). It was immediately clear to me that the ink adheres very poorly when applied over varnish and subsequent sealing with another layer of varnish just seems to result in smearing and bleeding of the ink. 

I have used other ink pens before but this has produced by far the best results. Now that I know this works I'll be investing in more of these pens which also come in Blue and Red ink as well as Black. 

Thursday 26 November 2015

Airfield Vehicles

Just a quick post of a few 6mm vehicles for my Desert Raiders project. These are a few spare Italian vehicles that I had in my box and have been painted for use as scenery rather than as playing pieces (hence they are not based). I'll place these around my Italian Airfield as additional targets and possible distractions for attacking LRDG/SAS.

They include three 3 Tonne Lancia Trucks, three medium Fiat 626 Trucks and two smaller SPA35 Dovunque trucks. 

Because they are unmanned vehicles and not part of a unit they won't really take part in the game under normal circumstances, except maybe as targets. However one option I could consider is that I could allow the Italian player to 'activate' these vehicles if needed, and then replace them with ones based properly, whereupon they would become part of the unit and moved as normal. 

Monday 23 November 2015

The Battle of Isipezi Hill

Col Evelyn Wood's Column
My social calendar is getting a little crowded as we near Christmas and free weekends for wargaming are become as rare as hens teeth. So when Postie called me last week and asked if I wanted a game on Sunday I quickly grabbed the opportunity as it is my last free day for several weeks. hence this will be my last game of the year in the shed-o-war. Pity it wasn't a happy ending!

Setup
The date is the 29th June 1879 and a large British Scouting force is pushing deep into Zulu territory looking for the enemy. They know the Zulus are out there but have no idea where they are. This is the second invasion of the Zulu Nation and this time the British have learnt a few lessons form the disastrous first invasion (of Isandlwana and Rourke's Drift fame). The force under the command of Colonel Evelyn Wood is supported by lancers a battery of guns and a Gatling gun. Facing them are over 10,000 Zulu's. 

Order of Battle
British Forces - 2,500 men
  c/o Col Evelyn Wood
    90th Foot - 8 Companies c/o Maj Tucker  (800 men)
    80th Foot - 4 Companies c/o Maj Rodgers VC (400 men)
    NNC - 5 Companies (500 men)

  2iC Lt Col Buller 
    17th lancers - 4 Squadrons (600 men)
    Frontier Light Horse - 2 Troops (100 men)
    Bakers Horse - 2 Troops (100 men)

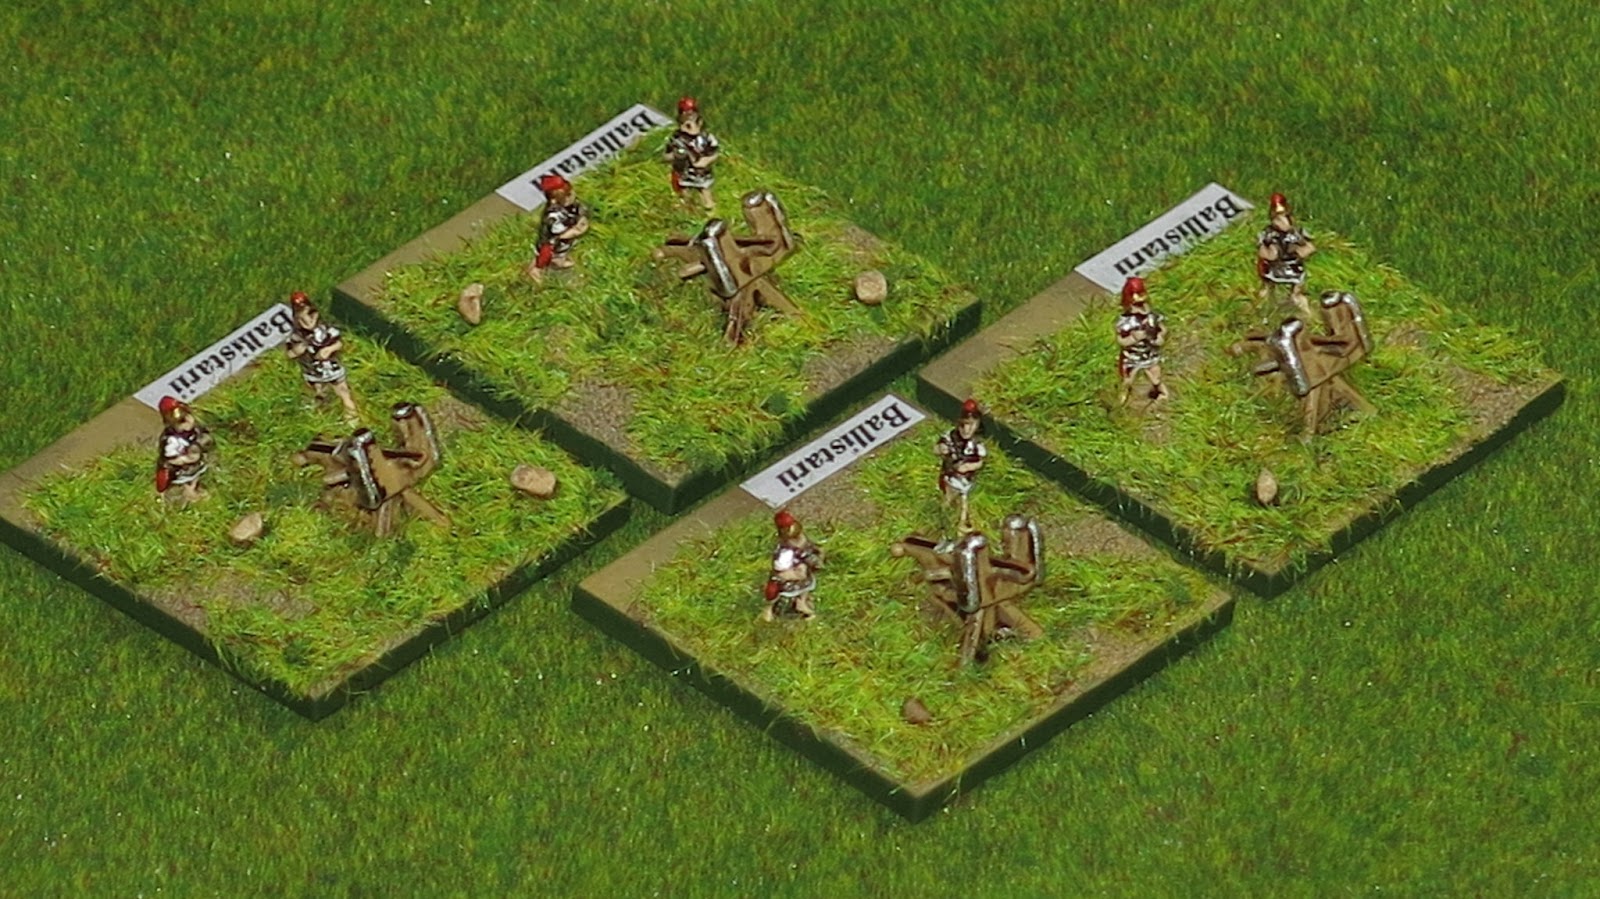
  11/7 Royal Artillery - 2 Sections (4 Guns)
  10/7 Royal Artillery - 1 Gatling Gun c/o Maj Tremlett
  6 Wagons

Zulus - 10,700 Warriors
  c/o Ntshingwayo Kamanole
  2iC Prince Kampande
    Left Horn
      Umsikaba - 2 Bases (500 warriors)
      Ngwekwe - 4 Bases (1000 warriors) - Veterans
      Umkapo - 4 Bases (1000 warriors)
      Imbube - 2 Bases (500 warriors)
    Head/Loins
      Umhlonga - 4 Bases (1000 warriors)
      Nkankone - 2 Bases (500 warriors) - Veterans
      Igwa - 2 Bases (500 warriors)
      Umbonambi - 8 Bases (2000 warriors)
    Right Horn
      Indlondlo - 4 Bases (1000 warriors)
      Nsugamgeni - 4 Bases (1000 warriors)
      Isangqu - 6 Bases (1500 Warriors) - Veterans
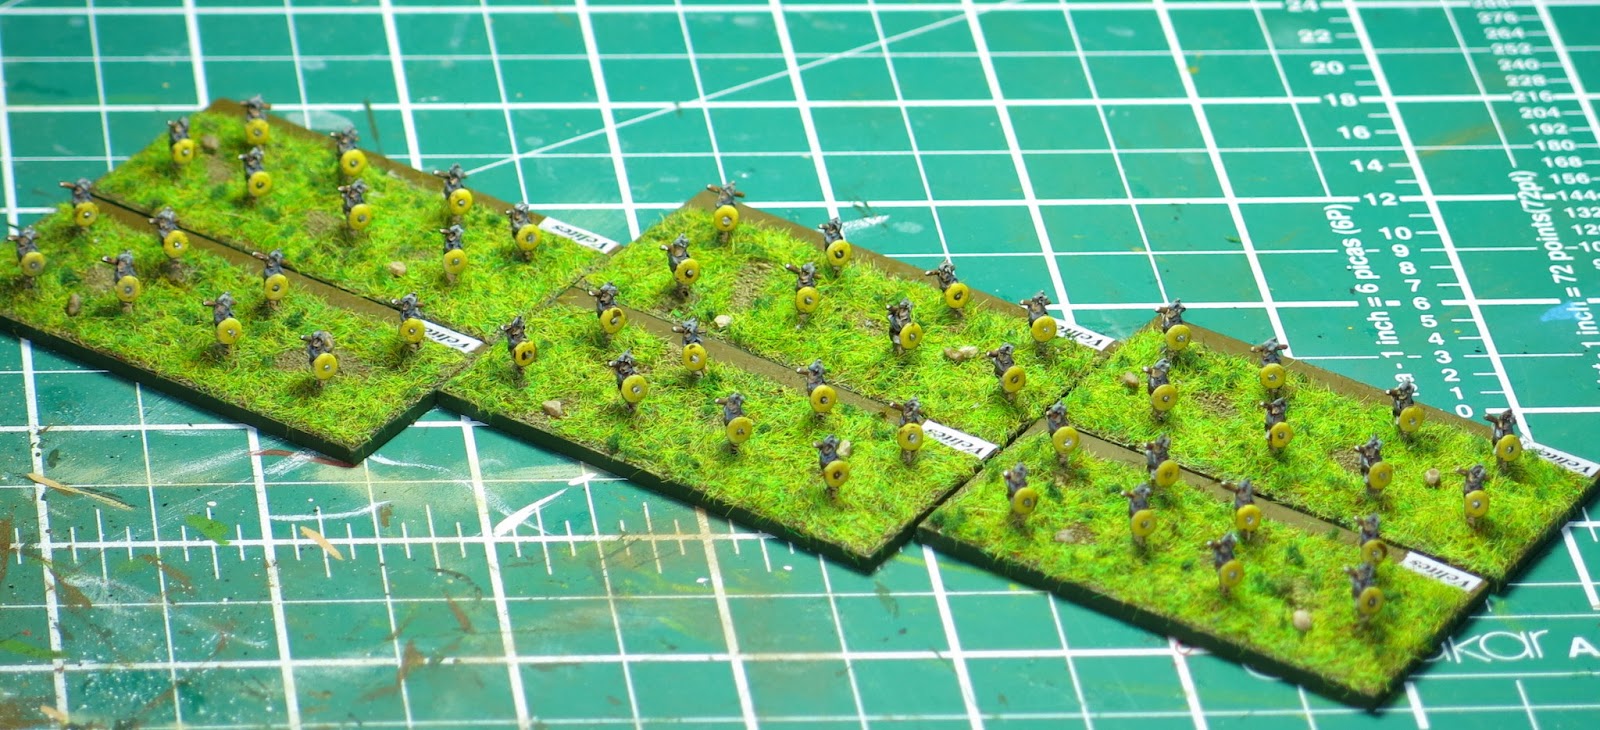
   Unit of Riflemen - Skirmishers - Decoy - 4 Bases (200 Warriors)

The Action
Col Evelyn Wood's column strung out along the road with no idea which direction the Zulu's would attack from. Eight companies of infantry lead the column with guns and resupply wagons in the center and more infantry (including the Natal Native Contingent) in the rear. Frontier light horse and Lancers form a cavalry screen making this a very formidable British army for the Zulu's to attack.


Zulu skirmishers watch the British advance. The rest of the Zulu army is hidden behind some of the surrounding hills...but which ones? This unit was purely a diversion to sow doubt in the mind of the British commander. 
The British begin to redeploy their forces, sending troops of horsemen out in all directions to act as a skirmish screen. Infantry begin to form lines and at first it looks as if the British are scattering all directions. 


Eventually the Zulu's appear...behind the British, cutting their escape route home. This is the 'Head' of the Impi containing 4000 warriors, two thousand of which are in the Umbonambi regiment.


The right horn consists of 3700 Warriors, with the large (6 base, 1500 warrior) Isangqu regiment in the centre. Their white shields show their veteran status. 


The left horn has 3000 warriors including the veteran Ngwekwe regiment.


Surjit begins to move his army in reaction to the Zulu deployment. At first his guns and some infantry regiments turn to face the Zulu's and begin to fire at long range, but it is never their intention to stand and fight.


Towards the other end of the British column Sujit starts positioning his troops for the 'end game'.


The Zulu's advance quickly, gaining ground on the British every turn. The Zulu's ran the whole length of the table moving 7" per turn while the British retreated on average about 5" per turn. The gap was slowly closed but never enough for the Zulu's to get within charge range. 


Zulu casualties begin to mount until they reached ten percent, then an Army check roll was required. I needed to roll high (6+ actually) and this is what I got! Even with adjustments this resulted in "The Zulu's cease their current course of action and withdraw"...game over!!!!


Both Surjit and I were gutted to see the game end like this. I was especially miffed as this is the second game in a row where an army Moral Check has brought the game to a premature end. Sujit very gentlemanly suggested we pretend I'd passed the test and continue to play on. A higher category on the army test list was "play on for 4 turns and check again" so we decided to run with that result instead to see what would happen. 


A company of Lancers has an opportunity to charge the flank of a Zulu Regiment. Technically they won the melee (+4 for lances!) but their own casualties were so high the lancers were effectively wiped out after only two turns of fighting. The Zulus took a lot of casualties too, but they were such a big unit they could absorb the damage and still function.


Finally the Zulu's have caught up to the British. Now within charge range it was essential for them to win the initiative to get into melee. All the Zulu units have now taken serious casualties and only their ever present leaders are holding the line together....which is why the loss of my Chief at this stage was an utter disaster!!

I moved the chief just a fraction too close to a front line unit and when it took casualties I had to roll to see if the chief was also hit. I rolled badly and the chief went down in a hail of bullets. With intense fire from the British forcing unit tests on all the front rank regiments, and without their leader to maintain order the Zulu units either broke or were driven to ground right under the guns of the British. There would be no recovering from this so I conceded defeat for the second time in the same game.   

Analysis
Well that could have gone better for the Zulu's. My plan was to confound the British by appearing where they didn't expect me. Before the game started I had to declare to Postie where my regiments would appear so I couldn't change my mind once the game started. But instead of consolidating his army in the centre and waiting to see where I appeared Surjit almost immediately started moving everything away from my deployment zone. This was a very risky move because he had no idea where I was and if I had deployed in front of him I would have caught his forces in the open several turns quicker than I actually did. Instead I spent the whole game running across the open ground trying to catch up with the British, taking casualties all the while. By the time I was within charge range my weakened forces were in no state to resist that final volley of fire. Of course moving my Chief into such a vulnerable position didn't help matters at all. Such a silly mistake to make and ultimately it cost me the battle. 

Thursday 19 November 2015

Termagants?

The young Padawan bought these plastic figures at SELWG last month and has been repainting them. Thankfully I think I have persuaded her to go down the historical route but these models were a useful painting lesson. She decided on the colours (I wouldn't want 40k players complaining in the comments!) but this was more about explaining basic techniques like dry brushing and washes than producing models to game with. 

Whatever they are, they look angry.
She has sat and painted with me before many times, but that was just daubing paint on models, not proper technical painting. This time I felt like she learned something as well as having fun with her weird old father. I'm not that much into sci-fi gaming these days but I still think she did a good job for her first proper painting session. 

Monday 16 November 2015

Carthaginian War Elephants

Another test piece for my new Punic War project. Eventually I'll be buying a more of these but I just had to paint a couple of War Elephants now, if only to pique the interest of my daughter! These were really fun to paint and I'm really rather chuffed with how they turned out. I ran out of Bronze paint so I improvised by blending some brown and yellow into silver until I reached a colour I liked. 


I think I have settled on a basing style for these miniatures that gives an interesting appearance while remaining fairly simple to do. I glue sand to the base and when dry paint it with Vallejo English Uniform, I then dry-brush with Green Ochre and edge the base with Luftwaffe Camo Green. Then I add a fairly light coloured short strand flock to approximately 80% of the base with a couple of dark patches added using tiny clumps of dark green railway Turf. The flock and turf are pressed down to produce a very short grass effect which I think looks better against 6mm figures. Then I add just one or two small stones to add a little more interest. Of course I'm still open to suggestions for improvements so if you have an idea please leave a comment and I'll give it a try out. 

Friday 13 November 2015

Punic War Ospreys

There are times when I think that historical wargamers ought to have an Osprey loyalty card because we just can resist buying their products. Every new period seems to be accompanied by several books from their excellent ranges and hardly a show goes by without me coming home with another volume. So it is with no surprise whatsoever that my new Punic War project should bring with it a long shopping list of Osprey guides to get me started. A quick Amazon order later and five books were soon landing on my doormat.


Even with postage costs the average price worked out less than £4.50 per volume for new and unsullied copies. A bargain in anyone's language. Now I just need to find the time to read them! 

Tuesday 10 November 2015

The Battle of Valderas 1808

Few games can be quite so enjoyable and disappointing at the same time as the one the Rejects had over the weekend. Five of us gathered in Posties Shed of War to play out a clash between the French and Spanish armies. Surjit and Richard took command of the French and faced Myself, Ian and Ray commanding the Spanish forces. From the start we didn't have high hopes for our troops (nearly all poor quality and under strength) but we were determined to give the French something to think about.

Ray has already posted a BatRep on his blog so for another perspective on this game check out his account of the day. 

Order of Battle
Unfortunately my photocopies of Posties hand written orders of battle were too faint to read and therefore recreate here. This is all El'Capitano's fault as he insists in writing everything in pencil...who the hell uses a pencil these days?!?! 

The Action
Initial deployment with the French on the left of this picture and the Spanish on the right. The Spanish army looks bigger but its units are smaller and of poorer quality than the French.

The Spanish commander was in the Brothel at the start of the game....probably the only successful maneuver of the day for him!

The Spanish. My Forces are closest and largely behind a hill. In the center Ian our commander held he ground. At the top of the picture are some of Rays troops. His cavalry are further along out of shot.

The French. Surjits two Divisions are closest and face opposite my troops. A Third Division sits  on the road. On the hill and beyond are Richards troops.

Another aerial shot showing the whole battlefield at the start of the game. The Spanish are in the foreground.

The French begin their move and almost immediately Surjit starts mixing up his Divisions. Messy boy!

The Spanish troops commanded by Ray on the right flank start to advance. With our army of generally poor quality we decided to advance on this side and try to dictate the terms of the battle. It almost worked even with most of the Spanish Cavalry refusing to move. 

Surjits troops begin to advance across the field in front of the Spanish. However a significant portion of his troops veer away and head towards the center of the battlefield to support Richard who's troops quickly looks like they are about to be swamped by superior numbers of rapidly advancing Spanish under Ray.

The rejects at play.  From front to back on the left are Postie, Surjit and Richard and on the right Ian and Ray. Here Ian moves a skirmish line into a cornfield as part of the Spanish effort to dominate the field of battle and dictate the terms of engagement. 

My troops move up onto the hill as the Spanish advance. The two units in Blue at the back are Militia.

An out of focus shot of French reinforcements (like they needed them!)...Imperial b***dy Guard!! Two units of Fusilier Grenadiers , two Fusilier Chasseurs and a unit of Gendarmes de Elite.

The French Columns advance towards my fragile division, but Surjit feeds some of his units towards the center to bolster Richards position. I still have an impossible task but its not as dire as it looked at the outset. 

Postie corrects a rather 'creative' piece of maneuvering by one of Surjits columns. 

My men wait on the hill and wonder why they joined this army.

An oblique view across the battlefield showing our lines advancing on Richards command in the distance. 

Two of Surjits columns move forward enough for me to advance and unleash my first-fire on them. I did this under orders from Ian in the hope I'd somehow get a perfect dice roll and cause significant casualties. You can probably guess how things actually went.

Another fuzzy picture showing Ray's advance towards Richards troops in the Center.

Overview showing the curved bow of our front line, hemming in the French. If we could provoke a morale check on the French we may stand a chance, but with the Imperial Guard on the battlefield we have to move fast.

One French unit is sent packing and routes through several other units (Surjits columns moving into the center) disrupting them all.

Just as we see a glimmer of hope one of our units is defeated in hand to hand and forces a Divisional morale check. Upon which old Ray (of Blog Don't Throw a 1 fame) throws double ones! The Division flees the field and our entire center disappears....game over.  

Analysis
I'm afraid we (meaning the Spanish Players) were convinced our glorious leader had it in for us. The Spanish forces in this game were of much poorer quality than the initial French forces we faced. Throw in the Imperial Guard reinforcements they received and this game could only go one way. Having said that I think our decision to dictate the battle was the right one. Rays attack on the right flank drew french units down the table towards the perceived threat. This meant that a) I wasn't facing impossible odds on the left flank, and b) a significant portion of the french army spent the game marching rather than fighting, and c) The french got in a right messy jumble as their maneuvering space was reduced.

So far so good. This made for a very interesting and enjoyable game with the French really having to think hard about how to respond to us rather than the other way around. I can't speak for the French players but I rather suspect that they expected us to fight a defensive battle. It felt good to confound them, even if the game still ended in defeat for us. I don't think we actually thought we stood much chance of winning but to then loose it so abruptly, as we did on a morale check, was very disappointing indeed.