 This page is an amalgamation of various posts I have written charting my progress through the design, development and implementation of an idea to recreate the desert raids of late 1942 by the LRDG and SAS using 6mm figures and an adapted version of the Flames of War rules.
Painting an LRDG Patrol
I have been wanting to put together a patrol of the famed Long Range Desert Group for some time. Made up of hardened desert soldiers, former explorers and adventurers the LRDG was a bold and daring reconnaissance and combat force that could seemingly attack axis forces anywhere behind the lines, almost at will. I have opted to build a Mid-War patrol so that it remains compatible with my current 1942 forces. Using the MW LRDG list from the Burning Empires book I have taken every upgrade I could to give this small and compact unit some real punch.| Confident Veteran | LRDG Patrol (MW) |
British Mid-War
|
| ||||||||||||||||||||||||||||||||||||||||
There is still room for expansion of this force with the possibility of adding Commando Platoons and additional transport vehicles to give it more flexibility in its missions. I can also add in a few Stuart Light Tank platoons from the list, although I haven't yet read anything to suggest these were used extensively by the LRDG. I know that some Stuarts were trialed by the Group but they were quickly found to be unreliable and unsuitable for the sort of missions this unit was created for. Another option that I am considering is to build an SAS Patrol as they worked closely with the LRDG throughout the war.
Deciding on a suitable colour scheme for these vehicles proved to be more difficult than I first anticipated. All the sources I have read have revealed that there was no official policy for camouflage and that individual Patrol commanders had considerable latitude with regards to colours and patterns. Most trucks were probably supplied in a sandy coloured paint scheme but few stayed that way for long. Common examples of camouflage included a hard-edged splinter camouflage in a dark grey, another utilised a randomly applied scheme of pink and light blue. One garish example that often gets mentioned consisted of a random vivid arrangement of pink, yellow and green! However the desert sun quickly faded the colours and the weathering the effects of dust and sand eventually resulted in a much more muted paint job.
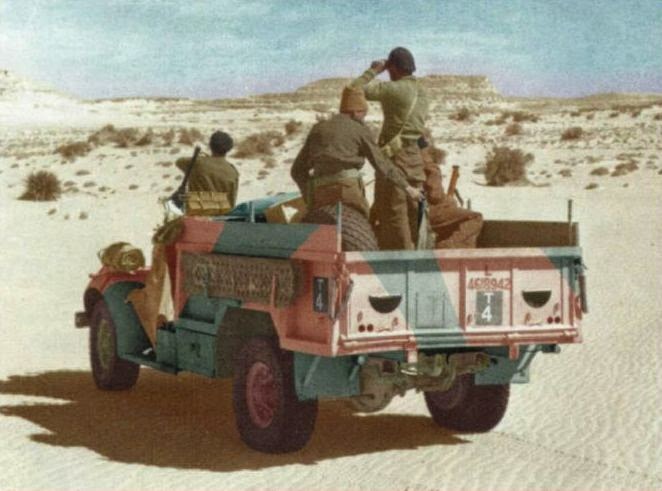
A colourised picture showing the colour scheme and camo pattern I want to recreate.
(Source: Tobias Gibson - Issue 43 of Model Military International)
In the end I have opted for a hard edged splinter pattern in faded Desert Pink and Pastel Blue with various items of equipment retaining their Dark Sand (947) base colour. I couldn't find a suitable Pink or Blue, so in the end I blended my own based on various pictures and how I wanted the finished models to look. I won't give a blending recipe because I think this is a matter of judgement and personal taste rather than being an accurate historical shade. I think the results are quite striking and look very authentic when compared to period photo's and the many of the colour schemes I have seen online and in print.
I've been working away on these for a week now and I'm really happy with how they are turning out. The colours are not as bright as they at first appear, especially after weathering and ink effects have been added. I have just a few things to finish and I'll post pictures of the models sometime next week.
The best sources I have found for colour schemes and other information about the LRDG are:
Long Range Desert Group site by Sven Schwarz - http://www.lrdg.de/main.htm
L.R.D.G. by Tobias Gibson - http://blindkat.hegewisch.net/lrdg/lrdg.html
LRDG Truck Camouflage, Markings and Names on the FOW Website - http://www.flamesofwar.com
Issue 43 of Model Military International (Nov 2009) also has an excellent article on the camo and colour schemes of LRDG Chevy's.
Finished Chevy's
I found several excellent websites (listed above) and a back copy of an article from Model Military International that I found very inspiring and helped me decide on a daring - even risky - hard edged camouflage pattern consisting of Desert Pink and Pale Blue. As you can see from the following pictures I have finished, and personally I really like the way these have turned out.
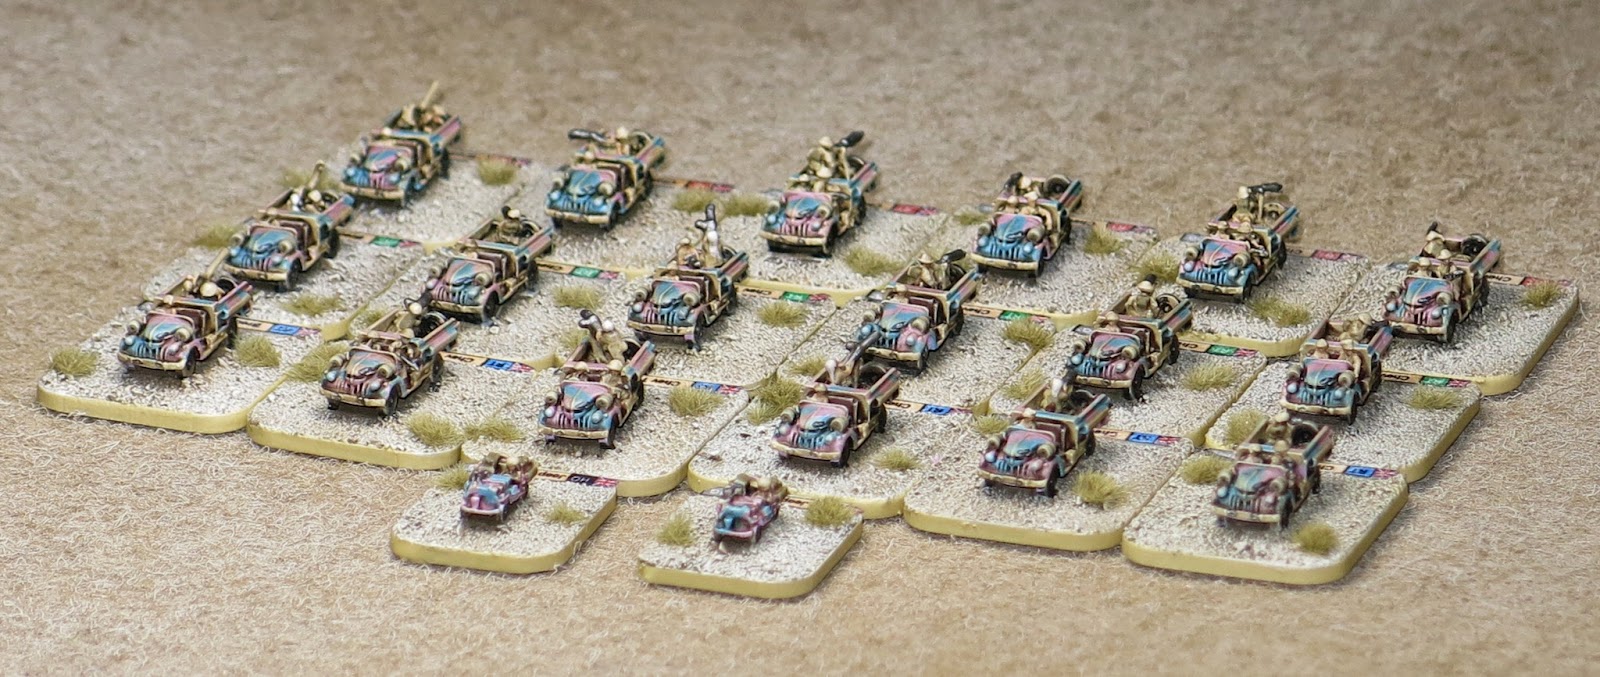 |
| Three Half Patrols with two Jeeps as the HQ Section. |
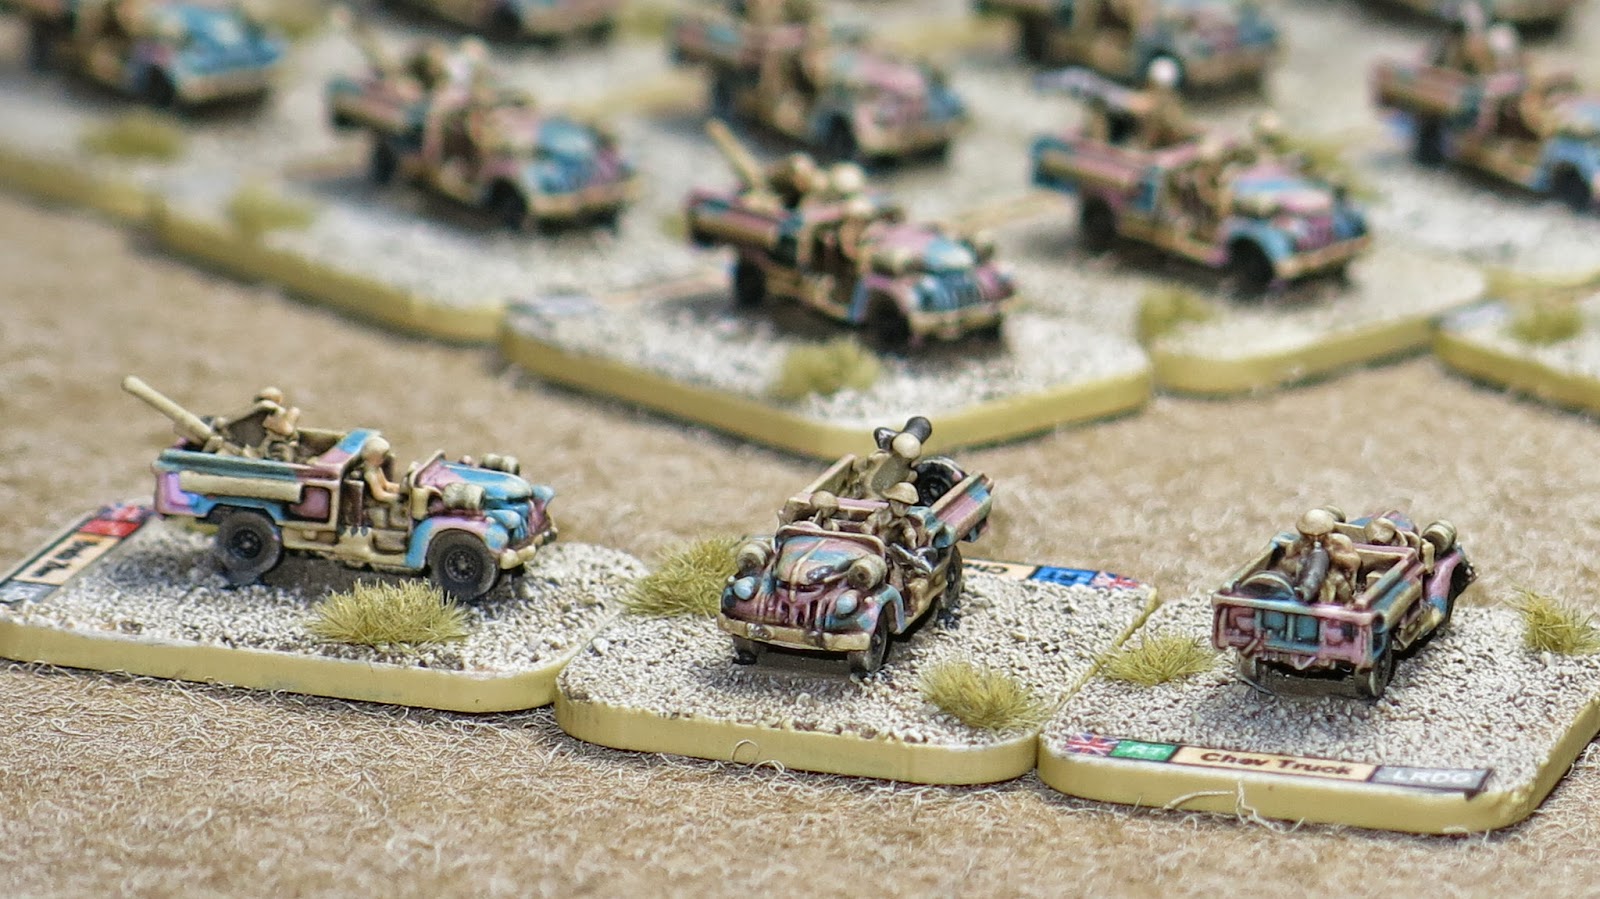 |
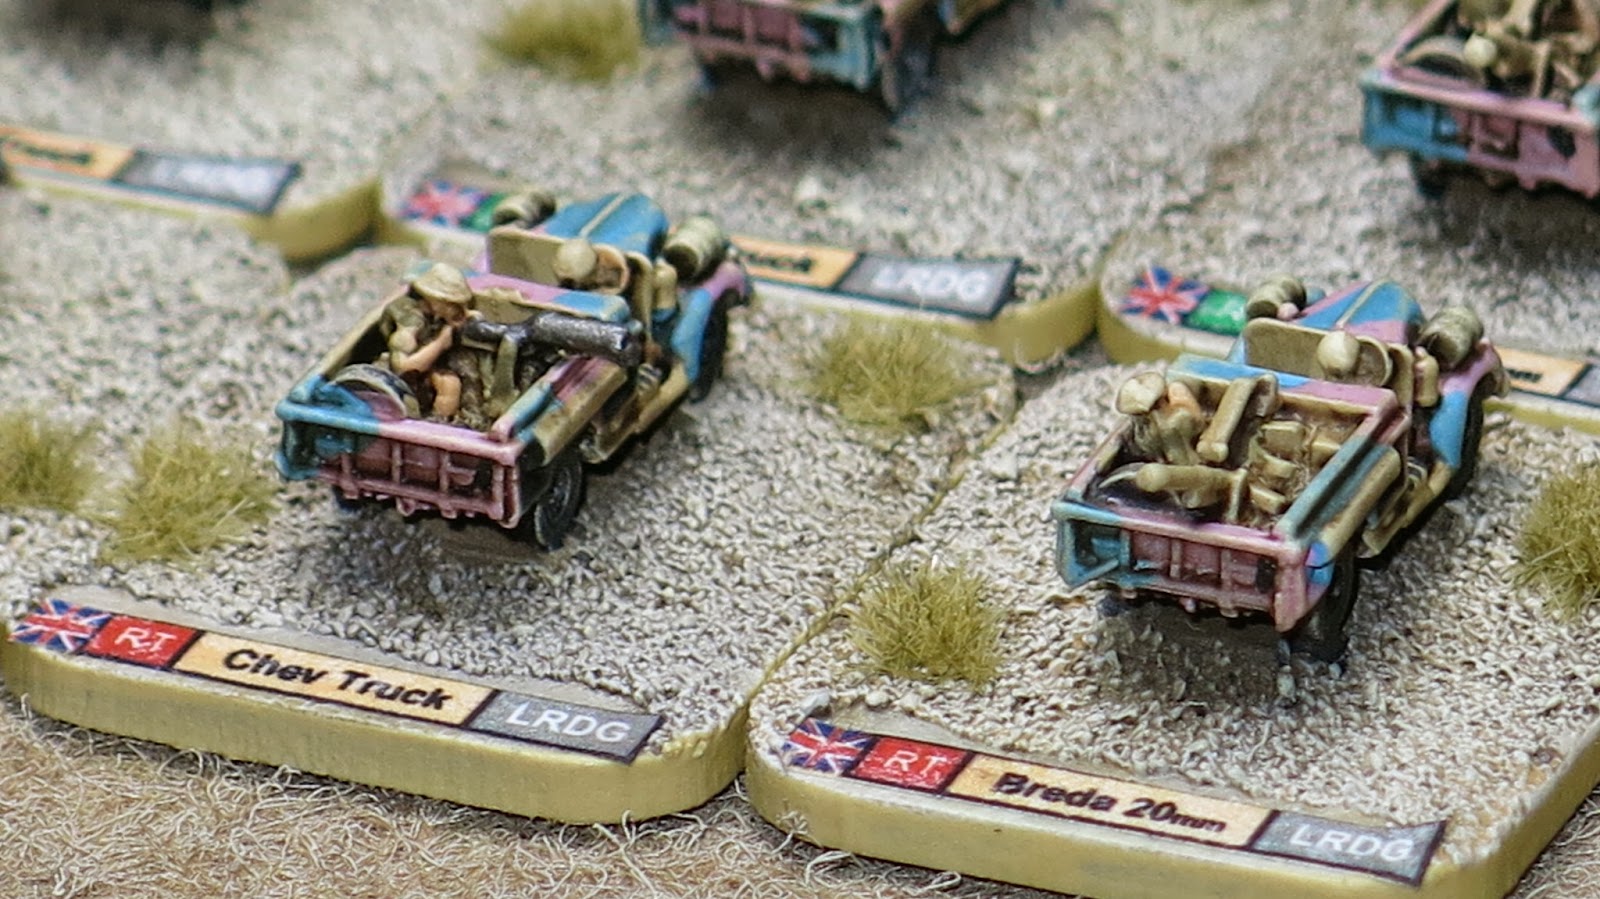
| A close up showing the side front and rear of these Chevy trucks. The truck on the left has a captured 20mm Breda anti-aircraft gun mounted in the back. In a moment of madness I also added small painted details such as the black strip of paint on the front nearside hood which would have had the name of the truck painted in white. |
 |
| As usual I have labelled all the bases although fitting these longer labels on was a tight squeeze. |
 |
| The models come in one piece with just the machine guns separate. But the guns were far too fragile to stand up to rough handling and the lack of extra crew (other then a driver) really bothered me. In the end I raided my 'bitz-box' and found some suitable artillery crew, HMG's and officers to mount in various positions within the trucks. A lot of clipping and filing later the new crew fitted well and mean each truck is different to the next. |
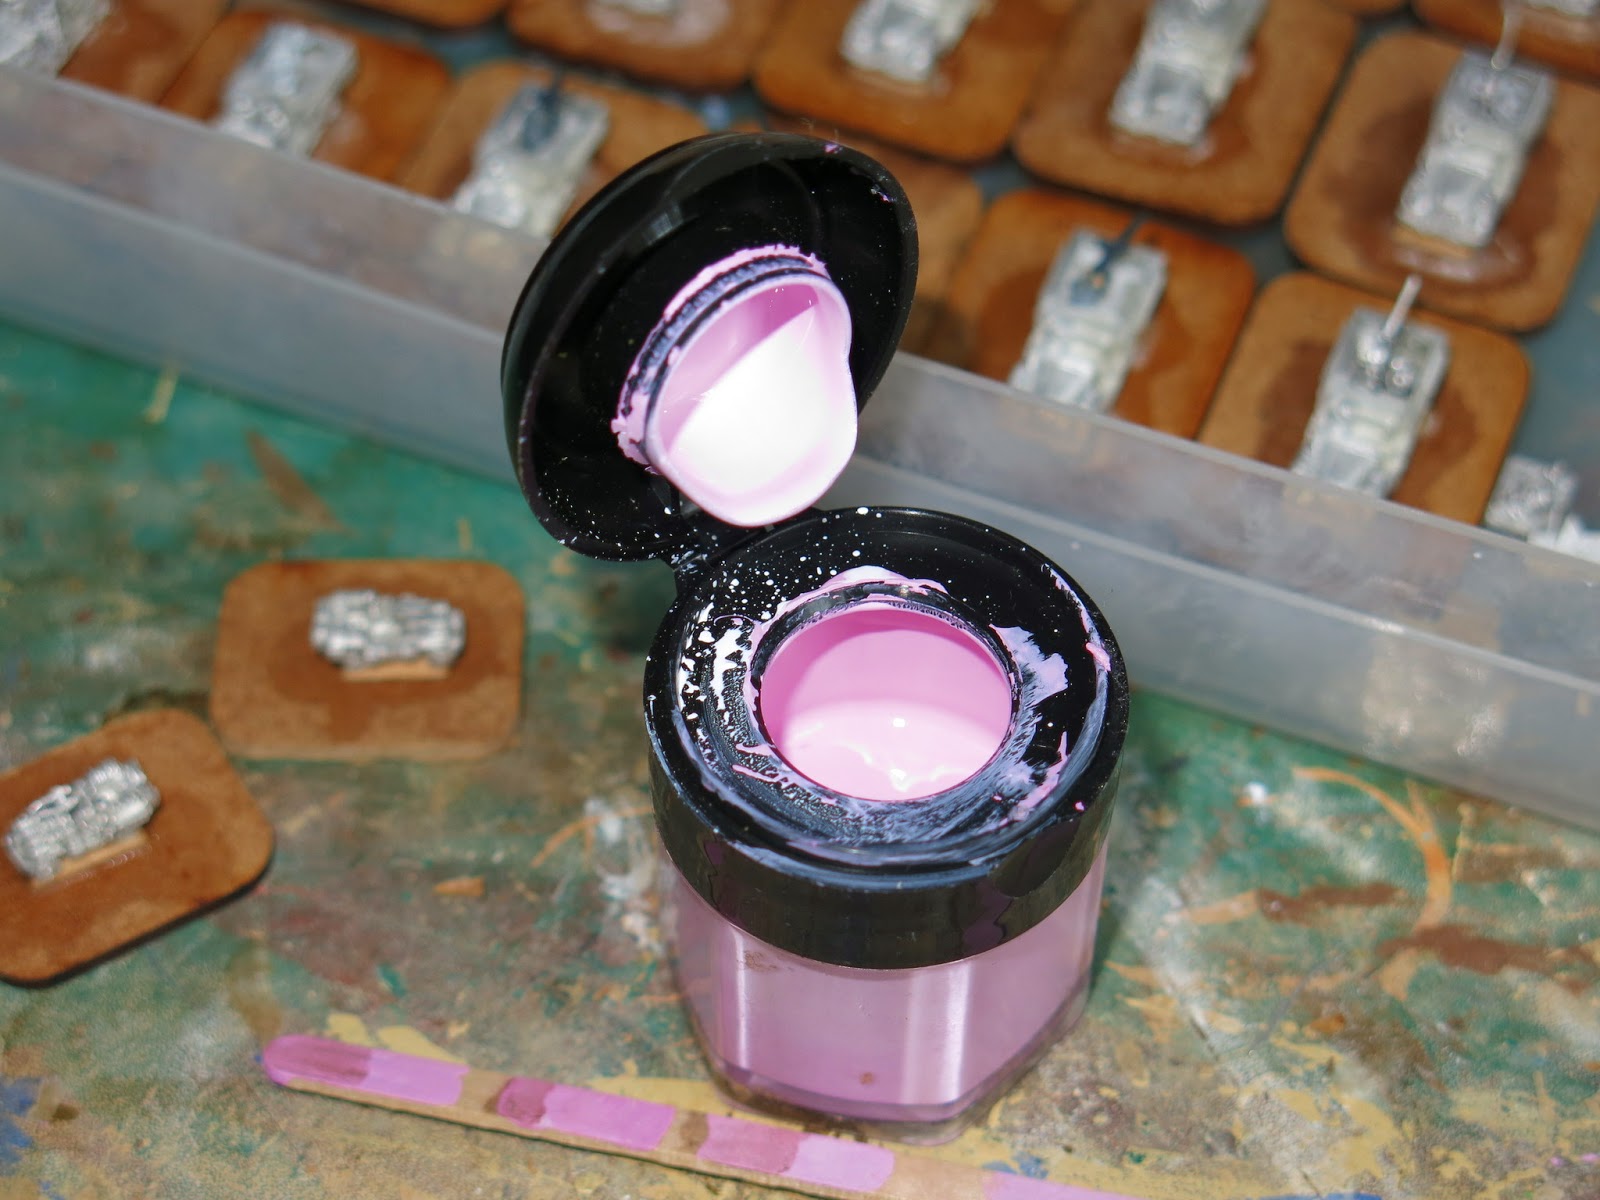 |
| Mixing the right shade of desert pink was difficult. I used some old Squid Pink (from the Vallejo Game Colour Range) and added white until I had the shade I wanted. It needed to be much lighter than the finished look to allow for the dark ink wash I would apply to the model after base coating. |
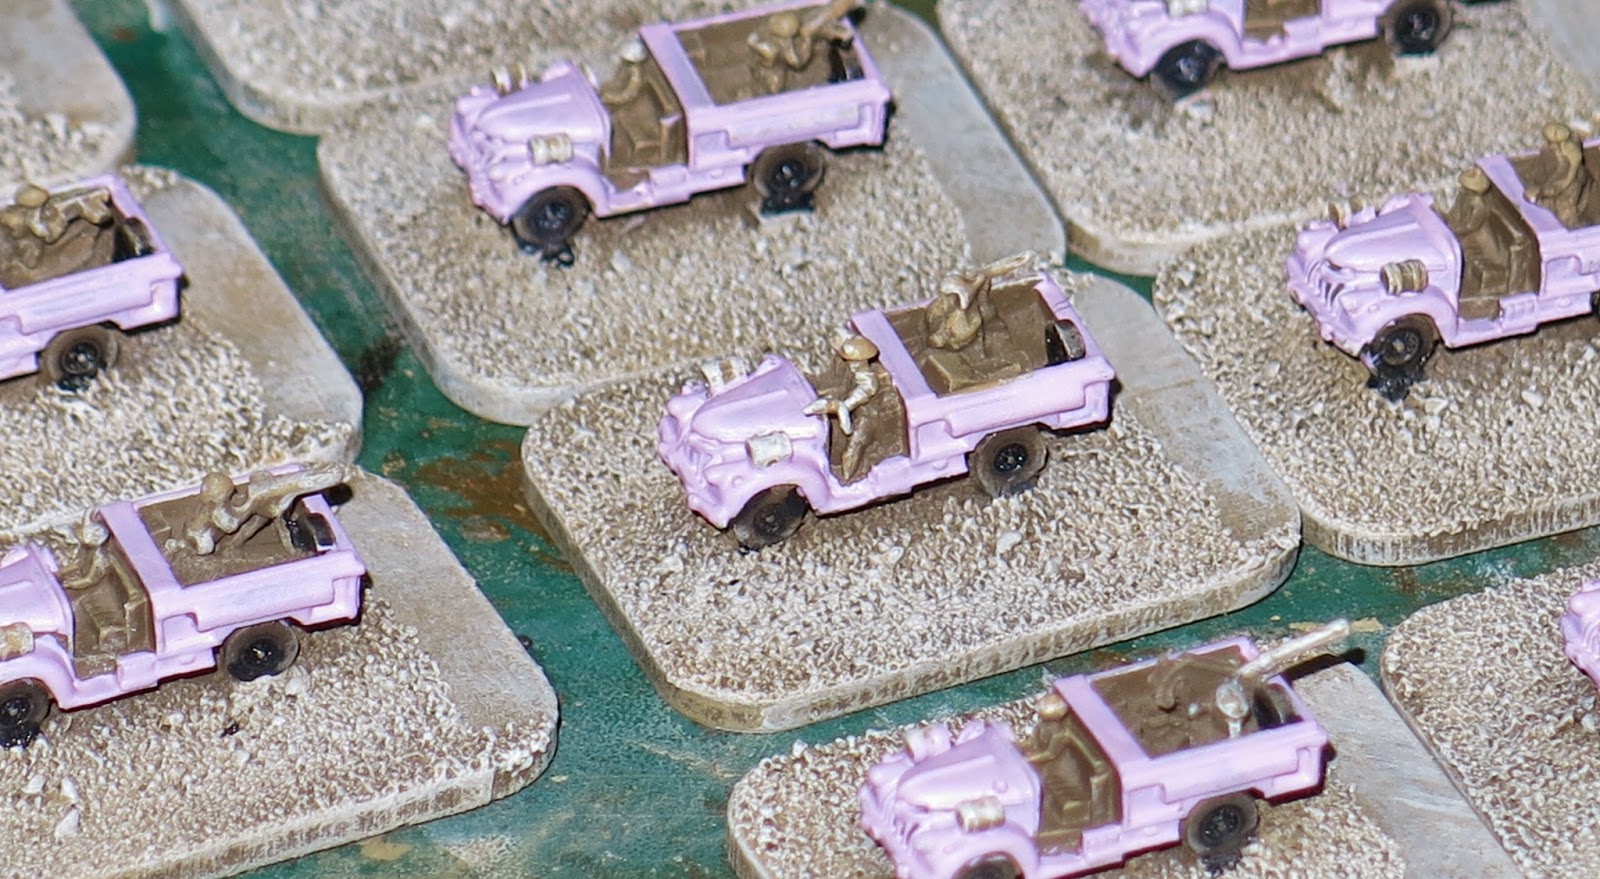 |
| The pink base coat still looked scarily bright (this picture just doesn't show that well). After I had added the light blue camo pattern and dusted the whole model with weathering the brightness was brought under control. The final ink wash completed the process so the finished models don't look 'neon-pink' on the games table! |
The models were very well detailed without a single flaw or piece of flash on any of the castings. The lack of additional crew was a little bit of a disappointment but I had great fun finding suitable models for a bit of micro conversion work.
The next terrain project is to make a perimeter fence and some MG outposts to offer protection to these buildings. I have already started on this but I'm making a lot of it (current estimate somewhere around 22ft of fencing!) and its taking a long time to work through each stage of construction and painting. Needless to say I'll post some pictures when I have it finished.
Here's my rough and ready step-by-step guide on how I made my perimeter fences.

The models don't come with undercarriage but because they represent parked aircraft rather than flying ones I wanted to raise them up just a little bit, so they didn't lay flat on the ground. I toyed with several ideas (each more elaborate than the last) before settling on a simple wooden block consisting of a 1 cm length of wooden chopstick (I knew these would come in handy one day!) glued to the underside of the models. The block isn't really visible when the plane is on the table and the model now looks like it is sitting on its undercarriage rather than slumped on the ground.
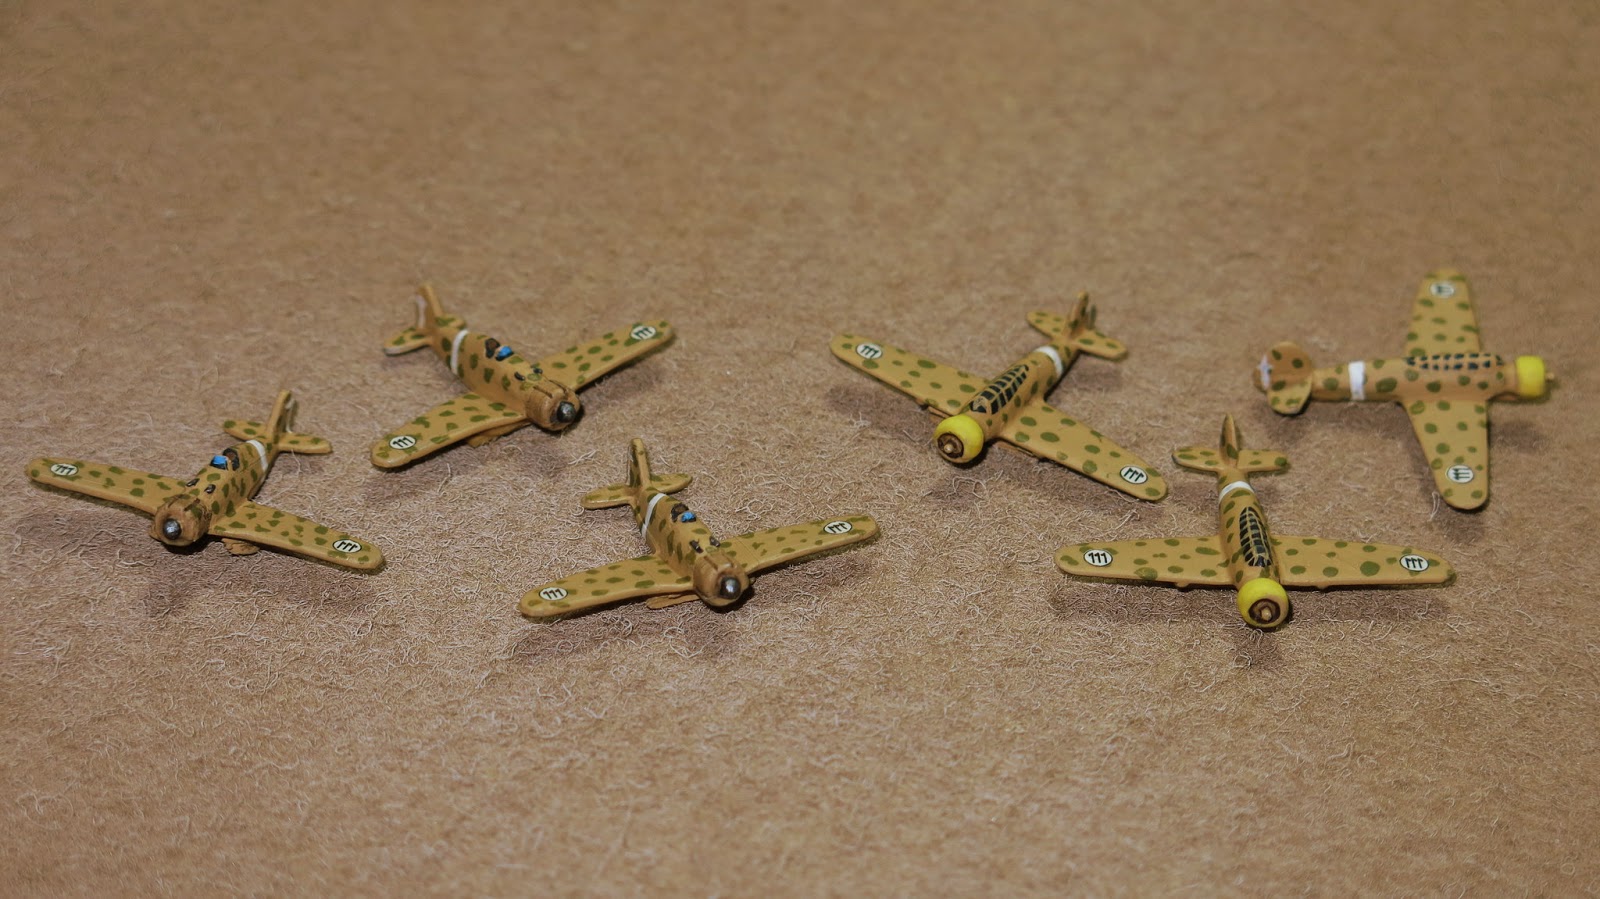
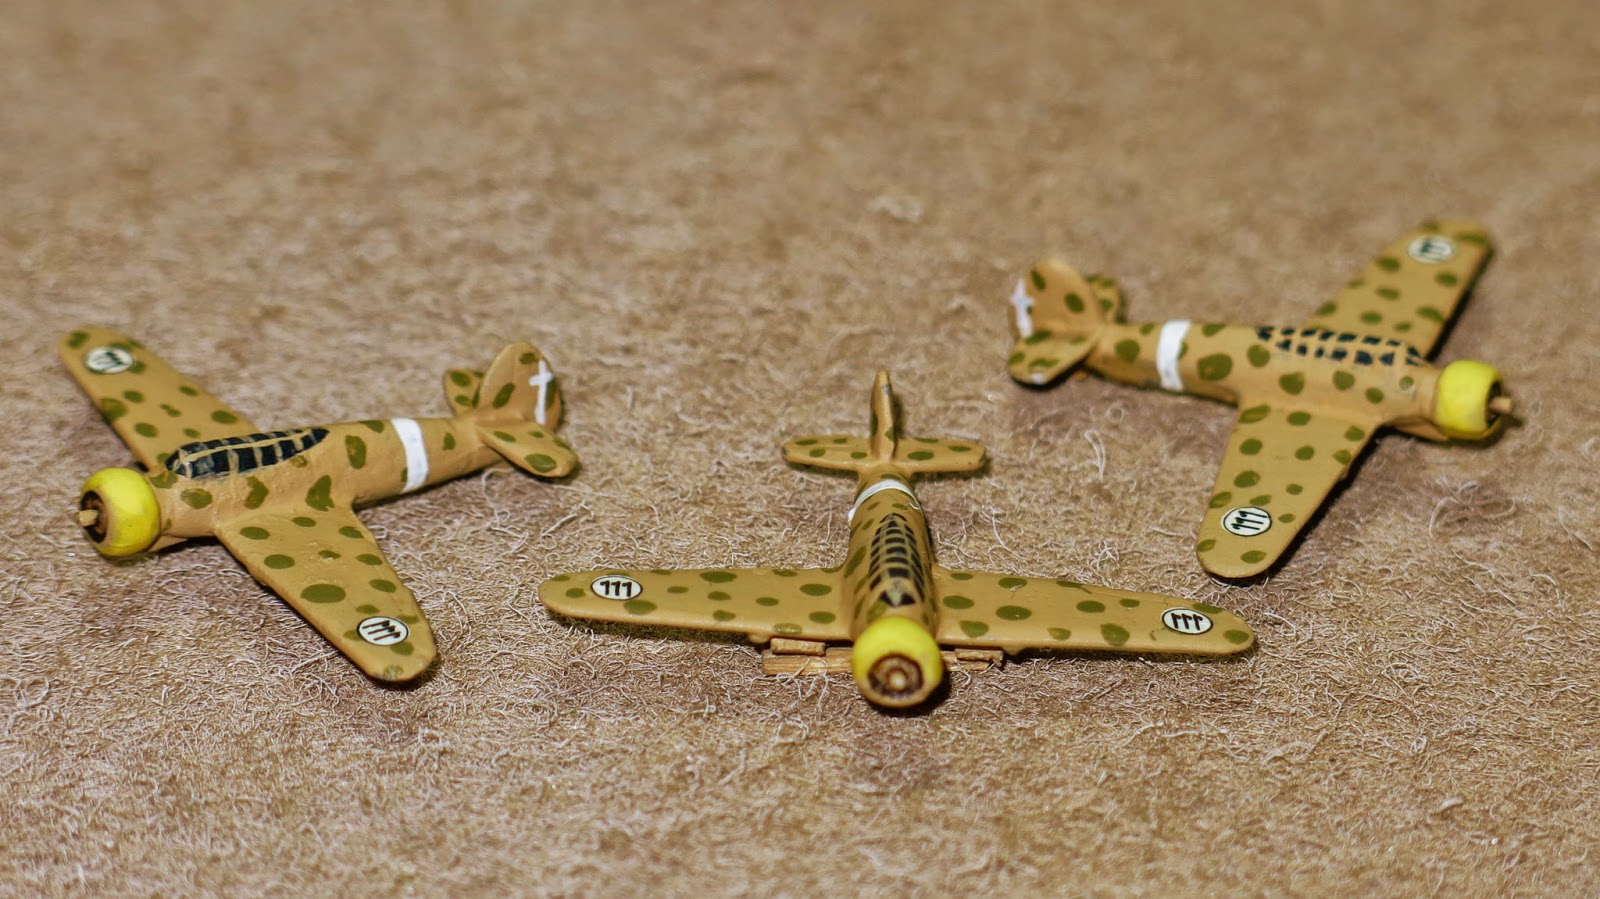
 The colour scheme is my best approximation of the camouflage they might have had in late 1942 in Africa. To be honest there are so many examples on-line and in books it was hard to pick a definitive pattern for them. I'm not an expert (and I'm sure one will pop out of the woodwork as soon as I post these pictures) but there seems to have been a lot of variation between squadrons so identifying the 'correct' pattern was pretty much impossible. I have used a base colouring of Tan Yellow (Vallejo 912) with a mottled camouflage pattern of German Camo Brown (826) and Luftwaffe Camo Green (823). The 'white' band and tail cross were painted freehand with Ivory (918) as I felt the White was just too bright.
 The wing decals are by Trafalgar Models and come from their WWII 1/300 scale transfer range (manufactured by Veni Vidi Vici). Unfortunately half of the decals I bought were transparent so I had to paint fairly precise circles on the wings to match the circular Fasces symbol of the Règia Aeronautica. The ivory background to the transfers looks really good but by god was it hard to get right. You need a very steady hand and good eyesight to pull this off! Having said that I'm really happy with how these have turned out. I found the transfers hard to get off the backing paper but after switching to a warm water soak they went onto the model really well.
As usual I finished these with several coats of GW Purity Seal satin varnish and a final layer of Testors Dullcoat.
With the Bombers completed I then moved on to some fighters for the airfield, again using 1/300th models from Heroics and Ros.
The Breda Ba.65's armament was primarily machine guns in the wings with two 12.7 mm (0.50 cal) heavy machine guns and two 7.7 mm (0.303 cal) general purpose machine guns, plus up to 500 kg of bombs in the internal bomb bay and on wing racks.

Axis Airfield
With the completion of my LRDG raiding patrol of Chevy trucks I turned my attention to something for these guys to attack and the obvious choice is an Italian Airfield. One particular raid - the attack on Barce - leaps to mind. I bought some very nice 6mm airfield buildings from Leven Miniatures and these have formed the basis of a series of buildings and terrain features (such as fences and perimeter posts) that I worked on over several weeks.
The problem is I could only find a handful of grainy black and white pictures axis airfield buildings to guide me in my task. From these I can see that buildings were camouflaged but they give no indication of colour schemes. I've hunted through my many books on the desert war and found a few photo's on the aftermath of such raids but few pictures show what the airfields looked like before the LRDG and SAS had finished with them.
Both of these pictures show European airfields and aside from a handful of partial pictures I cannot find anything relating to a Desert Airstrip, so I'm decided to improvise (ie guess) what one would look like. The following buildings are generic enough that I think they could be used pretty much anywhere in Africa or even mainland Europe but I have given them a 'desert Camo' pattern for their roofs based loosely on Italian Aircraft colour schemes for this period. I think the results look authentic enough, but I can always repaint them of I find some documentary evidence that suggests anything radically different.
The problem is I could only find a handful of grainy black and white pictures axis airfield buildings to guide me in my task. From these I can see that buildings were camouflaged but they give no indication of colour schemes. I've hunted through my many books on the desert war and found a few photo's on the aftermath of such raids but few pictures show what the airfields looked like before the LRDG and SAS had finished with them.
 |
| This is an Italian Airfield but it is unclear where this is. Note the Camo pattern in the hanger walls. (Source: IWM) |
 |
| This is an abandoned airfield at Wunstorf in Germany presumably taken towards or shortly after the end of WWII. Again a (different) camouflage patterns can be seen on the Hunger walls. (Source: IWM) |
Both of these pictures show European airfields and aside from a handful of partial pictures I cannot find anything relating to a Desert Airstrip, so I'm decided to improvise (ie guess) what one would look like. The following buildings are generic enough that I think they could be used pretty much anywhere in Africa or even mainland Europe but I have given them a 'desert Camo' pattern for their roofs based loosely on Italian Aircraft colour schemes for this period. I think the results look authentic enough, but I can always repaint them of I find some documentary evidence that suggests anything radically different.
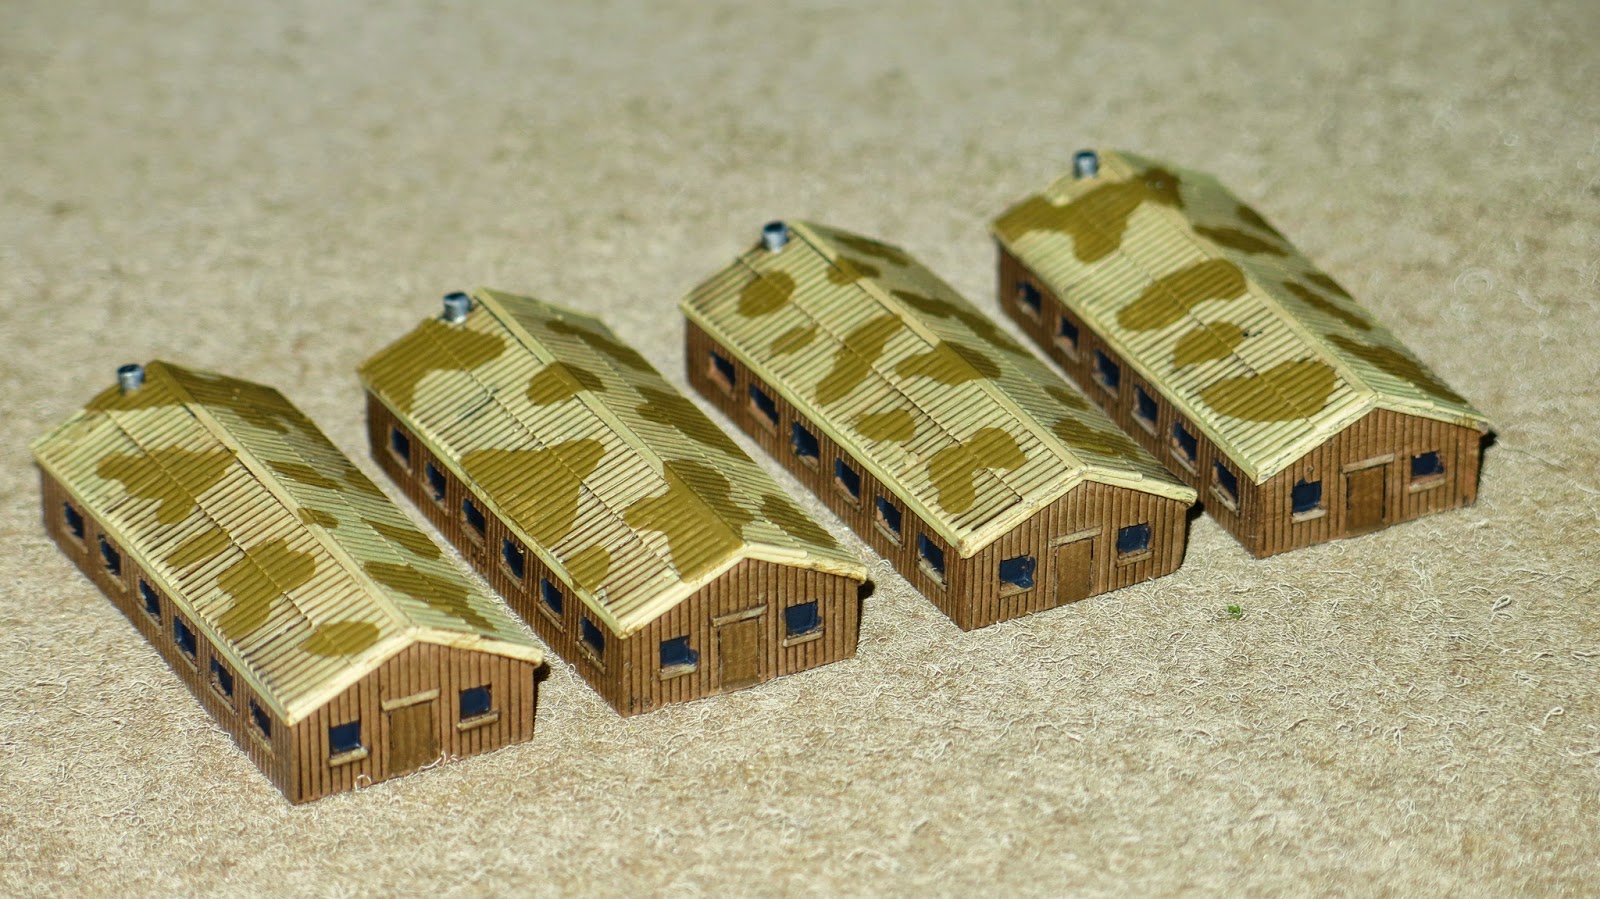 |
| Barracks Huts |
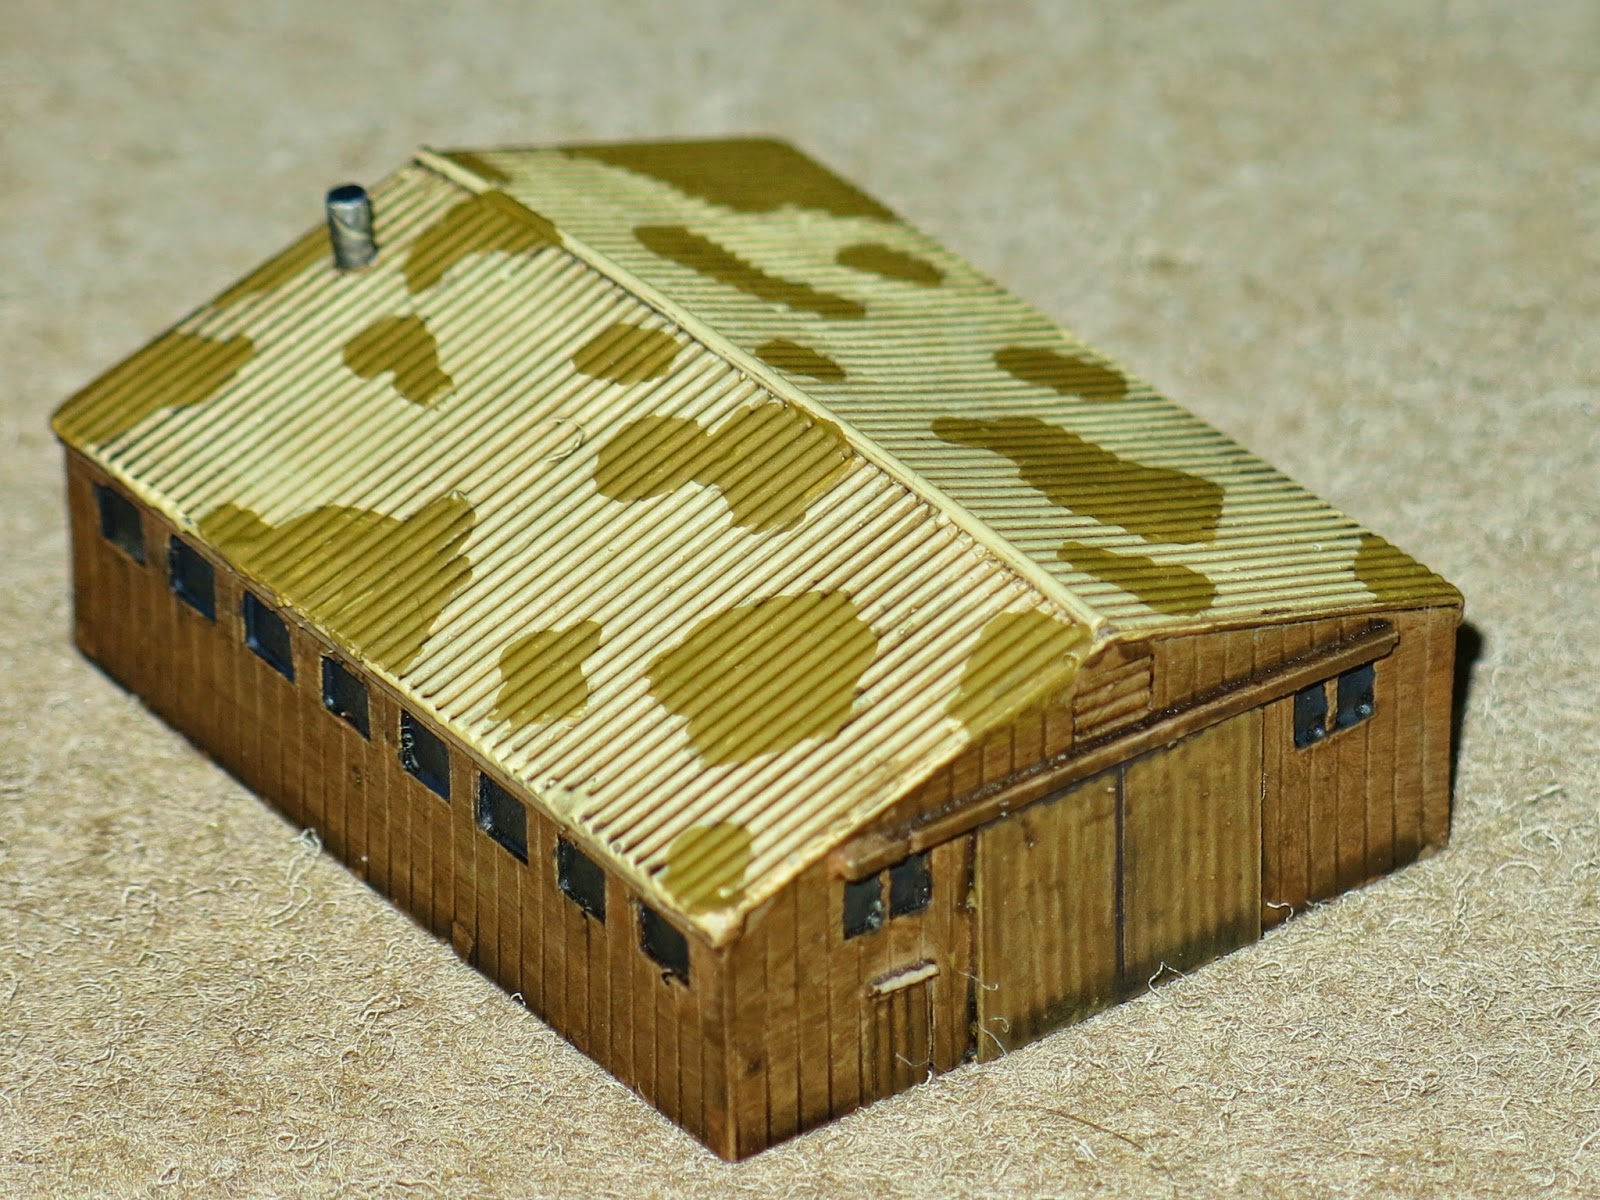 |
| Airfield Workshop |
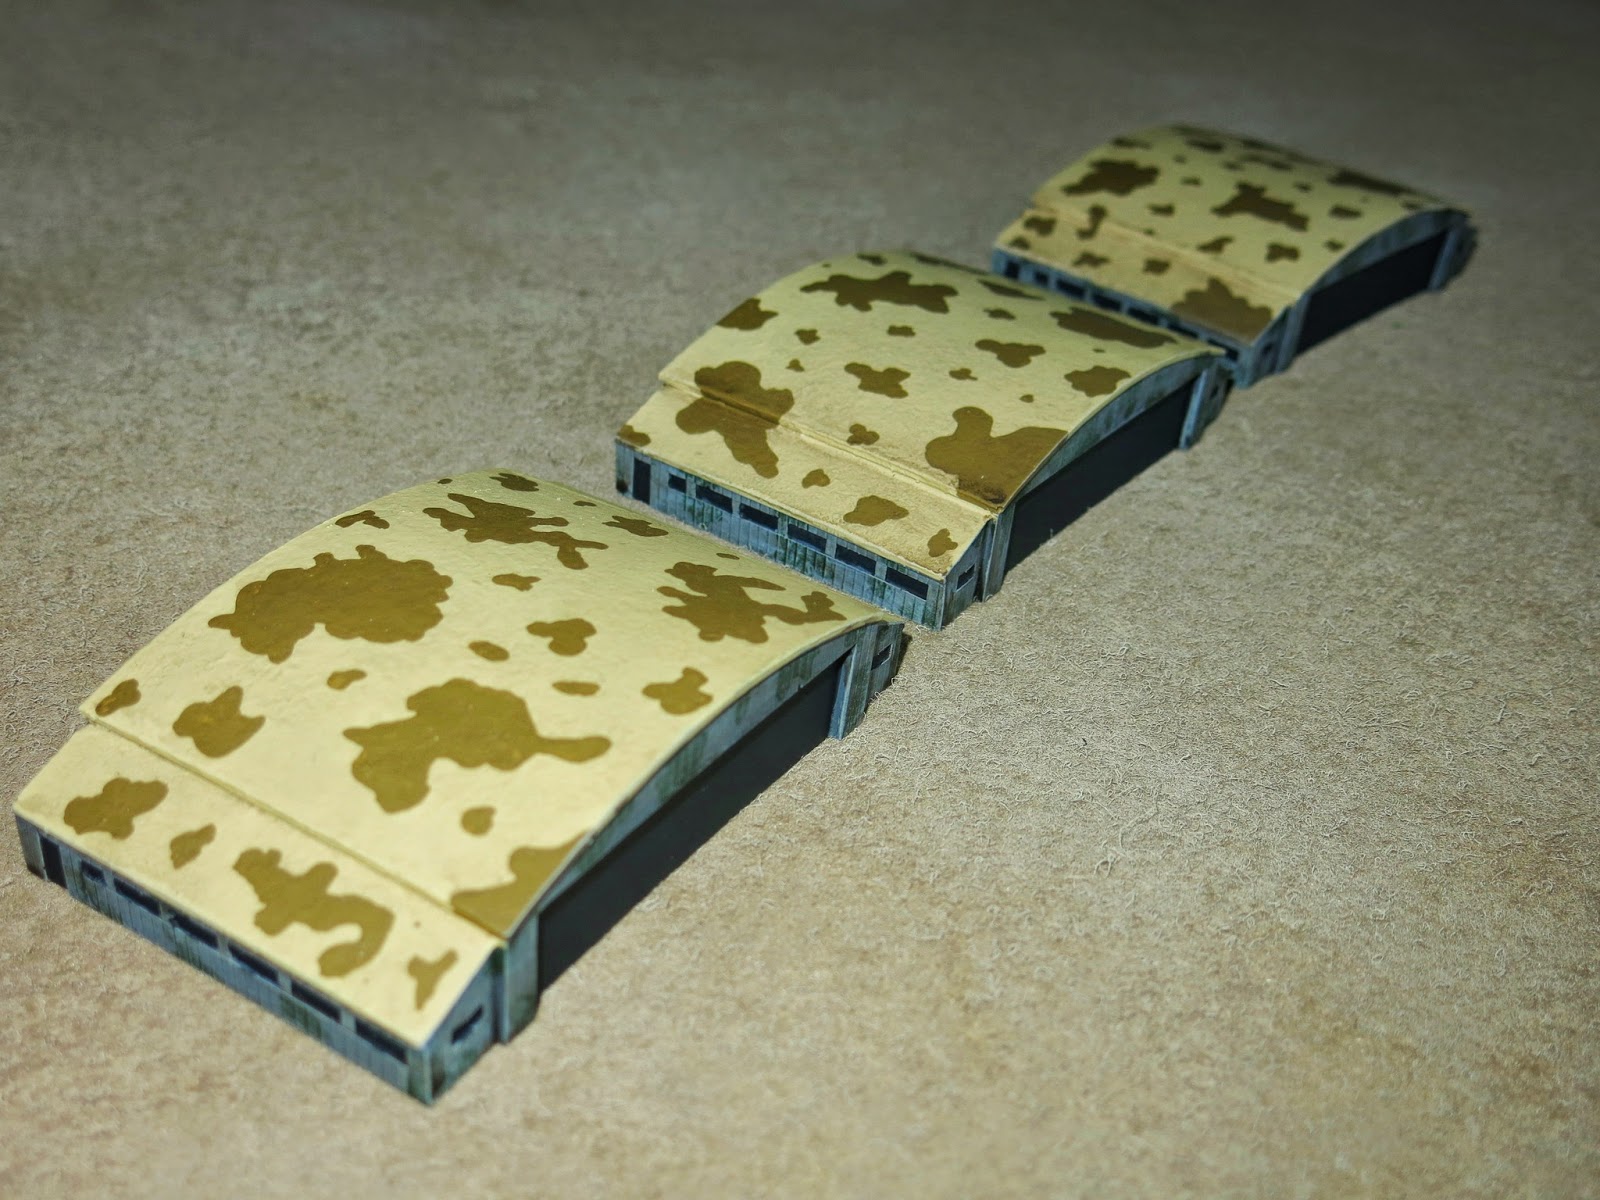 |
| Luftwaffe Hangers |
 |
| Dispersal Hut |
 |
| Supply Dumps - These can be places around the airfield |
The next terrain project is to make a perimeter fence and some MG outposts to offer protection to these buildings. I have already started on this but I'm making a lot of it (current estimate somewhere around 22ft of fencing!) and its taking a long time to work through each stage of construction and painting. Needless to say I'll post some pictures when I have it finished.
Airfield Perimeter Fencing
By 1942 the LRDG and SAS had launched so many successful raids behind enemy lines that axis forces were forced to commit resources to defending potential targets. While this made the task of special forces much harder it was also an important ongoing victory for them, tying up men and material that would otherwise have been used at the front. With this in mid my Italian Airfield needed an enclosing perimeter fence.
 |
| Front and back views of fence sections |
I made the wire fence for just a few pounds using materials that are easily available and relatively cheap. Large 'lolly' sticks can be bought from various craft shops but they can be expensive. Bypassing the local craft store I found packs of 50 for £1 in The Range hardware store. Several packs of Wooden Toothpicks are also required for this build and I bought 200 for £1 from a local thrift store. Plenty of PVA/White 'Wood' glue is also needed, especially for basing. The only speciality materials I bought were 2 Sheets of Wire Mesh (the sort used for vehicle body repairs). This can be bought from craft stores but I found the cheapest and easiest source was my local auto centre where I picked up two sheets for just £4. The only other materials I needed were standard modelling items like basing sand, primer, paint and varnish. I estimate that I was able to complete the whole project - making over forty sections or about twenty feet of fencing - for under £10.
 |
| I have made over 40 sections, each six inches long. |
 |
| More than enough for any scenario |
- Drill five holes in each stick, equally spaced, for the toothpick 'poles'. I was able to clamp up to a dozen sticks together to drill through, greatly speeding up this stage of the build. Make sure the holes drilled are slightly smaller than the maximum diameter of the toothpicks.
- Break the Toothpicks in half and place them point first into each hole (with a dab of PVA in the hole first of course). Make sure all the sticks stand straight and leave to dry.
- Use sprue clippers to cut the points of the toothpicks (currently poking out of the bottom of the Lolly Stick bases) flush with the base. Do not trim the tops of the poles yet!
- Cut the Wire Mesh into 1cm wide strips. I used a metal ruler to hold down the wire and cut the mesh with a modelling knife. Make sure to use a new blade for a clean cut.
- Pinch each end of the mesh and pull gently. This 'stretches' the mesh slightly and makes it perfectly straight. It also compresses the mesh slightly so the 1cm strip is now about 8mm wide.
- Cut the mesh strip to the same length as the Lolly Stick bases and glue to the upright poles with PVA/Wood Glue. Blue-tack may be required to hold the mesh in position while this dries. I added more glue to the joins later on to make sure everything was firmly held in position.
- Trim the vertical poles with the sprue clippers to the same height as the mesh fencing.
- Glue sand to the base being careful to avoid getting any on the mesh.
- Prime the model. I found that using a coloured spray primer (in this case I used brown) was the best way to cover these models quickly.
- Dry brush the base according to your desired colour scheme.
- Dry brush the fencing with metallic paint. I used Gunmetal with a second coat of silver on top. Be careful to avoid the upright fence poles as these need to remain 'wood' coloured.
- Varnish if desired. I game my models two coats of Citadel Purity Seal varnish to give them some durability and a dusting with Testors Dullcote to flatten the shine.
- Add grass tufts and other base dressing as desired.

With the Airfield nearing completion I now needed some aircraft to blow up!
Italian Aircraft
My Desert Raiders raiders project advancing nicely it was not time to complete some aircraft from the Règia Aeronautica (The Italian Air Force). These are not playing pieces but rather as terrain - parked aircraft - for raids by the SAS and LRDG.The models don't come with undercarriage but because they represent parked aircraft rather than flying ones I wanted to raise them up just a little bit, so they didn't lay flat on the ground. I toyed with several ideas (each more elaborate than the last) before settling on a simple wooden block consisting of a 1 cm length of wooden chopstick (I knew these would come in handy one day!) glued to the underside of the models. The block isn't really visible when the plane is on the table and the model now looks like it is sitting on its undercarriage rather than slumped on the ground.
The colour scheme is my best approximation of the camouflage they might have had in late 1942 in Africa. To be honest there are so many examples on-line and in books it was hard to pick a definitive pattern for them. I'm not an expert (and I'm sure one will pop out of the woodwork as soon as I post these pictures) but there seems to have been a lot of variation between squadrons so identifying the 'correct' pattern was pretty much impossible. I have used a base colouring of Tan Yellow (Vallejo 912) with a mottled camouflage pattern of German Camo Brown (826) and Luftwaffe Camo Green (823). The 'white' band and tail cross were painted freehand with Ivory (918) as I felt the White was just too bright.As usual I finished these with several coats of GW Purity Seal satin varnish and a final layer of Testors Dullcoat.
With the Bombers completed I then moved on to some fighters for the airfield, again using 1/300th models from Heroics and Ros.
I have painted two types of Italian Fighter planes that saw service in North Africa leading up to the period I am working on (Late 1942). First off are three Breda Ba.65's, an all-metal single-engine, low-wing monoplane used primarily for ground attack roles. These were on old aircraft by 1942 having first seen service during the Spanish Civil War. Most had been destroyed by 1941 but a handful continued in service beyond that date. I decided to have a small group because their ground attack role compliments the Bombers I have already painted.
The Breda Ba.65's armament was primarily machine guns in the wings with two 12.7 mm (0.50 cal) heavy machine guns and two 7.7 mm (0.303 cal) general purpose machine guns, plus up to 500 kg of bombs in the internal bomb bay and on wing racks.
Next up are three Fiat G50 fighters. First flown in February 1937, the G.50 was Italy’s first single-seat, all-metal monoplane with an enclosed cockpit and retractable Undercarriage to go into production. Like many Italian aircraft of the period they were very manoeuvrable but lacked fire-power (two 12.7 mm (0.50 cal) Breda HMGs). They were far from useless however and in the hands of skilled pilots could be deadly.

Libyan Buildings
With the airfield and aircraft largely finished I moved on to some 6mm buildings from Leven Miniatures. These will be added to my existing collection of buildings to make a small town or administrative centre similar to Barce in Libya. I haven't done anything fancy with the painting, although I have added some colour to the market tents and awnings.
All were base coated in Iraqi Sand (819) and then I painted in the windows and doors. Next I dry-brushed with Ivory (918) and washed with Soft Tone Quick-shade with a final very light dry-brush again in Ivory.
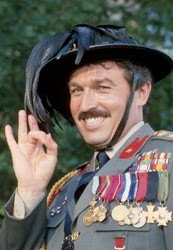 The Italian Bersaglieri in WW2 were generally of a higher quality than regular infantry, with a greater emphasis on physical stamina and marksmanship. Their helmets adorned with black Cockerel Feathers may have been lampooned by Captain Alberto Bertorelli in the 1980's British Sitcom 'Allo 'Allo! but in reality the feathers were part of the "esprit de corps" of the Bersaglieri and worn with great pride.
Bersaglieri Painting Guide (Vallejo Colours)

Battaglione Bersaglieri
With the airfield finished I needed some Italion defenders and to paint a Battalione Bersaglieri to represent the 9th Reggimento Bersaglieri, part of the 101st ‘Trieste’ Division.
 |
| Battaglione Bersaglieri with Transport Vehicles |
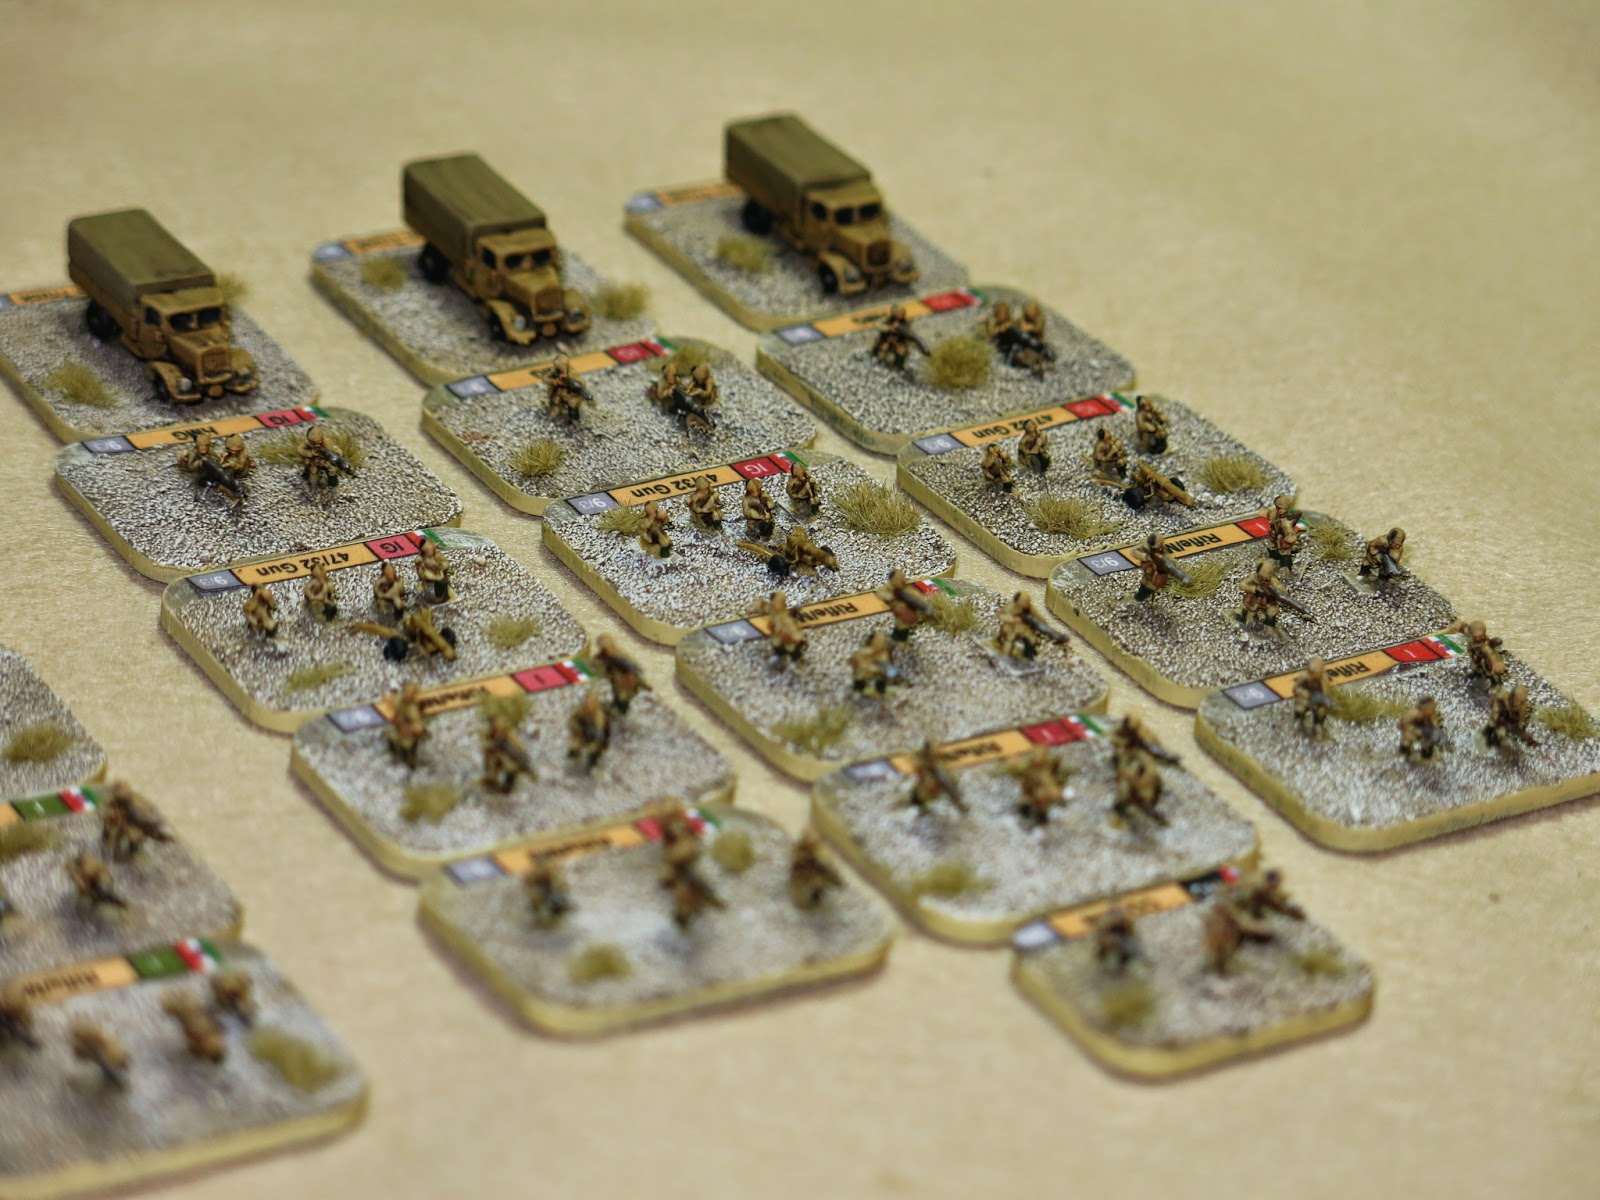 |
| A single Company within the Battalion - Lots of firepower! |
The Italian Bersaglieri in WW2 were generally of a higher quality than regular infantry, with a greater emphasis on physical stamina and marksmanship. Their helmets adorned with black Cockerel Feathers may have been lampooned by Captain Alberto Bertorelli in the 1980's British Sitcom 'Allo 'Allo! but in reality the feathers were part of the "esprit de corps" of the Bersaglieri and worn with great pride.Bersaglieri Painting Guide (Vallejo Colours)
Uniform - Desert Yellow 977
Puttees - Olive Grey 888
Tropical Helmet - Desert Yellow 977
Capercaillie Helmet Feathers - German Grey 995
Webbing - Yellow Green 881
Ammo Pouches - Beige Brown 875
Boots - Beige Brown 875
This force has a lot of firepower at its disposal with a high ratio of HMG's and Infantry Guns plus 3-ton trucks to provide transport.


Bersaglieri Motociclisti
I decided to paint a small support platoon of mounted Bersaglieri to compliment my fully mobilised Italian forces. These guys are mounted on the Moto Guzzi Alce ('Elk') which was in production throughout the war. This Single cylinder, 4 stroke 498cc engine produced 13hp and a top speed of 56mph. The Alce was a robust bike and was ideally suited to the rough conditions of the desert. Most Bersaglieri regiments were supported by a Motociclisti Company and I don't see why my Italians should not also benefit from their support.
When mounted they move as Jeeps so will be very fast, especially on roads. The riders can then dismount and become Rifle/MG infantry teams, providing much needed extra firepower just where it is needed.
 |
| Motociclisti mounted and unmounted |
 |
| As mounted troops they move like Jeeps which makes them very fast on roads or across country |
 |
| The command stand |
No comments:
Post a Comment
Thank you for leaving a comment. I always try to reply as soon as I can, so why not pop back later and continue the conversation. In the meantime, check out my YouTube channel Miniature Adventures TV