
The Setup
A Roman column is marching through rolling hills and isolated forests towards the site of its evening camp. The commanding General has sent out cavalry scouts but they have reported back that the countryside is devoid of any hostile Britons (Ray rolled poorly!) . Unfortunately for the Romans the opposite is the truth and not only are the surrounding hills swarming with fierce warbands but they have been able to sneak even closer to the head of the Roman column than they could have hoped. The trap is sprung and to the Roman commander it seems as if the Celts have burst from the ground just a few hundred yards away.
Order of Battle
Romans c/o General (Ray) and Standard Bearer
1st Command - c/o Legate Ray
1st Cohort (Eagle) 24 Figures
2nd Cohort - 16 Figures
3rd Cohort - 16 Figures
4th Cohort - 16 Figures
5th Cohort - 16 Figures
6th Cohort - 16 Figures
Legion Cavalry - 6 Mounted Figures
2nd Command - c/o Tribune Surjit
1st Auxilia - 12 Figures
2nd Auxilia - 12 Figures
5th Auxilia - 12 Figures
6th Auxilia - 12 Figures
1st Auxulia Archers - 12 Figures
8th Auxulia Archers - 12 Figures
Auxilia Cavalry - 6 Mounted Figures
Celtic Britons c/o Warlord Richard and Standard Bearer
1st Command - c/oWarlord Richard in Chariot
Warband - 24 Figures
Warband - 24 Figures
Warband - 24 Figures
Fanatics Warband - 24 Figures (with Attached Druid)
Slingers -12 Figures
Nobel Chariots - 4 Chariots
Nobel Chariots - 4 Chariots
Light Cavalry - 12 Mounted Figures
2nd Command - 2ic Champion Chieftain Lee
Warband - 24 Figures
Warband - 24 Figures
Warband - 24 Figures
Warband - 24 Figures
Slingers -12 Figures
Javelinmen - 12 Figures
Nobel Chariots - 4 Chariots
3rd Command - 3ic Horse Chieftain James
Warband - 24 Figures
Warband - 24 Figures
Warband - 24 Figures
Warband - 24 Figures
Javelinmen - 12 Figures
Nobel Chariots - 4 Chariots
Light Cavalry - 12 Mounted Figures
The Action
 |
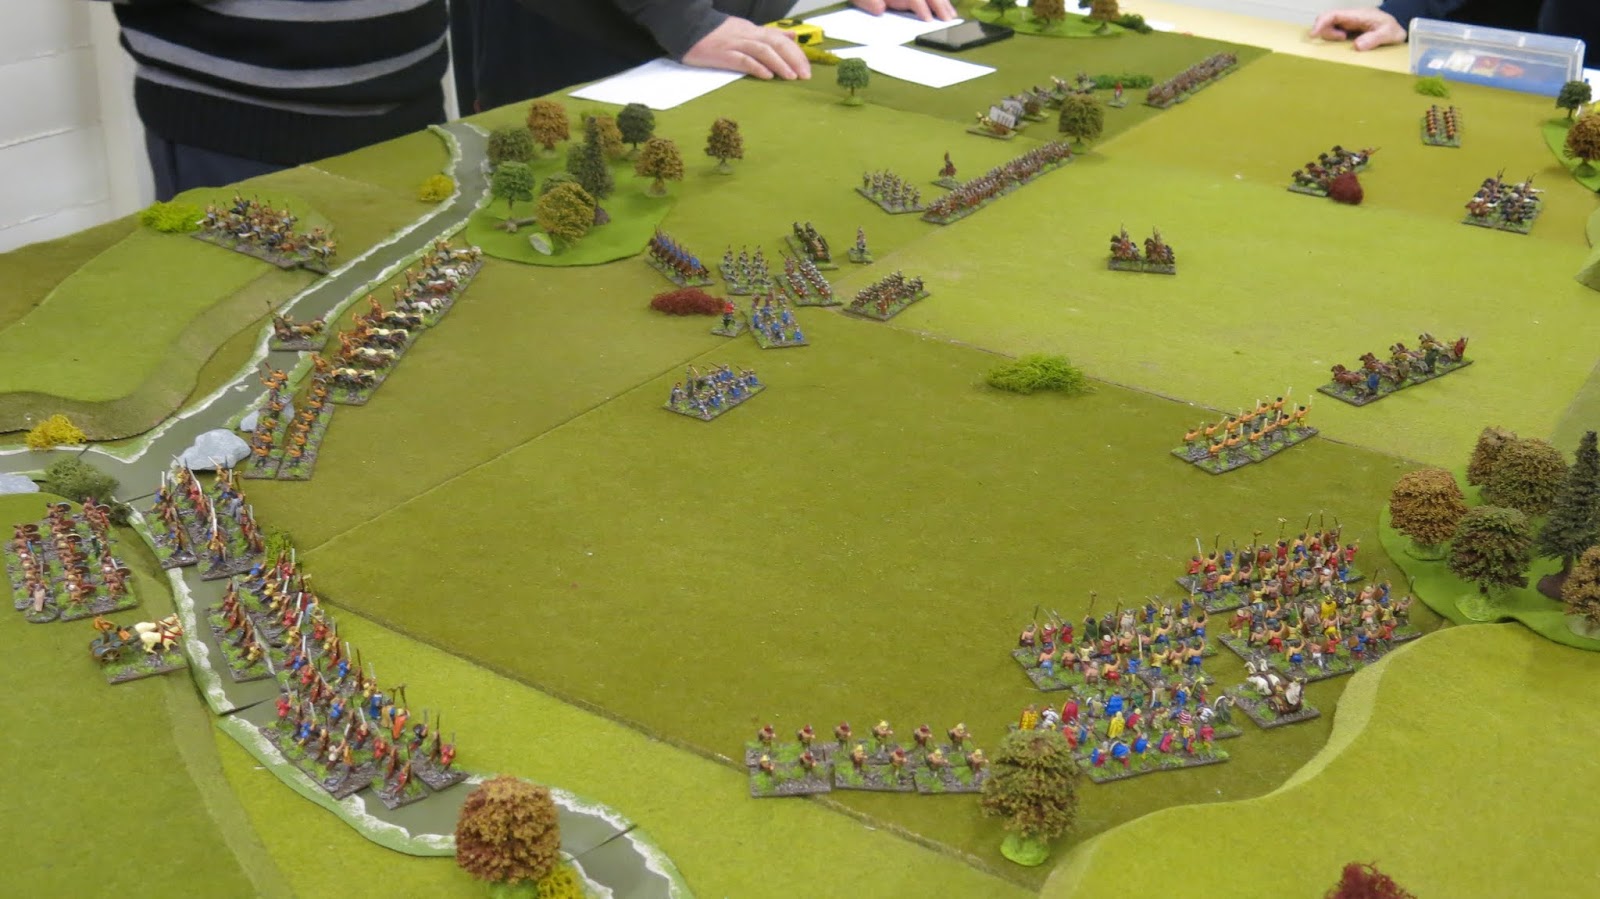
| Initial Setup. The Britons are hidden behind a ring of hills as the Romans march straight into the trap. As the ambushing players we were given time to study the disposition of forces and devise a plan. The Roman players were given no time to come to terms with their terrible position. |
 |
| The Roman Column with Auxilia units leading the way and Legionary Cohorts at the rear. |
 |
| Thanks to poor scouting the Britons were given a 'free' move before the game started. This meant we were able to start the game on the hills overlooking the Romans and it also meant we could rearrange our forces slightly (within reason). |
 |
| From the Roman perspective...not a good position to be in. If he survives, the Cavalry commander may well find himself being 'disciplined' for such poor reconnaissance. |
 |
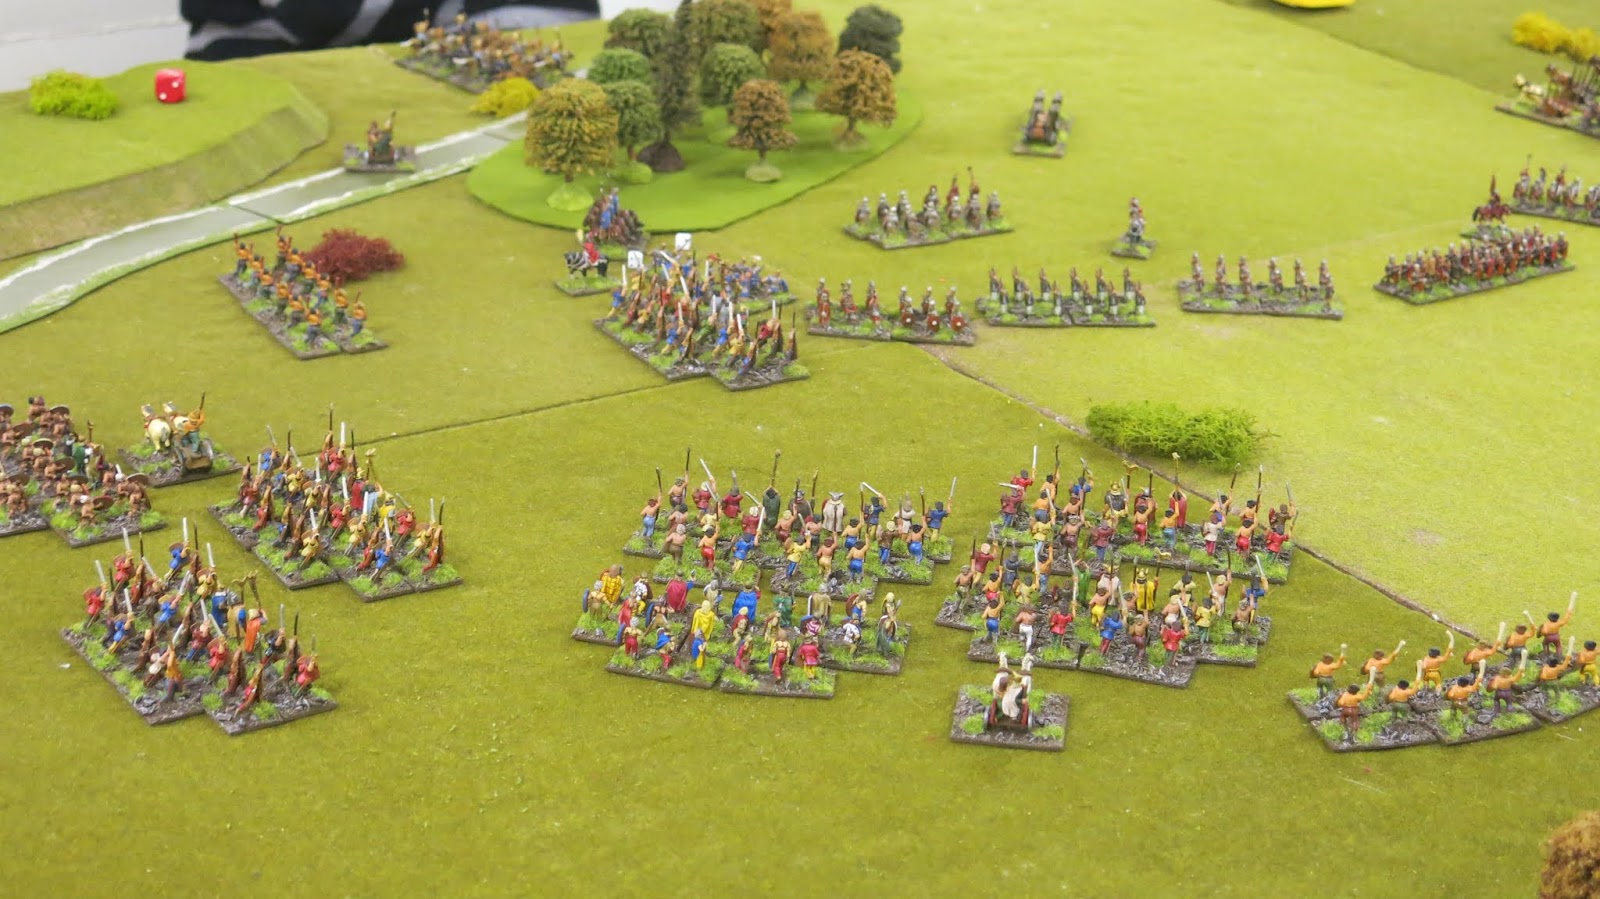
| Warband after Warband seems to burst from the long grass on the encircling hills and give out a visceral roar that sends shivers down the spines of the Romans. |
 |
| More Warbands, including one Fanatic unit with a Druid attached for good measure. And lots of Nobel Chariots as well. The Romans are not going to have long to respond to this assault. |
 |
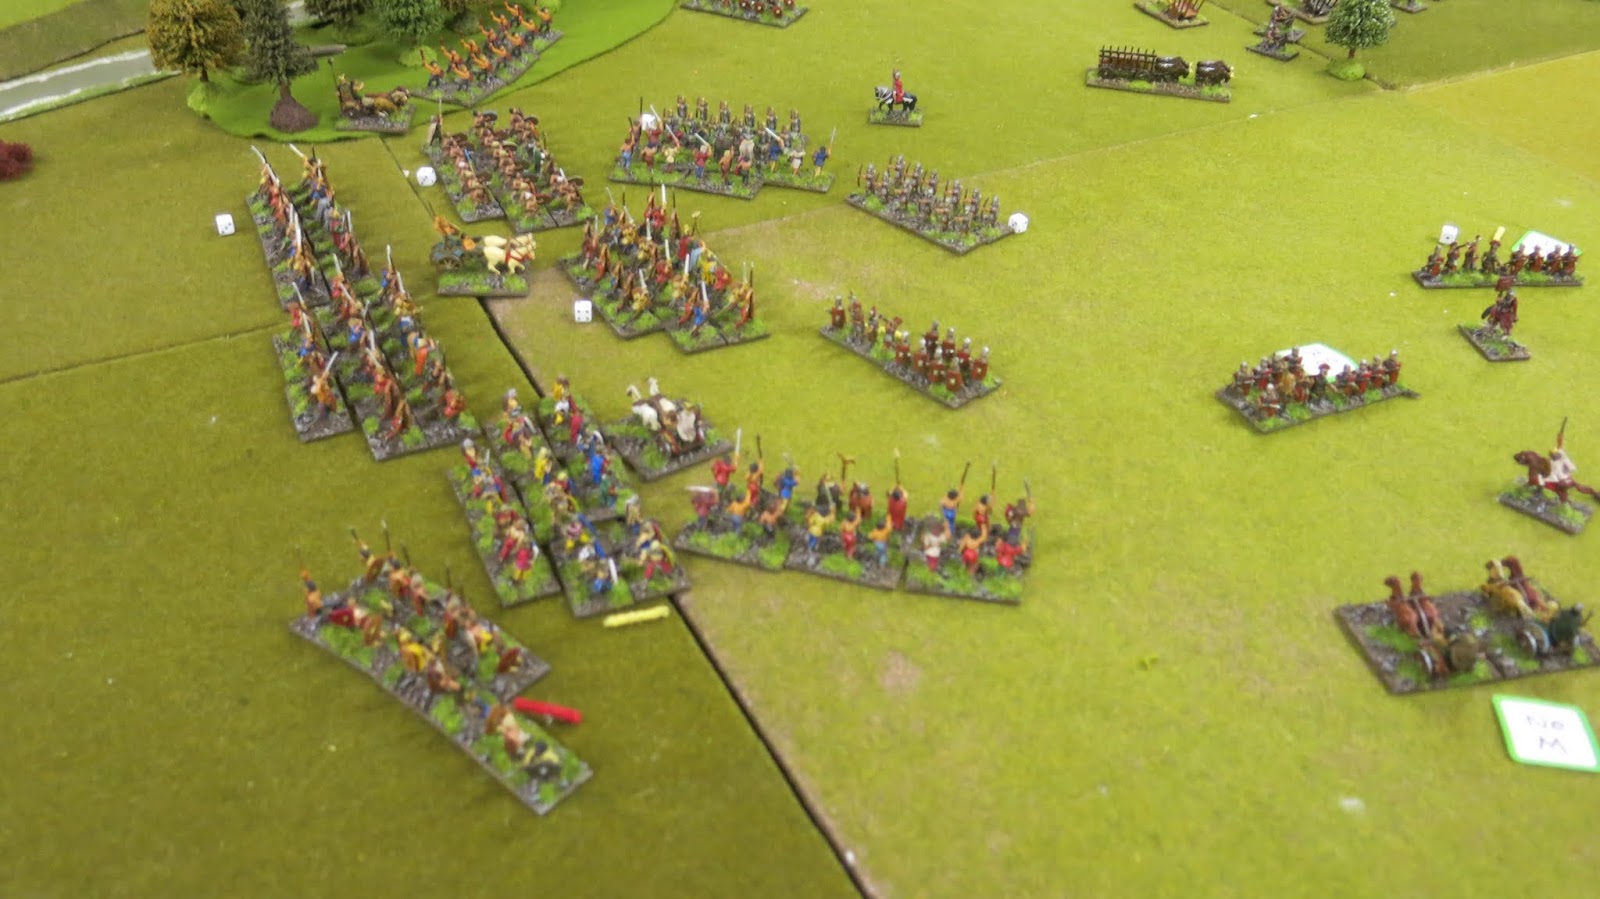
| Looking across the field to the head of the column. For the Commander and Second in Command their units will converge on the head, while the Third command will try to occupy the Legionaries in a bit to keep them out of the fight. |
 |
| The Roman players Surjit and Ray take full advantage of their troops disciplined training and are able to quickly manoeuvre their units out of column and begin redeploying. Surjit begins pulling his Auxilia back in an attempt to draw the Warbands towards the Legionary Cohorts. But in typical Surjit style it all gets a bit messy for a couple of turns! |
 |
| The river slows down the advance of Richards warbands but my troops (on the right) make better speed...apart from a unit of Javelin troops who remain out of command and fail every command roll for the rest of the game. Command distances become a major concern for the British players as they have fewer command stands than the Romans and bigger units. |
 |
| British Light Chariots smash into Auxiliary Infantry and Cavalry. While the units look impressive they are not as powerful as imagined. Against well drilled and armoured troops the best they can hope for is to weaken the enemy units. Roman casualties are light, but casualties are taken and this means they will be less effective when the much larger and powerful warbands reach the front line. |
 |
| My Nobels Chariots also smash into an Auxiliary cavalry unit. When I began my charge these cavalry were riding away with their back to me, but they were such well drilled troops they were allowed to turn to face me, although they lost the ability to counter charge. The resultant Melee was won by the Romans but the cavalry lost half their troops in the process. |
 |
| A closeup of the Chariots hitting the Auxiliary Infantry. Again despite having the advantage of a charge the melee felt very one sided with our chariots hitting on a 6 and the Auxiliaries hitting on a 4,5,6 !! |
 |
| Such one sided battles really p*ss off main warbands. There will be revenge! |
 |
| My General leading his warbands as they advance. The only way I could ensure that all my units were 'in command' was to put my general right in the middle of them. With a command radius of just 4" I had little choice. |
 |
| Auxiliary Cavalry follow up on an earlier victorious Melee to finish off some of Richards Nobel Chariots. Again it was a completely one sided fight. |
 |
| Meanwhile the c/o of the Third command of Britons has taken advantage of a big gap between the Legionary Cohorts. Swinging his chariots around he is able to hit them in the flank.More importantly the Legionaries won't be able to use their Pilum as the Chariots approach (this happens before the Melee is resolved, often giving the Romans a significant advantage). |
 |
| Despite the heavy casualties that the Chariots have taken the Warbands are still advancing and they have taken relatively little damage. The Auxiliary archers have thus far not proved their value against the Britons and pretty soon they will have to fight for their lives. |
 |
| The first Warbands start to get into Melee. Again the Romans have a huge advantage, hitting on a 4,5,6 while our Warriors have more attack dice but only hit on a 5,6. Things are getting a little cramped by now. With the Romans retreating it has forced two British commands (8 warbands and other units) into a very small area and trying to line up for a charge without blocking the way for friendly units is becoming a headache. |
 |
| Nearly all the Roman units have taken some casualties and crucially have lost one or more bases (this make a big difference in terms of attach dice but more importantly Morale). Meanwhile there are seven Warbands with little or no damage still waiting to reach the enemy. |
 |
| The Warbands of the 3ic are starting to go head to head with the Legionary Cohorts. Although they are coming off worse in Melee the Romans can't afford to loose more troops as their are fresh British units ready to move in and draw Latin blood. |
 |
| A fierce fight between a large Roman Cohort and three Warbands. The Roman player rolled impossibly well and wiped this unit out, but also took heavy damage in the fight. The two warbands behind were only to ready to move forwards and exploit the damage caused by their fallen comrades. |
 |
| The Roman line is getting thinner and they are starting to fall back little by little in an attempt to stay out of range of the warbands. But its starting to look as if the Britons ambush has paid off. |
 |
| More Warbands crash into the Auxilia units. My dice rolling was particularly poor and I came off worse, but I and Richard still have four warbands that have yet to take any damage. |
 |
| With defeat imminent, and more waves of British ready to move forwards (and dinner time beckoning) the Roman General orders a general retreat and throws in the towel. |
Once again I am impressed by the simplicity and versatility of Posties home made rules. We have played "Let the Gods Decide" before and we always seems to have a good game with these rules. In this game we were able to see distinct differences in style between the opposing forces. The Britons had no choice but to keep close together as any unit that fell outside command range was effectively out of the game. I had one unit of Javelin troops that fell behind after the first turn and never moved after that. Meanwhile the Roman troops had more officers, better discipline and were able to perform more complex manoeuvres, even when being charged by the enemy.
The main advantage for the Romans though has to be the effect discipline has on melee and their to-hit rolls. Despite being overwhelmed by Britons the Romans won the majority of melee's because they were hitting on a 4,5,6 in addition to devastating volleys of Pilum when charged.
Despite these advantages the Romans lost the game, and a lot of that has to come down to that poor scouting roll before the game started. That meant the British players had a free move, reducing the time the Romans had to redeploy their forces. And extra turn to retreat and redeploy may well have made all the difference to the Romans. Having said that I didn't feel that the Auxiliary units retreated far enough, or fast enough, to form a strongly defended line against the oncoming Britons. This gave the British players room to pick away at exposed units and break up the formation. Also the Legionary Cohorts at the rear of their column probably should have tightened up their formation, denying the Britons a change to extract casualties with their chariots and Javelinmen.
A good game, an excellent set of rules and my second win of the year!


