Thursday 28 April 2016

The Fall of Carthage

Its been a long time since I did a book review as I never seem to have the time to start, let alone finish, books these days. My recent holiday gave me an opportunity to reverse this trend and I took a pile of paperbacks away with me. As it was I only had time to read one book and I think I probably picked one of the best out of the bunch. 

The Fall of Carthage by Adrian Goldsworthy covers all three of the Punic Wars with Rome showing how Carthage was utterly unprepared for the Roman way of making war. Even at the height of Punic success - when Hannibal ravaged the Italian countryside destroying legion after legion - the Romans never wavered in their resolve to win or die. For them this was a war that could only end in the total destruction and subjugation of one side or the other. Such implacable stubbornness was unthinkable in the Hellenistic world and after three clear battlefield victories Hannibal had every right to expect to conclude the war on terms favorable to Carthage. This was not to be the case. Instead the seeds of the complete destruction of Carthage over 60 years later were already being sown.
"He who conquers is not the victor unless the loser considers himself beaten" Ennius (a writer during the period of the Roman Republic and the Punic Wars)
One of the best things about this book is that its not overly academic. Goldsworthy does take the time to discuss the historical sources (the book is meticulously referenced) and he never shies away from discussing their reliability but this never interferes with his telling of the historical story. Polybius is described as a generally reliable source and is one of the closest contemporaries of the history he writes about. Livy, writing later, is less reliable and there is a suggestion that his approach is much more pro-Roman and therefore unreliable. Having said that the Author does make it clear that sometimes historians just have to work with the sources they have and where only one source is available then that account has to be used, albeit with caveats.

Goldsworthy concludes by describing the conflict with Carthage - and in particular the Second War - as Rome's "Battle of Britain moment". Despite huge battlefield losses and a seemingly unstoppable foe the Romans simply refused to concede defeat. In so doing they broke every convention of warfare in the ancient world and locked themselves into a life or death struggle that could only end in the utter annihilation of one side or the other. Carthage didn't see the war in such stark proportions and consequently didn't prosecute the war as vigorously or as ruthlessly as they could have, and in so doing they lost the war and, in the end, everything.

The Sack of Carthage in 146 BC - The final act of the Punic Wars

For me the things that makes this book stand out is the fact that all three Punic wars are discussed in one volume and that the links between each conflict are very clearly laid out. In effect the Author is arguing that the three wars that spanned over a century were effectively a single struggle with Rome growing stronger economically, politically and militarily with every encounter. The Roman mindset was not initially expansionist but the conflict with Carthage changed that outlook - partly as a necessity of war with such a deadly foe - and by the end of the period Rome was on the fast track to becoming the worlds first superpower.

A very enjoyable book and one of the best pieces of historical analysis that I have read in a long time. 

Series: Cassell Military Paperbacks
Paperback: 416 pages
Publisher: Cassell (April 1, 2007)
Language: English
Rating:      ★★★★

Tuesday 26 April 2016

The Battle of Campanica

After months of preparation I have finally reached a point where I can play a To the Strongest game at home against the Young Padawan. I worked up two approximately equal forces (with a slight points advantage to the Carthaginians) and some basic terrain so we could have our first proper game with my newly minted armies. This game was more about familiarizing ourselves with the rules than anything else. Reading a rule-book is one thing but I find I need to play a game to start understanding how things work.

The Setup
This is a fictional battle between the Army of Hannibal and the Republican Romans sometime around 212BC. Both armies have been aware of each other for several days and have played the usual game of nerve, typical to warfare in this era. Four days ago the armies camped just a few miles apart and over the next three days they have tested each others resolve and shifted positions getting progressively closer and more belligerent. Today both sides feel they have an advantage and it looks as if the two enemies will finally meet each other in battle. 

Order of Battle
Romans - BigLee - 153 points
Servilius Geminus - Senior General (Brilliant)
General Paxus - Mounted, Detached - 1st Command - Roman Left Flank
  Velites x2
  Triari x2
  Balistari x2
General Scicus - Mounted, Detached - 2nd Command - Roman Centre
  Velites x4
  Hastati x4
  Princips x4
  Camp x1
General Flamminius - Mounted, Detached - 3rd Command - Roman Right Flank
  Triari x2
  Equites Extrodinari x1
  Equites Romani x2

Carthaginians - The Young Padawan - 188 points
Hannibal Barca - Senior General (Brilliant)
Hammilcar - Mounted Detached - 1st Command - Carthaginian Right Flank
  Punic Cavalry x4
Mago - Mounted, Detached - 2nd Command - Carthaginian Centre
  Baleric Slingers x2
  African Skirmishers x2
  Elephants x2
  African Spearmen x6 **
  Hero's x2
Hasdrabul - Mounted, Detached - 3rd Command - Carthaginian Left Flank
  Numidian Lt Cavalry x4

** Technically not allowed in the army lists but I still have some allied units to paint up so I made up the Carthaginian army by fudging the lists for this game.

This order of battle gave the Carthaginian's a numerical and points advantage but I foolishly thought this would just make up for the Padawan's inexperience and create a more balanced battle.

The Action
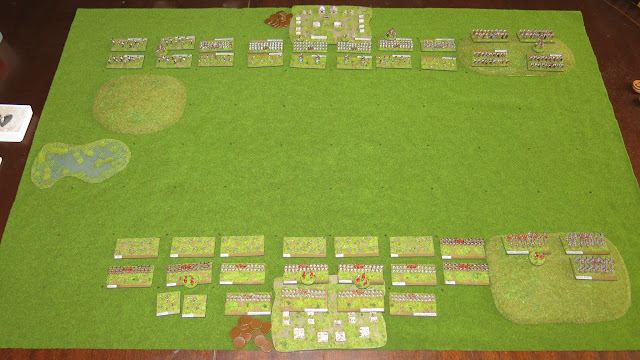
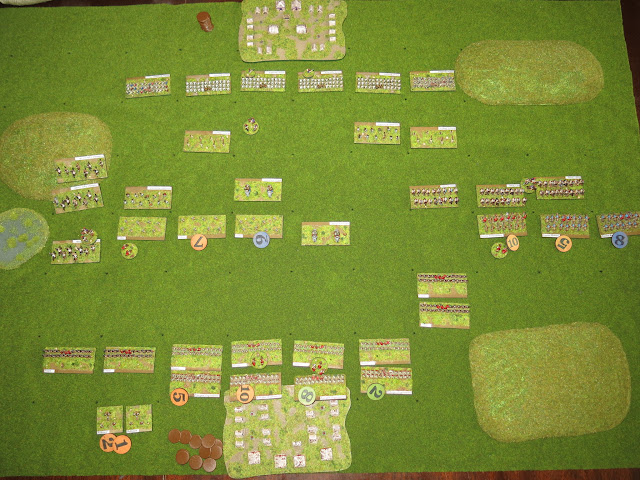
The Table set up for action

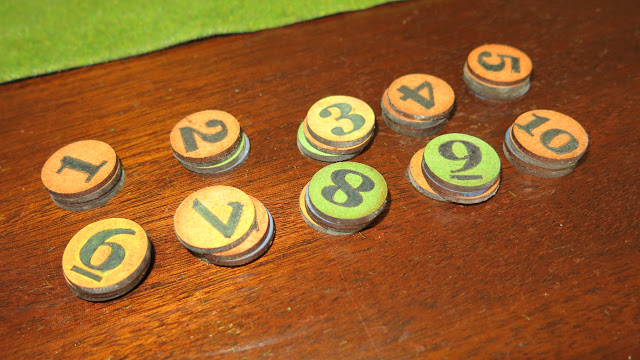
A small pile of numbered chits replaced the need to put cards on the table. Four sets of chits were just about sufficient for this game. 

The two armies lined up and ready for action.

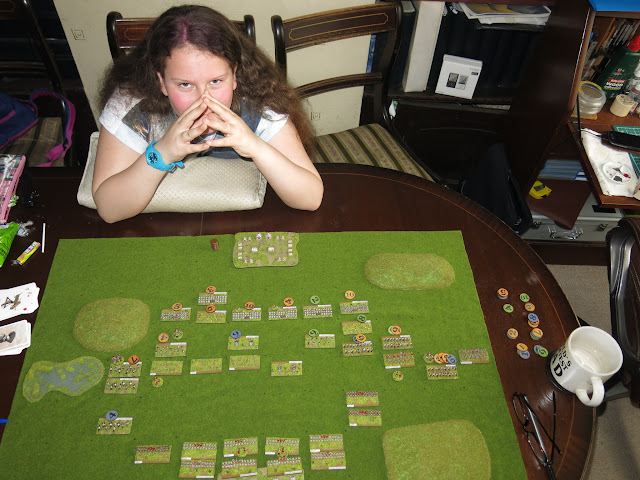
Opening moves... Skirmishers move forward and the cavalry wings begin to clash.....and the Young Padawan gives me a look that sends shivers down my spine!

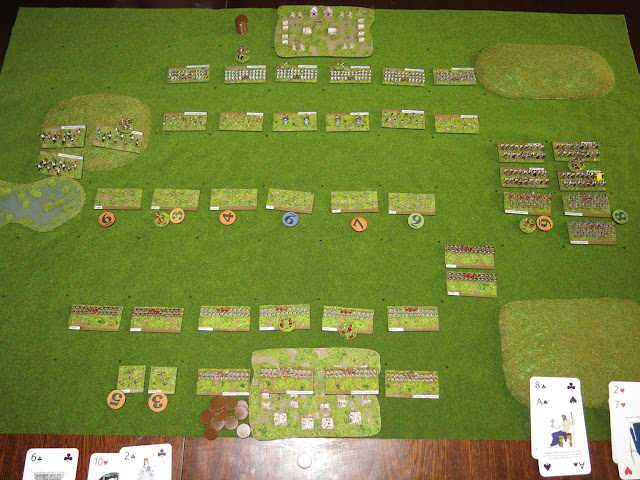
The numbered chits in action. This sized table and the 3" squares are just not big enough to accommodate cards. 

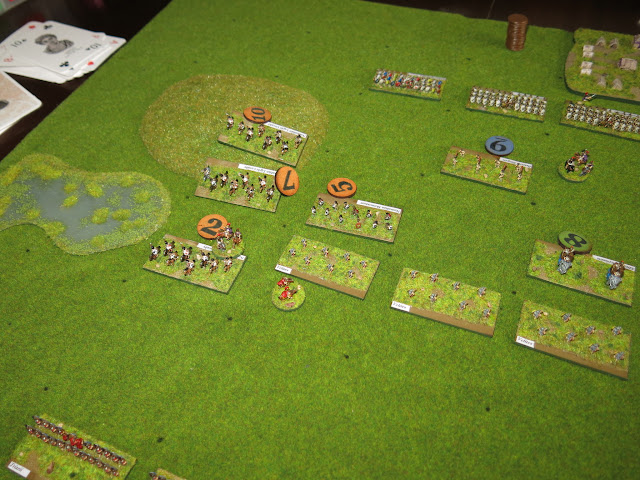
The Numidian Light Cavalry sweep aside my skirmish screen. 

The Carthaginian elephants start to break through in the centre while the Punic Cavalry begin to attack my Equites over on the right flank. Meanwhile my Balistari catapults can't hid the broad side of a barn!

She's giving me the 'Mr Burns' look again! The Punic Cavalry have destroyed one of my Equite units and the main line of Punic Spearmen start their advance forwards. 

My one hope was that my Equite Romani and Extrodinari might win against the Punic Cavalry and threaten the infantry advance, but it was not to be. 

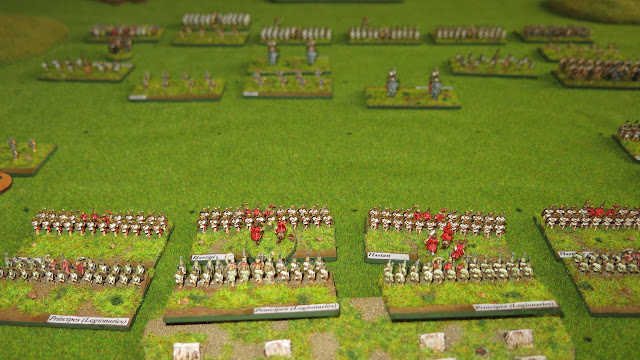
The view out from the Roman camp. Those elephants steamrollered on and seemed unstoppable. 

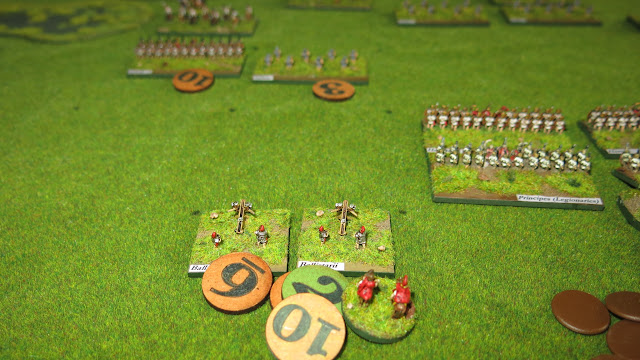
These bleedin Catapults were useless. I didn't hit a single target during the whole game. 

My Equites have been largely destroyed and the Carthaginian Elephants continue to lumber forwards. 

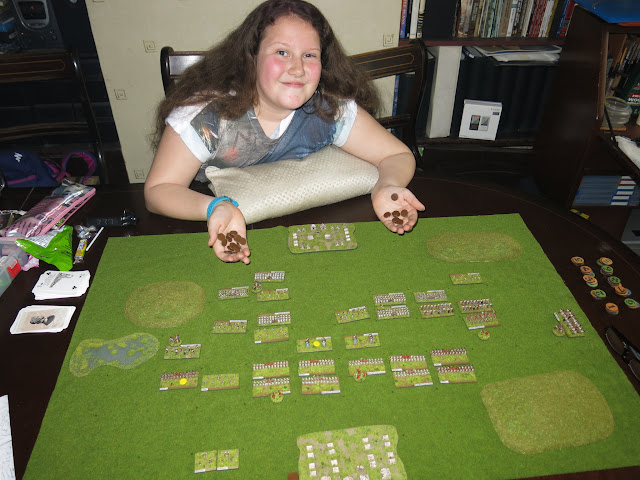
With casualties mounting and dinner on the way it was time to concede defeat. The young Padawan shows off handfuls of victory medals.  

Analysis
This was a test game played to as close to a proper full scale game as we could given time constraints and the fact that we are both novices with these rules. All things considered the game went very well and although we run out of time (the table was needed for Sunday lunch!) we still had enough time for a decisive Carthaginian victory to be obviously clear. Playing another couple of turns would only have emphasised my humiliation!

One of the benefits of playing this battle was that I now have a much clearer idea of what units I need to paint next. The Carthaginians need some Gaulish and Latin allies while the Romans are desperately in need of some allied cavalry. I also need to make or buy some more terrain for future games so my to-do list just got even longer.

The main purpose of the game - other than fun of course - was simply to learn the rules and to test various elements to see if I had missed something. One of the main things I wanted to test was the use of numbered chits rather than cards on the games surface (there isn't enough space for cards on a 3" grid). We found that this worked well considering the space constraints. I am waiting for delivery of a load of d10 dice to use in future games and I may use these to replace the use of cards. The idea is that these can be rolled instead of turning cards and each dice can then be placed behind units instead of laying down cards or numbered chits. This will clearly take up less space than cards and will be marginally quicker than turning cards and then placing numbered chits down. Whether this is a good idea or not remains to be seen.

One thing I realised early on in this game was that the 3" square grid isn't quite big enough for my bases. The units themselves fit OK but there isn't much spare room in the box for things like ammo and disordered markers, generals etc. I'll make a new mat with 4" squares for the next game and see how this works. Once I'm happy with the size grid I'm using I'll make a more permanent mat with some texturing and shading on it - the plain green mat alone looked very dull in this game.

So there you have it. My first TtS! game ended in defeat at the hands of my daughter but also helped define the course of this project over the coming months. I have a lot of work to do. 

Sunday 24 April 2016

Army Camps for TtS!

While I was at Salute I picked up a pre-order from Baccus that included tents and the other trappings of ancient battlefield camps. The To the Strongest! rules include the need for a camp for each army and this was the last thing I needed to paint up so that I could start playing. My original plan was to model two bases filled with tents, baggage carts, camp followers and all the trappings of a battlefield encampment. When I started arranging these elements on the mdf bases I soon realised I didn't have room for all these items and actually the best looking 'camp' models were the simplest, featuring only tents, a few camp fires and a campaign table outside the Generals tent. 

One camp for the Romans and one for the Carthaginian's.
One of the advantages of making these like this is that there is room for units of troops to be place inside the camp and other items such as Victory Medals can also be stored here. The spare baggage model will not go to waste, I'll paint these up and mount them as scenic items at a later date. There is also space around the outside of these bases to arrange fortifications if the player is willing to spend the points do so. This is a project for the future. 

With the flock and paint barely dry on these encampments the Young Padawan and I had our first proper game with my Romans and Carthaginian's. I'll write up a battle report and post it in a few days time but lets just say my first battle didn't exactly go to plan!

Tuesday 19 April 2016

Battle of Fort Lee 1756

On Monday some of The Rejects gathered for a special weekday evening game in honour of our temporarily returned Fran (aka The Angry Lurker). Fran is here for a week and was at Salute over the weekend but we couldn't let him go home to Ireland without a game in the Shed-o-War. For me this meant traversing the QE2 Bridge in rush hour to get to Gravesend for a 7 pm start. As it was the traffic wasn't bad at all and I made it to the game with plenty of time to spare.

I haven't done a full BatRep this time, because there wasn't really much time for note taking and carefully considered plans. It was out to the shed and start fighting as quickly as possible. Normally we would play a game like this over a five or six hour period but this time we had a maximum of about four hours, less if we started nodding off. I still had a long drive home and I know some of the other rejects also had long trips ahead of them so none of us were eager to stay too late.

Order of Battle
British
British Colonel (CiC - John)
   44th Line (16 Figures)
   60th Line (Royal American) (20 Figures)
   80th Light Infantry (12 Figures)
Special Character (Indian)
Civilians (30 Figures - Some armed with Rifles)

French
French Colonel (CiC - Fran)
   Bearn Line (20 Figures)
   Campagnes Franch de la Marine (12 Figures)
   Trans Rivienes Militia (12 Figures)
Indian Chief
Special Character (Indian)
   Indian Warband (12 Figures)
   Indian Warband (12 Figures)


The Action
The Table looked spectacular. British are closest in the fort with two patrols out on the roads and several militia armed with rifles among the general population. 

My troops out on patrol before the alarm  is raised

Ray's Light Infantry hold the bridge...but not for long.

More British on patrol, again these are Ray's.

Inside the Fort John also has a unit of infantry

Another view looking down the table across the British village towards the woods beyond

The French win Initiative and launch a surprise attack on the Bridge defenders. Richard immediately send his Indians forward who kill several of rays infantry. 

Then Fran advances his rangers and finishes the British off. The Bridge is clear and nothing can stop the French crossing.
My side of the British defence. Lots of unarmed civilians to get out of the way and a mix of lien troops and armed Militia to defend against an Indian warband.

The remainder of Rays Light Infantry leg-it for safety.

Reinforcements are sent out from the Fort

Overview of the central section of the table where most of the action took place. Closest are my troops and militia beginning to exchange a few shots with the Indians which can just about be seen by the top right of the larger cornfield. Across the table Ray's Rangers continue to fall back and Line troops move forwards towards the French and Indians that have started to come across the bridge.

My line troops (half of the 60th Line) move forwards towards the oncoming Indians in the distance

John, Ray, Richard and Fran across the table. Richard is moving his Indians forwards and preparing to set fire to a farmhouse.

More French cross the bridge and two large groups of infantry come out of the woods. The Blue discs were hidden movement markers but both units have now emerged from the woods and can be spotted by the British. 

Civilians flee as fast at they can to get away from the raiders and head for the fort. Meanwhile my Infantry break into skirmish order and begin to fan out.  

The Indians reach the edge of the |farmstead, look down the road and a row of levelled rifles... and decide not to take the direct route! One Indian can be seen saying "Er guys... maybe we should go around the back?"

Meanwhile French Marines and the Bearn Line pour across the bridge.

My troops place themselves to stop the advance of the Indians while Ian's troops (further back flying the flag) begin to reach the front.

The game progresses as we feed troops forwards while Ray pulls back his Light Infantry.

The French Militia and Indians start burning farms and looting the buildings. 

Meanwhile the Indians on my side of the table seem more interested in staying away from my guns rather than looting and burning. As far as I'm concerned this is a result. However by this stage I should have shifted some of my militia troops to support Rays fight across the table. I did this eventually but a bit late to have any effect. 

Rays Light Infantry try to slow down the advancing French while British Line troops move closer to firing range.

A mass of British red coats starts to move forwards, but its starting to get dark and there are still a lot of French heading their way.

Surjit's Indians are still loitering in the woods trying to build up the courage to attack the British. 

Of course the British have a nice defended position and a LOT of guns. If the Indians are stupid enough to attack they will get a pasting.

John and Ray laugh in the face of mounting losses.

At last the Indians move to the end of the woods and open fire. I return fire and kill three Indians. 

My god there are a lot of French and Indians moving through the village.

Finally some troops meet in hand to hand combat but its a one sided fight.

Meanwhile all the British Civilians have now made it into the relative safety of Fort Lee.

A swift exchange of musketfire.

Pretty much the end of the game. Postie had allotted 10 turns for the French raid and time was up. He added up the victory points and it was actually closer than we though with just five points between the British and French. If Surj's Indians had been more 'Indian' and done some looting instead of skirting around the woods the difference would have been even clearer. 

Game over and the Bromance continues!

Analysis
The British chances of success were slim from the outset, especially when we lost the initiative in the first round and Ray subsequently lost the bridge. Any effective opposition to the French here was over from the start and Ray spent most of the game in a fighting withdrawal to reach more favourable ground on which to mount a defence.

Essentially this was a battle of two halves, with one side having pretty much all of the action and the other side being a rather low key skirmish of little importance. My troops were not about to engage Surjit's Indians in melee and he wasn't going to charge into my gunfire, especially as I had half a dozen civilian riflemen in my ranks. Our game consisted largely of a stand-off that secured the flank of John and Ray's troops and kept the Indians on our side of the table out of the action. I did eventually feed a few of the riflemen back towards the other side of the filed overlooking Fran's advancing troops but this was too late to play a role. I should have moved them a couple of turns earlier, but I suspect the battle was already lost for us by then.

It was great to see Fran again, catch up on all the news, talk about our experience of Salute and all our purchases and of course for Fran to reintroduce the work 'Fek' to our vocabulary.