On Sunday Posties Rejects gathered in the shed-o-war for a WWI naval battle. For a change Stuart wasn't umpiring and we weren't using his models or rules. Instead John brought his collection of 1:2400 scale ships, some newly acquired Hex mats and his own rules for us to try out.
The Setup
The German Admiral plans to draw the British fleet out into the North Sea by setting a trap baited with a seemingly inferior force of German ships. The rest of the fleet is ready however to take full advantage of any rash response by the British. Unfortunately the tide is a factor the Germans must take into account as Sandbars restrict movement at the start of the game.
Order of Battle
German High Seas Fleet (Surjit and Ray)
Helgoland (Battleship) 12" Guns
Grosser Kurfurst (Battleship) 12" Guns
Bayern (Battleship) 15" Guns
Hannover (Pre Dreadnought) 11" Guns
Schliesen (Pre Dreadnought) 11" Guns
V45 (Torpedo Boat) 3" Guns + 4 Torpedoes
B109 (Torpedo Boat) 3" Guns + 4 Torpedoes
B110 (Torpedo Boat) 3" Guns + 4 Torpedoes
Sayolitz (Battle Cruiser) 11" Guns
Lutzoli (Battle Cruiser) 12" Guns
Leipzig (Light Cruiser) 4" Guns + 2 Torpedoes
Nurnberg (Light Cruiser) 4" Guns + 2 Torpedoes
British Grand Fleet (BigLee and Postie)
Ajax (Battleship) 13.5" Guns
Benbow (Battleship) 13.5" Guns
Ramillies (Battleship) 15" Guns
Thunderer (Battleship) 13.5" Guns
Britania (Pre Dreadnought) 12" Guns
Inflexible (Battle Cruiser) 12" Guns
Indomitable (Battle Cruiser) 12" Guns
Tiger (Battle Cruiser) 12" Guns
Monmouth (Armoured Cruiser) 6" Guns + 2 Torpedoes
Glouchester (Light Cruiser) 6" Guns + 2 Torpedoes
Rifleman (Destroyer) 4" Guns + 2 Torpedoes
Fury (Destroyer) 4" Guns + 2 Torpedoes
Africa (Pre Dreadnought) 12"
Liverpool (Light Cruiser) 6" Guns + 2 Torpedoes
Mameluke (Destroyer) 4" Guns + 2 Torpedoes
Oberon (Destroyer) 4" Guns + 2 Torpedoes
The Action
 |
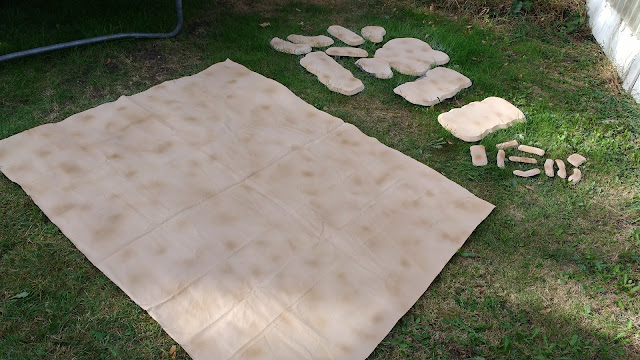
| The vast open ocean (well North Sea) courtesy of Tinywargames. John got a deal on three mats and they looked excellent. The hexes are very subtle but clear enough to make movement and targeting easy. The German High Seas Fleets Destroyer group hopes to draw the British towards the big guns of the Battleships. |
 |
| Two groups of British Destroyers are heading towards the Germans...but at this point haven't spotted them. |
 |
| The German big ships must spend the first few turns unable to move until the tide rises. |
 |
| The British Destroyers and Light Cruisers spot the Germans and train their guns on the enemy. |
 |
| The first target, the German Torpedo Boat B110. The waterspouts represent targeting by British ships. The British hit on a roll of 8 on 2 six sided dice. The Germans only need to roll 7. However once an enemy vessel has been targeted and hit, providing the shooting vessel doesn't change its target next turn, the to-hit roll drops to 4. |
 |
| The two destroyer groups edge closer to each other and the British start to open fire. |
 |
| The basic rules are very easy to master. Movement, targeting, resolving fire and then start again. Simples! |
 |
| The British make a mistake...they get within torpedo range of the Germans and several Torpedoes head towards the Brits. John was going to use string to show the Torpedo tracks but these refused to lay in a straight line! Pencils were used instead but in the end lengths of Pipe Cleaner were used (look at later pictures). |
 |
| The fight ins't one sided though and the German Torpedo Boat S56 is hit by gunfire and catches fire. Fortunately the German fire control teams are very good at their job and the fire is put out the same turn. |
 |
| More Torpedoes speed towards the British ships. However the HMS Fury destroys the S53 with one Broadside and the S56 succumbs to the gunfire of the HMS Rifleman. However the Glouchester has taken serious damage and is reduced to slow speed. The Mamaluke also suffers serious damage from Torpedoes and is also reduced to minimal movement. |
 |
| The German Destroyer and Torpedo Boats decide to start pulling away from the British ships...but one more turn of shooting first. |
 |
| Yet more Torpedoes streak through the water. |
|
|
The Liverpool and the S54 have been battling it out for a while now. The German boat launches a Torpedo and the Liverpool opens with its guns. Both ships are destroyed in a double explosion that lights up the sky.
|
 |
| The German Battle-cruiser fleet is finally starting to make its way towards the area of the battle. This group of ships are massive, sporting huge guns and lots of armour. |
 |
| At the Far end of the table two groups of German ships head towards the battle area. I couldn't figure out why the German players didn't immediately manoeuvre these two fleets to join up but we later found out that they couldn't do this. That entire end of the table (on the smaller mat seen at the far end of the table) was Mined and only two clear channels were available to the Germans. Once past the minefield they quickly regrouped, along with the remaining Torpedo Boats and Destroyers that had survived the earlier encounter with the British. |
 |
| Meanwhile the British main Battleship fleet is also steaming towards the same area of sea. |
 |
| The British and German fleets starts to circle each other slowly getting closer. The German commanders manage to get their ships in a right mess (Surjit, I'm looking at you!). The British fleet is better handled and begins getting into a battle line. |
 |
| Disaster, the first Salvo of the big guns sees the HMS Indefatigable is blown out of the water! (the black marker in the centre of the line is an oil slick). |
 |
| Return fire deals damage to many of the German ships but its not nearly enough to deal a deathly blow to the enemy. |
 |
| A lone German Torpedo boat manages to get up close for a final Torpedo run! Brazen but worth if for the Germans at this deals out yet more damage to the British fleet. |
 |
| The HMS Thunderer is taking a bashing. The dice shows that one turret has been destroyed and now the ship is on fire. The control teams fail to put out the fire so next turn the roll will be harder. But this is the point at which darkness forces both sides to break off. |
 |
| Two happy German Admirals. Their handling of the fleet could have been better but their gunnery was much better than the British. In particular they used their Torpedo boats more effectively and were able to claim a victory at the end of the game. |
Analysis
 |
| HMS Thunderer |
This was a disappointing result for the British. We failed to use our own Torpedo capability properly and I think this cost us the battle. We also had more than our fair share of bad luck and bad dice...although to be fair it seemed to be Postie that was cursed this game rather than me for a change. All in all a fun game and a simple but very effective set of rules. We were able to play out 17 turns of action over about six hours.
On a personal note, I enjoyed playing the British an in particular handling the HMS Thunderer. This was the last big warship to be built at the Thames Ironworks in Canning Town and my Great Great Great Great Grandfather was part of the workforce that built her. After construction the vessel was moved down river to Dagenham (where I now live) to be fitted out and armed.
 |
| Thunderer's launch from the Thames Ironworks at Bow Creek, Canning Town in 1911 |
 |
| Being fitted out at Dagenham. Thunderer Jetty is still in use today, albeit for a smaller class of vessel! |


