Wednesday 27 January 2016

6mm Roman Triarii

Progress with my Painting Challenge projects has been relatively swift by my standards since I was let in on a sympathy vote. I'm working on several things at once, partly to keep things interesting for me but also to maintain a reasonable level of productivity without cutting corners on quality. I am rather strict about varnishing for instance and like to leave at lest six hours between each of the four coats (2 Gloss & 2 Matt) that I apply. I can't sit around twiddling my thumbs in the meantime and having several projects at different stages means I always have something to do.

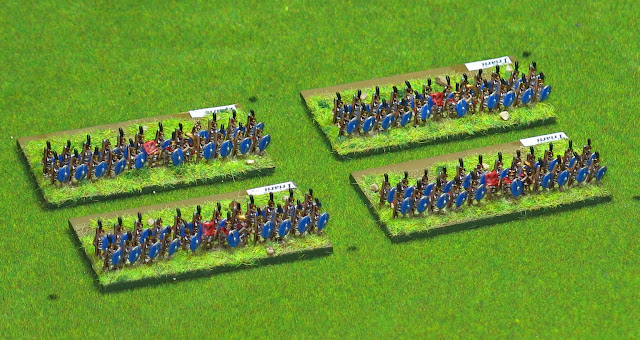
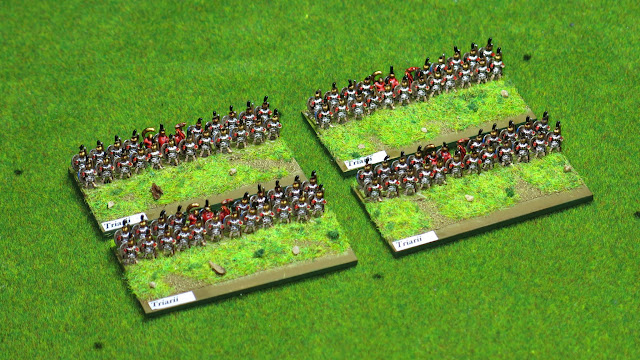
My 6mm Roman Republican army has grown again, this time with four units of Triarii. These were the oldest and wealthiest legionaries in the army and were usually positioned in the third rank behind the Hastati and Principes. They could afford the best equipment and typically wore heavy metal armour and carried large shields and long spears. By the time of the 2nd Punic War experience rather than wealth was the primary selection criteria for the Triarii. They were still the best armed troops although now they carried larger oval or rectangular shields rather than the smaller round ones of earlier periods.

Republican Triarii

As with my other Romans these minis are by Baccus and are very nicely cast with very few minor defects and virtually no flash to be removed. A handful of the helmet plumes either broke off or were miscast but these are so few as to not ruin the overall impact of the finished units. Its tempting to think that these are virtually identical to the Hastati and Principes that I have already painted but close inspection shows that these really are distinctly different figures with appropriate armour for their class. Some parts of the models were sticky to reach when painting but overall this was a simple paint job just requiring some patience rather than masses of skill to complete.

Triarii

From behind their armour vests are very visible

I rocketed through these in double quick time spending just two evenings painting the figures and a couple more for varnishing and basing. Whether I can maintain such a pace remains to be seen but if I can I could get my whole Punic War period wrapped up by the end of the challenge! Having said that I also have some WWII North Africa stuff to work on for the challenge. It all depends on how long I wait before my large order of Carthaginians arrives from Baccus. I'll let the Paint Gods (or Royal Mail) decide which direction I go in next.

Wednesday 20 January 2016

Mr First Challenge Submission - SAS Jeeps

Yesterday I submitted my first figures (see the post here) in the 6th Analogue Painting Challenge... a whopping 7 Points worth! Not only am I a late entrant to the Challenge I then went away for the weekend and lost two more days of painting before my Tuesday submission deadline. I therefore chose to get a quick and easy job finished first, just to get me off the dreaded nil-points.

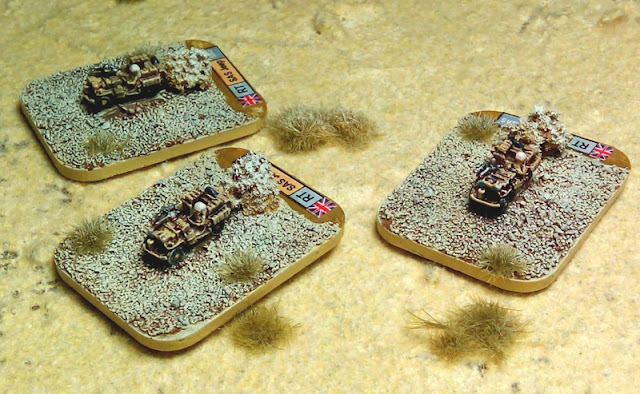
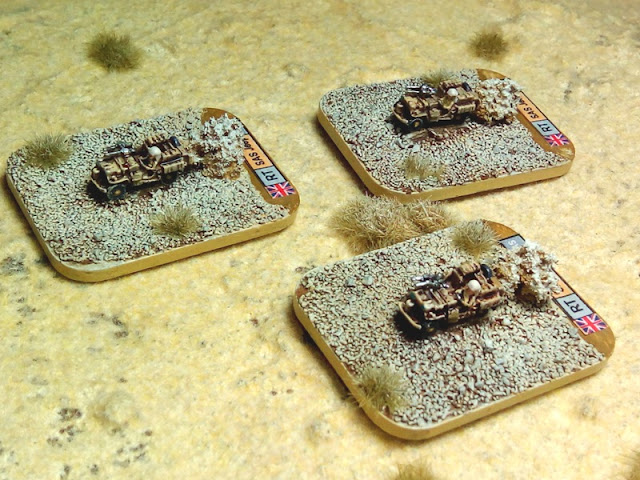
Although I have been painting 2nd Punic War figures lately I haven't given up on my WW2 North Africa stuff. The latest addition to my Desert Raiders collection are three SAS Raiding Jeeps, laden down with provisions, water, food, ammunition and some very determined and daring soldiers. 


These vehicles have been modeled with dust clouds billowing out behind them. I'm guessing they have just hit a German or Italian airfield and are now racing hell-for-leather away into the night before they can be pursued. One of the best known raids by the SAS was their attack on the Fuka Airfield in July 1942. Guided by the LRDG they arrived hundreds of miles behind enemy lines and caught the German Airfield completely by surprise, destroying 30 aircraft before escaping into the night.


I have some more desert stuff to do soon, but I also have a load more Punic War infantry to paint, plus an eclectic collection of other items. Its gonna be a busy few months!

Monday 18 January 2016

The Crazy 88

Well it seems that being a cry-baby has its advantages. Curt read my last post about not being part of the Painting Challenge and took pity on me, offering me a slot vacated by someone who had to pull out of the event. Ironically just as he announced my late entry I went away for the weekend so I only really got started on my first entries on Sunday evening. Within a few hours I was working on three scales and five periods, so expect an eclectic mix of entries from me during the remainder of the Challenge. 

I'm working hard to submit my first finished models this week so I can get on the points board, even if my entry will net me only a handful of points. I have set myself a very modest target, partly reflecting my late entry and my slow painting rate. Having said that this will still push me, especially as the bulk of these points will come from 6mm figures. 

One of the few things I did get done over the weekend was place a new order with Baccus for my next batch of models for the 2nd Punic War. Nearly a thousand Carthaginians will be winging their way to me soon I hope. The sooner the better because I have some serious catching up to do. 

Thursday 14 January 2016

The Challenge and Self Inflicted Isolation

I'm definitely feeling like an outsider in my own community... and it's entirely my own fault! To what am I referring I hear you ask? The Analogue Painting Challenge of course! I'm an utter fool for not having entered this years challenge and now I'm kicking myself on an almost daily basis for chickening out for the second year in a row. The irony is my painting output has been quite respectable recently (at least by my slovenly standards) and if I had entered I would easily have racked up my first 100 points by now. I'd never be in the top ten, but then, for most entrants, that isn't the real goal of the Challenge. 

I have followed every twist and turn of the challenge so far with great enthusiasm. I use the Feedly App to help me follow all the blogs I read and the Analogue Challenge has a folder set aside all to itself - it has to, with dozens of posts on a daily basis! I usually log-in over my morning coffee and again at lunchtime, with an hour set aside for a longer peruse and read of the days postings in the evening. I use the G+ button a lot to highlight the stuff I like (which is most of it) but if I'm honest I probably ought to leave more comments as well.

As well as using Feedly on my Tablet I also have it on my phone so I'm often scan the latest posts on that too. In fact my wife commented the other day "your always playing with your phone", occasionally smiling to myself, chuckling over some witty remark or exclaiming "Oooo" when I see something that is particularly inspiring. When my she asks me what I'm doing I just say "nothing dear" and put the phone away before I get in any more trouble. My poor wife probably thinks I'm having an affair!!

The quality of the entries this year has been excellent and I'm loving the side duels and the bonus rounds. I think everyone taking part should be giving themselves a big pat on the back for making this years event such a huge success...its just a pity I'm not among you this time. Given that some participants have not yet racked up any points, and that the point of the challenge isn't the points (if you get my point), I really ought to have taken part this year, even though I knew I would end up in bottom half of the table.

So let me be the first to sign-up for next years Challenge (assuming Curt has the energy for a 7th event!). No matter what my situation next year in terms of time commitments, I simply can't miss out on being part of that growing federation of participants old and new. 

Monday 11 January 2016

The Battle of Framerville 1918

On Sunday several members of Posties Rejects gathered for our first game of the new year. We played a WWI game set in August 1918 with the Germans defending desperately against an Allied offensive that never seems to run out of steam. A mass of British Mk V and Whippet tanks, backed up by infantry, advance towards an apparently weak and demoralised German line. It should be a simple matter to sweep aside the defenders and continue the advance...shouldn't it?

The British objective is to get one of their tanks to the German base line. This would result in the weary German troops breaking and pulling back. The German objective is simple, stop the Allied advance at all costs. 

Order of Battle
British 3rd Corps
 18th Division - Maj General R P Lee
   53rd Brigade
     10th Essex (12 Bases + 1 LMG)
     8th Royal West Kent (12 Bases + 1 LMG)
     7th Royal Bershire (12 Bases + 1 LMG + 1 HMG)
     10th Tank Battalion - 13 Mk V Tanks (7 Male & 6 Female)
     3rd Tank Battalion - 5 Whippet Tanks
       1 Lorry with Mortar
       1 Lorry
     1 Sopwith Camel (British)
     1 Sopwith Camel (Belgian)
     Heavy Artillery Batteries (off table) 

German 2nd Army
 51st Corps - Gen Lt Von Hofacker
   14th Bavarian Division
      25th Bavarian Infantry Regiment (36 Bases + 3 LMG)
      2 HMG (K Rounds Available)
      1 Fokker Triplane
      1 A7V Tank
      2 Captured Mk V Tanks (one Male one Female)
      1 Motor Car
      2 Batteries of Artillery
      1 AA Lorry
      1 Trench Mortar
      2 Flamethrowers
      1 Sniper
      1 Lorry
      4 Redoubts
      Heavy Artillery Batteries (off Table)

The Action
Framerville sits astride the German trenches. The Commander has evacuated/evicted the civilian population and sent them out towards the Allies but knows that the main road through the town is an open invitation to the allied tanks.

Two captured Mk V's have been pressed into German service. The Male tank more than proves its worth against its former owners.

Meanwhile a German A7V guards the main road into the town.

This view shows the initial deployment before the British rolled for their starting positions. Some would start a full 24" onto the table but most wouldn't. 

Frammerville is a rabbit warren of destruction and an ideal location for a sniper. Ours was in a hidden bunker by the road but the Allied players were convinced he was in the church tower.

The Allied players with their tanks in their start positions. Dave's tanks in the centre (opposite me) are in the most advanced position and look very threatening. 

The captured Mk V gets first blood. It knocks out one of Dave's tanks with one sponson mounted gun and one of Surjits tanks on the left flank with it's other gun. 

Boom! Unfortunately for the Allies this wasn't the only tank to meet a fiery end.

With the civilians moving away the road through Framerville suddenly looks very vulnerable. Meanwhile Ian positions his infantry in various buildings ready for the expected advance of the British.

Looking out across Framerville towards the Allied lines. The column of civilian refugees can be seen heading away down the road and for a while the town falls eerily silent. 

Then the buzz of an aircraft engine can be heard and a British Sopwith Camel comes into view. 

Thankfully the Germans have an Anti-Aircraft HMG truck....although it eventually proved to be useless as a weapon and better as a roadblock.

The Sopwith drops two sticks of 25lb bombs on the German lines - aiming for the tanks - but fails to hit any of its targets. 

Then the 'Brown Baron' appears, and so begins an aerial battle to rival the conflict down below.  

Meanwhile the captured Mk V continues to deal out lethal damage. By the end of the game it had destroyed five British tanks.

Dave's tank command in the center is in poor shape. Two vehicles are burning and a third has broken down. 

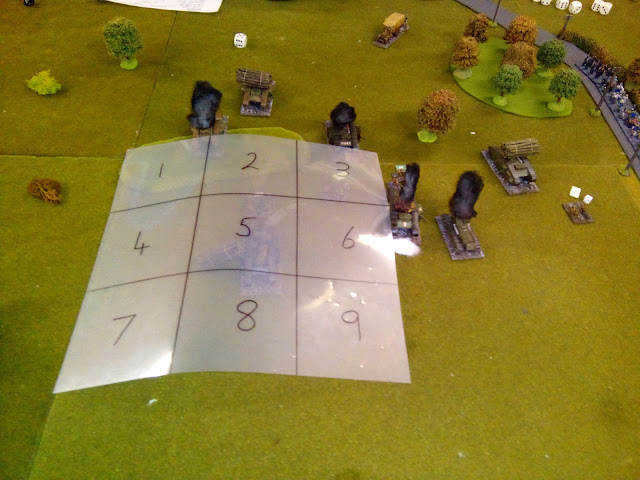
The Artillery template was used for Off-Table artillery fire, mortars and the bombs dropped by aircraft. In this instance all the bombs landed in empty sectors of the grid. 

The Sopwith is now out of bombs, but it still has teeth. From now on it will strafe ground troops with its HMG's.

Richards advance towards Frammerville is starting to stall. His fast moving Whippet tanks are being targeted but one vehicle still trundles forwards. If can get past the fire arc of the German guns it will have a straight run to the road through the town. 

The British Sopwith adds a little support, although its strafing runs are not proving very effective.  

Disaster for the Germans as their prized A7V goes up in flames. There is now almost nothing to stop the British Whippet from racing through the town. 

 Birds eye view of Framerville. The British tanks in the center have been decimated and most of the vehicles on the right have also been destroyed. But other than a few infantry and an LMG there is very little to stop the remaining Whippet tank from driving through the town and reaching the objective. The German players have one last chance in the form of a Flamethrower team which can be seen in the trench in the bottom of this picture. If I can get this unit into the buildings alongside the road I may be able to ambush the Whippet as it passes. 

The German Triplane circles overhead as the British continue to advance. Most of the German infantry in the trenches are wisely keeping their heads down and cannot be targeted by the British  whose tanks bristle with HMG's. The British infantry have consequently made it through most of the battle unscathed up to this point.  

With the refugees safely evacuated both sides find their arcs of fire are now clearer. The German bunkers begin to take damage from several sides and some gun crew are killed. The Sopwith's strafing runs have also taken a toll. 

The Triplane gets the Sopwith in its sights and rakes its side with bullets. Thankfully for the British pilot nothing serious is damaged and he lives to fly another day. 

In the center the British tanks burn (and in one case, broken down). Now only two tanks remain along with all the infantry doing their best to stay behind the armored behemoths. 

A very well placed barrage by the German off-table artillery lands right over the advancing tank and infantry. As this was in my sector it fell to me to roll the dice for casualties...and for once the dice gods did not desert me. The Mk V and several bases of infantry are killed. 

Meanwhile the British Whippet continues its advance unimpeded into the town. Two more turns of movement could end this game with a British win.  

The Triplane pulls a tight 180° turn and strafes the whippet but despite killing a crewman the tank rumbles onward. 

In a desperate act the Germans drive their AA truck into the path of the tank. The Whippet crew open up with all their HMG's and soon the truck is a burning wreak. Literally nothing stands between the British and victory other than one last desperate move by the Germans.

The Flamethrower team that moved into the buildings earlier judges itself to be in range of the tank and unleashes a burning spout of flame towards the tank. In seconds the Whippet is alight and destroyed... and the last hope of the British offensive is snuffed out. 

Despite the heavy casualty rate of the British, and the loss of most of their tanks, they came very close to wining this game. 

Analysis
This was a tough fight for the British and I did feel rather sorry for them by the end of the game. They had taken a lot of casualties and most of their forces hadn't even crossed the center line of the table. But they were very unlucky with their dice rolls (fists full of hit dice rolled without a single kill) while for the German players sometimes it felt like they were hitting with every shot. Of course this wasn't the case, but the dice gods definitely favored the Germans in this game.

I had a particularly good game with seven tanks kills to my name by the end of the battle, most caused by the captured MkV in the center of our line. If the dice had favored the British a little more this would have been a much closer affair. As it was they still came to within an ace of snatching victory with their Whippet tank in the town. It took an impromptu roadblock, a quickly re-positioned flamethrower team and a lot of luck to deny the Brits victory. 

Thursday 7 January 2016

How to Paint 6mm Romans

Its a common misconception that painting 6mm wargaming figures must be incredibly difficult and consequently is only for the eagle eyed 'expert' (or the masochist). This couldn't be further from the truth and if a ham-fisted clod like me can produce acceptable quality figures then anyone can. I'm not an expert but this is my method, it works for me and it may work for you. Hopefully by the end of this guide you will see that painting 6mm is more about having a methodical approach than achieving impossible levels of detail. 

1 - Check and Clean the Models 
Every project starts the same way regardless of how large or small the miniatures. I take my time to examine the figures before I go anywhere near a brush. Then I methodically cleaning flash, mold lines and vents from the figures, After all this handling I wash my models in soapy water to remove any grease from the surface.

2 - Mount Models for Painting
I use a cheap superglue to mount my figures on wooden coffee stirrers or lolly sticks because the models break easily off the wooden sticks when I have finished painting them

3 - Undercoating
I base coat my figures with English Uniform (brown) rather than black paint. Thanks to Tamsin (Wargaming Girl)  for this gem of advice early in my 6mm ancients venture, it really does work well.


4 - Block paint each area 
I usually start with the hardest to reach areas which usually means the hands legs and face. Don't worry about accuracy too much as all sloppiness can be corrected when painting adjacent areas with other colours. I usually apply metallic colours last but that is just a personal preference.


Flesh - Make sure you get those tricky bits like elbows poking out from behind shields. 

Tunics and Armour - These areas are 'deep' and surrounded by raised areas like shields and weapons. I paint these areas now and tidy up mistakes when I work on those outer areas. 


Shields - I paint the front of the shields at this point.  I give these two coats of paint to completely cover the primer.


Cloaks and Scabbards - These are the same color of Blood Red so I do these together. Care is needed not to get paint on surrounding areas with such bold colours. 


Wood - Staffs, spears, the back of shields are painted with Beige brown which is clearly lighter than the darker base-coat. This stage cleans up a lot of the minor mistakes from earlier stages so a steady hand is needed. 
Metal Speartips and Weapons - I use silver rather than Gunmetal...I like my weapons to glint in the sun!


Bronze Armour - Helmets and some shields are bronze. Some helmets also have plumes on them so I do these at this stage as well. 


Shield Bosses - The Roman shield or Scutum had a large round boss in the middle and metal reinforcement along the front spine and the top edge. Great care is needed on this stage as this is the focus of the figures and errors are very visible. 


Leather Straps and Belts - This is an optional stage, mostly because this is very fine work and therefore quite time consuming and tricky. 


Grass - I finish each model by painting the metal base a suitable color of green to match the flock/static grass I'll use later. 

Add shield designs - I use a combination of waterproof ink pens and paint to add fine detailed designs on shields. I do these last to ensure designs don't get smudged or chipped before varnishing. These shields do not have artwork on them so I can skip this stage with these figures. 

At this point I usually leave my models for 24hrs to allow everything to thoroughly dry before moving onto the 'wet' stages of the process. 


5 - Ink Wash 
I use Winsor and Newton calligraphy ink on my figures. It sinks into the creases and crevices of the models without making the raised areas too dirty and dull. My preference is Peat Brown ink rather than black because I find it gives deep dark shading without too much contrast. Sometimes the ink pools too much and needs to be wicked off with a dry brush or the corner of a tissue. Its important to try and do this while the ink is still wet and can be drawn off easily. However after drying sometimes it may be desirable to clean some areas that are dulled by the ink. Shields in particular can look too dirty with a coat of ink on them so I use a clean wet brush to gently rub the ink off these areas. Use gentle brush strokes and clean the brush regularly for best effect. 


6 - Varnishing
I always apply two Coats of Gloss Varnish  and then two coats of Matt Varnish to my models. I use spray varnish rather than brush on varnish mainly because its quicker and gives a consistent finish. I used Winsor and Newton Gloss to give a good hard protective covering to the models and then use Testors Dullcoat to give the figures a completely flat finish. I also use the brush on version of Dullcoat for touching up any gloss areas that get missed by the spray. I usually allow at least four to six hours between varnish coats so this process can take a whole day to complete before moving on to basing the figures but its time well spent.


7 - Break off of mounting stick and superglue to Base 
Slightly flexing the mounting stick breaks most of the superglue bond between the metal and the sticks. Gentle pressure does the rest and I have yet to have a single damaged model when removing them from their mounts. I then arrange the figures as needed on mdf bases using regular superglue to do this. A bit of PVA can also be used to fill small gaps. 


8 - Add basing sand around models - Use PVA glue on the wooden base, carefully avoiding the raised metal base of the figures. The sand brings the surrounding level up roughly to the same height as the figure base and means your little men don't look like they are standing on a blocks when finished.


9- Paint the sand & Base Edges
Carefully paint the sand around your figures and when dry add a little drybrush to highlight the rough 'dirt'. I like my MDF bases to have painted edges. My preference is for a rather dark green. You may need to do this twice as I find the MDF edges soaks up acrylic paint like a sponge and usually need a couple of coats. 


10 - Dress the Base (Static Grass and Rocks) 
Paint PVA glue to 80-90% of the base leaving some areas showing the dirt below. Then add the flock/static grass you desire. I press this down flat because I think it looks better on such small figures. I also add one or two small stones to each base just to make it more interesting. Lastly I add a unit label to the back edge of the base, although this is very much my personal preference. 


The Finished and ready for action


So that is my 'method', such as it is. I hope you have found this guide useful and interesting but more importantly realised that there are no dark arks (or electron microscopes) needed for painting at this scale. For me its all about method rather than skill and painting at 6mm is much much easier than most people realise. Pretty much everything here can be found elsewhere in the inter-web and there are some great YouTube video tutorials available to help newbies get started with 6mm.