Thursday 27 June 2019

Solo Wargaming - To the Strongest!

Regular readers will be aware that I have been playing more solo games recently and its a trend that will likely continue. I'm still attending games at Posties Shed-o-War but I only average about one game a month, especially during the summer when other events and holidays reduce availability to join the lads for a battle. The young Padawan can occasionally be arm-twisted into joining me for a game of To the Strongest! at home, but if I want to play with my 'little men' more often, solo play is the best way forward. This long overdue article discusses how I achieve realistic games using these wonderful rules. You may have a different approach and as always comments and suggestions are very welcome.


I have played quite a few games solo now and have slowly been developing a method for 'automating' one side so I can play against an opponent that still has the ability to surprise me, or at the very least put up a stiff fight. The rules for TtS! already introduce a certain amount of friction and no commander can say with certainty what he will be able to achieve in any given turn. Careful management of activations and positioning of generals can help, but the dreaded Ace (or 1 if, like me, you use dice), can't be argued with! But this still leaves a lot of room for additional mechanisms to make playing an opposing army unpredictable.

I have used the following ideas in most of the solo games I have played so far, and there is always room for new ideas, although I have no desire to make them too complicated or too random...I want to play a challenging opponent, not a schizophrenic machine that makes completely random, unfathomable or stupid moves.

Make life hard for yourself
All my games start by writing up an Order of Battle for both sides. I try to do this in a fair way, without giving any side a significant weakness or advantage. However, I have slowly come around to the idea that the 'enemy' needs to have a points advantage to counteract any unconscious bias I may have during the game. It also means that whatever army I play I have to play well to win. Victory is more likely to be genuine and not the result of bias in decision making. How much of an advantage is a matter of debate but through a bit of trial and error, I have settled on between 5-10% extra points for the enemy army. This equates to one or maybe two more units in the field than they would normally have in a straight fight, so a reasonably significant advantage.

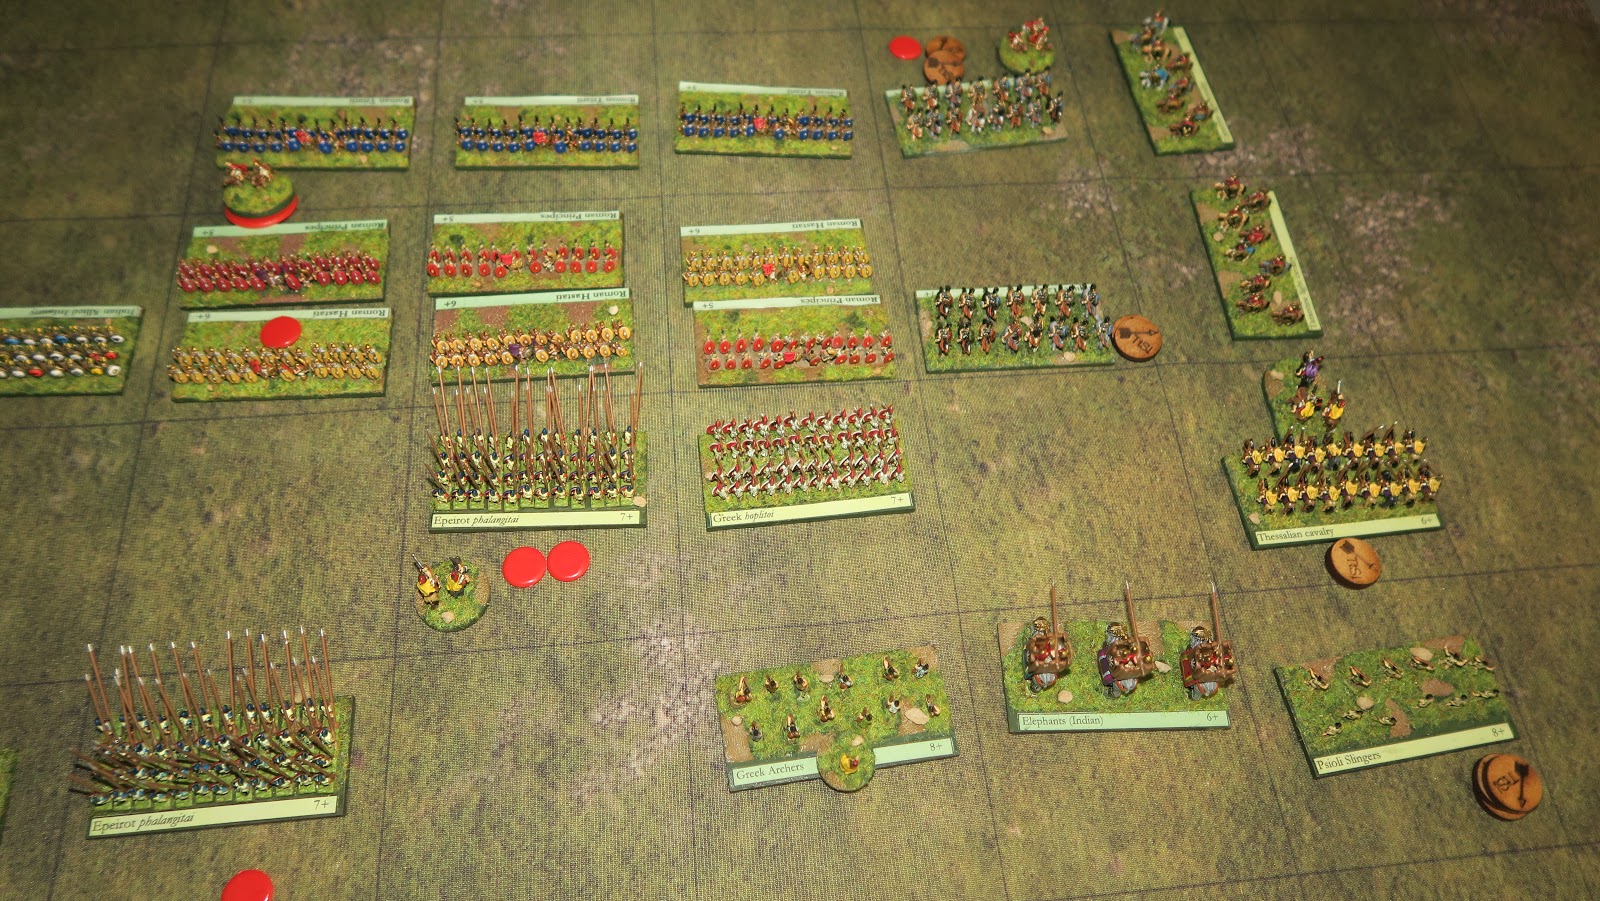
Randomly select and place terrain.
To the Strongest! does include rules for removal and movement of terrain after it has been placed. This effectively randomises the position of terrain making its final configuration random-ish. However, I also like to replay actual battles so sometimes the terrain and deployment are determined by the scenario. 

Dice for sides to deploy
If the game is a fictional rather than a historical scenario, then it is possible to ensure any unconscious bias in the setup of terrain can be eliminated by randomising which side each army sets up on. Pick a side of the table and roll to see which Army will be deployed there. Alternatively, flip a coin to decide. 

Deployment of Commands. 
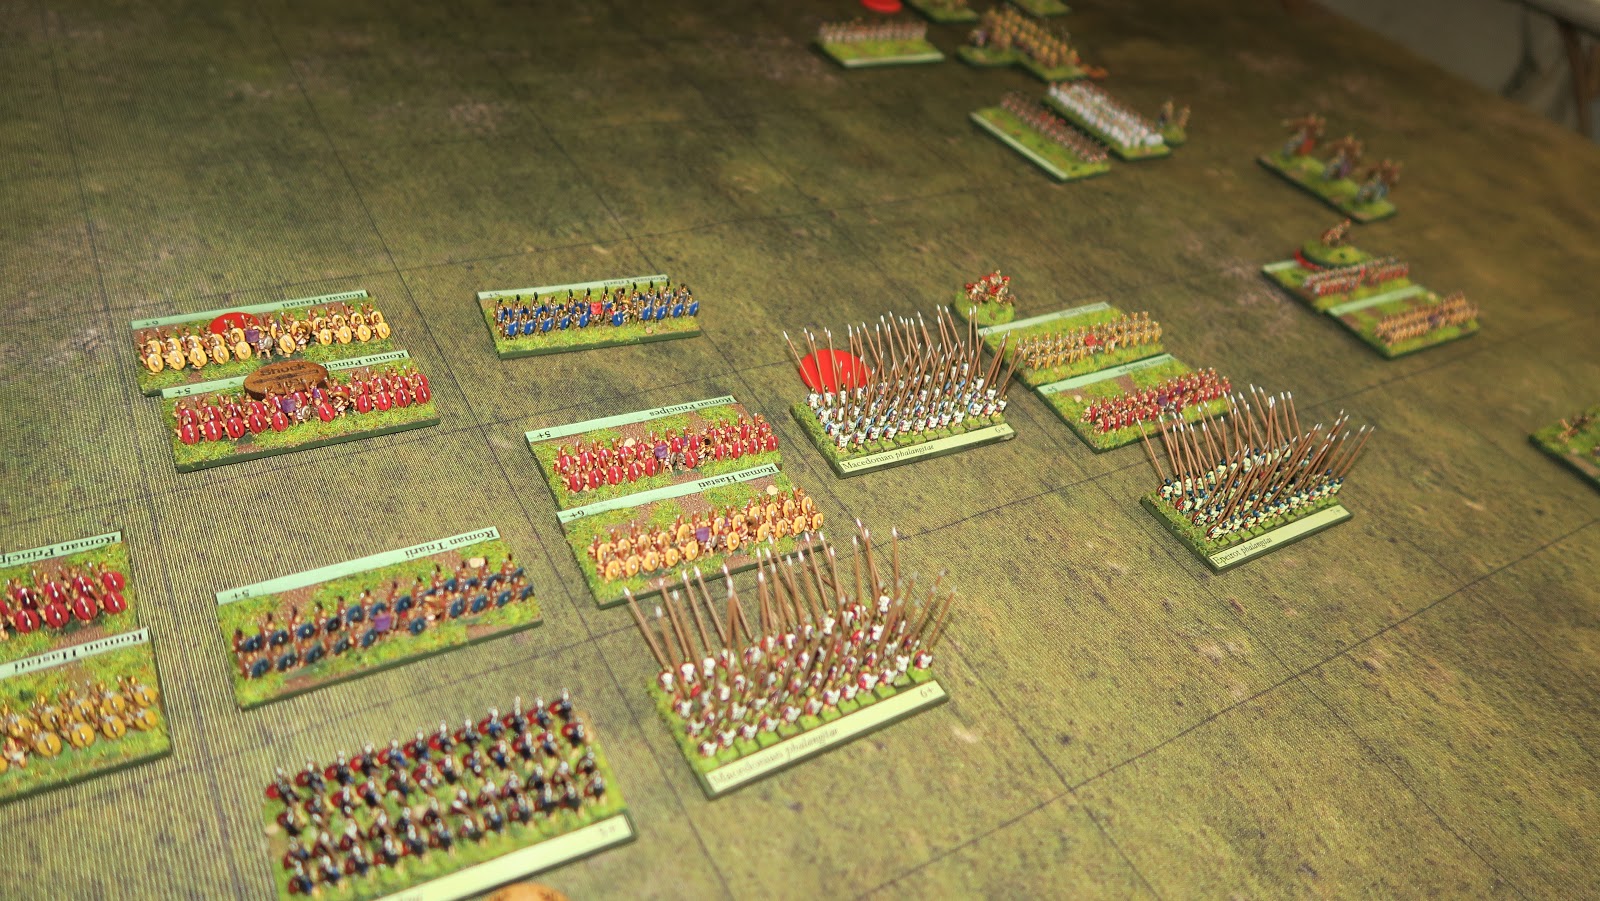
To the Strongest divides armies into multiple commands, usually three but more could be used for really big armies. Where these are positioned relative to each other (and the army opposite them) is an important decision for the player. Deployment can also dictate strategy, so a strong cavalry command opposite a weak one could prompt an attack. I usually set up my army then deploy the enemy 

Dice for the location of the senior general.
The Senior commander's location can have a significant impact on the behaviour of a command, especially if he is a Brilliant General or Great Leader.
  • 1-3 Right Flank
  • 4-7 Centre
  • 8-10 Left Flank

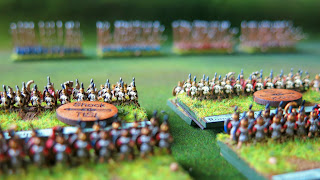
One VERY aggressive Roman! 
The aggression of each command
This something I have tried to do with all my Solo games. Each command may act differently, with one being aggressive and charging, while the others are more defensive. This makes playing the enemy army quite challenging, trying where possible to follow this instruction and turn it into a strategy with a chance to win.

For each command, roll a D10 (or pick a card) and consult the list below:

  • 1-2 Defensive - Units within the command are not free to move until the enemy is within charge distance. 
  • 3-5 Timid - Units within the command are free to move but will not initiate any melee until at least one unit of the command is engaged by the enemy. 
  • 6-8 Cautious - Units within the command must advance towards the enemy but are free to decide whether to engage in melee.  
  • 9-10 Aggressive - All units must advance and engage the enemy where possible, with ranged weapons or in melee.

Strategum Cards
The use of Strategum cards can also add an element of surprise to a game. Of the twelve Strategumss, two are used immediately after deployment but before the game commences. Four others delay the arrival or movement of units, again introducing a random element into the game that the Living player can't predict either in his own forces or the enemies. 

Chance Cards
A new idea that I am working on (still being developed) is the use of chance cards to inject subtle effects on the behaviour of enemy units. These tend to be little effects that may provide a local advantage or disadvantage to a single unit. 
  • Each turn I roll to see if a chance card comes into play (1-5 = Yes, 6-10 = No).
  • I then roll to decide which command will be affected (1-3 Right Flank,  4-7 Centre, 8-10 Left Flank)
  • Then I decide which unit gets the Chance Card by rolling a 1d10 counting from left to right until I reach the number rolled. If the number rolled is higher than the number of units then I re-roll. I only count (and by extension apply the card to) the front unit if there are shared boxes or multiple rows of friendly units. 
The nominated unit then pulls a chance card or in my case, I re-use the Startegum chits. The result can be a bit unpredictable and may be an advantage or disadvantage depending on timing. Any chance cards that are not used (by choice, or lack of opportunity) are lost at the end of the turn.
  • Hearts: Blood Red Fury - The nominated unit is inspired by its commander to fight harder. If the unit chooses to charge an enemy (this turn only) it will get a one-off bonus attack dice. 
  • Clubs: Shaken but unbowed - The unit must fall back at least one box with its next activation. It may reactivate in the same turn (cards/dice permitting) to move forward again if it wishes. 
  • Diamonds: Tough as Nails - If the nominated unit has to make a save roll, it gets a one-time bonus of +1 to its saving roll
  • Spades: Going nowhere - This unit is stubbornly holding its ground. The unit is allowed to make a Rally activation even if it is in the ZOC of an enemy unit. 


    No doubt more ideas could be developed even further, but what I don't want is to make these additional 'rules' a distraction from the excellent ruleset Simon has produced. The solo games I have played so far using these techniques have produced challenging experiences and sometimes unexpected outcomes. For me playing Solo will never be as much fun as playing against a living opponent, but at least this way I can get a game in, learn the rules and justify the hundreds of hours I spent painting my miniatures! 

    Wednesday 19 June 2019

    Battle of Asculum 279BC

    On Tuesday I had another go at a solo game of To the Strongest. This time I've switched from the Punic war to the earlier Pyrrhic war and the Battle of Asculum. After invading Italy and defeating the Romans at Heraclea, Pyrrhus overwintered his army in the south. In the spring of 279 BC Pyrrhus was finally ready to restart his campaign and invaded the province of Apulia. Eventually, he met the Romans, and an appointment with history, at Asculum. The scene was therefore set for a clash that would go down as a victory so costly that it was a victory in name only.

    According to ancient sources, the battle of Asculum began when both sides found themselves facing each other across a fast flowing river. The Roman commander offered Pyrrhus an opportunity to cross the river unmolested or vice versa so they could have a true match of strength and honour. Estimates of the number of troops involved vary but the best figures are probably about 40,000 infantry each. Pyrrhus has superiority in cavalry and also had 19 elephants. Confident of victory against the Romans Pyrrhus allowed the Romans to cross the river. However, this first day of battle found fighting across the bad ground on his flanks restricting his ability to use his cavalry and elephants to full effect.

    On the second day of the battle, Pyrrhus was quick to capture the rough ground using light troops and therefore ensure that the battle would take place with clear flanks and flat ground. Now he would be able to use his elephants to full effect. However, the Romans, shocked by their defeat the previous year, had prepared a defence against elephants in the form of special anti-elephant ox wagons. These four-wheeled wagons were pulled by 4 or 6 oxen and each cart had screens to protect the crew. They were armed with long poles wielding grapples, blades and burning brands sticking out from the sides. The idea was simple enough as these would be used to slash at the legs and trunks of the elephants. The effectiveness, however, was unclear and some contemporary sources suggest that although initially successful in halting the charging elephants, they were themselves neutralised when attacked by greek light troops. The crews were either killed or fled and then the elephants continued on their destructive path. In later years the Romans learnt that special equipment wasn't needed, just new tactics, culminating in the disciplined infantry manoeuvres employed at Zama against the Carthaginians.

    Estimates of casualties vary but most sources seem to agree that the Romans lost approximately six thousand men and the Greeks three and a half thousand, however, Pyrrhus was unable to seek new reinforcements whereas the Romans seem to have a limitless supply of manpower and no sooner had one army been destroyed they could raise another. This is exactly the same sort of lesson that Hannibal would learn in the later Punic wars where he would destroy one Roman army after another only to find a new one raised to face him. Pyrrhus would famously say of Asculum, "if we are victorious in one more battle with the Romans, we shall be utterly ruined." (or words to that effect, the quote varies from source to source!).


    The Game Setup
    My game is set on Day 2 of the battle after Pyrrhus had captured the unfavourable rough ground. The two army lists I have prepared give the Romans a slight advantage in points, however, the open ground does play to the Greek strengths in cavalry and elephants. Contemporary sources suggest that the Romans adopted a static line whereas the Greeks strove to break the flanks.

    For this solo game, I once again used dice to determine how aggressive the opposing side (in this case the Romans) would be and their deployment. I also used the Strategum cards from the rules but picked for the Romans as some of these require secrecy and that's a little hard to achieve when playing solo! I picked "Cry havoc and lose the Pigs of War!" for the Romans as it replicates the use of novel weapons - like the anti-elephant wagons. For the Greeks, I picked randomly and got "Tonight we dine in hell" which effectively gives one pre-designated unit a free rally from disorder. I gave this to a unit I knew would be in the thick of the battle. 


    Order of Battle

    Roman Army 
    1st Command - Publios Decius Mus - General (Mounted, Detached, Senior, Brilliant) 
        Allied Light Cavalry (Light Cavalry, Javelin)
        2x Equites Latini (Cavalry, Javelin)
        Equites Extraordinarii (Cavalry, Javelin, Veteran)
    2nd Command - Publius Generalus Madeupus - General (Mounted, Detached)
        6x Hastati/Principes (Legionaries, Special)
        6x Triarii (Hoplites, Veteran, Small)
        2x Italian Allied Infantry (Javelinmen)
    3rd Command - Publius Sulpicius Saverrio - General (Mounted, Detached)
        Allied Light Cavalry (Light Cavalry, Javelin)
        2x Equites Romani (Cavalry, Javelin)

    Greek/Epirot Army
    1st Command - Pyrrhus of Epirus - General (Mounted, Detached, Senior, Heroic, Great Leader)
        Thessalian Cavalry (Cavalry, Veteran)
        2xTarantine Light Cavalry (Light Cavalry, Javelin, Veteran)
        Elephants (Indian Elephants, Deep, Escorted)
        Psioli Slingers (Light Infantry, Sling)
        Greek Archers (Light Infantry, Bow)
    2nd Command - General (Mounted, Detached)
        2x Epeirot Phalangitae (Pikemen, Deep)
        2x Macedonian Phalangitae (Pikemen, Deep, Veteran)
        Greek Hoplitoi (Hoplites, Deep, Raw)
        Agrakas Hoplitoi (Hoplites, Deep, Veteran)
    3rd Command - 2i/c General (Mounted, Detached)
        2x Greek Allied Cavalry (Cavalry, Javelin)
        Greek Light Cavalry (Light Cavalry, Javelin)
        Elephants (Indian Elephants, Deep, Escorted)
        Greek Archers (Light Infantry, Bow)
        Psioli Slingers (Light Infantry, Sling)


    The Action
    Initial deployment with the Greeks closest and the Romans across the open ground. 


    The Phalangitae look prickly and dangerous but the improved rules for the handling of Roman maniples mean this battle won't be a cakewalk for the Greeks

    Turn 1 - The Greeks advance quickly. This is the first time I have used the Group Move rules to move multiple units and their general. You can also combine this with the March Move rule to go faster, so long as the units don't start, pass through or end in charge or missile range of the enemy (the rules are more detailed than this, but that's it in a nutshell)

    The Romans also think group movement is a good idea and promptly roll a one! The Generals ability to re-roll activation dice doesn't apply to Group moves to this command can't move at all.

    Turn 2 - Meanwhile, on the other flank, Pyrrhus leads the Thessalian Cavalry and smashes into the Romans Elite cavalry unit. The Romans are disordered, attempt to rally but fail. They are now very vulnerable if the Greeks can attack again next turn. 

    Meanwhile, the Phalangitae are bearing down on the Romans and they have lots of sharp pointy reasons why they feel confident of victory. 

    Turn 3 - Crunch! The infantry meets across the whole of the front line. A lot of javelins are thrown (to little effect) but now its a battle of Phalangitae verses Maniple. The line exchange system of the Romans makes then a surprisingly tough nut to crack.

    Pyrrhus and his cavalry start to work their way around the flank of the Roman Cavalry. The Elephants are kept in reserve for later. 

    One of the Italian Allied Infantry units is destroyed by the Macedonian Pikes and worse still the general for the command is injured! The Greeks curse their luck, one more pip on the dice and they would have bagged themselves a Consul. 

    The Hastati/Principes are tough and their Pilums as shock weapons are very effective. The Greeks are starting to take casualties and become disordered while the Romans maintain a disciplined formation despite the weakening of their centre. The Greeks decide to fall back next turn to try an rally their line. This will also draw the Romans forward making Pyrrhus' flank attack easier...its hoped.  

    Turn 4 - Disaster for the Greeks as the 3rd command's two Allied Cavalry are destroyed. Aside from two light units of infantry, the only thing stopping the Romans here are the Elephants that had been kept in reserve. Meanwhile in the centre an activation roll of a 1. The commands general rushes to the scene allowing a re-roll and promptly rolls another one!! This leaves the Greek centre very vulnerable. 

    Back on the other flank Pyrrhus' command is faring better, now slowly enveloping the Roman flank. The elephants here move into position. 

    Turn 5 - The Roman position on the right flank really looks precarious as no matter which way the remaining Italian cavalry turn they can be flanked and outnumbered. Meanwhile though the Manipular Legions in the centre are starting to push back the Greek Phalangitae. 

    The Greek left flank reorders itself and prepares to meet the Roman cavalry. They must hold this flank to give their infantry in the centre time to hold the Roman maniples which in turn will give Pyrrhus time to flank their entire line. Everything still hangs in the balance for both sides. 

    Turn 6 - Pyrrhus and his cavalry are now surrounding the Roman flank. The remnants of the Roman cavalry command here have been wiped out and the General only survives because he is Senior meaning he isn't lost when his command is destroyed. Things have become so desperate the Roman commander has had to call some of his Triarri from the centre to try and hold the Greeks back. 

    Turn 7 - At last, the Phalangitae have broken through the Maniples and the Romans look very close to breaking. They are down to just one victory medal remaining so any loss will end the battle in Greek victory. Pyrrhus' army is similarly mauled but with seven medals remaining their position is more secure. 

    Meanwhile, on the other flank, a charge by the Elephants was initially held back by the use of the Anti-Elephant wagons (the "lose the pigs of war" startegum) but one Italian Cavalry unit has been destroyed and the chance to outflank the Greeks looks like it has passed. 

    Turn 8 - More casualties and the complete loss of their flank mean the Romans are at breaking point... then the Phalangitae defeat another Italian Allied infantry unit and a shudder ripples through the Roman lines which begin to crumble. Trumpets sound the retreat and the Romans fall back....Pyrrhus and his Greeks have won the battle. 

    Analysis
    Wow, that was a tough and gruelling fight for the Greeks. The end result gave the Romans 9 victory medals but the Greeks won a resounding victory with 16 medals. That being said Pyrrhus' army has been severely mauled by the encounter. A Pyrrhic victory as it should be.

    With each Solo game, I'm getting better at the rules, bringing in new elements that I haven't used before. In particular, there are several new rules that will probably make there way into v2 of this rulebook (available as a downloadable supplement from the Big Red Bat shop for free) that I have used for the first time. One of the big takeaways for me from this game is the need to update my homegrown quick reference sheet. The rules are deceptively simple yet quite complex and (being a bear of little brain) I can't remember half of them! My QRF helps me to at least get through a game without too many errors. 

    Sunday 16 June 2019

    North Weald Airfield Museum

    The North Weald Airfield Museum displays items that show the active service life of the airfield between 1916 and 1958 when the airbase closed. The museum is situated in what would have been the old station office for the airfield. It's been some years since I've been here so I thought it was well overdue a return visit. As usual, I went camera hand and took a load of photos, some of which are shown below.  Outside the entrance is a large memorial stone donated by Norway in recognition of the use of the airfield by the Royal Norwegian Air Force that was based here during World War II after the occupation of Norway by Germany.

    The Norwegen War Memorial outside the Museum

    Inside the museum, there are five main rooms dedicated to different periods of airfield history. The first room looks at the history of the airfield for WWI right through the interwar period. There's a heavy emphasis on the fight against the Zeppelin raids and the development of tactics to deal with this new weapon of war.

    WWI posters portrayed the Zeppelin raids as an affront to humanity.
    Rather than weakening the resolve of the British to fight, indiscriminate
    warfare such as the bombing of Civilians populations only served to
    inflame public opinion. 

    Another room is specifically dedicated to the battle of Britain and many young pilots flying hurricanes would give their lives in this conflict. The collection here includes documents lots of photographs of personal histories medals and unusual items of memorabilia. One such is the chest mike the WAAFS would wear when working in the plotting room as part of Britain's anti-aircraft defence network.

    Part of the WWII display. The uniforms are all original and most of the exhibits are donations from private individuals. 

    Model planes are found throughout the collection, alongside original artefacts such as this aiming mirror used in both the Spitfire and the Hurricane. 

    This chest mike enabled the WAAF operators to keep both hands free and provide two-way communication with squadrons in the air, individual airfields and forward observation positions. 

    Yet another room is dedicated to the later War. And all the foreign pilots that served here. Before America officially joined the war over 60000 Americans had volunteered to join the RAF. 6 1/2 thousand had actually served in the RAF many giving their lives to defend England and democracy. Later as already mentioned the Norwegian air force was based at North Weald.


    After the war, the airfield continued to be used well into the jet age and only cease to be an RAF base in 1958. The airfield itself continues to this day as a civil airfield but they have a nice collection of aeroplanes that can be seen on special days. I also have a number of air shows during the year all of this has been reduced due to that very close proximity with the M25 and M11 motorways.


    This is a very small museum, so allow about an hour to 90 minutes for a visit. However, the collection is very interesting, very well displayed and the staff are extremely helpful and willing to answer any questions. Entry is just a couple of pounds and all profits go to the upkeep of the collection, so if you have an hour or two and it's well worth visiting and having a little explore. Check out their website at www.nwamuseun.co.uk for more information.

    Monday 10 June 2019

    Broadside 2019 - Rejects go Red!

    The sports hall filled up quickly and stayed busy most of the day; the company was friendly with wargame regulars rubbing shoulders with families who popped in having been to the pool next door; the club demo games covered a wide range of periods and were generally of a high calibre. This could describe every Broadside Wargames Show we have attended over the years and Sunday's event was equally good as any we have been too before. A small but very friendly show with great games and a good selection of traders.

    Posties Rejects have sort of adopted this as our 'local show' and put on a demo here every year. This time it was Ray's turn to devise a game and we were able to have two goes at his recreation of the Battle of Killiecrankie. Not only did we put on our annual demo game but this year saw us 'rebranded' with new Red polo shirts. Black seems to be the colour of preference for the majority of people attending these shows and we sort of merged into the background with our old black polo shirts. Now there is no denying we stand out!

    Running a demo can best be described as exhausting fun, and we were all shattered by the end of the day. We had gathered at Posties at 7am to load up the cars and were at the venue by the time the doors opened to exhibitors about 8am. Once we had set up we all had a brief chance to look around the traders and club games before we started on our demo. Interest seemed to be high and we had several detailed conversations with experienced gamers interested in the period we were playing or the rules we used. We also had several family groups pass by and the kids seemed to enjoy the colourful figures we had on display.

    Setting up before the show started. The terrain was all items we use for our regular games and Ray used a lot of it for this scenario.

    With visitors beginning to arrive we got started on the first of two games. Ray and Postie umpired and handled all the 'admin' while Richard and Surjit played against Dave and John. I was nominally helping the latter pair play the Jacobites but I was so busy talking to visitors they got little assistance from me. 

    There was a good selection of traders at the show this year but we were so busy with our game that we didn't really get a proper look around. I still managed to get a good book on the campaigns of Alexander the great and some modelling supplies, as well as another T-Shirt from Art of War. I also didn't get much time to look at the other games but did snatch five minutes to whiz around and snap a few pictures.

    Corsair vs Mustang - Dogfight ‘69 (Participation) by Maidstone Wargames Society

    The Colonel’s Jammed and the Gatling’s Dead (Demonstration) by S.E.E.M.S

    War in Middle Earth (Demonstration) by Shepway Wargames Club - Winner of best Game in Show

    Trophy Hunting in the Lost Valley (Participation) by Friday Night Fire Fight

    A Song of Ice & Fire (Demonstration) by Medway Wargames Society

    Star Wars Legion (Demonstration) by Emotionally 14


    Assault on Cap D’Enfola - Elba 1944 (Demonstration) by Deal Wargames Society

    Flames of War ‘Late War’ reveal (Demonstration) by Battlefront Miniatures
    Kill Team (Demonstration) by The Emperor’s 10th Games Club
    There were also a selection of Boardgames for Participation being run so all in all a wide selection of games and genres. 
    I didn't get much time to wander and join in, but that's only because we were so busy with our game. As always we had a great time and thoroughly enjoyed running a demo game and meeting so many nice people. We were all exhausted by the time we got back to Posties and unpacked. We had a quick cuppa and a post-show chat then I decided to hit the road home. Unfortunately, instead of my usual, 35-minute drive took over two hours due to an accident in one of the Dartfort tunnels, so by the time I got home I just slumped on the sofa, utterly spent. Still, there's worse ways to spend a Sunday. 

    Saturday 8 June 2019

    Broadside Demo Game - Killiecrankie 1689

    Once again we are fast approaching the Broadside Wargames Show in Sittingbourne. Posties Rejects have adopted this show as our 'local' and the one where we regularly run a display game. We've had a bit of success running demo's here and we're hoping to get an equally enthusiastic response with our game this year. Hats off to Ray who has organised everything, picking a battle to recreate and all the models needed. This year and we have had three playtest games to learn the rules (we are using the newest version of Beneath the Lillie Banners) and to discuss various aspects of the scenario. Ray has been tweaking the setup so we have a game that mirrors the historical events but allows enough freedom to give both sides a good game. Below are a couple of 'sneak peak' pictures from our test games. 


    As usual we have tried to put on a demo game that reflects the best of what you would see at one of our regular games. 

    Friday 7 June 2019

    D-Day 75th Anniversary Service

    This week I have been in the company of some very special men on what can only be described as a pilgrimage of commemoration and remembrance at the National Memorial Arboretum in Staffordshire. Its been a very memorable and emotional few days in the company of so many brave men and women who served their country in WWII and other conflicts after. The service yesterday was attended by HRH the Duke of Cambridge (Prince William) who gave a moving reading of his Grandfathers speech on D-Day. One of our Veterans, Don also gave a reading and the unfaltering firmness of his voice said volumes for how much this event meant to the Veterans present.

    The weather held off for most of the day with a brief but ill timed shower during the wreath laying ceremony. Other than that it was a beautifully sunny day with blue sky's dotted with fluffy white clouds and everywhere the sound of laughter and friendly words. All age groups were represented with veterans of 100+ accompanied by great great grandchildren, barely a few months old. All who were old enough to be aware of it, shared the feeling that this event was special and very important. It's only been five years since the last big commemoration services and the ranks of the D-Day veterans has been cruelly thinned by time and age. In five years time there may be fewer still and then the responsibility of remembrance will fall on the shoulders of a new generation.

    One of the things I found both touching and encouraging was the number of children and young people present. Many were the grandchildren and great grandchildren of the vet's but there were also school groups and families unconnected with the service. They need to see and experience these events to foster a connection and link with their history. Without getting too political I have always firmly believed that a people that forgets its history is doomed to repeat the mistakes of the past. Division, tribalism, lack of empathy and nationalism thrive in that vacuum  and it would be a tragedy if the sacrifice of the greatest generation were for nought.


    Don Shepherd (Sapper D-Day Juno Beach) and Albert England (RN on LCT's to Gold Beach) enjoy a drink together.

    Myself and Albert England. Albert's picture is on the front page of The Guardian this morning.

    With Major John Hawkins. Johns father served in WWII and John served in Korea. He had recently found out he was awarded the Military Medal for bravery in that theatre.

    The band of the Royal Engineers at the start of the service.

    The Duke of Cambridge reads an extract from a speech given by his Grandfather, King George IV

    Don gives a reading from the poem, Little Ships.

    Later Don was interviewed by local news and ITN.

    The Normandy Memorial at the Arboretum

    The wreath and message left by Prince William

    My Brother-in-Law Ray, interviewing a British veteran that landed on Utah. This illustrates that the invasion was a multinational affair with unprecedented cooperation between the forces. 

    The Arboretum is huge with memorials to nearly every branch of military service.

    Even full with people as it was yesterday the Arboretum in a calm reflective sort of place and very moving indeed. 

    Memorial to the Parachute Regiment. Not all of the memorials are as grand and large but all are unique to that service and many are inscribed with the names of the fallen. 

    I was shaking hands all day but this gentlemen (Jack Farney)  so greatful he really made an impression on me. As I shook his hand he said "God bless you" and I had to reply "No, God bless you sir." I feel very strongly that it was thanks to amazing men like this - humble and self affacing to this day - that I and my children were able to grow up free. I doubt if I would have had their courage, but I am glad they did.  

    Another incredible gentlemen, Alfred Booker RN. He served on the HMS Ramalles and said they were bombarding the Getrmans all day until some guns were so worn they needed to be replaced. 

    At the end of the day we went back to our hotel for a wonderful meal and a sing-a-long. Don and Albert joined in and still have more vitality than men half their age (and they can still drink you under the table...trust me!)

    These three days with the Veterans have been extraordinary, humbling and something I will remember and cherish for the rest of my life. I'm meeting them again in a few weeks to start the fundraising for next years trips, but I doubt if any of us will experience anything quite like the last few days again.