Showing posts with label Tools. Show all posts

Friday, 14 November 2025

Wet Pallets - A Tool, not a Rule

Are wet palettes really essential for miniature painting, or are they just another gimmick? That’s the question I tackled in my Podcast last weekend (which I forgot to repost here for regular readers!). For anyone new to the idea, a wet palette is a simple tool—an airtight container with a damp layer underneath and a semi-permeable paper on top. It keeps acrylic paints moist for longer, which is especially useful for painters who want smooth blends, consistent layering, or need their colours to stay usable across multiple sessions. Many pro painters swear by them, and they’ve become a familiar sight in online tutorials and painting guides.

But are they really for everyone? In the video, I explore the clear benefits: less wasted paint, better consistency for thin techniques, and a real advantage in hot or dry conditions. At the same time, I point out some genuine drawbacks. Metallics, contrast paints, and technical paints often separate badly on a wet palette. Maintenance can be a hassle if you only paint occasionally. And for batch painting, drybrushing, or quick “slapchop” methods, the wet palette can feel more like an unnecessary obstacle than a game-changer.


I share my own experience too. I used a wet palette for around six months, but ultimately it didn’t suit my style. It felt like extra maintenance that slowed me down, and I went back to a dry palette happily. That doesn’t mean they’re bad—it just means they’re not for everyone. So, are wet palettes gimmick or essential? Watch the video to see the full breakdown, and join the conversation by leaving your own experiences in the comments. Have you found a wet palette invaluable, or did you, like me, decide it wasn’t worth the effort?

Wednesday, 22 October 2025

Paint Pen Comparison: Are they any good?

Every so often, a new hobby product comes along that gets a lot of attention, and lately, paint pens for miniatures seem to be everywhere. I decided to give them a fair try to see what all the fuss was about. This isn’t a sponsored video; I bought all three sets myself for an honest, unscientific comparison. The three types I tested were Army Painter Speed Paint Markers, AK Real Colour Markers, and AK Playmarkers. To keep things consistent, I applied all of them onto an old 28mm fantasy miniature that had been base-coated white. I wasn’t aiming for a masterpiece — just a sense of how they behave in real use.

Each brand had its own quirks. The Army Painter Speed Paint Markers offered the expected semi-transparent finish, but dried so quickly that the paint couldn’t settle into recesses as intended. The result? A slightly streaky, uneven look.

The AK Playmarkers use a brush-style nib made of nylon, which felt more natural to handle, but the paint itself was quite runny. Combined with the large nib, it made precise control difficult — not ideal for small-scale detail work.

Finally, the AK Real Colour Markers provided much stronger, opaque coverage. Unfortunately, the chunky felt nib made fine detail almost impossible, especially in tight areas of the miniature.

In short, while all three pens have interesting features, none of them felt like a real alternative to a standard paintbrush. The humble brush still offers far more control, subtlety, and versatility. Of course, this is just my personal first impression. My technique might not be the ideal way to use these pens, and I know some hobbyists swear by them. So, if you’ve tried any of these paint markers and found success, I’d love to hear from you!

Watch the full video for the side-by-side comparison and let me know your thoughts in the comments.


Sunday, 5 January 2025

Three products that change how I paint forever

I've been painting miniatures for over forty years, so it is inevitable that my style of painting and the products I use will have changed over the years. But what are the three products that have changed the way I paint and have become permanent features on my desk?


Sunday, 19 February 2023

AI and Solo Wargaming

Could we one day see Artificial Intelligence used to enhance solo tabletop wargames, providing more realistic generals to fight against on our game tables? Could AI for instance enable us to play against accurate facsimiles of famous generals from the past, providing wargamers with more realistic and challenging opponents in solo games? Or is this one step too far for a hobby that has one nostalgic foot planted firmly in the past?

Sunday, 25 September 2022

Are you a Hobby Hipster? or an Old Grognard?

Are you a Hobby Hipster? A painter and modeller that follows the latest trends and fashions, from contrast paints to 3D printing (and everything in between)? Or, like me, do you pick and choose those developments that suit your needs? 

Sunday, 7 August 2022

Tidy up to get more done: Improve productivity by being better organised

The painting desk is the nerve centre of your army building operation and should be suitably organised to make the best of the time spent there. I'm a firm believer in keeping your workspace tidy, clean and well laid out so you can resume work the next day with the minimum of fuss. 

Wednesday, 29 June 2022

Revisiting my Vortex Mixer: Cheap, but still working!

Over a year ago I bought a cheap vortex mixer for my paints. I reviewed the product at the time but it wasn't clear if it would either be used much or keep going. Fifteen months later it is still going strong and performing the job I bought it for. 


IMHO a bargain, but maybe I have just been lucky with this low-cost alternative. As usual, I would love to hear your experiences with vortex mixers - cheap or expensive - in the comments below.

Friday, 21 May 2021

Unboxing - Rattle-Can Spray Shelter

Another unboxing video this time for a spray shelter so that I can varnish my models whatever the weather. I don't often spray anything indoors because where possible this should be done in a well-ventilated space, but occasionally the weather makes nipping outside impossible. 


Let's just say this is a lesson in reading the product specification properly before pressing the BuyNow button! 

Friday, 30 April 2021

Mini Vortex Mixer - Economical or a Waste of Money?

Just a short video today taking a quick look at a Vortex Mixer I got for my birthday a few weeks ago. I have been using it and decided it was time to do a quick review. 


This is definitely at the cheaper end of the market but it does the job. For my occasional use, this is more than adequate for my needs. However, there are plenty of similar machines to choose from and lots of reviews on YouTube so I would definitely recommend doing your research before spending your hard-earned gaming budget on a machine. 

Sunday, 4 April 2021

Buying new brushes

I recently bought some new brushes and decided that I would do a short video on what to look for when purchasing the most important tool on your painting desk. I'm not making any specific recommendations though, that's a minefield I'd rather avoid! 


I'm bound to have missed some advice out so please if you disagree or have more to add please leave a comment below or on my YouTube Channel, Miniature Adventures. And of course ff you did enjoy the video please like, subscribe, and share. Until next week, stay safe, get as many games in as you can, and of course, keep rolling high!

Wednesday, 31 March 2021

Spring Cleaning - The post Challenge tidy up

It's been about a week and a half now since the Analogue Hobbies Painting Challenge came to an end. Usually, the end of the competition is followed by a long hiatus in painting where I can't motivate myself to lift a brush and I try to get some games in instead. Well, I will be playing some more solo games soon but I have managed to get some stuff painted thanks to the Monday night painting sessions myself and fellow Posties Rejects have been holding for the last year. They have been such a good motivator we will be continuing them long after lockdown is a bad memory and we can get together for games again. But in addition to doing some painting, I have been getting on with some long-overdue tidying up!

The Operations Room has been both my games room and my office for the last year and bit by bit it has been getting messier and messier. With the workload of the Challenge behind me, I have been pottering around sorting out several bags of rubbish, cleaning surfaces (so much dust!) and reorganising my depleted supplies. I have also been reorganising my tools (and adding to them, more on that in a moment) and need room so they will be close to hand. When I moved in here 18 months ago I never thought I'd be spending quite so much time in this 7ft by 8ft room and such tight dimensions mean it was always going to be a bit cramped in here. Nearly all my storage was immediately occupied and new purchases have used up what little space was left. So one of the first things I did last week was start to move some stuff out again! I have been boxing up a lot of my building materials and have found space elsewhere in the house for them. 

Understandably little actual painting has taken place although I have started a small project which should be finished for next week. I have however started making some replacement hills using my new Foam Cutter. I did a quick 'unboxing' video for my YouTube Channel and I have now christened it with hopefully the first of many terrain building projects. 


Many years ago I bought a load of TSS hills made from Polystyrene. They did the job I wanted them for but they have taken a bit of a battering and most are long past their prime. I also have a selection of hardboard hills that I bought from various shows over the years (they featured in my recent Rorkes Drift game) but I wanted a selection of larger flatter hills that could be used on the edge of the table. I had half a dozen A3 sheets of High-Density Foam that I used to make some of my Frostgrave Terrain last year and decided this was the ideal material for my hills. It's soft enough to be easily sanded and shaped but dense enough that it will be tough and last longer than the styrene ones they are replacing.  

The Foam Cutter made short work of cutting out the hills and bevelling the edges and now I need to sand them, prime them and then I can add some grass. I'll try to get them finished over the weekend because I want to have a couple of solo games later next week while I have a few days off work. 

Friday, 3 February 2017

Wearing shades while I paint

After Christmas I just 'happened' to be passing Hobbycraft during the January sales. My local branch was doing a deal on craft lamps and I thought I would treat myself to a new one to compliment the lamp I already had. When I got it home I was amazed at the light it kicked out, nearly double the watts of my old lamp. In fact I was so please with the new lamp that I decided a total upgrade was needed and bought another! 


These lamps are completely adjustable and the heads swivel so can be angled to direct the light. So in the space of a few weeks I have gone from a perfectly reasonable single lamp of 40w to two lamps with a combined light output of 150w! I'm going to have to wear sunglasses when I paint!

Deal with it!


Saturday, 28 November 2015

Waterproof Ink Pen

Last weekend I took my wife to a hobby and craft show at Excel. Most of the traders there were selling stuff I wasn't interested in (Papercraft, Knitting, Crochet, Jewelry making etc) but there were a handful of stalls selling painting accessories. In an ironic twist - despite this being a day out for my wife - I ended up buying more than she did... a fact not lost on her! A regular attendee at these sort of shows is ArtMaster from whom I have bought brushes and other accessories many-a-time. I picked up a new water bowl, a brush rack, yet more brushes (doh) and best of all, a waterproof ink pen.


The pen cost just a couple of pounds but it looked like a great way of drawing fine lines on miniatures, especially as the tip is just 0.05mm! Potentially very useful for drawing intricate designs on 6mm shields and other flat surfaces. The question was, would it write on an acrylic surface and would the ink bleed when varnished? I decided to run some tests and in the end I thought it worth sharing my results here so you can draw your own conclusions,

And the winner is....


Ink from this pen can be applied directly on top of acrylic paint. It adheres cleanly and when dry remains waterproof enough to allow brushed or spray gloss varnish to be applied over it (top row of the picture above). However the best results seem to be obtained with a coat of brushed on gloss varnish over the ink (top left). Once this has dried Matt/Dullcoat can be applied over the top if that is your preferred finish. 

The bottom row in the picture shows some tests using the ink on top of already varnished surfaces (Matt on the left and Gloss on the right). It was immediately clear to me that the ink adheres very poorly when applied over varnish and subsequent sealing with another layer of varnish just seems to result in smearing and bleeding of the ink. 

I have used other ink pens before but this has produced by far the best results. Now that I know this works I'll be investing in more of these pens which also come in Blue and Red ink as well as Black. 

Tuesday, 9 December 2014

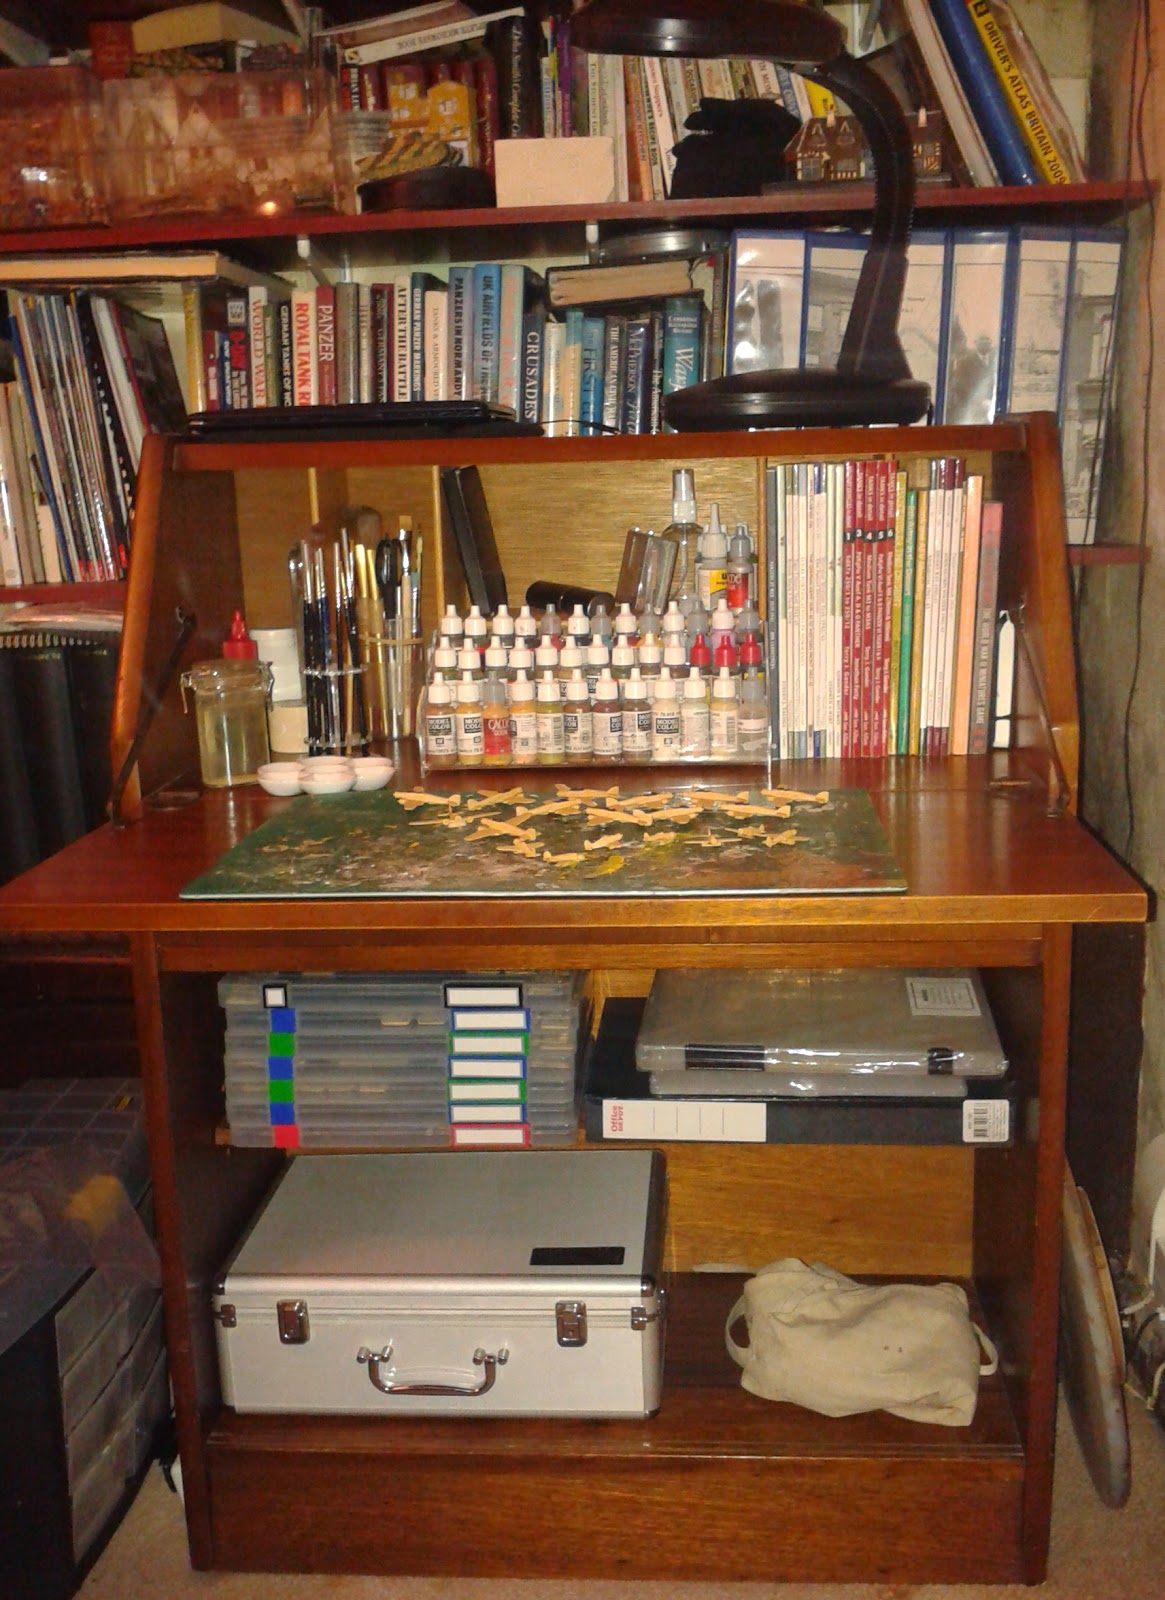
A New Painting Desk

I have bought myself a new painting table, larger than its predecessor. I don't have the luxury of a games room or man-cave and have always had to work in a corner of the family room. Nothing has changed there but I have been thinking about getting a bigger table for some time. I have had my old desk for 8 years and it has served me well, but space has always been an issue and while I have made-do it has never really been large enough. 


One of the advantages of working in a recycling centre is that I have a lot of 'pre loved' furniture passing through all the time. I wasn't looking for a new desk but this item arrived last week and I knew immediately that it would be a suitable replacement for my ageing and small desk I use at present. Like my old desk this is a writing bureau - so it can be close up when not is use - but it is wider and deeper with proper shelving below. More importantly the work area is 70% bigger and I have more desktop storage for reference material , my note books, tools and brushes. 


I have removed the glass doors that enclosed the front (they would have been broken in no time!) and adjusted the shelf to accommodate my army boxes and some tools. Other than that there has been little need for alterations. I'm hoping this new desk will give me some much needed work space and serve me for many years to come. 

Monday, 8 July 2013

The Mk1 eyeball is no longer enough

I've been road testing a new 'painting tool' over the weekend, and its one that a few years ago I would never have considered. With the arrival of my latest batch of 6mm models in the post I decided that I needed to admit defeat and buy myself some magnification for painting. These models are so damned small that any real attempt at detail is beyond me and I need a little help. I hasten to add it's not my eyesight which is causing the problem just the scale I'm working in. Honest. 

The visor comes with four different lenses that provide increasing levels of magnification starting with a modest 1.2x lens and stepping up through a 1.8x, 2.5x and a 3.5x lens. These come in a sealed box to protect them from scratches and are easily fitted into the visor where they can be flipped up when not required. There are two positions for the lenses so if you wear glasses the visor can still be used. This also means you can put two lenses in and flip them both down to get even more magnification. I have to say the quality of the optics, despite being plastic, is very good with no distortion to the image when using them. The only thing I'd suggest is a degree of paranoia over protecting the lenses from scratches. 

The only downside from a miniature painters point of view is the rather poor LED light on the top. It is powered by two AAA batteries, so its not too heavy, and is directionally adjustable. But being such a small LED it's not very powerful and it doesn't have a very good colour balance (it has a distinct bluish hue) and is probably best left turned off. I already use a powerful Daylight Lamp for painting and have no need of the LED on this visor so I have removed the batteries to reduce the visors weight slightly. 

I bought this magnifying visor set from Maplins and after giving it a workout over the weekend I'm pretty happy with my purchase. I won't be using it all the time, most of the work that goes into painting a miniature can be done at arms length, such as basing and undercoating etc.  But when I start on detail work and pull out the 0000 brush I'll also reach for my shiny new magnification visor. 

Tuesday, 23 April 2013

New Paint Rack

Here's something I picked up a couple of weeks ago but haven't had a chance to write about until now. My little painting desk is a 'bit' cluttered to say the least and there's not nearly enough space for my paints. There's not a lot I can do about this in the short term but I do have plans for a bigger desk when I get round to the unpleasant task of redecorating (I hate DIY). But for the moment I don't have a 'man cave' and I can barely call what I do have my 'man corner'...[boo hoo].

Reorganising my desk is therefore something I do with tedious regularity because it creates the illusion of improvement, but this latest reshuffle has been prompted by the purchase of a nifty little nail varnish stand..?!?

I have Phil at The Wargaming Site to thank for this product as he mentioned it on his Blog a few weeks ago and, after some measuring and a bit of umming and ahhing, I bought one. I hasten to add its not for my Nail Varnish Collection (I keep them hidden) but to use as a paint rack. Made of sturdy clear perspex this stand measures 29.5cm long x 11.5cm tall x 12cm deep which means it can comfortably hold 30 Games Workshop sized paint pots or up to 39 of the Vallejo style dropper bottles. I have been able to fit my core 'working' paints (The ones I use most often) plus water and blending medium on my rack with lesser used pots stored separately. Not bad for just £7.50 plus delivery.


There is also a five tiered version although this isn't available at the time of writing this. Aside from being very cheep compared to custom paint packs the real benefit of these stands is that they can accommodate a wide variety of paint pots of different sizes on the same shelf. The only downside that I can see is that unlike custom stands the bottles/pots are loose and could therefore be knocked over if you move the stand around, so this is probably best used in a static set-up such as in a painting room... or a 'man corner'.

My newly organised (but still too small) painting desk. Its now a lot tidier than it was and I have moved some of the infrequently used items to a separate toolbox stored where I can easily access stuff when I need it.

Wednesday, 16 January 2013

An Italian Striptease

Stripping miniatures down to naked metal can sometimes be a bit of a tease. Over the years I have found that removing acrylic paint from a miniature can either be easy or it can be an absolute pain in the posterior. I'm trying to strip old paint from some of 6mm Italian Tanks and normally I have found that a good long soak overnight in very soapy water softens the paint. A quick scrub with a brush and the paint usually lifts off easily... but this time it just isn't shifting.

*Removing paint from old miniatures can be difficult. There are lots of techniques for stripping acrylic paint from metal, but most require some patience and a little bit of elbow grease. The basic method is to soak your miniatures in one of the paint removing mediums listed below for 6-12 hours and then use an old toothbrush to remove the softened paint. This process may need to be repeated several times to get all the paint removed. I've used several products over the years so here are a few of the more popular examples for returning your lead miniatures to bare metal ready for repainting. Some of the products listed may not be available in every country so I have tried to give generic names or alternatives where possible.


Washing Detergent - Normal washing-up liquid can help soften acrylic paints although it takes 6-12 hours of soaking and some scrubbing with a toothbrush afterwards. 

Pinsol / Pine oil - Good on Acrylics and Enamels. Soak miniature for at least 6 hours, longer if possible & remove with a soft brush. May require several applications. Best not to use this on plastic models but can produce good results removing acrylics from metal after only 2-3 hrs.

Dettol - This is a method endorsed by the Angry Lurker and has the advantage that the waste liquid is biodegradable and safe for the environment. Only use the original 'brown' version of this antiseptic disinfectant; it'll stink the house out so this might be worth doing outside or in a well ventilated area. 

Castrol Super Clean - A non smelly product that is also bio-degradable and is safe to use on plastic models as well. This product contains Sodium Hydroxide and can produce excellent results after only 6 hrs. The main drawback is that this product comes in a gallon can which is probably more than anyone needs for this type of job.

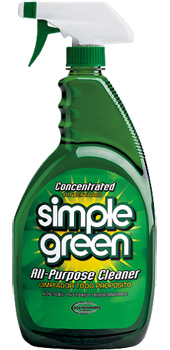
Simply Green - A 2-Butoxethanol based product that can be used on Plastic or metal models. Best used as a soak rather than sprayed or brushed on. The product is Non Toxic, Biodegradable and non corrosive. Gives good paint removal after only a couple of hours but for best results soak for 12 hours.


Oven Cleaner - This is another product that uses Sodium Hydroxide as its main active ingredient. There are lots of different products available but the one that get mentioned often in various miniatures/painting forums is Easy-Off Oven Cleaner. Soaking produces the best results after 6hrs.

Brake Fluid - Can be bought in relatively small quantities from any garage. Brake Fluid gives best results after 24hrs soaking so this isn't a fast option. Safe to use on plastics but needs to be disposed of responsibly as it is harmful to the environment.

Dawn Power Dissolver - Recommended by the guys at From the Warp this product can produce results in a little as 20 minutes. Because it is a foam it can be sprayed on to the model and left to do its stuff, but be careful not to spray it onto anything you don't want stripped!

Nail Polish Remover / Acetone - Easy to acquire but smelly as hell. Use in a well ventilated area and soak your model for at least 6 hrs. Do not use on plastic miniatures unless you want them to turn into slag.


There are several other products that I have read about, but the application and results are (allegedly) broadly the same. Some of these such as Linseed Oil and regular DIY store paint stripper are fairly logical options. Others like Lighter Fluid sound distinctly dangerous and then there are the weird and wacky options such as Coca-Cola and Distilled Water.

Aside from the paint removing medium you will need some or all of the following tools to clean your models. Most people won't have a problem with any of the products listed but some may have a chemical allergic reaction so its always a good precaution is to wear some latex gloves. A ceramic or metal container to soak your miniatures in. An old toothbrush is also essential. Regardless of what method you use an good scrub with a toothbrush can help lift loose paint and get in those hard to reach spots. An absorbent cloth or paper towel to mop up spills... trust me this is essential. A small bit chamie leather to grip the model with while scrubbing. This is soft enough not to damage the casting and can be washed out between uses. The tool of last resort is the dental pick which lets you get in the deepest recesses and remove those stubborn bits of paint.

*I first published this article in December 2009 but thought it worth a second posting (with a few updates) considering the problems I have recently encountered cleaning old miniatures. I'll be using the Dettol method (its the 'Reject Way' apparently) and will report back here on the results. 

Tuesday, 27 November 2012

DIY Painting Tool for 6mm

Following on from my post yesterday showing the first of (hopefully) many 6mm models I thought I'd share this simple painting stand I threw together. At this scale painting really is a production line and anything that helps speed the process along and minimises the handling of the models while painting is a good thing.  


This was built using a simple off-cut of wood about 3cm wide by 15cm long, chosen because it fits nicely in the hand. I then picked three long coffee sticks and glued them together with PVA glue and clamped them while it dried. Any thin strip of wood would do but these were the materials I had to hand.


The beauty of this set-up is that I can fit five or six vehicles on it (I just uses Blue-tack to stick them but you could use a glue gun) for painting while still keeping it easy to handle. Then in between each stage I can put the whole thing down on the table to dry without the risk of them being knocked over. Another important advantage of this painting stand over the traditional 'lolypop stick' method is that the model is raised slightly and it is possible to paint from below for those really difficult to reach spots.

I may adapt this idea and make another version with individual dowels for holding vehicles but this Mk.1 version worked just fine and will be ideal for painting 6mm infantry. 

Wednesday, 14 March 2012

What was I thinking?!?

I'm an idiot, and a cheep one at that. I've made a colossal blunder and the only positive is the fact that I didn't spend a fortune on it. None the less I'm miffed at my stupidity and consider myself suitably chastised by my failure. So what did I do wrong? I bought Games Workshop brushes instead of sticking with my normal Winsor and Newton series 7's. Uuugh...I feel dirty just admitting it!

"The Stupid, It Burns" by Ahren Paulson
Back in January I wrote about my Mobile Painting Kit which I had put together to use in work or when travelling for my job. When I used the kit on my last trip I took my trusty Winsor and Newton's with me but decided I really ought to buy a set of brushes specifically for my travel box. But I baulked at the thought of spending £50 on a new set of brushes and stupidly opted for a set from Games Workshop instead. After just a couple of uses I can honestly say they are utter cr*p, the worst brushes I have ever owned.

I've only had them a week and I'm ready to throw the lot in the bin. None of them keep a point and even the 'fine detail' brush is like painting with a wallpaper brush. After just a couple of uses hairs are falling out and those that are left are forked or splayed. The tip needs constant grooming to return to something resembling a point. Their paint retention is OK but the hairs are so loose most of the pigment seems to soak into the ferrule making the splayed hairs even worse.

I hate to say this about myself but I am thick, thick, thickity, thick. There's little else I can say about this other than to beg forgiveness from the gods of painting and make a solemn promise not to do it again.

Wednesday, 25 January 2012

Mobile Painting

Last year my job changed (a promotion non-the-less!) and my new role involves a reasonable amount of travelling. A couple of times a month I have an overnight stay in Southampton and recently I also had a two day trip up in Manchester and today I'm in Leicester. While I'm enjoying getting out from behind my desk now and again it is playing havoc with my free time and in particular the time I spend painting. Frankly I'm so tired some evenings that I just can't face painting and all I want to do is veg in front of the TV. Consequently I have hardly picked up a brush in over a month. So I decided it was time to get mobile and better utilise some of the time I'm spending in hotel rooms in the name of my hobby.

Back in June last year I posted that I had made up a tool kit so that I could prepare miniatures while at work and I have used this successfully several times. Indeed on my last trip to Manchester I set about cleaning up and assembling a couple of vehicles for my FoW forces. But what I need to do is extend the principle so that I can get some painting done while away from home, or even at work in the few lunch breaks I get now.

The end result of this thought process is that I have put together a small travelling paint kit with the same selection of tools that I had in my tool-roll plus a few essential painting tools and a core selection of paints and inks. I can't bring everything with me but I can selectively pick out the paints I need to get a particular stage of a model completed while I'm away. It will require a little more forethought on my part so that I take just what I need each time I use the kit but its not an impossible choice to make.

Here's what I have included:

  • A selection of small diamond files
  • 2x Mini Clamps
  • Brushes for cleaning
  • Tweezers (Metal and plastic)
  • Pencil (for marking joints etc)
  • Craft Knife and Spare Blades
  • Sculpting Tools
  • Adhesives : Epoxy Resin Glue, Milliput Putty, Superglue, Bluetac
  • Rubber Gloves
  • Wooden Sticks for mixing glue
  • 50x50cm Leather work sheet (Shammy leather)
  • Small cutting mat
  • 20ml bottle of Distilled Water/Flow Improver (80:20)

I've also selected a core set of paints to keep in the box and have been selected with Flames of War/WWII colours in mind. I use Vallejo paints almost exclusively so the following list of colours are from that range.

  • 882 Middlestone
  • 886 Green Grey
  • 887 Brown Violet
  • 863 Gunmetal
  • 872 Chocolate Brown
  • 890 Reflective Green
  • 830 German Fieldgrey
  • 873 US Field Drab
  • 918 Ivory
  • 982 Cavalry Brown
  • 988 Khaki
  • 995 German Grey
  • 823 Luftwaffe Can Green
  • 826 German Camo Medium Brown
  • 875 Beigh Brown
  • 984 Flat Brown

I've also included bottle of GW Devlan Mud wash and a small bottle of Vallejo Satin varnish as well as the essential bottles of Black and White paint. The final stages of a project - Matt varnish, flock etc - I'll still have to do at home but most of the earlier work can be done regardless of where I am.