Sunday, 29 November 2020
The Eye of the Beholder
Friday, 27 November 2020
Debris of War - Furniture
I have been working on a lot of little items of late to use as 'scatter terrain' or set dressing for a games table. These are items that probably won't serve any purpose from the point of view of gameplay, but will enhance the look of the table. These models from Peter Pig fit that bill perfectly.
They can be used in amongst the ruins of buildings or piled into the back of carts. I particularly like the upright piano and the chests of drawers. Simple items of furniture that make a ruined building look a little more realistic I think.
Wednesday, 25 November 2020
A forward Supply Depot
The logistics of warfare is an area that we often overlook when we wargame. Supply lines and lines of communication have always been vital in warfare but as armies became more and more mechanised the needs of fuel and spare parts and other essential items became as important as things like food and medicines. One of the major problems for the allies with invading in the Normandy region was the lack of a significant port. The raid on Dieppe had shown that trying to capture a port in the first wave of an invasion would be extremely costly, if not impossible. They fully expected that Cherbourg would probably be out of action for some time after the Invasion, but more importantly, it was a long way from where the front was going to be in maybe a month or two months time. This knowledge influenced allied backing of the Mulberry harbour construction, providing a port facility much closer to where the fighting was going to be, not just during the Invasion itself, but in the immediate months ahead.
The harbour served its purpose and by the end of 11th June 104,428 tonnes of supplies had been landed in Northern France. Rough weather hampered the effort and forced the abandonment of Mulberry Harbour A at Omaha Beach. However, Harbour B at Gold Beach was still in use 10 months after the invasion, by which time over 4 million tons of supplies had been landed. The scale of the logistical effort to sustain the invasion was huge. The U.S. military alone had to ship 7 million tons of supplies and replacement vehicles to the staging areas, including 450,000 tons of ammunition. All of this took place in an age before containerisation and required an army of dockhands, drivers and support personnel to keep the flow of material to the fighting troops at the front.
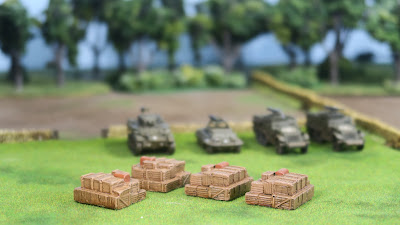
These little models are not particularly good. They are made from a plaster-like resin which soaks up the paint and has lots of bubbles in them. However, I bought these for the silly sum of 50p on a bring and buy stall some years ago, so despite their quality, there were still worth buying. To be honest, when you look at them at arm's-length on the tabletop, the flaws are hardly noticeable, so they will do for most games. I think they are actually meant to be for 28mm wargames because the crates are pretty large for 15mm. However, I think that they'll be ideal for a tank depot where the crates carrying spare gun barrels, engines or sections of track would be pretty large.I have a few more 'scatter terrain' items to finish off which should be ready to show off for Friday. Don't get too excited, they are tiny, won't really have much impact on a game but will enhance the look of certain scenes on the games table.
Sunday, 22 November 2020
Are you a Secret Wargamer?
Friday, 20 November 2020
The Chausey Granite Walls of Normandy
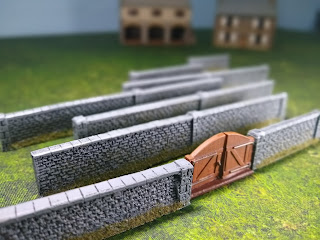
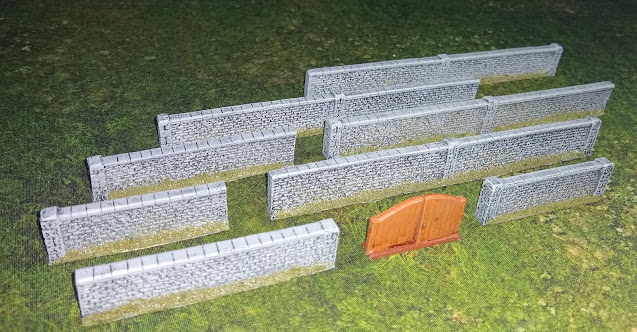
These stand about 18mm tall so will provide complete cover for infantry and concealment for some smaller vehicles. I only have enough for a small courtyard between a few buildings but it least I have that option available to me now. The set includes four long sections 146mm long (just under 6"), two smaller sections 75mm (3") long and two more 55mm (a tad over 2") sections. The set also comes with a large double gate which I mounted on a section of sprue so it would stand up. With the gate, the whole lot comes in a fraction under 3ft. I normally try to write a little historical blurb about what I have painted but honestly what can I say about walls.. well more than one might imagine!
In Lower Normandy and the area around the Cotentin Peninsula, it is quite common to see buildings built from light granite blocks. When I was much younger I spent a couple of family holidays in the Channel Islands and the use of granite as a building material is common there as well. Most of the Granite apparently came from the island of Chausey - geographically part of the Channel Islands but under French jurisdiction - which is why so much of the archipelago's buildings share the same building material to those of the Cotentin Peninsula. The further east you go in Normandy the more likely you are to encounter buildings (such as the larger ecclesiastical buildings like the Cathedrals) made from a particularly hard limestone known as Caen Stone. Unlike the light grey Granite of Chausey, Caen Stone is a light creamy-yellow so its possible to tell which bit of Normandy you are in from the colour of the buildings.
Wednesday, 18 November 2020
A Quarantined Wargamer Update
Sunday, 15 November 2020
Conquer the Lead Mountain
Friday, 13 November 2020
Signposts for Normandy
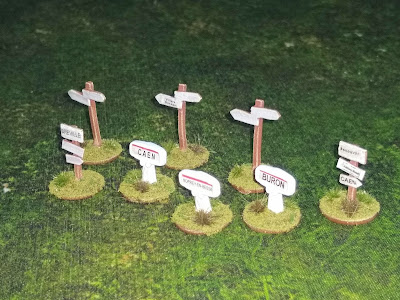
The Peter Pig set consists of eight metal signposts, some typical roadside signs and some more ad-hoc affairs presumably put up by the military. You may notice that some of the signs feature the names of locations in the British and Canadian sectors around Caen. "But you have American infantry" I hear you say, which is true at the moment...
I have just bought a load of British Airbourne troops for battles in the eastern end of the Overlord lodgement, which I'll be painting in the Analogue Painting Challenge over the winter. A mix of very nice figures from Peter Pig and Skytrex are sitting on my desk as I type this. I'll be cleaning them up and preparing them for the challenge over the next few weeks... but more on that in a later post, closer to the time.
Wednesday, 11 November 2020
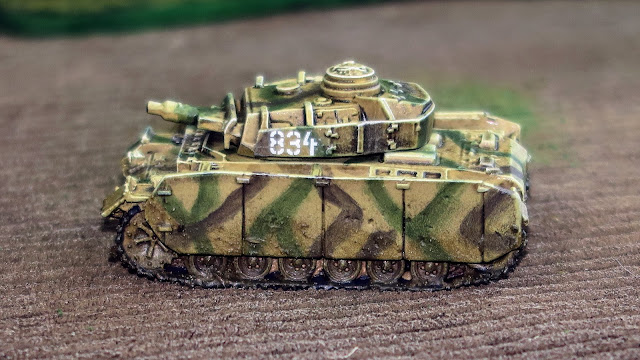
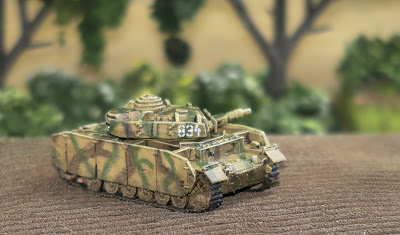
Panzerkampfwagen III Ausf N
The Panzerkampfwagen III Ausf N was the last production model of the Panzer III and the only version to be armed with the 7.5 cm L/24 gun. The gun had been used on earlier versions of the Panzer IV and fired a much more effective high explosive round than the longer barrel guns fitted to earlier versions of the Panzer III. Only 700 Ausf N's were made and all used chassis from earlier versions of the Panzer III, most based on the Ausf J, L and M.
The Ausf N had frontal armour of 50mm and side armour of 30mm so it wasn't as well protected as its larger cousins. However, it had a maximum road speed of 40 km per hour with an average speed of 20 off-road making it's relatively 'nippy'. Its theoretical range was 155 km on roads and 95 km off-road and like all German armour towards the end of the war was limited mostly by fuel supplies rather than spare parts. As well as the main gun it could carry 64 rounds of a mix of 7.5cm armour piercing and high explosive shells, and 3750 rounds of a 7.92 mm machine gun rounds, belted in 150 round bags.
Production ended in 1943 but some of these were still in use 1944, albeit in very small numbers, continuing in their role as infantry support tanks. However, by this time most surviving Pzr III's were being taken back to be converted into the turretless Sturmgeschütz III.
Sunday, 8 November 2020
Sportsmanship verses Gamesmanship in Wargaming
Friday, 6 November 2020
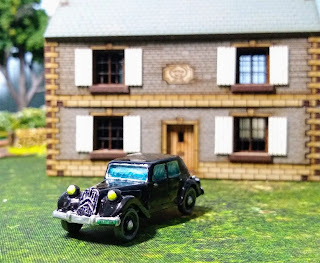
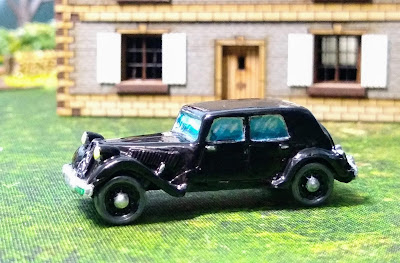
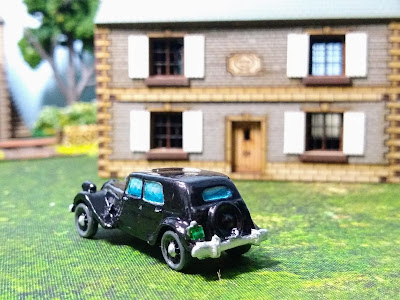
Citroen Traction Avant from Peter Pig
Production was temporarily halted during the war but resumed again in 1945 and the series continued in production well into the late '50s. Designed for mass production is was cheap enough that a well off farmer may well have been able to afford one so it won't look out of place parked in front of my 4Ground farmhouse.
I went for the simple black bodywork because it looks so elegant with its chromed bumpers and fittings. Yellow headlights and green number plates finish the look. As usual, I gave it a couple of coats of gloss varnish but instead of finishing off with a flat matt varnish I only applied Matt varnish to the tires. And unlike my military vehicles, I didn't add any mud splashes...this car has been looked after by its proud owner!
Wednesday, 4 November 2020
Tank Battle at River Cottage
Last week I posted a Batrep for a Chain of Command game set in Normandy 1944 which kept me happily occupied in the early part of the Half Term holiday. I had a few days off work but we weren't going anywhere so I decided to keep myself busy getting in some Solo games. It took me a couple of days to set up the terrain (I'm very fussy!) and I completed a full game of Chain of Command which saw my American Riflemen beat a German Infantry Platoon who were ensconced in a Normandy Farmhouse. When I'd finished the game I packed away the figures but decided I didn't want to break down the terrain set up I'd built instead reusing it for another Too Fat Lardies game, What a Tanker!
The Setup
The action in this game is set earlier in the day before the infantry arrives and sees a Tiger I face off against a Sherman M4 and a Firefly. I've played a few games with the Tiger before and I knew from experience that it's a tough nut to crack so although the Allied tanks came in at more points I didn't feel that this was an unbalanced game.
The Action
As with my earlier Batrep, here's a picture of the setup, this time showing the Tiger coming in from the left and the M4 and Firefly coming down the lane from the right.
You may notice that this layout differs only slightly from the Chain of Command game I posted last week. The shell craters at the main road junction are missing...but I'll come to this a bit later!
As with my previous Batrep, I'll be listing the dice rolls for Command Dice for each tank so you can see how I decided to use the dice. I'll list the dice in order, from one to five. Any 6's are at the end where they belong but I'll try to show what I converted them to by striking them through and listing the conversions afterwards in italics (where I remembered to write it down!). Later in the game, as temporary damage is taken, you'll notice the number of command dice being reduced or increased as the damage is inflicted and repaired.
You'll also notice that the order in which the tanks go varies because I'm rolling for initiative each turn which occasionally made for some interesting moments!
Turn 1
Firefly 112345 - The Firefly is in front of the M4 so moves out of its way by driving to the bottom of the hump-backed bridge. Its a tall tank so can still see over the bridge, giving it a 'hull down' position. The commander can't see the Tiger yet so doesn't acquire the target this turn.
Sherman M4 11136611 - The perfect set of dice to be honest. The Sherman's engine roars to life and the tank surges forward. It makes it to the stream, crosses, and still has enough movement (using the wildcard dice for movement) to get to the field gates in a bold flanking move. If it can get behind the Tiger it can get a rear shot while the Firefly keeps it busy to the front.
Turn 2
Sherman M4 1224461 - The Sherman using its wild dice to get more movement in and is now almost behind the Tiger in a hope to force it to shift position.
Firefly 2234563 - The Firefly commander is able to Acquire the Tiger (it is VERY visible right now!), orders the gunner to aim and fire. The shot is on target but rather disconcertingly the AP shell impacts uselessly on the Tigers frontal armour.
Turn 3
Sherman M4 1135561 - The Sherman moved across the Wheatfield into the road but can't acquire this turn.
Firefly 1122361 - The Firefly commander is a little perturbed to have the Tiger pointing its huge gun at his side armour to decides to reverse 90° into the field and use the Bridge to obscure itself from the Tiger. Both tanks loose acquisition in this careful games of chess.
Turn 4
Firefly 11246622 - The Firefly commander decides that he needs to change position again. He gets out onto the road and over the bridge and while he can acquire the target again he's not in a position to fire just yet.
Sherman M4 334562 - The commander has a moment of rash bravery and decided to fire at the Tiger rather than trying to reverse out of trouble. The shot hits but once again the round bounces of the Tigers armour. The commander's heart sinks little knowing that inside the Tiger the German crew are more than a little alarmed at the second resounding strike on them. No one likes being shot at, no matter how thick the armour!
Turn 5
Firefly 23456633 - Now the firefly gets to shoot, converting wild dice to aim dice to improve the shot. It scores three hits on the tiger but with 5 saves the shot impacts harmlessly on German armour.
Tiger 22345 - No drive dice to move, not enough acquisition dice to see the Sherman through the Bocage and no wildcards to repair the damage. There is little the Tiger can do this turn.
Turn 6
Tiger ????? - For some reason, I didn't write down the dice roll this turn (sorry) but again little happened and the Tiger is still in the sights of the Firefly.
Sherman M4 ?????? - Yep still didn't make a note of the dice but with no drive dice amongst them the Sherman can do little this turn.
Firefly 4566661333 - With some wild dice the Firefly takes very careful aim... scoring 5 hits on the Tiger. Three saves mean the Tiger survives for now but as most of the hits were criticals the damage is permanent so the Tiger lose one command dice which cannot be repaired. The hull is hit damaging the running gear so the tiger will move a little slower in future.
Turn 7
Firefly 344455 - Perfect timing for the Firefly to win initiative. It takes aim, fires, reloads, fires a second time and reloads again. The first shot impacts harmlessly on the Tigers armour but the second hit does more temporary damage to the already beleaguered Panzer.
Tiger 16Repair - The Tiger repairs a point of temporary damage but that returned command dice will only be available next turn so, for now, all the Tiger can do it try to get out of the Firefly's view. The Panzer reverses (slowly) behind the farmhouse.
Sherman M4 14556623- The Sherman commander senses the wounded Tiger and decides to continue shooting at it. The M4 pulls into the road again and fires, but once again its shell impacts harmlessly on the Tigers impressive frontal armour.
Turn 8
Tiger 33
Firefly 1222461 - Having lost acquisition of its target the Firefly decides to change position and box the Tiger into its current position. The Firefly moves up to the junction with ample move to take up a partially concealed position behind the farm's pigsty where it reacquires the Tiger.
Sherman 12246631 - Once again the Sherman nips out into the lane, acquires its target down the road, aims and fires. However, this time in its haste to shoot it misses its target entirely. Using the last wild dice it reverses back into the field and relative safety.
Turn 9
Sherman M4 3445
Firefly 1244563 - Shifting position slightly the Firefly hits the Tiger once again with its 17pounder gun. The shot is on target but once again the Tigers formidable armour shrugs off the impact.
Tiger 1344 - The Tiger commander has some wounded (possibly dead) crew, damage to the running gear of his tank, the inter-com is on the blink so he having to shout orders and all the remaining crew are being deafened by the gong-like clang of AP rounds hitting their armour.
Turn 10
Sherman 11334
Tiger 366Repair x2 - One of the unconscious crewmen is revived and the intercom is fixed (two wild dice used for repair) so the Tiger regains two temporary damage and will be back up to 5 command dice next turn...if it lasts that long!
Firefly 1122463 - The Firefly moves again but is able to aim and fire once more inflicting two temporary damage on the Tiger once again!! The Tiger crew are now sooner repairing the damage that they are receiving more. If they don't fire back soon this fight will end only one way.
Turn 11
Tiger 22
Sherman M4 1133465 - Convinced now that the Tiger is critically damaged in some way the Sherman commander hoves out onto the road and rolls down to stop next to the Firefly. Taking careful aim its shot is on target but once again ineffectual.
Firefly 1134565 - Aims while reloading from the last turn then fires and reloads again. This shot is critical and deals another point of permanent damage and cripples the Tigers running gear even more.
Turn 12
Tiger 445 -Again the Tiger can do nothing and the crew are too shaken even to make any repairs.
Firefly 135666445 - The Firefly gunner aims carefully, and prepares to out two rounds into the crippled Tiger. The first hit slices into the Panzers weakened armour, hits some of the rounds inside and with a muffled WHUMP the commanders hatch blows open and flames shoot skyward.
Analysis
Well, that was a very satisfying game which went on longer than I expected. The Tigers armour is formidable, shrugging off multiple hits from both the Sherman and the Firefly. In the end, it was the 17pdr gun in the Firefly which did the job. Once the Tiger started to take damage and was unable to move out of sight of the Allied tanks it couldn't repair damage as quickly as it was taking it.
Shortly after this encounter German artillery bombarded the road junction in response to a request from the Tiger commander, radioed in just before he was killed. The Allied tanks skedaddled and German infantry took possession of the Farm as a forward command post. The burning Tiger was recovered and hauled away from the road just before some American infantry arrived to try and take this important position back from the Germans.


