Showing posts with label Pyrrhic War. Show all posts

Wednesday, 19 June 2019

Battle of Asculum 279BC

On Tuesday I had another go at a solo game of To the Strongest. This time I've switched from the Punic war to the earlier Pyrrhic war and the Battle of Asculum. After invading Italy and defeating the Romans at Heraclea, Pyrrhus overwintered his army in the south. In the spring of 279 BC Pyrrhus was finally ready to restart his campaign and invaded the province of Apulia. Eventually, he met the Romans, and an appointment with history, at Asculum. The scene was therefore set for a clash that would go down as a victory so costly that it was a victory in name only.

According to ancient sources, the battle of Asculum began when both sides found themselves facing each other across a fast flowing river. The Roman commander offered Pyrrhus an opportunity to cross the river unmolested or vice versa so they could have a true match of strength and honour. Estimates of the number of troops involved vary but the best figures are probably about 40,000 infantry each. Pyrrhus has superiority in cavalry and also had 19 elephants. Confident of victory against the Romans Pyrrhus allowed the Romans to cross the river. However, this first day of battle found fighting across the bad ground on his flanks restricting his ability to use his cavalry and elephants to full effect.

On the second day of the battle, Pyrrhus was quick to capture the rough ground using light troops and therefore ensure that the battle would take place with clear flanks and flat ground. Now he would be able to use his elephants to full effect. However, the Romans, shocked by their defeat the previous year, had prepared a defence against elephants in the form of special anti-elephant ox wagons. These four-wheeled wagons were pulled by 4 or 6 oxen and each cart had screens to protect the crew. They were armed with long poles wielding grapples, blades and burning brands sticking out from the sides. The idea was simple enough as these would be used to slash at the legs and trunks of the elephants. The effectiveness, however, was unclear and some contemporary sources suggest that although initially successful in halting the charging elephants, they were themselves neutralised when attacked by greek light troops. The crews were either killed or fled and then the elephants continued on their destructive path. In later years the Romans learnt that special equipment wasn't needed, just new tactics, culminating in the disciplined infantry manoeuvres employed at Zama against the Carthaginians.

Estimates of casualties vary but most sources seem to agree that the Romans lost approximately six thousand men and the Greeks three and a half thousand, however, Pyrrhus was unable to seek new reinforcements whereas the Romans seem to have a limitless supply of manpower and no sooner had one army been destroyed they could raise another. This is exactly the same sort of lesson that Hannibal would learn in the later Punic wars where he would destroy one Roman army after another only to find a new one raised to face him. Pyrrhus would famously say of Asculum, "if we are victorious in one more battle with the Romans, we shall be utterly ruined." (or words to that effect, the quote varies from source to source!).


The Game Setup
My game is set on Day 2 of the battle after Pyrrhus had captured the unfavourable rough ground. The two army lists I have prepared give the Romans a slight advantage in points, however, the open ground does play to the Greek strengths in cavalry and elephants. Contemporary sources suggest that the Romans adopted a static line whereas the Greeks strove to break the flanks.

For this solo game, I once again used dice to determine how aggressive the opposing side (in this case the Romans) would be and their deployment. I also used the Strategum cards from the rules but picked for the Romans as some of these require secrecy and that's a little hard to achieve when playing solo! I picked "Cry havoc and lose the Pigs of War!" for the Romans as it replicates the use of novel weapons - like the anti-elephant wagons. For the Greeks, I picked randomly and got "Tonight we dine in hell" which effectively gives one pre-designated unit a free rally from disorder. I gave this to a unit I knew would be in the thick of the battle. 


Order of Battle

Roman Army 
1st Command - Publios Decius Mus - General (Mounted, Detached, Senior, Brilliant) 
    Allied Light Cavalry (Light Cavalry, Javelin)
    2x Equites Latini (Cavalry, Javelin)
    Equites Extraordinarii (Cavalry, Javelin, Veteran)
2nd Command - Publius Generalus Madeupus - General (Mounted, Detached)
    6x Hastati/Principes (Legionaries, Special)
    6x Triarii (Hoplites, Veteran, Small)
    2x Italian Allied Infantry (Javelinmen)
3rd Command - Publius Sulpicius Saverrio - General (Mounted, Detached)
    Allied Light Cavalry (Light Cavalry, Javelin)
    2x Equites Romani (Cavalry, Javelin)

Greek/Epirot Army
1st Command - Pyrrhus of Epirus - General (Mounted, Detached, Senior, Heroic, Great Leader)
    Thessalian Cavalry (Cavalry, Veteran)
    2xTarantine Light Cavalry (Light Cavalry, Javelin, Veteran)
    Elephants (Indian Elephants, Deep, Escorted)
    Psioli Slingers (Light Infantry, Sling)
    Greek Archers (Light Infantry, Bow)
2nd Command - General (Mounted, Detached)
    2x Epeirot Phalangitae (Pikemen, Deep)
    2x Macedonian Phalangitae (Pikemen, Deep, Veteran)
    Greek Hoplitoi (Hoplites, Deep, Raw)
    Agrakas Hoplitoi (Hoplites, Deep, Veteran)
3rd Command - 2i/c General (Mounted, Detached)
    2x Greek Allied Cavalry (Cavalry, Javelin)
    Greek Light Cavalry (Light Cavalry, Javelin)
    Elephants (Indian Elephants, Deep, Escorted)
    Greek Archers (Light Infantry, Bow)
    Psioli Slingers (Light Infantry, Sling)


The Action
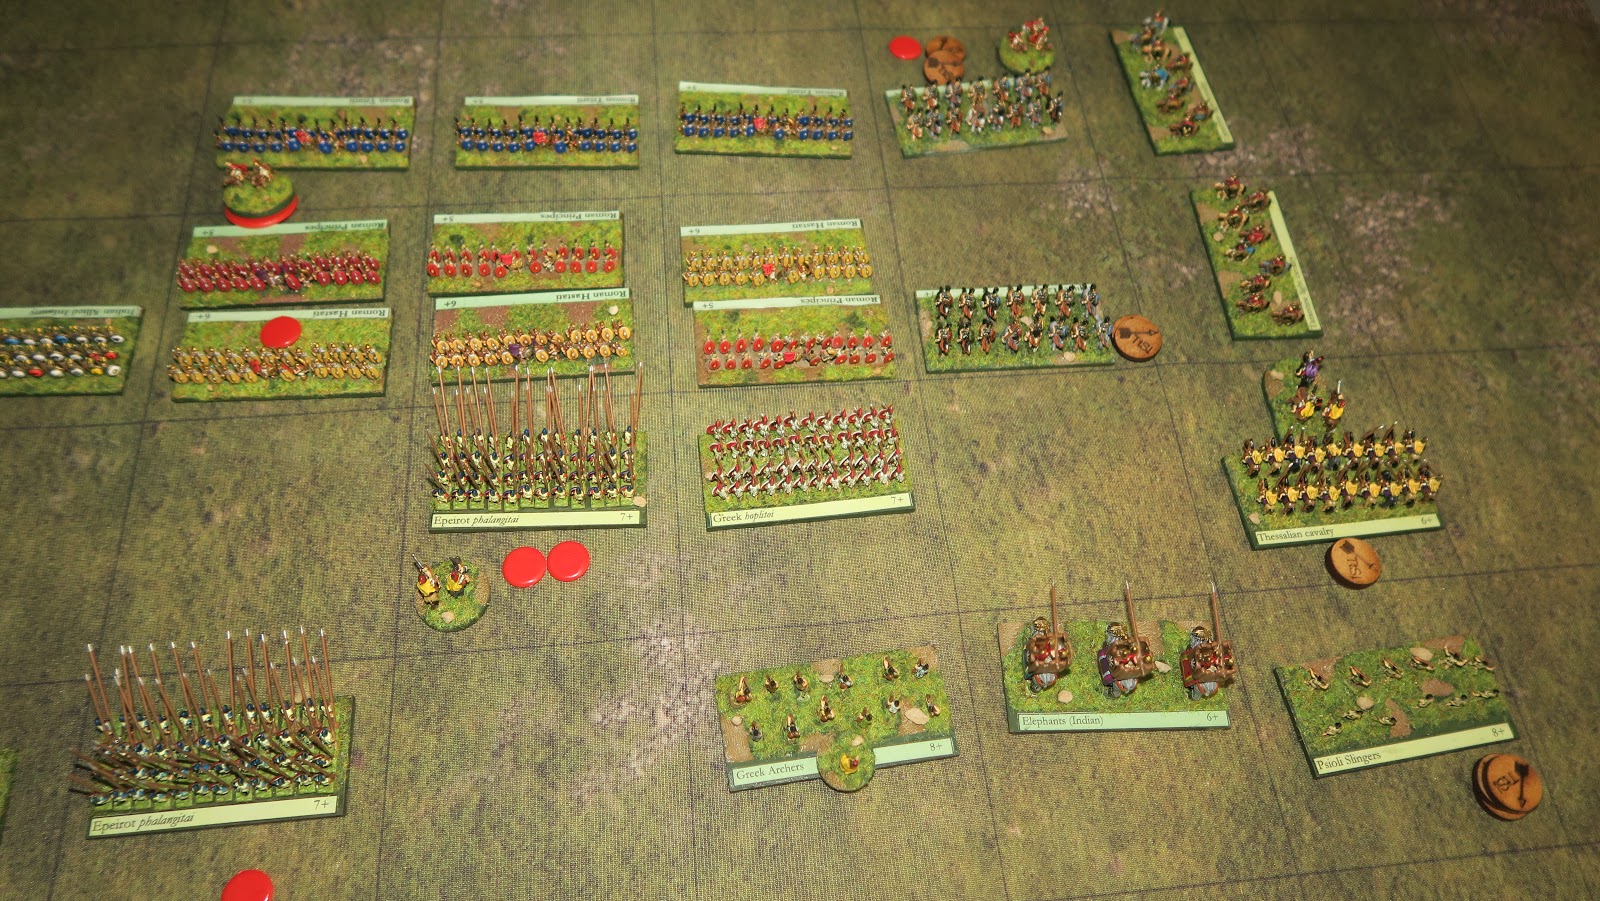
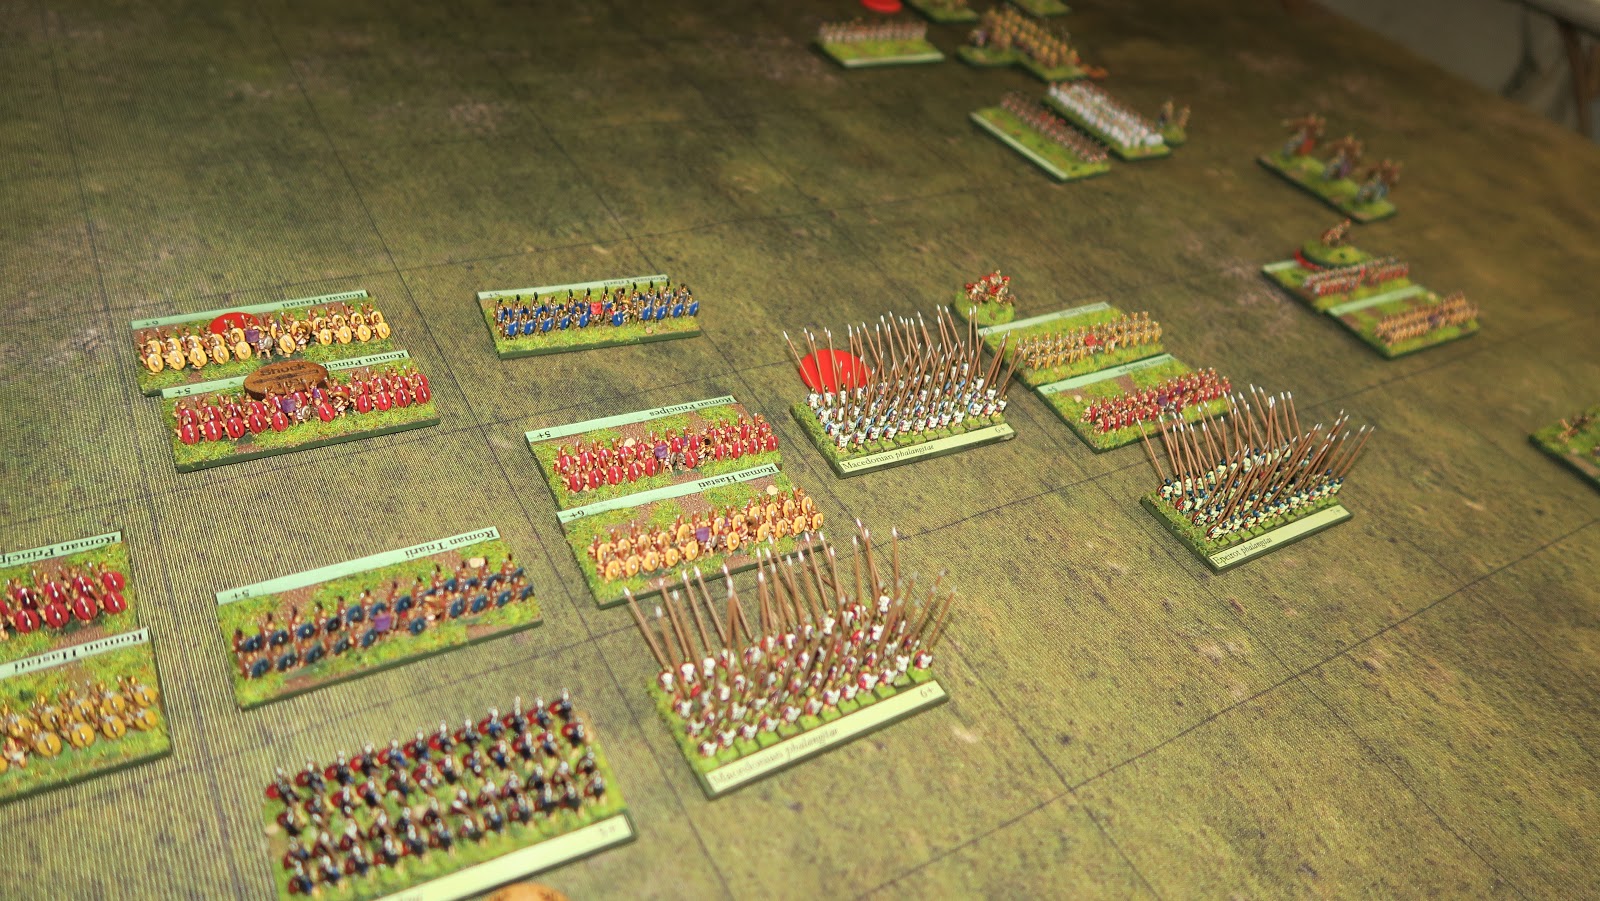
Initial deployment with the Greeks closest and the Romans across the open ground. 


The Phalangitae look prickly and dangerous but the improved rules for the handling of Roman maniples mean this battle won't be a cakewalk for the Greeks

Turn 1 - The Greeks advance quickly. This is the first time I have used the Group Move rules to move multiple units and their general. You can also combine this with the March Move rule to go faster, so long as the units don't start, pass through or end in charge or missile range of the enemy (the rules are more detailed than this, but that's it in a nutshell)

The Romans also think group movement is a good idea and promptly roll a one! The Generals ability to re-roll activation dice doesn't apply to Group moves to this command can't move at all.

Turn 2 - Meanwhile, on the other flank, Pyrrhus leads the Thessalian Cavalry and smashes into the Romans Elite cavalry unit. The Romans are disordered, attempt to rally but fail. They are now very vulnerable if the Greeks can attack again next turn. 

Meanwhile, the Phalangitae are bearing down on the Romans and they have lots of sharp pointy reasons why they feel confident of victory. 

Turn 3 - Crunch! The infantry meets across the whole of the front line. A lot of javelins are thrown (to little effect) but now its a battle of Phalangitae verses Maniple. The line exchange system of the Romans makes then a surprisingly tough nut to crack.

Pyrrhus and his cavalry start to work their way around the flank of the Roman Cavalry. The Elephants are kept in reserve for later. 

One of the Italian Allied Infantry units is destroyed by the Macedonian Pikes and worse still the general for the command is injured! The Greeks curse their luck, one more pip on the dice and they would have bagged themselves a Consul. 

The Hastati/Principes are tough and their Pilums as shock weapons are very effective. The Greeks are starting to take casualties and become disordered while the Romans maintain a disciplined formation despite the weakening of their centre. The Greeks decide to fall back next turn to try an rally their line. This will also draw the Romans forward making Pyrrhus' flank attack easier...its hoped.  

Turn 4 - Disaster for the Greeks as the 3rd command's two Allied Cavalry are destroyed. Aside from two light units of infantry, the only thing stopping the Romans here are the Elephants that had been kept in reserve. Meanwhile in the centre an activation roll of a 1. The commands general rushes to the scene allowing a re-roll and promptly rolls another one!! This leaves the Greek centre very vulnerable. 

Back on the other flank Pyrrhus' command is faring better, now slowly enveloping the Roman flank. The elephants here move into position. 

Turn 5 - The Roman position on the right flank really looks precarious as no matter which way the remaining Italian cavalry turn they can be flanked and outnumbered. Meanwhile though the Manipular Legions in the centre are starting to push back the Greek Phalangitae. 

The Greek left flank reorders itself and prepares to meet the Roman cavalry. They must hold this flank to give their infantry in the centre time to hold the Roman maniples which in turn will give Pyrrhus time to flank their entire line. Everything still hangs in the balance for both sides. 

Turn 6 - Pyrrhus and his cavalry are now surrounding the Roman flank. The remnants of the Roman cavalry command here have been wiped out and the General only survives because he is Senior meaning he isn't lost when his command is destroyed. Things have become so desperate the Roman commander has had to call some of his Triarri from the centre to try and hold the Greeks back. 

Turn 7 - At last, the Phalangitae have broken through the Maniples and the Romans look very close to breaking. They are down to just one victory medal remaining so any loss will end the battle in Greek victory. Pyrrhus' army is similarly mauled but with seven medals remaining their position is more secure. 

Meanwhile, on the other flank, a charge by the Elephants was initially held back by the use of the Anti-Elephant wagons (the "lose the pigs of war" startegum) but one Italian Cavalry unit has been destroyed and the chance to outflank the Greeks looks like it has passed. 

Turn 8 - More casualties and the complete loss of their flank mean the Romans are at breaking point... then the Phalangitae defeat another Italian Allied infantry unit and a shudder ripples through the Roman lines which begin to crumble. Trumpets sound the retreat and the Romans fall back....Pyrrhus and his Greeks have won the battle. 

Analysis
Wow, that was a tough and gruelling fight for the Greeks. The end result gave the Romans 9 victory medals but the Greeks won a resounding victory with 16 medals. That being said Pyrrhus' army has been severely mauled by the encounter. A Pyrrhic victory as it should be.

With each Solo game, I'm getting better at the rules, bringing in new elements that I haven't used before. In particular, there are several new rules that will probably make there way into v2 of this rulebook (available as a downloadable supplement from the Big Red Bat shop for free) that I have used for the first time. One of the big takeaways for me from this game is the need to update my homegrown quick reference sheet. The rules are deceptively simple yet quite complex and (being a bear of little brain) I can't remember half of them! My QRF helps me to at least get through a game without too many errors. 

Tuesday, 20 November 2018

Planning for the Challenge

I've been feeling a little bit 'unfocused' for a while. Not quite between projects so much as struggling to bring several to a conclusion. I have a number quite usable armies for different periods that I want to expand and I have some vague ideas for future projects that I don't want to rush into. In short this particular wargames butterfly has become stuck in a web of his own making! Don't get me wrong, I'm not in a 'slump', I'm not struggling with time (any more than usual), I've just allowed myself to become distracted by multiple projects to the point where I have ground to a halt unable to make any clear decisions. So this week I have been giving some serious thought on how break the deadlock and I'm using the upcoming Analogue Hobbies Painting Challenge to drag myself out of this stalemate. 

In previous years I have gone into the painting challenge with a very clear 'project' as my goal. One time it was painting 6mm armies for the 2nd Punic War; The year before last I focused on a  Pyrrhic army and last year I painted thousands of Zulu's for an Anglo Zulu War campaign. I'm glad I did these projects but it has to be said some were difficult to keep up with. In every case I completed my painting list but said to myself, I want to come back to this and expand at a later date. That date has finally come. Unlike previous years I'm not heading into the Winter Painting Challenge with a huge target list, rather I have a series of small additions to each of the previous projects that I wan't to work on. In short I'm finally getting around to the fun stuff after the hard slog of building the core of several armies. 

2nd Punic War
The biggest additions are a long overdue expansion of my 6mm Polybian Romans. I've ordered enough figures to double my existing Hastati, Principes and Triarii as well as some more Generals and Hero figures. I'm also considering expanding some of the Allied units that go with this army but for now I have left them off my order. The biggest challenge I think I am going to have with these will be getting them to look like the units I already have painted. Thankfully I keep detailed notes when painting new figures so I should be able to keep the painting consistent with those I did three years ago. I'll also need to pay special attention the the basing so they match what I already have. 

For my Carthaginian army I have ordered some more African war elephants. The plan is to re-base my existing pachyderms on bases of three per base rather than the two per base I have now. I'm not doing this for any game purposes, this is purely an aesthetic issue for me. I just think the completed elephant units will look more intimidating than they do now, especially when they are moving towards your troops!

I have also bought more Celts to add to Hannibal's army. These are large deep units with a lot of figures per base and particularly scary when deployed. They will make a very useful (and very colourful) addition to the Carthaginian forces that I already have. 

Pyrrhic Army
I'm not planning on a massive change to this army at the moment. I have some more Generals and Hero models to complete, and I think I have some additional heavy Cavalry to add to the army. To be honest, I love my Pike units, but I almost reached a point (pun intended!) where I wanted to chuck the whole lot in the bin. I wish I had bought the cast pikes rather than open handed figures I went with because the pins I used were not only incredibly difficult to attach but are also very painful when trying to move a unit on the table. The units may look spectacular, but they are a nightmare to store safely and are very difficult to game with. These puppies have drawn more blood than any models I have ever owned or painted before!

Anlgo Zulu War
My Zulu War project last year was by far the biggest I have undertaken so far. I painted a LOT of Zulu's and redcoats last year but they represented only small portion of the troops I wanted to complete. In particular I didn't paint any Natal Native Contingent so I have now bought some and will be working on these soon. I'm hoping to add four or five companies to my existing British forces. A lot will depend on how enthusiastic I get for this but I have also bought some Natal Native Horse and some Boar units to compliment my existing troop options. 

One thing that has been a huge distraction (but but a thoroughly enjoyable one) in recent months, has been a renewed attempt to write my own set of rules for the period. Its been a difficult process but I think I have a working framework in place, although I am still trying to flesh this out in detail. I'm in no hurry to complete this though and when the Challenge kicks off again I probably won't have time for more work on it. I think that putting the project aside for a few months will actually be a good thing because it will give me time to ponder several ideas that haven't been included yet. This is definitely a long term project and one that I will be revisiting again in the new year.

What a Tanker!... in Two Theatres
Earlier this year I started building up a collection of vehicles to play What a Tanker! My main focus has been the war in the Western Desert between the British and Italians during Operation Compass. I have therefore ordered a few  more vehicles and some terrain to continue and expand this project.

I have also been revisiting the idea of playing some Normandy Campaign games using this rule-set. I already have a selection of Tanks from the period and quite a lot of terrain but both need expansion. Some of this featured in my first play-test of the rules but I need to add some terrain if I hope to run a large game for the Rejects. The first additions in terms of armour have been ordered along with some pre-painted terrain to expand my current collection. I'm even considering some ideas for more scratch built terrain (more Boccage!?). A lot will depend on how much progress I make during the Challenge and how motivated I am! Watch this space.

So have I come to any conclusions?
Today I have spent a couple of hours working on my plan for the Challenge and I feel much more focused as a result. At the very least I now have a clear to-do list down on paper rather than vaguely tucked away in a corner of my brain (a scary place with lots of cobwebs). I have a lot of prep to do before the Challenge starts but I feel confident I'll be able to hit the ground running when the starting pistol fires. 

Tuesday, 14 November 2017

Skirmish at Isentium

Today I decided I needed a game come what may so I decided to give a solo game a try. I've not done much of this in the past but I think this may be the way forward for me. I've missed a lot of games with the Rejects this year due to unfortunate timing and illness and while I'm determined to rectify this I think a few home games on my day off work wont do me any harm. So today I decided to have a small solo game of To the Strongest!

I made up two small cavalry only forces from my Greek/Epirots and Polybian Roman armies. The scenario is that both sides are sending out small cavalry forces to scout a crossing point along a river for the main army. Both forces approach each other unawares on opposite sides of the bank of the river. The game starts as both sides spot each other. There are several fords in this area and lots of woods and small hills. Not ideal country for a major battle but certainly suitable ground for two scouting forces to have a go at each other. 

Order of Battle
Greek/Epirot Forces - General (Pyrrhus) Mounted
  Greek Allied Cavalry + Hero
  Greek Allied Cavalry + Hero
  Thessalian Cavalry + Hero
  Greek Light Cavalry + Hero
  Tarantine Light Cavalry (Veteran) + Hero
  Tarantine Light Cavalry (Veteran)
  (Total 60 Points)

Polybian Roman Cavalry Command - General Mounted, Detached, Senior, Brilliant
  Equites Romani + Hero
  Equites Romani
  Equites Latini
  Equites Latini
  Equites Extraordinarii (Veteran) + Hero
  (Total 60 Points)

Action
Opening Deployment with both sides approaching each other on opposite sides of the river. The game begins as both forces become aware of each other. 

The Roman commander decides to keep his forces together and heads immediately for a strategic crossing point. Meanwhile the Epirot commander, knowing he is numerically inferior, decides for a more risky strategy. He send his light cavalry in a wide flanking move to harass the Romans from behind as his veteran cavalry force the crossing. 

The Romans move fast but find some of their troops hemmed in by the river. This pauses the crossing as they try to reform

Meanwhile the Epirot leader has a terrible time just crossing the first ford. He looses valuable time getting hi forces across the river and only the Roman delay stops him from loosing the second crossing without a fight. 

The Romans have reformed and decide to let the Greeks have a go at crossing the ford.Roman Javelins are raised in readiness. 

The Greeks do not disappoint and charge across the Ford. Javelins darken the sky and...not a single hit results! 

Thessalian Cavalry battles it out in Melee with the Veteran Extrodinarii but it is the Romans that come off worse. For a moment it seems this crazy plan of Pyrrhus may actually work! But melee and an further exchange of Missiles wipes out the Thessalians before they have time to react. 

Now the Greek Allied Cavalry sweep in to attack the Ford and at their head is Pyrrhus himself. He knows that he needs to keep the Romans occupied at the ford while his flanking force gets into position. 

The Greek Light Cavalry make the upper ford and are now working behind the Romans. One good turn of luck and the Greeks plan will have worked. 

The Greek Cavalry at the Ford are forced back and their is a pause...giving the Romans a chance to turn a couple of their rearward units around to deal with the Greek Light Cavalry that are coming up behind them. 

Now its the Turn of the Romans to cross the Ford. In one very successful round of melee they sweep away another Greek Unit and it looks like the door is finally open for them to cross and finish Pyrrhus. 

Meanwhile the Greek Light Cavalry try to use their speed and agility to hit-and-run the Romans but they fail to hit a thing with their Javelins (a recurring theme in this game!)

Its starting to look like a clear Roman victory as they pin down the flanking force and cross the ford. Pyrrhus should have thrown in the towel at this point!

The end. A combination of Latin Cavalry attacks and javelins destroys the last serious Greek Cavalry unit. Pyrrhus escapes with his life but leaves the best of his cavalry to be buried in Roman soil. 

The final positions. The Greeks have lost three heavy cavalry units while the Romans remain largely unscathed. 

Analysis
Well that was fun. I honestly didn't know which way this was going for most of the battle but when the end came it happened in just a couple of turns. 

Saturday, 7 October 2017

Play testing the Line-Exchange rules

I should have known the Young Padawan would be reluctant to face my Macedonian Pikemen again, so instead I have had to resort to some solo play-testing of the 'new' Maniple Line-Exchange rules. The whole exercise took less than an hour and quickly demonstrated that the Republican Roman manipular armies can now go toe-to-toe with the best the enemy can throw at them.

For this test game I have tried to match up the points values for an even fight. So on the Greek side I decided to make all the Pike units Macedonian (ie Veteran) and have a Hero attached. This gives them a points value of 68 which is the same as four sets of the revised Roman maniples consisting of the 'new' Hastati/Principes units supported by a small unit of Triarii. I didn't included Generals or skirmishers to deliberately keep this a simple test of Pikes verses Maniples.

The Pike units face off against the Roman line

As well as combining Hastati and Principes into a Standard Unit they are also now classed as Legionaries which means they are equipped with a Pilum, a shock weapon for use in the Melee phase before resolving hand to hand combat. 

The Pike units moved first (on a dice roll) and quickly pushed forward to attack. 

Very quickly it was apparent the new Hastati/Principe units had more hitting power as several units engaged in Melee and launched their Pilum on the way in. Unfortunately none resulted in a hit but if I was playing against these that extra attack roll against my troops would certainly have put the wind up me! 

The first line exchange worked perfectly. The Hastati fell back and were replaced by the Principe, which replenished the Pilum shock weapon and also resulted in a successful Rally Save. The Macedonian Pikes are now facing a tougher unit than before (the roman unit now saves on a 5+ instead of 6+) and have the prospect of another barrage of Pilums ahead of the next Melee. 

A less successful line exchange as the rally save is missed. However the Roman front line has still been refreshed with tougher troops with Pilums to the ready! 

Not only are the Romans holding the line they are managing to dish out some damage as well. 

I made full use of Rally activation's which meant that both sides held on for several turns longer than in the last game I played with these troops. 

A crucial moment. The Romans have dealt some damage to one of the pike units and the Macedonians have failed to rally. They are now very vulnerable if hit again. 

The Romans destroy a Pike unit... unheard of under the rules as they stood before. The battle isn't over though as the Romans have also lots a unit of Hastati/Principe an are down to the third line of troops, the Triarii in the centre. (The big red tokens just show where destroyed units were)

More damage is taken by the Macedonians as the now free roman unit turns and prepares to flank the like of Pike units. 

A bit of manuvering later (and several melee hits and rally saves as well) things are looking like they could go either way. The Romans have now lost three of their Hastati/Principe units and even a Triarii. Both sides now have a chance to flank the enemy line and it will now come down to dice rolls...who is lucky and able to manoeuvre and attack while they have the advantage. 

The Romans have the day but both sides have been severely mauled. 

Analysis
Wow, that rule change made a huge difference to the handling of the Roman army and made for a much more balanced and interesting game. I think this test battle could have gone either way and in the end it was unlucky dice rolls on Rally saves that lost it for the Macedonians. It took 7 or 8 turns of combat before the Romans got the upper hand. The line Exchange system worked well for them and meant they remained an effective force much longer than in previous games.