Monday 29 July 2019

War and Peace 2019

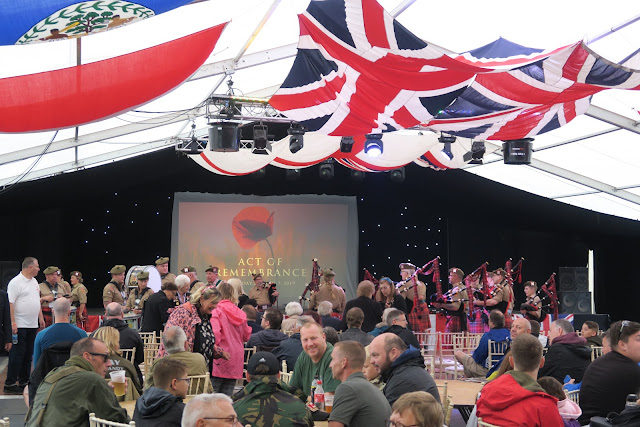
Saturday I went to the War and Peace Revival show at Paddock Wood in Kent. This time I accompanied the Veterans and saw another side of the show that I haven't encountered before. I'm normally straight into the Living History areas of the show or hastening to the arena to see some armour in action. This time my day started with a service of remembrance surrounded by some highly decorated veterans.

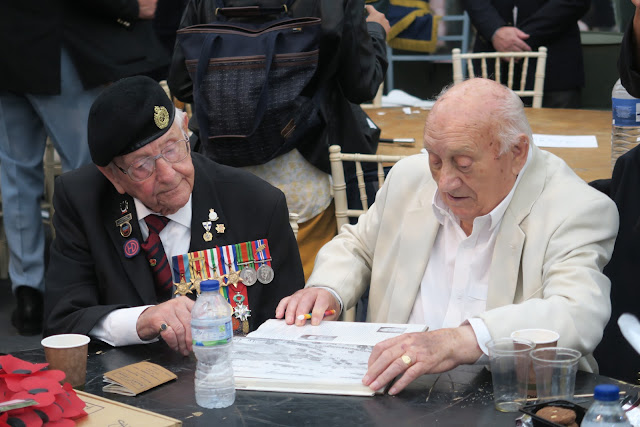
Don and Albert look through a book of D-Day photo's. 

Inside the Veterans Marquee

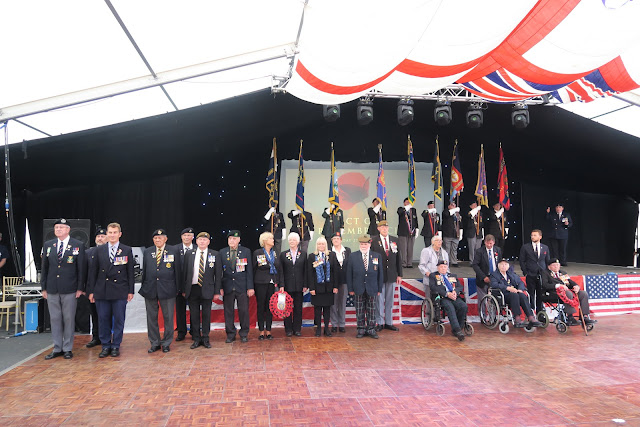
Parade of heroes. Some very decorated men and women in this lineup

The drumhead remembrance service was very moving

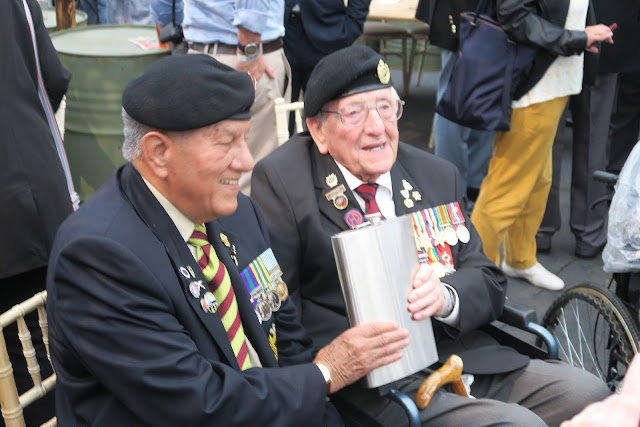
John and Don have a 'little' snifter! 

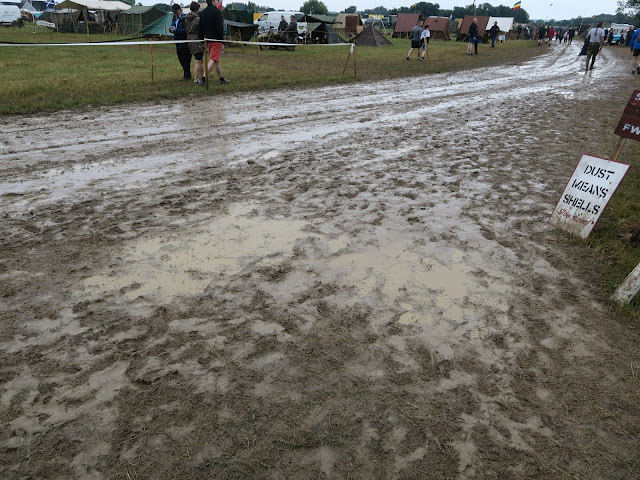
As the service came to an end, so did the rain so we headed out for a very quick look around the showground. Luckily I've been here many times and I knew to wear some waterproof shoes! Let's just say the roads around the side had gone from plain old mud to mud-coloured soup with the passage of thousands of visitors and hundreds of military vehicles.

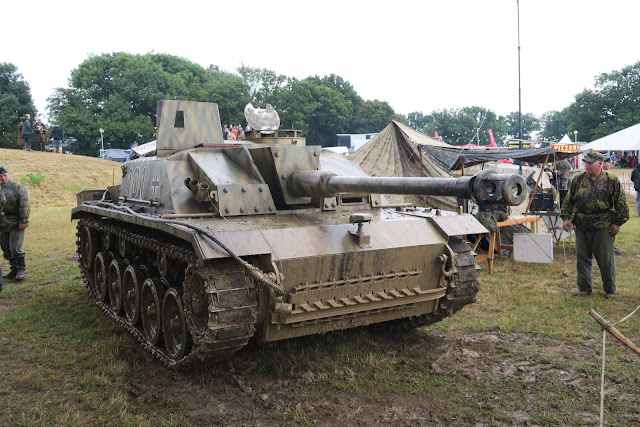
This replica StuG is often seen at living history events. 

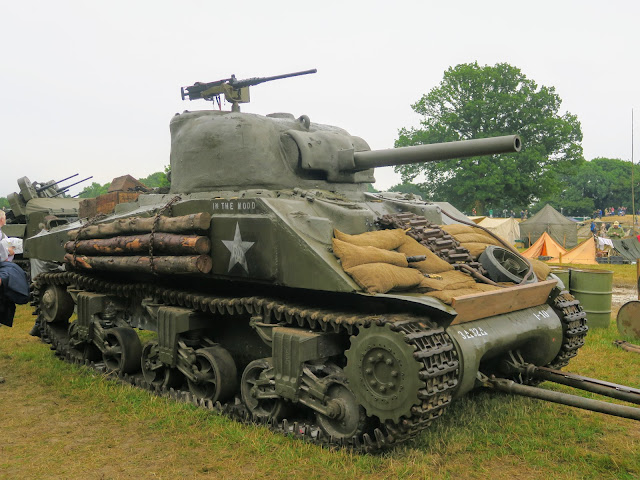
This excellently restores Sherman is still covered with battle damage, shrapnel slash marks and impact scars. 

Dust wasn't an issue...the mud looked like it could swallow up a person. 

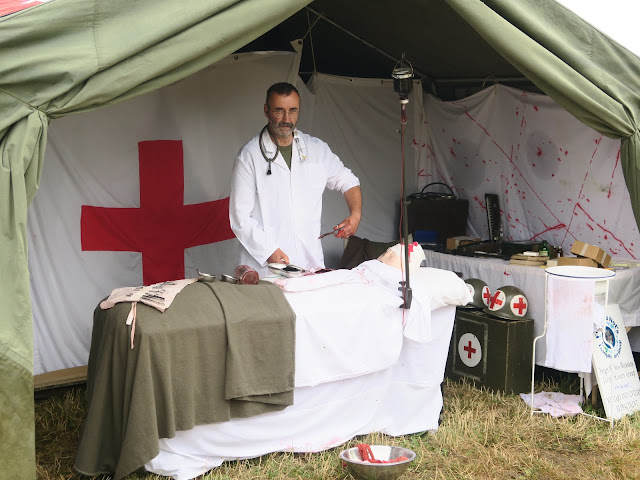
A mock-up of a WWII field hospital. 

Did I mention the mud? Lucky my walking shoes are water proof. 

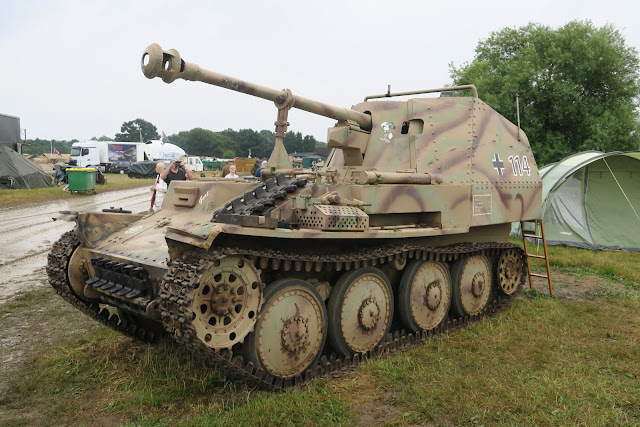
This Marder II (Ausf M) is a rare example. The open-topped fighting compartment is mounted on the chassis of the Czech Panzer 38(t). About 80% original parts the remainder has been sensitively restored by the owner, but he's always on the lookout for original parts. 

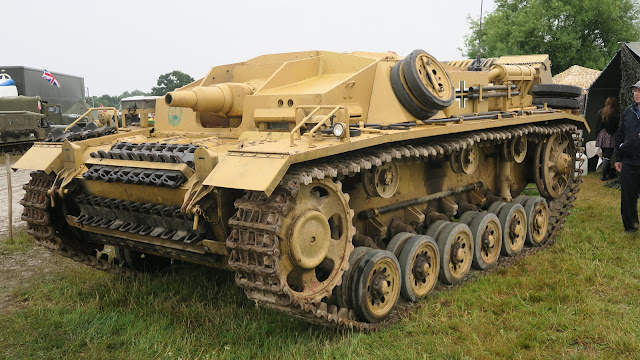
The same owner also has this original StuG III Ausf D. It was one of only three sent to North Africa and was captured by the allies, this one being returned to Britain. 

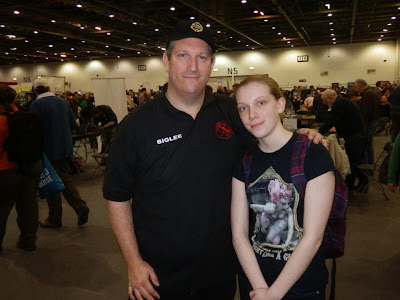
Myself and my Brother in Law Ray. 

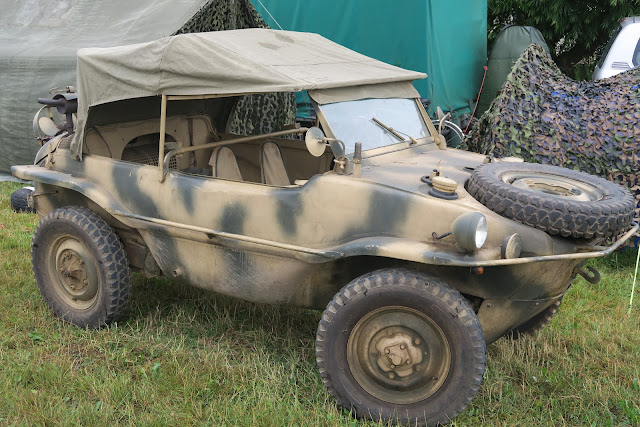
A fine example of a restored Volkswagen Schwimmwagen

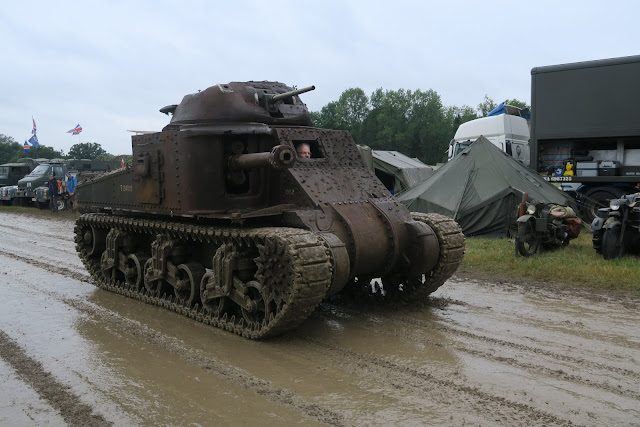
This M3 Grant tank still bears the scars of years as a range target. A testament to the simplicity and durability of this vehicle the new owner put a new engine in it and runs it in its current 'swiss cheese' condition. 

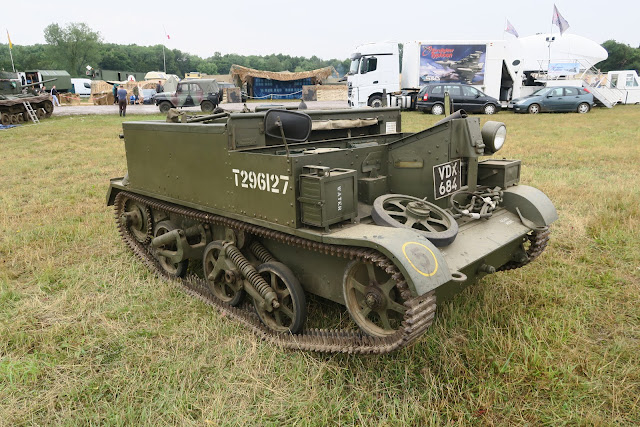
I've always wanted a Bren Carrier... it's on my shopping list should I ever win the lottery! 

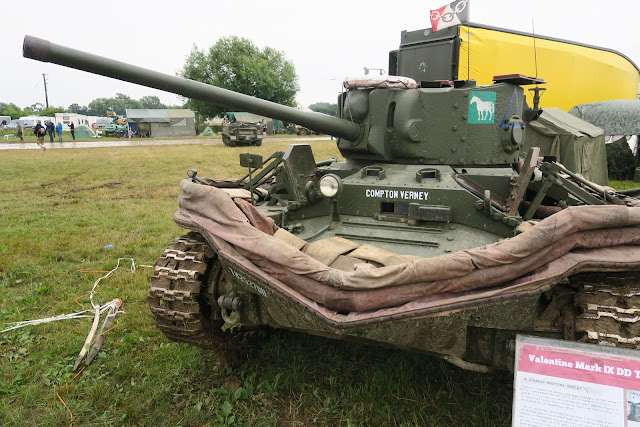
Another excellent restoration, a rare Valentine DD tank. The inflatable screen is very similar to those fitted to Shermans for the D-Day landings. 

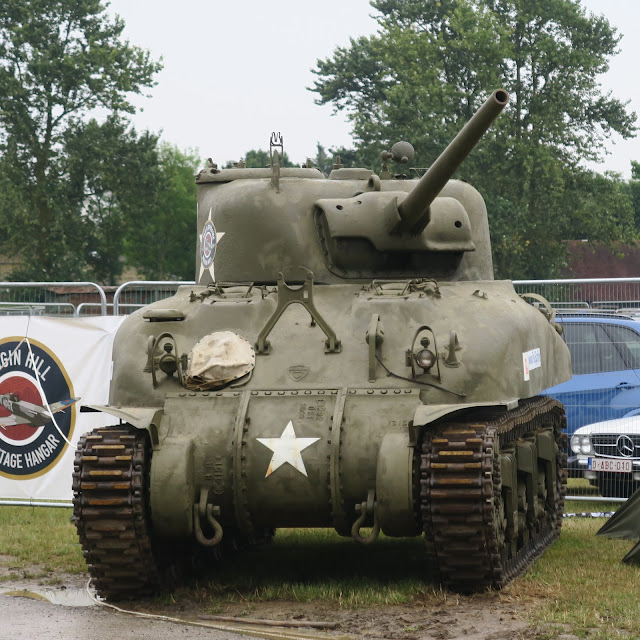
A classic Sherman. There were a few of these roaring around the site. 

Two Hetzers owned by Kevin Wheatcroft. One has been restored and the other (from a Swiss range) is about to begin restoration. 

Want to buy some track for your Tiger I? At £550 a link it could prove expensive!

Or a Panther wheel at £350... you need deep pockets if you're a collector. 

A wonderful and typically wet day but a good one despite some exhibitors going home early the day before. I guess the bad weather had them worried about their armour getting rusty!

Thursday 25 July 2019

The First Padawan flies the nest

Today is a big day in the Hadley Household because my eldest daughter, Sarah (the original Padawan) is leaving home! She and her Partner have bought a flat (with a little help from the Bank of Mum and Dad) and after what feels like an eternity of legal wrangling are finally at the end of the process. Like her younger sibling, Sarah has been dragged through hundreds of museums, forced to play games with her old man and indoctrinated into a world of geekdom from an early age. Now she's a qualified Nurse in a great job she loves and with a bright future ahead of her. So we didn't do a bad job of raising her after all that!


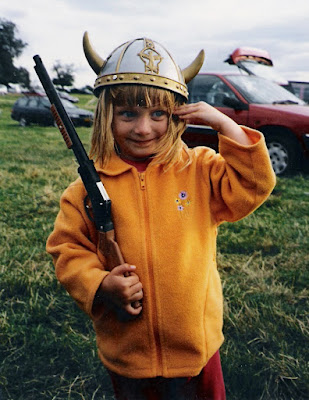
Early days - My little warrior 

Visiting Museums and Archaeological sites
has always been 'in the job description' for
both my kids.   

Dragonmeet 2010. A dedicated tabletop gamer
in the making 

Accompanying me to Salute 2012 

Dragonmeet 2018 and I've been replaced! 


My immediate future looks like it's going to be filled with a lot of DIY. With a spare bedroom, we're going to be moving things around a bit and hopefully, by the end of the process, I'll have a games room as my reward. Actually, I'll be sharing the use of the room, but the point is I'll have space to store all my gaming stuff in one location for a change and I'll have enough space to set up a small table permanently to play longer solo games. I've no idea how long this process will take - there's a lot of decorating work to be done. 

It goes without saying that I'm going to miss my daughter a lot, but change is a good thing and I'm very excited for her and her partner as they begin a new adventure together. They need their own space, and it's about time I had mine as well! Now I can direct all my wargame geekery at my younger daughter... poor lass!

Sunday 21 July 2019

Battle of Ticinus Refight

So as promised I have replayed last weeks Battle of Ticinus using the To the Strongest! ruleset, but this time gave the Romans more freedom to deploy and fight. I used exactly the same forces as last time but for this game, I was able to twist the arm of the Young Padawan to play Hannibal while I took on the role of Publius Scipio. I started off by explaining to her the historical background for this battle and how the last game unfolded, so she was fully aware of the potential weakness of my small army. 

The Setup
So as already indicated I set this battle up exactly the same as last time, but with some differences to the Roman deployment. I was convinced that Scipio's deployment of his Velites in front of his own cavalry was a mistake and postulated that the light infantry would have been better deployed on the flanks. My plan was to engage the Numidian Light Cavalry in a Javalin fight but make full use of my greater numbers if at all possible. In the centre, my Cavalry would go toe-to-toe with the Punic cavalry and I hoped that they could hold the line long enough for my Velites to deal with the enemy cavalry. As with any game, the dice could go any way, so I really wasn't sure if this plan would work. 

The Action
The setup - The Carthaginians at the top have again put their Numidians on both flanks. The Romans have deployed the light Velites out on the flanks this time. 

The Young Padawan enjoying the game...Now she is officially a
moody teenager this is as close to a happy face as she is willing to go. 

The Carthaginians move up quickly

My Romans are more cautious than Publius Scipio was in the last game. The Velites on the flanks spread out and the centre advances just outside of the Carthaginians charge range. The Padawan will have to activate twice if she wants to get into melee. 

My Velites start lobbing Javelins at the Numidian Horse. Indeed, all along my line, a rain of missiles head towards the Carthaginians. 

By the end of a second successive turn of missile fire, I have success! Two Numidian Light Horse units are destroyed making this already a much better performance by the Romans compared to the last game. 

The destruction of the Numidian Horse (or at least half of it) is a blow for Hannibal. The plan to encircle the Romans is dead in the water. 

Things now unravel quickly for Hannibal as first one of the Punic Horse units is defeated and then another Numidian unit. Suddenly the Carthaginian position looks very vulnerable indeed. 
  
With superiority in numbers, the Romans are able to direct a lot of firepower into the centre and another Punic Cavalry unit is destroyed. 

We have met the victory point for this game and the Padawan concedes defeat. Now massively outnumbered there is no way she could win from this position. 

Analysis
Well, that couldn't have gone better for the Romans. Putting the Velites out on the flanks they were able to a) hold their ground against the Numidian Light Cavalry, and b) bring a lot of missile firepower together against individual enemy units. They quickly got the upper hand and within a few turns were in a position to begin encircling the Punic Cavalry, utterly reversing the historical result. 

I know that a game can never completely simulate real battle but I think this refight very clearly showed that Publius Scipio used his light troops in a completely inappropriate way historically (which was my conclusion after the last game). I didn't expect the Punic Cavalry to be defeated the way they were in this game but that was just unlucky dice for the Padawan. However, with the Numidian Cavalry eliminated I would have brought my light troops around the flanks of the Carthaginian forces and I think the result would have been the same. 

Friday 19 July 2019

The Battle of Ticinus 218BC

The Battle of Ticinus was the first direct clash between the Carthaginian forces of Hannibal and the Romans (under the Consul, Publius Cornelius Scipio) in mainland Italy. It was a small battle between mainly cavalry forces and is often overlooked from a wargaming perspective. However, I think this is is an excellent little battle that offers some interesting challenges to both sides. The encounter was also significant because success was a massive morale boost to Hannibal's weary troops that were still recovering from the crossing of the Alps. It was also significant in another way that Hannibal could never have imagined. The consul's 18-year-old son, the future Scipio Africanus, first distinguished himself by saving his father at the height of the battle. 

Setup
When Hannibal crossed the Alps he had effectively outflanked the Romans under Scipio who had been sent to Gaul to stop the Carthaginian advance. Scipio decided to return to northern Italy leaving most of his army behind to make their own way back along the coast. Hannibal didn't know this and expected to face a full consular army, however, he had to locate it first. Scipio had taken command of troops in northern Italy and the second consul, Tiberius Sempronius Longus, was recalled from Sicily with his army and began to march northwards. However, it would take him 40 days to arrive  (an incredible achievement in itself) and Scipio was confident he could deal with this upstart Carthaginian before then.

Both sides needed an early victory to consolidate the loyalty of the local Gaulic Tribes, but arguably Hannibal needed this more having lost up to half of his army crossing the Alps. Scipio and Hannibal began to reconnoitre in force in an attempt to find the other army and these two relatively small armies would come together near the Ticinus River. Scipio was confident as his force was larger, albeit a large portion consisting of Velites. Hannibal spotted an opportunity and deployed his small force with the fast, Numidian Light Cavalry on his flanks to wrap around the Romans.

The actual battle was a disaster for the Romans. Hannibals Cavalry charged the Velites who barely had time to throw any Javelins before being driven from the field. Then, as planned the Punic cavalry held the Roman cavalry in position while the Numidians raced around the flanks and hit the Romans from behind. Scipio was himself surrounded, seriously wounded and would have been killed were it not for the prompt action of his 17-year-old son, leading a Turmae of cavalry into the thick of the fighting. The younger Scipio would remember this encounter for the rest of his life and learned an important lesson in not underestimating the Carthaginian General. He would later defeat Hannibal at Zama and earn himself the title, Scipio Africanus. 

The topography of the battlefield is open to wide interpretation but it is possible to derive some information from Polybius. Scipio had recently crossed the Ticinus river on a pontoon bridge and faced Hannibal across a flat open area. The terrain in this area would probably have been heavily wooded but Polybius describes the land as open and flat. My map is entirely my own invention, but it fits the descriptions I have read. Incidentally, as the battle takes place in late November, I have decided to use my new winter game mat that I bought from Deep Cut Studio

Incidentally, the two main sources on the battle are the History of Rome by Livy (Book XXI) and Histories of Polybius (Book III). Polybius makes it clear in his account that he visited the places and monuments and looked at documents.


Order of Battle
This OOB is derived largely from the description of Polybius.

  Carthaginians
    General - Hannibal Barca
       Punic Cavalry x4 (one Veteran unit)
       Numidian Light Cavalry x4
  Romans
    General - Publius Cornelius Scipio
       Equites Romani x2
       Equites Latinii x2
       Velites x6

The Romans have a slight points advantage but also have two more bases than the Carthaginians. If I was deploying these troops myself I would have put the Velites on the flanks but I have followed the historical disposition of forces and arrayed the Light Troops in front of the Roman Cavalry as Scipio did. 

The Action
Initial deployment. Hannibal puts his Numidians on the flanks but positions them in such a way as not to present too wide a frontage to the Romans...no need to scare the enemy off when they are about to make a mistake!

As the Carthaginians advance, they spread out. The heavier cavalry in the centre expects to receive a hail of Javelins but exceptionally high activation rolls mean the Velites move forwards but don't get a chance to activate again and use their ranged weapons. In the actual battle, Polybius describes the Velites as not getting a chance to throw their Javelins so this is starting out following history. 

The Punic Cavalry now charge the light Velites who automatically fall back. The rules say they need to move out of contact to the nearest box so they take up positions behind the Roman Cavalry....possibly where Scipio should have put them in the first place!

All the velites in the centre fall back but on the flanks, against light-horse, they decide to stand and fight. These dice show a Numidian activation charge and melee attack, saved by the Velites who strike back which is itself saved by the Numidians. Inconclusive, but nailbiting as these units can only take one hit before being destroyed!

About three turns in and the Numidians on the Carthaginian right flank are following the plan and are ready to outflank the Roman line. One of the Roman calvary units in the centre is disrupted, as is a Carthaginian unit. However, for the Romans, this is more of a problem because they can't attempt a Rally activation while in the Zone of Control of an enemy unit. They will have to either risk fighting (one more hit will destroy them) or fall back and attempt to Rally. 

The disordered Roman unit falls back but fails to Rally. There then follows a turn where both sides hurled Javelins at each other without a single hit, let alone needing to save. 

Now the Carthaginians start to encircle the Romans. The Numidians on the far right flank have turned and have opened up a chance for one of the heavier units to get a flank attack on the Roman Equites. This is crucial and could mark the point of no return for the Romans.  

The flank attack - combined with missile attacks from the front - destroy the equities. Scipio is with the unit and needs to check to see if he is wounded or killed. He receives a minor wound only just avoiding a critical injury or death. History repeats itself yet again for the second time in this game. 


The wounded Scipio moves to the last remaining Equite unit which has already been distrupted. 

As the Carthaginians tighten the noose the remaining Velites flee of the table (if they can't flee to a valid box they are removed and the river seals their fate). 

Scipio, bleeding and humiliated, wisely escapes with the tattered remains of his cavalry back across the Ticinus river. 

Analysis
A short but bloody battle that almost completely followed the historical accounts of this fight. Scipio may have had many good qualities (one must assume, as he was a Consul) but clearly, tactics weren't one of them. Putting his light Velites in front, between his and the enemy's cavalry was a properly stupid move and lost him the battle. I may play this game again to see if the dice produce a different result but next time I'll untie the Romans hand and deploy in a more sensible fashion. 
Sunday 14 July 2019

The Battle of Hadley Hall - 22nd May 1778

It's been over two years since I have played any American War of Independence games in the shed-o-war (the last one was the Battle of Freemans Farm). I really like this period and the look of the games and Posties collection of figures are excellent. Four Rejects gathered to play with sides being decided randomly before any of us saw the setup. The two C/O's (Ray and Richard) then went into the shed and deployed their forces before calling in the second in commands (Surjit and myself). 

The Setup
This is a fictional encounter set around the rather grand looking Hadley Hall...my namesake wasn't too pleased to be having a battle on his front lawn. I've no idea which side he sympathised with but as soon as the battle began he and his family wisely hid in the back yard. 

Order of Battle
This is the OOB that Postie drew up for us. To explain the letters next to the units mean the following; E means Elite; V Veteran; and T Trained. The number after that is how many figures are in a unit so you can see there is a lot of difference in sizes. 

British - c/o Maj-Gen Sir William Howe
  1st Brigade Col Meadows
    Combined Grenadiers (E) (20)
    Combined Light Infantry (E) (20)
  2nd Brigade Maj-Gen Grant (1)
    23rd Fusilers (V) (16)
    42nd Highlanders (V) (16)
    55th Line (V) (16)
    64th Line (V) (16)
    Medium Gun
  3rd Brigade Maj-Gen Leslie
    7th Fusiliers (V) (16)
    27th Line (V) (16)
    26th Line (V) (16)
    4th Line (V) (16)
    Light Gun
  4th Brigade Col von Lossberg (Hessians)
    Von Woellworth ex von Rall - Grenadier (E) (24)
    Von Knyphhausen Fusiliers (T) (24)
    Combined Grenadiers (E) (24)
    Light Gun
  5th Maj-Gen Ernst Von Prueschenk (Hessians)
    Jagers - Rifle (E) (16)

American - c/o General George Washington 
  1st Brigade Col Irving
    2nd Pennsylvania Line (T) (16)
    5th Pennsylvania Line (T) (16)
    7th Pennsylvania Line (T) (12)
    10th Pennsylvania Line (T) (12)
    Medium Gun
  2nd Brigade Gen Poor
    1st New Hampshire Line (T)  (20)
    2nd New Hampshire Line (T)  (20)
    4th New York Line (T)  (16)
    Sherburnes Additional (T)  (16)
    Light Gun
  3rd Brigade Gen Patterson
    8th Massachusetts Line (T)  (20)
    12th Massachusetts Line (T)  (16)
    14th Massachusetts Line (T)  (20)
    Webbs Additional (T)  (24)
    Medium Gun
  4th Brigade Gen Smallwood
    1st Maryland Line (T)  (20)
    2nd Maryland Line (T)  (16)
    3rd  Maryland Line (T)  (20)
    Haslets Delaware (V)  (16)
    Light Gun
  5th Brigade Col Daniel Morgan
    Riflemen (Rifle) (E)  (16)


The Action
I didn't, unfortunately, note down the positions of the various brigades. I have given myself a stern talking to and a slap on the wrist and promise not to be so lax in future!

Initial setup. The British are on the right commanded by Ray and Surjit. 

They check the rules for loopholes before play commences...

The Americans look across at a temptingly thin British line, knowing that they will take significant casualties if they attack. The plan, however, is to do just that. This is the strongest part of the American line and we have a chance (albeit a slim one) of breaking the British here. 

Meanwhile, on the other flank, my job is to pose enough of a threat to keep Surjit's Brigades here. I decided early on that I wasn't going to present myself as a target to British firepower until the very last. I keep some of my units behind a convenient hill and wait patiently. The bulk of my troops, however, are near the centre and I start with a feint forwards to keep Surjts attention. 

The advance begins. 

Richards lines move forwards. The first units to fire on each other are the skirmishers in front of Hadley Hall and they continue to exchange shot throughout the battle. 

Richard takes a closer look at the skirmishers. 

We decide that the British skirmishers are quackers so close to the duck pond (sorry, had to be said). 

Stirring stuff. This period looks so good...This reminds me of an advert I saw as a kid on the back cover of a comic book...

Years before I discovered wargaming as a hobby and clearly I was already hooked! 


Smoke fills the air as both sides begin to come within range of musketry fire. The British fire is deadly, but not enough to halt the American advance. 

Badley mauled by gunfire some American units still get in close enough to initiate a charge

Smoke a flame fills the air and the Maryland boys show their metal in melee. 

In the centre, I push forward to put some pressure on the British that have emerged from the woods. The Brits eventually fall back to protect themselves. Meanwhile other units under my command begin to exchange fire with some German units. 

Richards attack on the flank may be paying off. One of the Maryland regiments is in, with more ready behind to consolidate any gains made. 

Musketry ripples along the front and one of my Medium gans manages to unleash cannister on one of the German units. Casualties are high but these units are so large they seem to absorb whatever I throw at them. 

Success! The Maryland regiment has routed one of the British regiments. They follow up with a secondary charge into the second line of British units but this time don't do so well. We were actually hoping the Maryland regiment would run away, clearing the way for the units that followed, but they held fast and only fell back half a move...putting them slap bang in the way of their comrades following behind. 

The British have been trying to get more units into this fight and have now got one coming in from the side. The British ability to fight in Open Order is a real problem here. This means we lose once dice when shooting at them but they still get to fire back at full strength. Plus being British they get a bonus for British Volley fire and you can see the Americans have an uphill struggle on their hands. 

In the centre, I have been keeping within effective musketry range but trying to avoid a British Charge. My fire has been a bit of a hotch-potch with the usual poor dice rolls mixed with the occasional success. On balance, nothing to write home about. However, it has kept Surjit occupied and he seems to have ignored his C/O's plan to shift units towards the left flank. 

On our right flank, my heavily outnumbered revolutionaries have stayed out of fire behind the hill. If we can just win initiative I'll bring them forward but for not two units seem to have attracted the attention of four veteran British Regiments and a Gun Battery. 


On the far left flank, the Skirmishers continue to pick away at each other. No doubt the owner of Hadley Hall is most displeased with the occasional stary musketball as windows are smashed. 
Washington provides some welcome stability to units that would otherwise have crumbled by now. The Revolutionary advance continues. 

At last, we win initiative! My two flank units surge forward over the hill and unleash two very good volleys at the British. Huzzar!

In the centre, more fire from my troops whittles down one of the British Regiments but it just retires in good order out of close range. Cowards!

The American's push forward again. Another regiment manages to close with the enemy but British firepower is starting to take its toll. 

The British line seems to be holding fast and the Americans are bleeding themselves into the ground. One more effort and we'll see where we are at. 

In they go, but the British hold fast and the Americans are forced back again. 

Rather than continue fighting fruitlessly Washington asks Howe if he will allow the Americans to withdraw from the field. Howe being a decent chap agrees and the American loose, but with their army able to fight another day. 

Richard was recognised for Outstanding Leadership and Courage on the Battlefield. We gave it our best shot and almost managed to break through the British line. But almost of not enough and conceding defeat and securing an honourable withdrawal was the only option in the end. 

Analysis
Despite being on the losing side (again!) I thoroughly enjoyed that game. I really do like the period and I think Posties home brew rules (called God save the King) work well. Not overly complicated but with enough flavour to give a real feel for warfare in the rebellious colonies. I just hope I don't have to wait another two years before we play this period again.