Showing posts with label Accessories. Show all posts

Wednesday, 15 July 2026

History in Your Pocket

Today I wanted to look at an intriguing new Kickstarter project called Pocket General: Waterloo, a portable historical wargaming system that replaces traditional miniatures with beautifully illustrated playing cards. While the video explores my first impressions after speaking with creator Brandon Fisichella, the wider discussion raises some interesting questions about accessibility, affordability and the future of introducing new players to historical tabletop gaming.

Historical wargaming has always been a rewarding hobby, but it is also one that demands a considerable investment of time, money and space. Building opposing armies, painting hundreds of miniatures and collecting terrain can be immensely satisfying, but it can also appear daunting to newcomers. Pocket General approaches that challenge from a different direction. Instead of asking players to assemble large collections before enjoying a battle, it provides complete armies represented by high-quality illustrated cards that are ready to play straight out of the box. The result is a system that can easily travel in a pocket, making it ideal for holidays, weekends away or simply gaming where storage space is limited.


Importantly, Pocket General is not presented as a replacement for traditional miniature wargaming. Rather, it offers another way to enjoy the hobby while lowering the barriers for those taking their first steps into historical gaming. By making classic battles such as Waterloo more accessible, it may encourage newcomers to discover the wider hobby before eventually moving on to painted miniatures and larger collections.

Another aspect that makes the project stand out is its visual presentation. The card artwork captures the energy and movement of Napoleonic battlefields with an expressive style that conveys the smoke, confusion and drama of combat. The creators have also committed to commissioning only original artwork from human artists, with no AI-generated imagery used in the production of the game. The Kickstarter campaign is focused primarily on funding these commissions while ensuring the artists are paid fairly for their work.

The initial release focuses on the Battle of Waterloo, providing French and British forces, with plans to expand into Prussian, Dutch and Hanoverian contingents as additional funding becomes available. Future ambitions also include terrain cards that would allow players to build more detailed battlefields while retaining the system's remarkable portability.


Whether Pocket General becomes a regular feature on gaming tables remains to be seen, but it is certainly an imaginative attempt to make historical wargaming easier to access without sacrificing its historical flavour. Anything that encourages more people to explore our hobby deserves consideration, particularly when it is supported by original artwork and a genuine passion for history.

Sunday, 21 June 2026

Do Tokens Ruin Wargames?

Tabletop wargaming has long struggled with visual spectacle and mechanical clarity, and few topics highlight that tension more clearly than the use of tokens, markers, and tabletop gaming aids. In todays video, I take a closer look at whether these tools enhance or detract from the immersive experience that draws so many hobbyists into miniature wargaming in the first place. 


The discussion originates from a viewer who observed that early photo's of playtesting of our 1812 Retreat from Moscow rules introduced a range of counters and markers onto the tabletop. While entirely functional, it was noted that these elements sometimes “spoil the visual effect of the armies.” That observation opens up a much wider question that that I wanted to discuss today: how much visual clutter is too much?

So today I briefly discuss some of the major categories of wargaming tokens used across historical and skirmish systems. These include casualty and wound tracking markers, activation and turn order counters, status and condition effects such as pinned or suppressed, and tactical resource tokens like command points or ammunition tracking. Each serves a practical function, reducing bookkeeping and helping players manage increasingly complex rule systems without constantly referencing notes or rosters. These markers can enhance gameplay, but with a visual trade-off. 

Historical wargaming is built on atmosphere, with painted miniatures, carefully crafted terrain, and cinematic table layouts forming a key part of the hobby experience. When that battlefield becomes crowded with brightly coloured counters and reminders, some of the illusion can be lost. The question is not whether tokens are useful (they clearly are) but whether their implementation can be improved. The video also explores practical solutions for hobbyists who want both clarity and aesthetics. One approach is integrating tokens into the visual language of the table itself. Instead of generic plastic markers, players can use scenic elements such as equipment piles, smoke effects, terrain-integrated counters, or themed objective markers. These subtle changes can preserve immersion while still providing the clarity needed for smooth gameplay.

Friday, 14 November 2025

Wet Pallets - A Tool, not a Rule

Are wet palettes really essential for miniature painting, or are they just another gimmick? That’s the question I tackled in my Podcast last weekend (which I forgot to repost here for regular readers!). For anyone new to the idea, a wet palette is a simple tool—an airtight container with a damp layer underneath and a semi-permeable paper on top. It keeps acrylic paints moist for longer, which is especially useful for painters who want smooth blends, consistent layering, or need their colours to stay usable across multiple sessions. Many pro painters swear by them, and they’ve become a familiar sight in online tutorials and painting guides.

But are they really for everyone? In the video, I explore the clear benefits: less wasted paint, better consistency for thin techniques, and a real advantage in hot or dry conditions. At the same time, I point out some genuine drawbacks. Metallics, contrast paints, and technical paints often separate badly on a wet palette. Maintenance can be a hassle if you only paint occasionally. And for batch painting, drybrushing, or quick “slapchop” methods, the wet palette can feel more like an unnecessary obstacle than a game-changer.


I share my own experience too. I used a wet palette for around six months, but ultimately it didn’t suit my style. It felt like extra maintenance that slowed me down, and I went back to a dry palette happily. That doesn’t mean they’re bad—it just means they’re not for everyone. So, are wet palettes gimmick or essential? Watch the video to see the full breakdown, and join the conversation by leaving your own experiences in the comments. Have you found a wet palette invaluable, or did you, like me, decide it wasn’t worth the effort?

Friday, 26 May 2023

Double Dial Counters from Foxtrot Charlie Miniatures

Today's post is a quickie, to show off a recent purchase from Foxtrot Charlie Models. I have been looking for a way to keep track of Battle Moral in my Wars of the Roses games using Test of Resolve. I recently did a review video of these rules and in it, I explained that each company has a number of resolve points that are lost during the melee or firing phases of the game. Armies are typically divided into three Battles (sometimes more) and each Battle has a morale value based on the number and type of units within it. As Resolve is lost from its constituent companies so Moral Points are removed from the Battle. When the Battle reaches zero morale points it has to test to see if it continues fighting or withdraws. 

My order of battle stretches the size of the Battles way beyond the rules authors' design parameters, meaning my Battles will start the game with quite large Moral Values. I couldn't figure out the most elegant way of keeping track of Morale...until now. 


These MDF Double Dial Counters from Foxtrot Charlie Models are exactly what I needed. There are  8 dials in a pack for just £10.75 so they were also a very economical solution to my requirements. The Dials come unassembled but were really easy to put together and can then be decorated as required. I decided to replicate the groundwork of my bases so they match my Wars of the Roses armies and blend in with the game mat I am using. 


That's one more task off my to-do list and at a very reasonable price too. 👍👍👍

Sunday, 15 January 2023

My choice of brush

A quick chat about the brushes I use. Everything from premium Winsor & Newton Series 7's for the finest performance to cheap synthetic brushes for rougher jobs. I have gone through a lot of sable brushes over the years and spent a lot of money on what is arguably the most important tool on the painting table. 

Wednesday, 29 June 2022

Revisiting my Vortex Mixer: Cheap, but still working!

Over a year ago I bought a cheap vortex mixer for my paints. I reviewed the product at the time but it wasn't clear if it would either be used much or keep going. Fifteen months later it is still going strong and performing the job I bought it for. 


IMHO a bargain, but maybe I have just been lucky with this low-cost alternative. As usual, I would love to hear your experiences with vortex mixers - cheap or expensive - in the comments below.

Sunday, 3 April 2022

Managing Wargame Admin: Paperwork or Tokens

I recently discussed that I prefer to keep in-game admin on the table, rather than use off-table paperwork. Most games have some form of 'admin' whether this is recording hits or keeping track of conditions and effects. There is probably no one correct answer but today I ask, how do you feel about the use of tokens or other on-table devices for tracking these items?

Friday, 28 May 2021

How to make Cheap Wargame Hills

A few weeks ago I made some prototype hills just to work out how I wanted to do them. The intention all along was to make a large batch of foam hills to fulfil my gaming needs for many years to come. With the arrival of a new batch of XPS Foam, I set about the task of cutting, sanding, painting, and then applying the static grass. The whole project took just a couple of days, most of that being drying time. 

Enough hills to give me plenty of terrain choices

The build was so simple, and low cost, that I decided to make a very short tutorial video on my work process. If you have wavered over making your own hills for the games table then this short film will show you just how easy they were to make


For those that are interested, here is a list of the raw materials I used and a cost for the whole project.

XPS Foam (A3 20mm thick) £10.00 *
4x Bags of Javis Spring/Autumn Static Grass £14.00
500ml Bottle PVA Glue £2.00
2x200ml Tubes Burnt Umber Artists Acrylic £4.00
Total Cost £30

*This low unit cost was achieved by buying a much larger pack and stashing half of it away for use in future projects. One can never have enough foam! 

I hope you found the video useful and if you have never made foam hills before give it a try. You'll be amazed at how easy they were to make and how much money you'll save. 

Sunday, 16 May 2021

Making Cheap Smoke Markers

Inspiration comes from strange places sometimes and such is the way with today's video on my YouTube Channel Miniature Adventures. It's a how-to tutorial video on how to make cheap, quick and easy smoke markers for wargaming. Smokescreens are often hard to replicate on the wargames table but this easy method creates reusable markers that look good for just a few pence each. With materials bought from pound stores, this is a very cost-effective way of making good looking terrain for your wargames table. 


Using basic materials, easily available from any high street or online, these smoke tokens can be used to enhance the look of the miniatures wargame. They take only a few minutes to make and can be in use on the table in moments.

Friday, 14 May 2021

Unboxing - Old D Day Maps

Today I have a short video showing off a couple of reproduction D-Day maps published by Godfrey Edition. These have all the D-Day Bigot planning annotations on the maps and will keep me engrossed in the detail for days to come. 


I plan on using these to enhance my setting up of terrain and possibly for a campaign series of linked games sometime in the future. 

Sunday, 7 February 2021

Using Player Handouts in Wargames

Last week I discussed how to create narrative in a wargame and touched upon the use of player handouts. I thought this was an area worth discussing at more length, hence today's video. I've been a Roleplayer and a Wargamer for decades and I firmly believe that some of the storytelling skills of one genre of gaming can be used to enhance the experience of the other. It is easy to dismiss this as showmanship and irrelevant to the wargamer but I believe the use of handouts such as maps, written orders, captured intelligence and photos can turn a good game into a great game. 


Maybe you already use some of these elements in your games and as usual, I would love to hear your experiences in the comments below, or on my youtube channel

Wednesday, 23 September 2020

Covering Fire Markers (and other things)

I seem to have had a burst of productivity in the last week and got quite a lot of little projects completed in a relatively short period. I'm really enjoying getting into the Chain of Command rules and have been working on various projects to expand my options in the Normandy / NW Europe Theatre of WWII. I will be buying some new troops - possibly to work on in the next Analogue Hobbies painting Challenge which starts in December - but for the time being, I decided I needed some extra terrain.  

Last weeks Chain of Command game (Sgt O'Reillys Charge) made me realise that I needed to get some covering fire markers to show when an area of cover is being targeted. I did find some commercial markers (by Likto) but they were already expensive before applying international postage so I decided to make my own instead. In all likelihood, there may only be one or two areas being targeted in this way in the average game but I made enough to allow for covering fire from three whole squads (each covering 9" of terrain). That should be ample, but to be honest, they were so easy to make I could knock up more quite quickly if needed. 

My base material was the humble lolly stick, cut into roughly 2" lengths. I then sanded the ends and corners to make them smooth. Using a Dremmel I drilled a series of shallow bullet holes in each piece and then base coated in Flat Earth (983). The ground was then dry brushed with Reflective Green (890) and Olive Green (967). I then went back and dabbed in some black to emphasise the bullet sholes using a fine nibbed art pen. The last step was a little flat earth around the bullet holes. When all of this was dry the usual Gloss then Matt varnishes were applied. The whole thing took about half an hour to make and paint and another hour for the varnishing. 

The next big job following the game was to work on expanding the existing Index from the rulebook. The rules are brilliant and necessarily detailed but the index for finding them isn't as good. I had a mare of a time trying to find the rules on covering fire for instance. I knew I'd read them but couldn't locate them in the book when I needed to check the wording. Thankfully I never had to do the index because Dick Bryant (of Kingston Irregulars) came to my rescue, offering to share an index he had. It's saved me several hours of work and has made navigating the rulebook a whole lot easier! 

With a considerable amount of time saved, I decided to make some progress on a few terrain items that I wanted to finish. First I bought a cheap MDF ruined building online which needed painting and assembling. It turned out the reason it was so cheap was that the laser cutting wasn't as precise as it could have been and required some on-the-job alterations to fit together. Considering it never came with any build instructions I don't think I did a bad job. I added some extra detail with rubble and weeds building up in the corners of the ruin and the end result is a very useful bit of terrain for CoC games. Slightly less challenging was painting a new set of field walls to match the ones I have already and rebasing some very cheap trees I found on eBay. The latter aren't brilliant quality (they were a bit top-heavy for a start), but at just a couple of quid for eight trees, I couldn't ignore them. I rebased the trees on some metal washers and after adding some turf and tufts they look a little better... and crucially they stand up now! 

The next project is already underway, with the arrival of some vehicles from Skytrex. I haven't bought stuff from this company in years and I'd forgotten how nice their models are. I'm currently prepping a Panzer III M and an Sdkfz 222 Armoured Car for the Germans, and an M20 Utility Vehicle and an M5 Light Tank for the Americans. I'm taking my time with these so expect to see them 'revealed' over the next few weeks. 

Friday, 31 August 2018

Art of War T-Shirts

I don't often endorse products on this blog but I've had my arm twisted (in a good way) and felt it was high time I mentioned Art of War Shirts. I've been buying shirts from Art of War for a while now, regularly picking up one or two every time I visit a show, and it suddenly dawned on me that the majority of my current t-shirt collection are from this company. I bought another two shirts on Monday when I visited Military Odyssey, including the new and rather amazing Rorke’s Drift design.

The shirts come in a wide range of sizes suitable for the smallest to the largest of wargamers. Crucially they are made in 100% pre-shrunk cotton so they retain their shape even after several washes. And for a 'large' fella like me I like the fact these are longer than most T-shirts. Typical shirts are too short and leave the belly peaking out the bottom edge (most definitely not a good look!).


Like I said I don't often endorse a product but over the years I have got through a LOT of T-Shirts and I usually struggle to find designs I like in my size and when I do the quality often doesn't match the price tag. I'm glad to say that thus far I haven't been disappointed by any of the T's I have from Art of War Shirts and given the quality I think they are very reasonably priced indeed. Take a gander at their online shop and if you like what you see Like their facebook page to keep up to date with all the latest news and releases. 

Tuesday, 22 May 2018

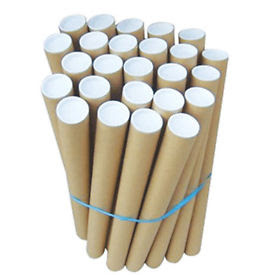
Tubes for my Game Mats

Over the years I have bought several game mats, some get used some don't, but all cost good money and until now have been rolled up and crumpled in a corner due to lack of storage space. So last week I made the long overdue decision to buy some cardboard postal tubes in which to store my mats. It took a while to find something suitable that was a) big enough to fit 4ft wide mats, b) cheap enough not to break the bank and c) in stock! 

Here's a tip, if you can buy 'in bulk' (usually five or more) the unit cost is much much cheaper. The company I bought from sold five tubes for the same price that two singles would have cost. I'm not complaining because it means I was able to get five 5ft tubes for just under a fiver each. Not too bad and an investment if it means my mats are properly protected (at long last). 

Thursday, 26 April 2018

More casualty marker dice frames

Last year I made up a load of casualty markers for my games. I made several sets for single dice, sets of two and three, but I soon realised I needed a few more of the single frames. So while I was at Salute I picked up some more of the little MDF single's (made by Minibits) for a couple of quid. I've now expanded my existing set of single dice frames so I have more than enough for my own gaming needs. I also decided to make some extra frames for Postie, as a small thank you for all the games he runs for the Rejects

Plenty of dice frames to go around.

An example of our use of dice as casualty markers.

We often use rule-sets that employ small 5 mm dice as casualty counters and they are forever being knocked over (sometimes even accidentally!) when we move units around. I've done a set of 50 for the shed-o-war which should be ample for pretty much any size game we play in future. 

Wednesday, 27 September 2017

Casualty Dice Holders

This week I have spent a little time working on some casualty dice holders. Over at Reject HQ we always use small 5mm d6's to keep track of casualties, the problem is we keep knocking the pesky things over. I'm still working on writing up a simple set of Zulu Wars rules and its clear that I'll need to record casualties in the same way, so a handy solution to the dice problem was urgently needed. At first I was considering making my own but quite by chance I found the ideal solution on eBay. Minibits make a range of laser cut mdf dice frames for different size dice so I bought a load suitable for 5mm dice. Yesterday I spent an hour sticking them to round bases and painting and flocking them. 


I would have liked to share a picture of these dice holders containing some actual dice but you'll just have to use your imagination. I have bought a load of 5mm six sided dice from a company in Hong Kong (a ridiculously cheep purchase on eBay) but I think the carrier pigeon delivering them is walking the route! 

Thursday, 14 September 2017

FoW Unit Cards... for 3rd Edition

This is something I worked on prior to the Rejects Demo Game at Broadside back in June. Earlier in the year I bought the 4th Edition rules and rather liked the idea of Unit Cards as a simple way for players to understand their troops. However I decided that I didn't want (for the moment at least) to convert to 4th Edition. With the demo game looming I decided to make my own Unit Cards specifically for the simplified version of 3rd edition that I was planning on using at the show. The result was a series of cards for all the LRDG and Italian units that featured in our game, and as a tool for newbie players I felt that worked really well. I have since used the cards again in small scale games at home and decided to expand the collection by making more for other units. 

Here are some examples of the cards I made in June. Note to the rules Lawyers; These are for my simplified version of the rules so any differences to the stats in the rulebooks reflects changes I made specifically for the demo game. 

All the cards were broadly the same, made on a spreadsheet and then printed on card. 

The cards are a convenient place to note down special rules as well as the vehicle or unit stats.

Tank and Armourd vehicle cards are only slightly different

Different movement rates for mounted and on foot are easily accommodated

I was also able to use the cards for units that I created myself that are not in the rulebooks

I'll definitely continue to use these for other games. I'm currently making a set for the units I painted for Operation Compass over the winter. Another advantage of these cards is you can just grab the units and the cards, set up terrain and your ready to play a game in next to no time. If anyone wants a copy of the spreadsheet let me know. Its in a Google Sheet format so I can share with anyone that uses Google Drive. 

Tuesday, 27 June 2017

Upgraded Storage for my Miniatures

I acquired a new piece of furniture for my future games room (the one I dream about getting at some unspecified time far in the future!). This all metal file cabinet has 15 drawers and is ideal for storing my growing 6mm collections. I already magnetise the bases as my carry boxes are lined with magnetic sheets so moving most of them to the new cabinet was easy and they adhere quite nicely to the metal trays. I had a few more recent models that needed magnetic strip added to the bases and its taken a few days to organise and label the draws appropriately. 

Each drawer slides fully out if needed making it easy to move models to the games table. The only downside, I've almost filled  the cabinet already! I only have a few empty drawers remaining so I guess I'll just have to keep my eyes peeled for a matching companion. This type of unit also comes in a 30 drawer version (with shallower trays) so I may look out for one of those. There a few second hand furniture dealers nearby I can visit and of course the internet is bound to throw up examples for sale eventually. I have seen a couple for sale but they were too far away to collect.

One word of advice if you consider the same option, use decent quality magnetic strip. Some of the stuff I had was so magnetically weak it was next to useless. Luckily I had some better quality material and was able to use that and it makes all the difference.

Moving models from their transport boxes to the new storage unit.

15 Drawers and after transfer just  five spares, two of which have
been immediately earmarked from my Zulu War project
Neatly labelled of course...


It didn't take long for me to fill most of the drawers, and this is just my 6mm collection.


Friday, 9 June 2017

Desert Theamed Dice Trays

Earlier in the week Posties Rejects had a run through of our Demo game for this coming weekends Broadside Wargames Show and one of the things we identified as being needed were some dice trays. We don't normally use these but the tables at the show are quite small which means there is no 'spare' table on which to roll dice (and the game surface will be full of terrain). I said I would 'knock up' a couple of dice trays and here are my modest efforts...


The wooden trays are from IKEA and once upon a time were used for storage. I gave them a rub down with some sandpaper and repainted them in sand coloured paint before adding a desert inspired camo pattern. I then glued in some rubber mat in the rolling section of the tray. The smaller section can be used to store dice and measuring tapes. I think they will do the job quite nicely. I may make some more in other colour schemes depending on how well they perform on Sunday.

Friday, 3 February 2017

Wearing shades while I paint

After Christmas I just 'happened' to be passing Hobbycraft during the January sales. My local branch was doing a deal on craft lamps and I thought I would treat myself to a new one to compliment the lamp I already had. When I got it home I was amazed at the light it kicked out, nearly double the watts of my old lamp. In fact I was so please with the new lamp that I decided a total upgrade was needed and bought another! 


These lamps are completely adjustable and the heads swivel so can be angled to direct the light. So in the space of a few weeks I have gone from a perfectly reasonable single lamp of 40w to two lamps with a combined light output of 150w! I'm going to have to wear sunglasses when I paint!

Deal with it!