Friday 31 July 2015

BigLee heads to Skeggy!

The Jolly Fisherman poster created by artist John Hassall 
in 1908 for the Great Northern Railways (GNR).
Its holiday time and tomorrow the family and I are heading north to Skegness. Last time we visited this area was over a decade ago so I'm looking forward to exploring this part of Lincolnshire and getting some bracing North Sea air in my lungs! 

I'm also looking forward to a relatively relaxing week away from the normal stresses of work and home. Better still I'm taking a pile of books and magazines away with me and I'm determined to spend as much time as possible just reading. I'll probably dip in and out of several books at the same time, but the aim is not to read something cover to cover like some sort of reading challenge. I just want to read for fun and to relax and if that means jumping from book to magazine to book, then so be it. And what am I taking with me... mostly Featherstone's of course! I've read most of them before but like I said this is reading for relaxation not as a chore.

I'll also be spending some time scouring local book and museum shops for new reading material. Other people buy sticks of Rock and Kiss-me-Quick hats at the British seaside, but I'm happiest when treating myself to new books or exploring local hobby stores. So there will be a temporary hiatus in posts on BigLee's Miniature Adventures, but only for a week. Rest assured I will have visited at least one museum while away and I always return home with hundreds of pictures to share. 

Toodle Pip!

Sunday 26 July 2015

Making time to read

Since my redundancy last year my reading output has dropped drastically. I rarely get a proper lunch break these days and this was usually the time when I'd get most of my reading done. Add to this the fact that with my new job I'm so knackered when I get home from work about the most ambitious thing I can do of an evening is not fall asleep in front of the TV! My pile of unread books has grown ever larger and so I decided to make a real effort to squeeze time (any time) for reading back into my daily schedule...and I started by reading a book I have already read before! In my defence it was a Donald Featherstone classic and I one that I value as probably the best book I have for wargaming the battles of North Africa in 6mm.

Tank battles in miniature: A wargamers' guide to the Western Desert Campaign in 1940-1942 was originally published in 1973 but had somehow gone completely under my radar until I bought the 2010 paperback reprint edited by John Curry. I enjoyed the book so much that I stumped up the cash for an original first edition hardback copy and this is the book that I have been reading recently.

I wrote a brief review of the book when I first read it and decided to republish it again here below:


The book contains a clear and concise summary of the actual campaign at each stage of the war. This is probably the clearest description I have read so far in fact. Each phase of the campaign is clearly delineated and at the end of each section the vehicles and tanks used by both sides are listed along with approximate numbers. This will be of great importance when building an army list or picking a particular period or battle to recreate. Having detailed the action of the campaign the author then goes on to discuss the tactics and their evolution throughout the war.

Following on from this is a section describing the terrain encountered and it was here that I realised what a really good writer Donald Featherstone is. Don's descriptions are evocative, vivid and clearly convey the desolate and barren land across which men fought and died. This was as harsh and as unforgiving a landscape as anyone could wish to fight for. But it was also 'ideal' country for manoeuvre warfare and as such was unlike any other theatre in the Second World War.

Further chapters describe the technical specifications for the vehicles, tanks, guns and aircraft used throughout the campaign. There are also sections on communications, visibility and navigation, how top fire tank and anti-tank guns, 'brewing-up', air operations, the Long Range Desert Group, minefields and supply. Much of this can be found in other books but this volume collects together a wide range of facts that not only give a really good picture of the Western Desert war but will also be invaluable to anyone planning on wargaming the period. 

This is an truly excellent book that is just as useful now as it was when first published in 1973. 

Paperback: 156 pages
Publisher:   Patrick Stephens Limited, 1973
Language:  English

Wednesday 22 July 2015

Army Tents

Another batch of quick and easy 'buildings' from Leven Miniatures, this time simple army ridge tents.

I'd never make it in the Army.... I really hate camping.

There's not much I can say about these really, they were so simple to paint. Base coat of Khaki, with a Quickshade wash over the top. Then I applied a quick highlight using more khaki lightened with Ivory and a little more wash around the bottom (ground) edge of the canvas. Lastly I used German Grey for the dark interior as seen through the tent flap.

OK not exactly a masterpiece of creative painting but it kept me busy for 20 minutes and I'm sure I'll get to use them at some point.

Monday 20 July 2015

Pizza, Pie or Escarpment

Over the last week I have been working on my biggest terrain project yet. Its for a specific scenario I have in mind for a future Desert Raiders game so I won't give the game away by stating where it is, all I'll say is that it represents an escarpment somewhere in Libya. The inspiration for this project came from the Rejects glorious leader himself. Postie made a couple of hills for our Broadside demo game and we were all very impressed with the quality of the finished terrain. In fact I was so impressed that when Stuart offered to make something for me I jumped at the chance.

Rather than making a generic hill I asked if he could make me something specific and I quickly drew a rough design of what I was looking for. I wanted a corner hill representing the edge of an escarpment leading down to the plain on which the main battlefield will be situated. A couple of weeks later a sculpted and primed hill was handed over and all I have had to do was finish painting it and add detailing like grass and rocks.

My Daughter said it looked like a slice of Pie or piece of Pizza, so....

Postie made the hill from high density insulation foam and then coated the whole thing with tile grout. This sets hard and adheres to the foam really well. Then the whole model was painted with brown emulsion and allowed to dry thoroughly. I then used a small Tester Pot of sandstone emulsion (just £1 from ASDA) to drybrush the cliff edges and block paint the plateau areas on the top. When dry I coated the flat areas with PVA and added some sand coloured static grass that I bought from TSS (The same flock they use to cover their 'desert' hills). Unfortunately the static grass got up my nose and made me sneeze... right into the bag! Everything in a three foot radius was covered in sand coloured static grass and a week later I'm still cleaning it up (I am SO popular with the wife right now!!).

The last stage involved adding several packs of Silfor Grass Tufts and small stones to add detailing. The finished terrain fits in well with my existing TSS Hills and will make an excellent addition to the game I am planning. 

Saturday 18 July 2015

Ink or Quickshade for 6mm?

A few years ago I experimented with various products for shading models with Ink and ink alternatives. At the time I was predominantly painting 15mm figures and in the end I settled on using Winsor and Newton Ink as the best way to produce deep shadows. Used with dry-brush highlighting it worked well on 15mm figures. When I started painting 6mm vehicles I used the same technique but then I discovered small bottles of Army Painter Quickshade and gave them a try. They worked well on infantry figures and I ended up using them almost exclusively. But last weekend I realised I had run out of Quickshade, prompting a temporary reversion to Winsor and Newton Ink. I rather liked the high contrast shadows it created and decided it would be worthwhile revisiting the whole "what to shade my models with" debate.

So here's my rather unscientific test, pitting Quickshade Soft Tone and Quickshade Strong Tone against Winsor and Newton Peat Brown Ink. I've used some spare Italian tanks I had and base coated the models with Tan Yellow (912) before applying the inks. 

The three contenders - From left to right, Quickshade Soft Tone; Quickshade Strong Tone; and Winsor and Newton Peat Brown Ink.

The Soft Tone Quickshade settled nicely into the recesses of the model and is suitable subtle without obscuring the base colour too much. 

The Dark Tone Quickshade understandably produces darker shadows but also significantly darkens the base colour making it looks slightly dirty.

The Winsor and Newton in produced the strongest shadows but with less darkening of the base coat than the Strong Tone Quickshade did. 

My personal preference is the Winsor and Newton because I prefer the bold dark shadows it produces. Like the Quickshade Soft Tone it doesn't obscure the base colour and flows easily into all the recesses. I think that combined with strong highlighting it is possible to make even 6mm models stand out on the games table. Of course the best results rely heavily on the model itself having plenty of detail for the ink to settle into and I think this would probably work best on vehicles rather than infantry.

The finished effect might not be to everyone's taste (all painting is a matter of personal preference) but I quite like it. Having made my choice I am interested to hear what other 6mm wargamers prefer. Do you even use ink on figures at this scale? Or maybe you think that different types of ink or shade suite different types of figures? Whatever the answer I'd like to hear what you do, if only to gauge how far off the mark I am! 

Thursday 16 July 2015

Italian L3/35 Platoon

In 1929 the Italian Army bought several Carden Loyd Mark VI tankettes and these formed the basis for the development of a new breed of Italian army vehicles designated as Carro Veloce (Fast Tanks). The CV29 was the first but was quickly upgraded and improved leading in 1935 to the CV35. By 1938 these vehicles had been re-designated as Leggero (light) tanks. The CV35 (now known as the L3/35) had bolted rather than riveted armour and carried twin 8mm Machine Guns and a two man crew. The main weakness of the CV35 was its armour, a mere 6 to 12 mm (0.24-0.47 in) and really only protection against light weapons. 

My L3/35 Tank Platoon

Despite a less than illustrious military career L3's saw service almost everywhere the Italians fought in World War II, including North Africa. In 1940 when Italy invaded Egypt from Libya they had 324 tankettes in its seven tank battalions but they were no match for British Matilda's and many were lost during General O'Conners offencive culminating at Sidi Barrani. Despite being hopelessly outdated the L3/35 continued to serve in the Italian Army for the rest of the war. While their equipment left a lot to be desired the bravery of the Italians who rode to war in these tiny vehicles cannot be doubted.

The L3/35 was a tiny vehicle with barely enough space inside to accommodate the two man crew

Close-up of the L3/35's. 

Monday 13 July 2015

Vietnam 1967 Battle report

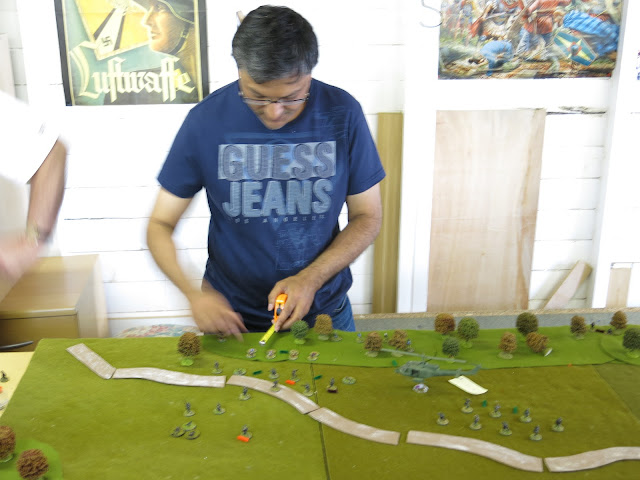
Mark ran another Vietnam game for the Rejects on Saturday with myself and John as the US Players against Surjit playing the VC. As usual all movement started hidden and plotted on a tactical map. Only when revealed by enemy activity (or when a unit reveals itself by shooting or moving into the open) are the models placed on the table. This makes for a very cerebral game trying to anticipate the enemy and guess his positions and intentions. 

The US Players objective in this game is to secure the area as a forward fire base and of course the VC want to stop this from happening. A lot of heavy machinery was on the table for this game but the question is can superior equipment and fire-power win against an enemy that remains largely invisible and can strike from anywhere at any time?
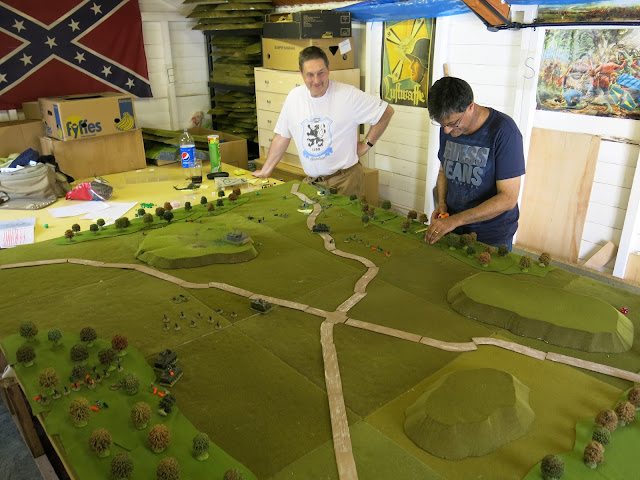

Tactical Map

The Tactical Map


VC Order of Battle

Commander Surjit
1 Command Sections Including 3 Radios
4 Mainforce Rifle Squads of 12 Men Each
28 Local Militia divided into seven 4 man sections
2 81mm Mortars and Crew
2 .30 Cal Light Machine Guns and crews
1 Mainforce Ambush Team consisting of 5 Men
1 Militia Ambush Team consisting of 5 Men

US Order of Battle
Force Commander and 2 Bodyguards
US Army Platoon:
   4 Rifle Squads (10 Men Each)
   2 Medium Mortar Crews
   2 M60 Machine Gun Crews
   1 ACAV M113 APC
   1 M113 APC
   2 M548 APC Cargo Vehicles carrying ammunition and Stores
Support Units:
   1 OH-6A Observation Helicopter
   1 AH-1G Huey Cobra Gunship
   1 UH-1H Huey Transport
   1 UH-1B Huey Gunship
   2 Rounds of Artillery Support
   1 M551 Sheridan Armoured Vehicle
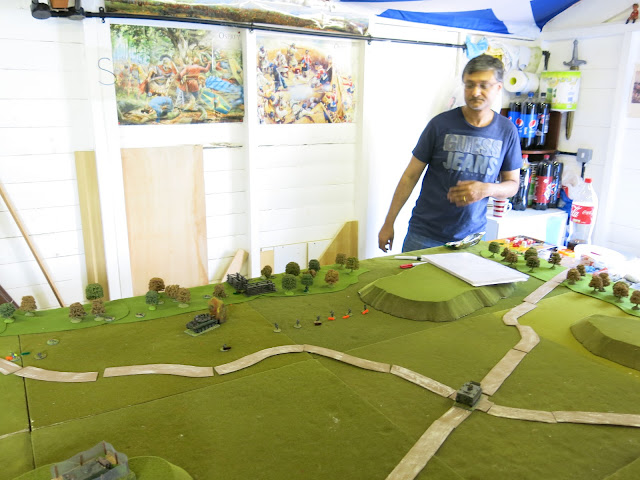

The Action
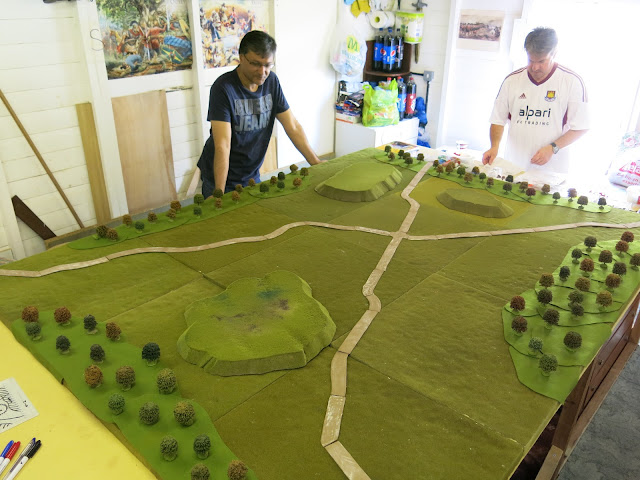
The empty table...all movement is hidden at the start of the game.

In thunder Huey Transports and APV's to quickly deploy ground troops to the LZ

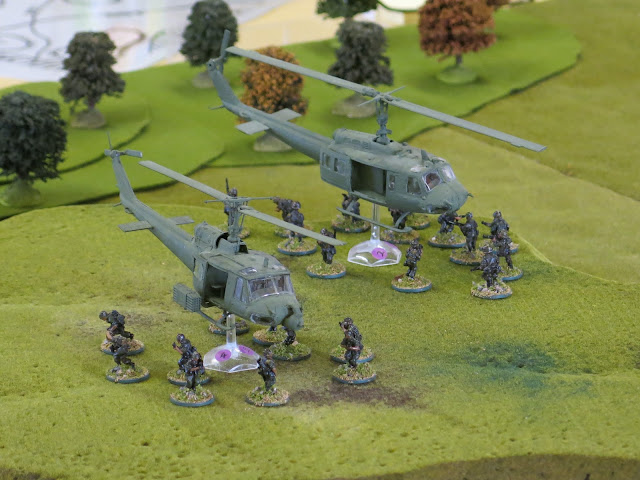
Rifle Squads pour from the two Hueys

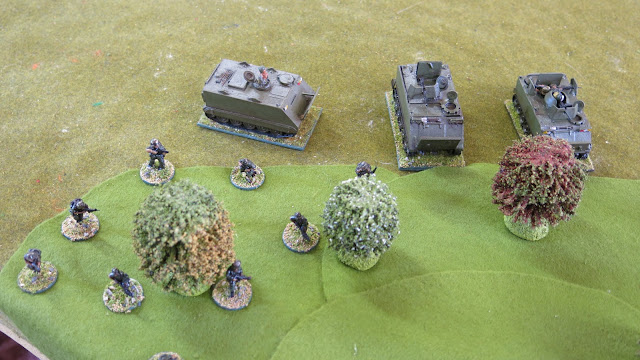
The APV's quickly deploy troops to begin sweeping the nearby forests for VC

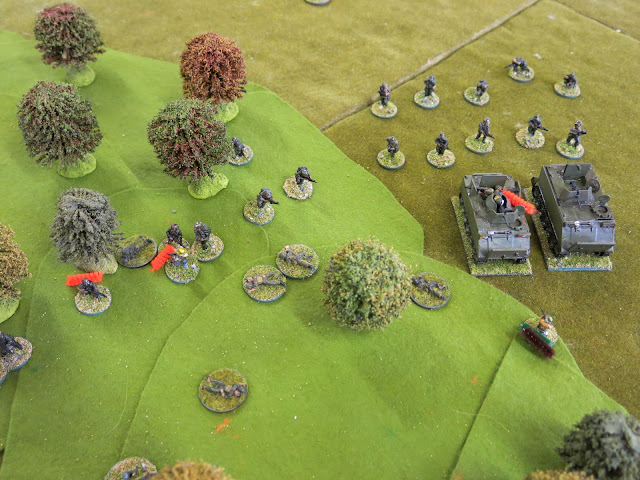
Surjit launches an ambush against Johns troops clearing the forest across the table from me

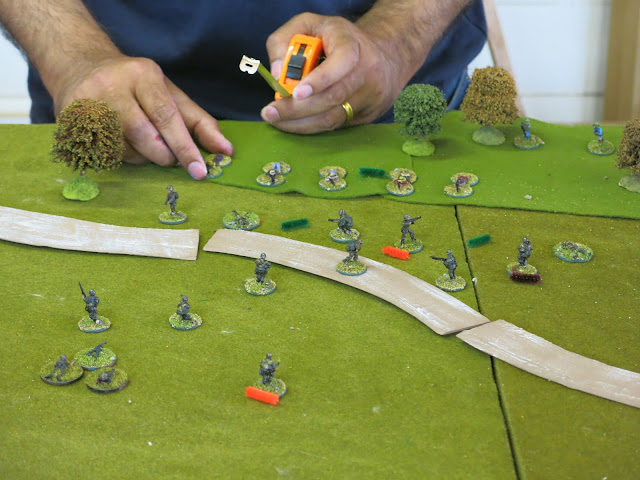
The Green markers represent troops that have gone prone. Orange troops with one wound and Brown troops with two wounds. 

My men encounter VC in the forest and shots ring out

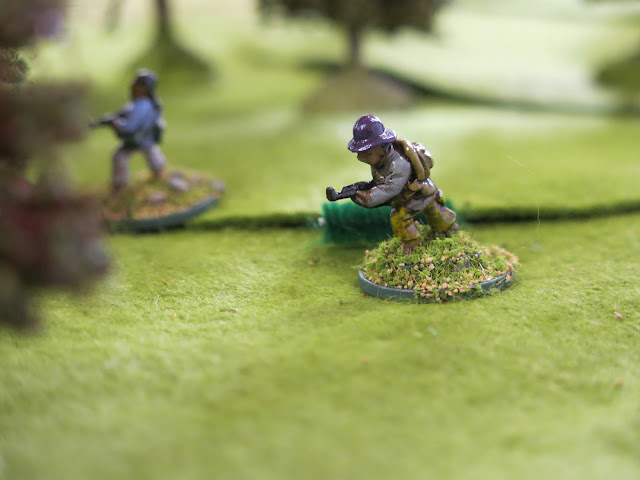
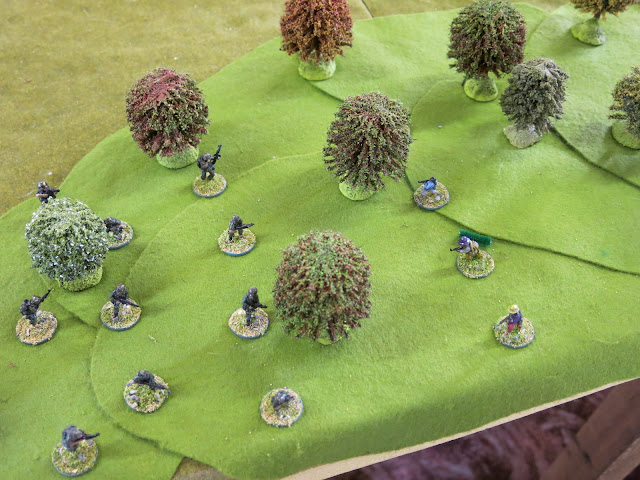
VC Charging into the fray

Something for the VC to think about...an M551 Sheridan Armoured Vehicle

The combat on Johns side of the table gets messy, especially when the VC Charge into hand to hand combat. 

Circling helicopters don't put the VC off, even when the Huey starts using its Grenade Launcher on them.

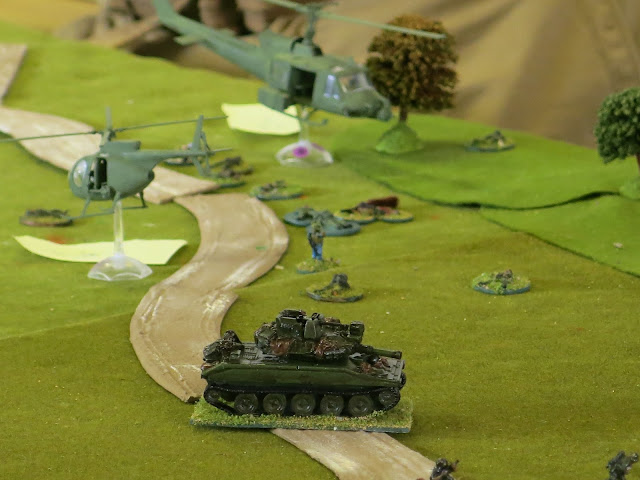
US Hardware on display, but somehow the VC just don't seem to care all that much!

On the left my troops continue to push through the forest as another unit runs to join them. On the right John has suffered heavy casualties and Surjits VC continue to pop out of the jungle and attack.

My infantry converge on the VC blocking my path but then suddenly things turn nasty. The VC charge into melee and quite sensibly target already wounded and prone US troops. This means the US player will rolls with two penalties for being wounded and being prone verses an uninjured and standing VC. I throw in addition infantry to double up against the VC but then find out the penalty applies to BOTH men, even the uninjured and standing guy that has just joined the fight. Result I loose four riflemen in a matter of seconds. 

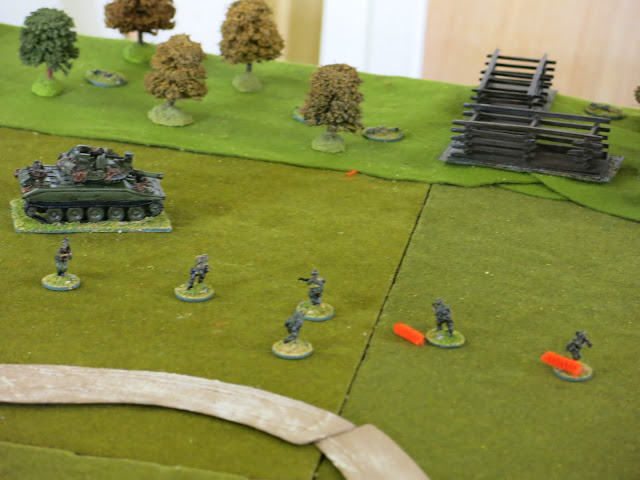
Off table artillery has hit a previously unknown VC Bunker, utterly destroying it in the process. 

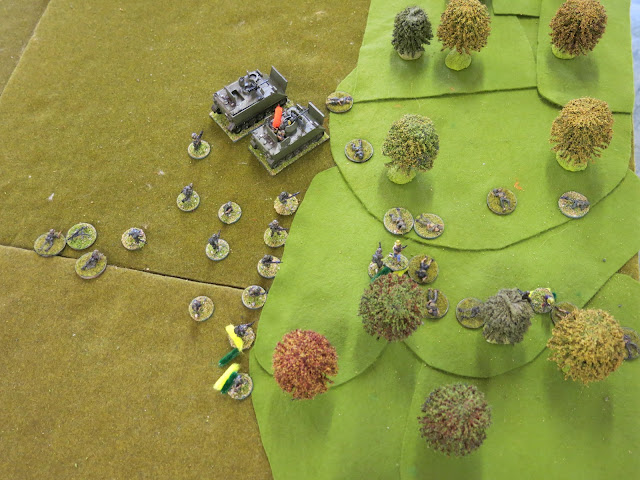
Reeling from the loss of four men my unit fails a moral check that forces them to go prone and hold position. The VC take advantage and follow up by charging their prone enemy....sigh, another two infantry lost. This unit of ten men has now lost two men to shooting and SIX to melee in just two turns. 

Surjit is feeling quite happy now. He still has a load more units to reveal and the US players effective infantry are dwindling fast. Time has run out (Both John and I had to leave at 5pm so we had to stop the game at this point) and its hard to call victory for either side. The US certainly control the area but the VC still have a lot of units hidden and capable of resisting the remaining US troops. 

The VC still hidden at the end of the game....I don't think the US units could beat this lot, even if we had the time to play on. 
Analysis
A good game and one where the hidden movement rules really add an element of uncertainty for both sides. Deciding how to deploy and what strategies to employ when you have no idea where the enemy are is a real tactical conundrum and something often utterly missing from regular wargames. I'm not sure the US forces could have won this game, even with all their firepower and in the end the early finish just saved us from a long drawn out defeat!

Thursday 9 July 2015

Desert Roads Revisited...yet again!

It seems I'm never happy with the terrain I have made because this is the third time I have revisited my desert roads. My first attempt was a temporary affair and the roads I made were rather flimsy and didn't stand up to much use. Then a few months later I had another go and made different set of roads that were much more robust and I think looked a lot better.

I used this set in my Alam Halfa game last year and made more than enough for that particular game. But looking back at my pictures I decided that the roads were 'missing something' and looked far too neat and clean. Not at all like the dark metalled roads with sand encroaching along the edges that I had originally envisaged (see the picture on the right). So over the weekend I finally 'bit the bullet', dug out my desert roads and spent a few hours undertaking some necessary improvement work.


Lots and lots of road... over 30 feet of it in fact. 

To achieve the dark road I simply dry brushed the middle of the road with black paint (why on earth didn't I think of that when I made these?!?). I tried using charcoals and even black crayon on some spare material but neither looked any good so in the end I simply went with my first instinct and dry brushed with my regular acrylic paints. A warning to anyone wanting to copy this idea: dry brushing paint directly to a sandpaper road surface utterly destroys brushes! Having said that I think the finished effect looks a lot closer to my original idea and I'm really happy with the roads now. So happy in fact that I took the opportunity to make about ten feet of new roadway - including several Junctions - so now I have more than enough for my future wargaming needs... even for games on Posties massive table in the Shed-o-War. 

Monday 6 July 2015

Luftwaffe Workshop Building

Another day and another 6mm building from the excellent range by Leven Miniatures. This time its a Luftwaffe Workshop for my growing airfield collection.


The casting on these buildings are near perfect and allow for some nicely detailed finishing. I usually paint a base coat without primer to avoid flooding the details with paint. I then use an ink wash to add shading to bricks, around door frames and other tiny details before finishing with a subtle dry brush to revive the highlights. 

Saturday 4 July 2015

6mm Flags

I've been working on a load of small projects lately and the latest has been the most challenging. I need some 1:285th scale flags for my Desert Raiders project. OK Maybe I don't need them, but I wanted them and that's pretty much the same thing to most wargamers. "This will be easy" I said to myself...oh how wrong I was! 

Finished flags flying from white flagpoles...with an Italian Truck and a Pound Coin to show the scale.

The First step was to find a good representation of the Italian Army flag for the period. There are plenty of examples on the Internet so that didn't take long - just be sure to get the right flag. The Italian national flag changed after 1946 when Italy became a Republic. There are also two versions used prior to this date during WWII, the Civil or National flag and the War Flag for use by the Army (with a crown above the central shield). I wanted the National flag because mine are for the Italian civil administration buildings. 

I wanted my flags to droop and fold realistically (or as close as I could get) so I found some thin paper to print them on. However after several tests I found that the paper tore or fell apart when glued so in the end I went with regular 80gsm printer paper. I made several different sized flags aiming to keep them 1:285th scale but still big enough to be able to see. Fortunately I found several wartime photo's on-line showing captured flags that ranged from 6ft to 20ft in width which gave me some latitude with which to work. 

Two sizes of flag were eventually selected.

The base and flagpole is simple a little section of wooden coffee stirrer stick and a dress pin (nicked from the wife's sewing box!). I doused these liberally in super-glue to bond the pole and base together but also to coat the shiny steel pin prior to painting with my normal Vallejo acrylics. 

These dress pins will not bend but are also hard to paint. 

Then I tested the best way to make the flags malleable and easy to crumple and fold. Soaking the whole flag made the paper soft but also made the colours run so in the end the best method was the simplest; just glue the two halves of the flag together with a minimal amount of PVA and then fold using my finger nails. Once dried I then trimmed any white edges off with tiny make-up scissors (don't tell the wife!). Once everything was dry I followed my normal procedure of spraying with GW Purity Seal varnish and then Testor's Dullcoat to finish. 

These were very fiddly to make but great fun and I'm really happy with how they look once finished. Utterly unnecessary for the game of course.

Thursday 2 July 2015

Sidi Rezegh Mosque

This past week I have been working on a few small items for my 6mm North Africa project and today I completed a new building from Leven Miniatures. The Sidi Rezegh Mosque was actually a tomb of an Arab saint, and was the scene of a major battle during Operation Crusader in 1941.

Its a simple building and suitable for lots of different scenarios. Most of the pictures I have found show the building in a rather rough condition so I have 'dirtied it up' a bit to give it a slightly weathered look.