Who chooses the games you play? Are you a consumer of other people's choices or do you regularly choose what you play? Or maybe you are a provider of games, choosing to umpire or host games rather than play?
Sunday, 29 January 2023
Friday, 27 January 2023
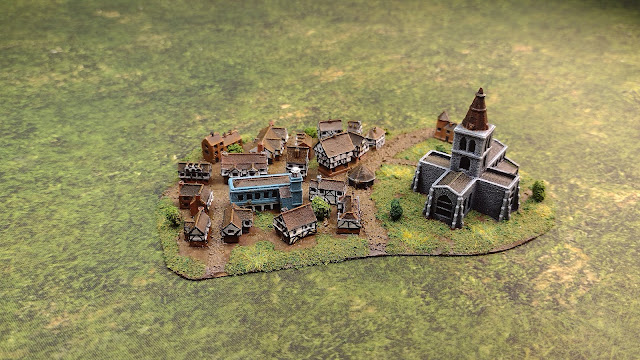
Medieval Town & Church in 2mm
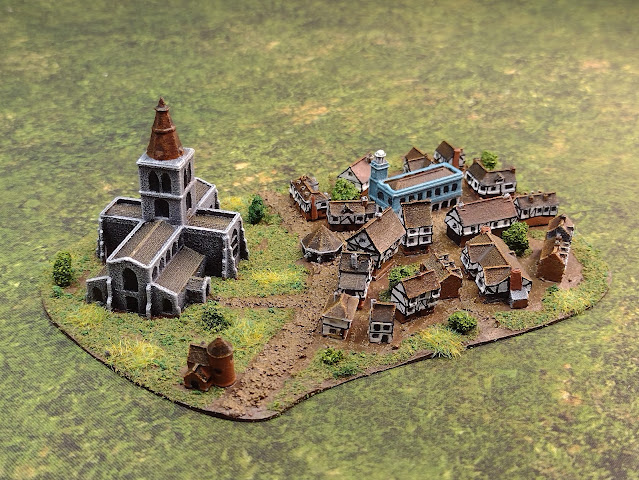
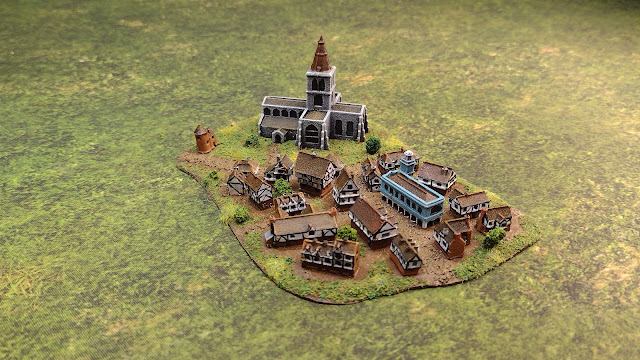
I had intended to get the last units of my Tudor army finished this week but time got away with me and so I decided to do something ‘easier’ by skipping ahead to some medieval buildings. As it was, they were decidedly more tricky and intricate than anticipated…painting medieval wood-framed buildings in 2mm is very fiddly! All the buildings are from Brigade Models and are wonderfully detailed for such small buildings. The surfaces also have a bit of texture to them which makes painting flat surfaces like plain walls or roofs easier.
This small town has a large church, which may be associated with a monastic order or a saint. There is a network of streets, and buildings of various sizes, all tightly clustered around muddy roads. As would be typical for a market town I made the main street a little wider than the side roads. For the groundwork, I used my usual mix of turf with some lighter-colored grass patched for contrast. The penultimate stage was to soak a few small clumps in PVA and clued them into place to represent a few trees. The last step was a dabble of textured paint (European Mud, by Vallejo) to blend the roads and bare patches in a bit better. Overall I’m pretty happy with this for my first foray into 2mm town planning!
The next piece I did was this small country church. There’s not much to say about this other than the detail is very fine for such a small model and there was little to zero cleaning required prior to undercoating.
I wasn't sure how many points I would get for these in the Analogue Hobbies Painting Challenge but in the end, I was awarded a very generous 30 points. Pretty chuffed with that and it makes the effort all the more worthwhile. No, time to get back to painting Lancastrian Billmen and Archers!
Tuesday, 24 January 2023
The Battle of Abensberg: 23rd April 1809
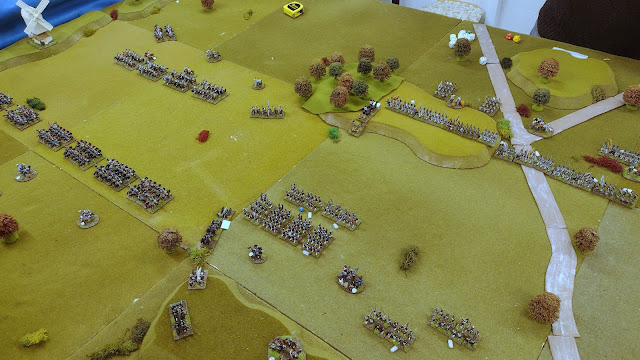
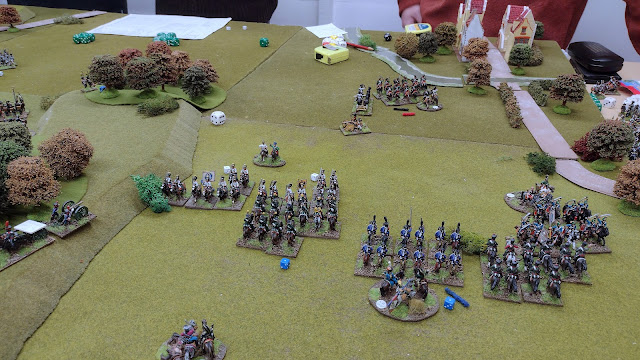
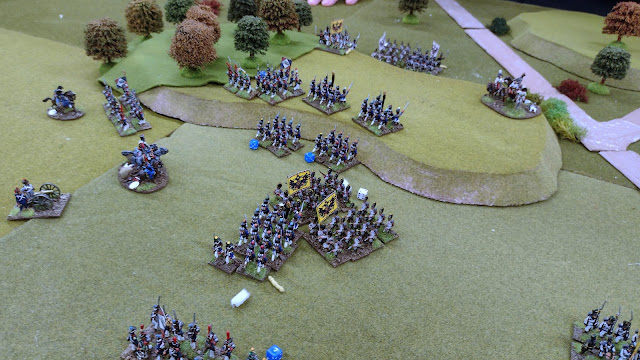
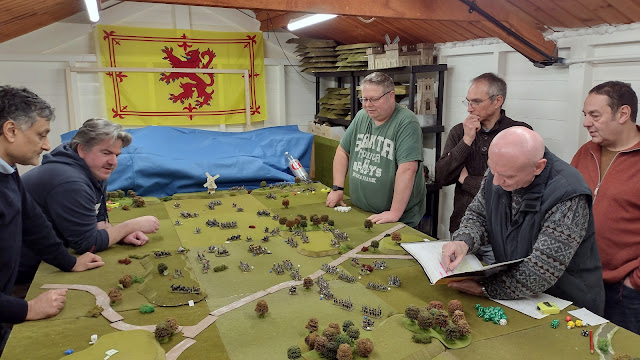
The Rejects gathered at the weekend for our first in-person game of the year. Six players joined Stuart in the Shed-o-War for a Napoleonic game using Postie's own hybrid rules. Despite being pretty cold outside the shed warmed up nicely in what turned out to be a fun game, although it took a long time for anything to happen. For much of the game, both sides approached each other like two prize fighters, sizing each other up and waiting for the right moment to land a punch. When the fighting did start it was over in just two turns out of 9 played.
French - C/O Ovdinart - Part of 2nd Corp (c/o Surjit, 2iC Mark, 3iC Lee)
One infantry division consisting of three Battalions
One heavy cavalry division (c/o Nansouty) also of three Battalions of Cuirassiers & Carabiniers)
And one light cavalry division (c/o Lasalle) of two Battalions of Chasseurs a cheval & Hussars)
I would normally replicate Stuart's Order of Battle here but I was once again struggling to read his spider script so here's a summary of the two forces instead.
French - C/O Ovdinart - Part of 2nd Corp (c/o Surjit, 2iC Mark, 3iC Lee)
One infantry division consisting of three Battalions
One heavy cavalry division (c/o Nansouty) also of three Battalions of Cuirassiers & Carabiniers)
And one light cavalry division (c/o Lasalle) of two Battalions of Chasseurs a cheval & Hussars)
Austrians - C/O Kallowrath - Part of 3rd Corp (c/o Richard, 2iC Ray, 3iC David)
One infantry division consisting of three Battalions
One heavy cavalry division consisting of three Elite Cuirassiers
One light cavalry division consisting of two Battalions of Dragoons, Chevaualeger & Hussars
The Action
As indicated in the introduction, not a lot happened in the first seven turns of the game. Both sides edged toward each other looking for an advantage. Both sides exchanged artillery fire. Then in turn 8, all hell broke loose...
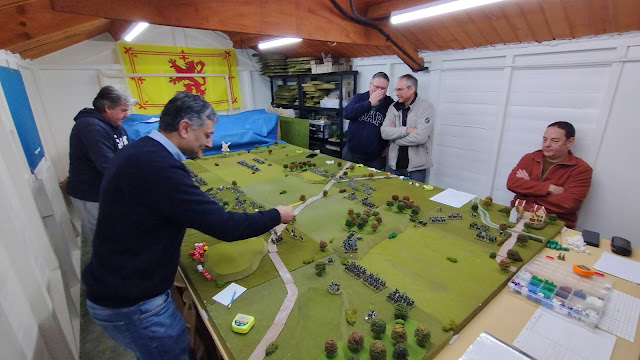 |
| The initial moves were cautious and reserved as each side weighed up the other. Both armies were well-matched and deployed fairly equally so neither side had a clear advantage at any given spot. |
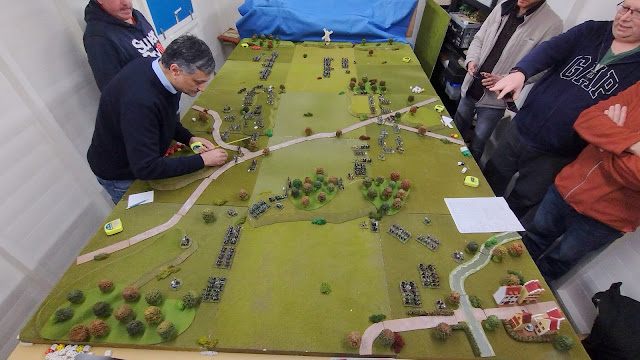 |
| The first few moves were small, cautious, and very very tentative. |
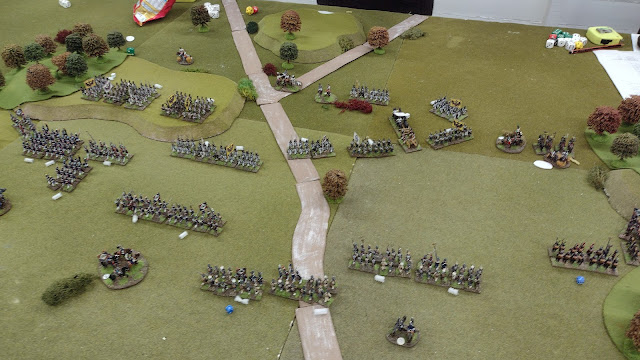 |
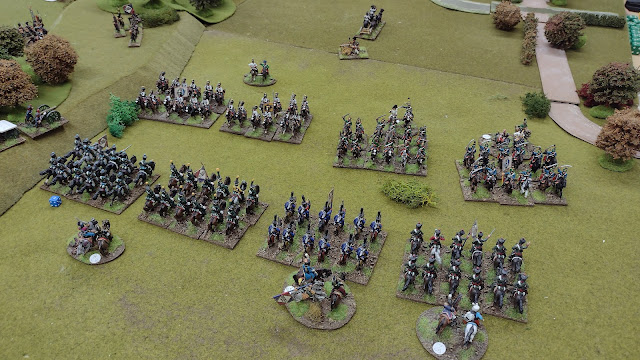
| By the end of Turn 5, our Infantry Division has moved forward to attack the Austrian positions. This is the signal for both cavalry wings to also press their attack. |
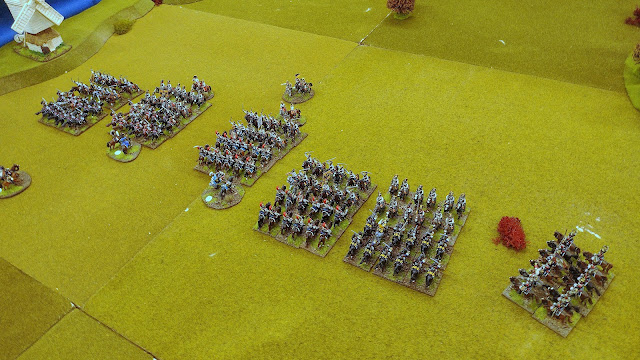 |
| Mark and Ray's Heavy Cavalry Divisions smash into each other and both sides collectively hold their breath. |
 |
| The tension is rising but everyone is enjoying the game.... |
 |
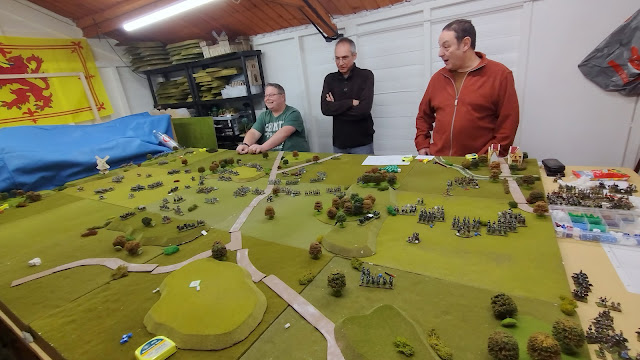
| Some people are enjoying it a little too much. |
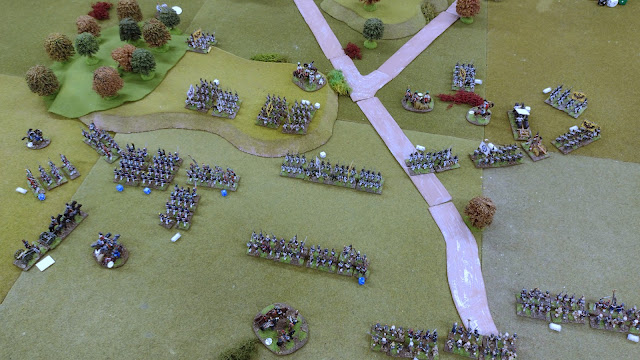 |
| In the center, the two sides begin to exchange musketry |
 |
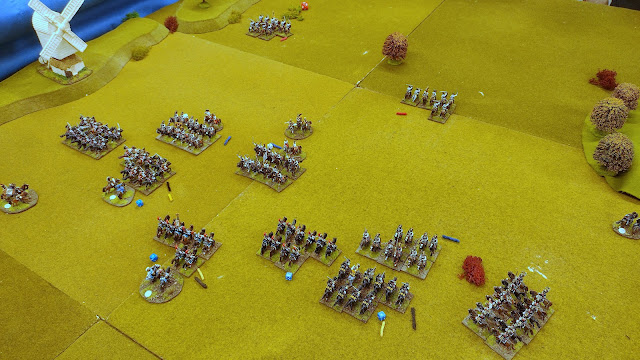
| Follow-up charges on the flanks more or less saw the remaining Austrian Heavy Cavalry destroyed. This could be the decisive part of the battle. |
 |
| Neither side now has the energy (or the units) to fight on and it looks like this is going to go down to a point decision based on damage inflicted rather than ground taken. |
Victory goes to....
Stuart carefully tabulates victory points and announces that the Austrians have scored 15 points...and the French have 27 points! A French victory. None of us expected it to be so clear cut but the Austrians lost a lot of leaders in battle and several battalions were destroyed or routed by the end of the battle.
As usual, we all shook hands, congratulated each other on a battle well fought, and then retreated inside for tea, cake, and some post-game analysis.
Sunday, 22 January 2023
Returning to Wargaming: Rediscovering an old love, or a mid life crisis?
Have you returned to the hobby in your 40s after taking a break from Wargaming for a career, marriage, or kids? If so, is this a mid-life crisis or just the rediscovery of an old love?
Saturday, 21 January 2023
Sir Hugh Peshall and Sir William Stanley
I have nearly completed my Tudor/Lancastrian army for Bosworth and these two units get me to within sight of the end…before I start all over again with the Yorkists! This week I have Sir Hugh Peshall’s troops and those of Sir William Stanley.
I couldn’t find a banner for Peshall but I did have a description from one of the Heraldic Banners books by the Lance and Longbow Society. The description was clear enough for me to recreate the banner and be reasonably confident it is ‘close’ to accurate. Certainly close enough for a 1cm square flag! Sir Hugh was an indentured retainer of Lord Hastings so it's unsurprising he would be fighting for Henry Tudor following King Richard's execution of his former patron. Sir Hugh must have distinguished himself in the fighting at Bosworth because he was knighted later the same day.
Then we have Sir William Stanley, the younger brother of Thomas Stanley. He was a knight of the Body to Richard III and had received numerous land grants in the Welsh Marches. Despite this he eventually committed his forces to the battle, indeed his intervention tipped the balance at the crucial moment, ensuring victory for Henry Tudor. Despite this, he met an ignominious end just ten years later when he was executed for his part in the 1495 Perkin Warbeck conspiracy. Warbeck, for those that don’t know, was a pretender to the throne, claiming to be Richard of Shrewsbury, Duke of York, one of the so-called "Princes in the Tower".
Because Sir William commands his own small army I have modeled him on his own base as a commander
Labels:
6mm,
AHPC XIII,
Baccus,
Battle Report,
Big Battles,
TWotR
Friday, 20 January 2023
Sir Thomas Stanley & Sir Everard Digbie
Last week I finished the foot troops for Oxford's command and this week I am moving on to some of the more ‘exotic’ units on the table along with the first of the infamous Stanley.
I have been wanting to get started on some artillery and handgunners for this battle but decided to hold off until I had got a large body of infantry under my belt. For my Lancastrian/Tudor army, I have two Companies of Artillery and two large skirmish units of Handgunners. Archaeological evidence from recent digs and surveys of Bosworth has uncovered the largest collection of canon balls from any Medieval battlefield. Their discovery, along with a host of other artifacts including Badges, tackle, and bits of armor, has helped redefine the location of the battlefield. If you get a chance to visit the Bosworth Battlefield Museum it is packed with finds that you would be hard-pressed to see anywhere else.
.jpg)
I have represented these Handgunners as large skirmish units consisting of two bases but with fewer men than a regular infantry unit. Given their relative lack of accuracy and their alarming propensity to explode, I’m sure this dispersed formation was a very good idea! There are some excellent examples of early Handguns on display in the Royal Armouries in Leeds (another recommendation btw!). Looking at these crude firearms I didn’t expect them to be anything more than an annoyance on the battlefield. However, I have since read that experiments with a mid-15th century replica handgun, using period-accurate mixes of gunpowder, were able to fire a lead ball 630 meters with a recorded maximum velocity of 142 meters per second. More than enough to penetrate armor!
With the gunpowder weapons of Henry’s army completed I want to move on to the infamous Stanley’s. This powerful family always seems to have managed to stay in favor without committing themselves to any one side until the outcome was already clear. At Bosworth both Thomas and William Stanley stood back in the early stages of the Battle, waiting to see which side had the upper hand. So this week I am starting with Sir Thomas Stanley on his own base, accompanied by a company of Mounted Household under his command.
Lastly, and also part of Thomas Stanley’s army, we have Sir Everard Digbie. He brings a company of retinue/billmen and a company of Archers onto the field.
Labels:
6mm,
AHPC XIII,
Baccus,
Battle Report,
Big Battles,
TWotR
Sunday, 15 January 2023
My choice of brush
A quick chat about the brushes I use. Everything from premium Winsor & Newton Series 7's for the finest performance to cheap synthetic brushes for rougher jobs. I have gone through a lot of sable brushes over the years and spent a lot of money on what is arguably the most important tool on the painting table.
Saturday, 14 January 2023
Lake Trasimene: The Largest Ambush in History
The Battle of Lake Trasimene was another crushing defeat for the Romans and was Hannibal's second major victory on the Italian peninsular. This Quick Strike, After Action Report, tells the whole story and reveals my recreation of the battle using 6mm Punic War miniatures and the To The Strongest! rules.
TtS! is played on a Grid but for this game I marked out the grid in a fan, radiating out from the shoreline of the battlefield. This meant that I could move units as per the rules while accentuating the idea of the Romans being surrounded and attacked from all (landward) sides. As with previous games, the grid was marked with dots so it is barely perceptible - especially with the 'fog' overlaid. This is an idea I may use again in future games.
This battle report has been a long time coming, but now that it is done, I hope you enjoy it. Planning the game and work on the script began in the Summer of last year, with the game taking place in November! I continue to love the Quick Strike format, but editing a game to under ten minutes is a really tough challenge. It takes a lot longer to knock into shape than making a long-format battle report and kept letting myself get distracted!!
Sunday, 8 January 2023
Wibbly Wobbly Timey Wimey
There are some weeks where time seems to flow 'differently'. This has been one of those weeks!
Friday, 6 January 2023
Poynings, Guildford, Talbot & Savage
Thanks to a very understanding wife, I have got a lot painted in the Challenge thus far. But I couldn’t avoid work forever and now that I'm back I expect painting time will be curtailed. That being said, I'm happy with what I have got done so far. This week I present the troops of Poynings, Guildford, Talbot & Savage.
First, we have the troops of Sir Edward Poynings of Southwark. In my army list, he has a unit of pikemen and a unit of archers. It's likely that many of the pikemen that accompanied Henry’s army to England were French and other mercenaries (that depends on the source material and the scholar interpreting them of course). For the purposes of my OOB, I have assigned the to Poynings and they were his red livery. Sir Edward had been amongst those nobles who rebelled against Richard III in 1483 and after their defeat, he had fled to join Henry in exile.
Next, we have Sir Richard Guildford of Halden. As with Poynings, I have assigned him a unit of pike and a unit of archers. I made an educated guess as to the livery for his troops, partly based on his personal banner but also on the fact I wanted to do halved livery (yellow and black). I wasn’t sure how well it would come out but I’m pretty happy with the effect.
The last two units are small skirmish cavalry units under Sir Gilbert Talbot and Sir John Savage. Some of the accounts I have read suggest these were placed on the flanks of Oxford's army when it attacked Norfolk's troops. Various rules treat such light cavalry differently so it's hard to judge how effective they would be but as with all the other variables for this battle, it's something I can experiment with. Any suggestions for research material on how light cavalry was used in this period would be greatly appreciated.
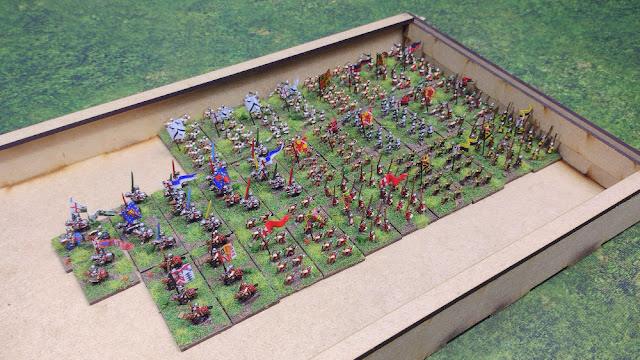
Lastly, I thought I would snap a picture of everything I have completed thus far. This is a little under a quarter of the total project…so I have my work cut out for me!
Incidentally, thank you to everyone who has left nice comments on my submissions thus far. It is greatly appreciated and keeps me motivated. However, I must correct a misconception…the painting really isn’t that great. Seriously, 6mm is a doddle to paint simply because you don’t have to be that careful or detailed with the painting. My method is to block paint all the main areas and then ink the whole model to add shadows and define one bit of kit from another (the micro equivalent of blacklining a figure). Close up they look terrible…but they look perfectly fine in the 3ft test. I have been putting extra effort into the basing and the flags and these two latter stages - far more than the painting - are what make these look ok at arm's length.
Monday, 2 January 2023
A Trio of Earls: Richmond, Pembroke & Oxford
My second entry to the Analogue Hobbies Painting Challenge is a trio of rebel Earls and their accompanying troops for my Lancastrian army at Bosworth.
First and foremost, we have Henry Tudor, The Earl of Richmond. Henry had been exiled to France for several years, but now, with the support of the French King, he was making his play for the crown. This was a risky move that would likely see him either crowned King or dead (one way or another). Richard has been modeled with a slightly larger command stand of three mounted figures and bears Henry’s Standard in green and white with a prominent red dragon. He is supported on the battlefield by a company of Mounted Household Knights. This company carries his banner as Earl of Richmond which is also mirrored on the caparison (the cloth covering) on Henry’s mount.
Next, we have Henry’s Uncle, Jasper Tudor, at one time the Earl of Pembroke. He continued to use this title in exile until it was restored to him by his Nephew Henry upon his ascension to the throne. He is represented here as part of another company of Mounted Household Knights. The banner I have used is very similar to that of the Earl of Richmond.
Finally, I have Sir John de Vere, the Earl of Oxford. He commanded the main portion of the Army and the inexperienced Henry was wise enough to leave command in the hands of the much more experienced soldier. Oxford, as a Battle Commander, has a command base that is slightly smaller than Henry’s. He is accompanied by a company of Foot Household/Men-at-arms, a Company of Retinue/Billmen, and a Company of Archers.
As before I have made all the standards and banners myself using artwork scanned from various sources, mostly the excellent Heraldic Banners guides by the Lance and Longbow Society. I hadn’t quite anticipated how much extra work is required to make flags this small. Painting the white edges and ensuring they are varnished properly before adding to the bases seems to be taking ages, but hopefully, I’ll be able to pick up the pace a little with practice. Despite the extra work, I’m more convinced than ever that it's worth it for the final touch on a base of figures.
Next on my desk will be more contingents from Oxford’s command which I want to complete before moving on to the Stanleys and their armies. Having completed the first few companies I am more convinced than ever that I’m not going to complete the whole project by Challenge end. Thus far, the painting portion of making these bases is only half the job, in terms of time commitment. I don’t want to skimp on this element and I would rather take my time and do the best job I can on these than rush just to get stuff completed. I still estimate that I will have about two-thirds or more of the project completed by the end of the challenge and hopefully the momentum I have built up by that stage will see the project ‘completed’ by summer... I hope! Otherwise, this may have to be a double-challenge project!!
Sunday, 1 January 2023
Resolutions 2023 & how to keep them
Happy New Year to all my viewers. Once again it is that time of year to set new resolutions (or recycle old ones) for the year to come. I keep mine simple and achievable and like to think of them as my mission statement or stretch goals for the year. Nothing too wild or grandiose, destined to be abandoned by February.
Subscribe to:
Posts (Atom)




.jpg)
.jpg)
.jpg)
.jpg)
.jpg)
.jpg)
.jpg)
.jpg)
.jpg)
.jpg)
.jpg)
.jpg)
.jpg)
.jpg)
.jpg)