Showing posts with label AHPC XIII. Show all posts

Friday, 17 March 2023

The French at Bosworth: Philibert de Chandee & Bernard Stuart

This isn’t the end. It may well be my last entry to the Analogue Hobbies Painting Challenge, but my quest to paint both sides for the Battle of Bosworth is by no means over. Indeed, after a weekend away visiting the Battlefield (and buying more books) I have added to my OOB and I have even more to paint!! But first, this week's entry is the ‘French’ contingent in Henry's army under the command of Philibert de Chandee.


De Chandee of Brittany was in command of the French mercenaries in Richard's army and played a significant part in the battle. These were experienced soldiers, fighting in a continental style that had not yet been incorporated into the English army of Richard III. Chandee was Knighted by Henry on landing in Milford Haven. It was these experienced troops, many of whom were Pikemen, who turned the fight. In some sources the long pikes of these troops stopped Norfolks Vanguard from moving forward, enabling Oxford to outflank the king's line. Alternatively, it was the bodyguard tactics of the pikes that saved Henry from Richard's final cavalry charge. Whatever the truth, it must have been significant because de Chandee was made Earl of Bath by Henry after the Battle. I have modeled these units with Crossbowmen rather than bowmen and as such, these are skirmish units of fewer men. Chandee himself commands Foot Knights/Men at Arms and Pikemen.


Next, we have Sir Bernard Stuart. As his name suggests he was a scot and in his role as Lord of Aubingy he was an ambassador between Tudor's allies in Scotland and the French court. He commanded Scottish troops who had been based in France and in my OOB he fights in De Chandee’s Battle. He fought many more battles for the King of France and King James IV made him a member of the Order of St Michael. He died in 1508 in his homeland of Scotland, aged fifty-six.


Up to this point, I was within sight of completing both armies. However, I was very aware that the army I had for Richard was not big enough and so I would have to add some extra units to give them the numerical advantage they had over Henry. I have just had a very interesting weekend away visiting the Battlefield of Bosworth, including the excellent visitor center on Ambion Hill. I also visited the Richard III center in Leicester and between them learned a lot of new stuff and came home with an armful of new books. One of these, Nobles and Knights Profiles by Bob Pritchard has been very useful and I have already amended my OOB to beef up the King's army. I have several more weeks of painting ahead of me, long after the Challenge has ended, but safe in the knowledge that the majority of the work has now been completed.

My Revised Order of Battle for Bosworth. The units indicated in yellow are yet to be painted but as you can see, the majority of the project is completed. 


Incidentally, I hit my Points Target easily last week. It's not my highest result for a Challenge, but I knew I had a busy few months at the start of the year and if I had set a higher target I surely would have failed. As it is I consider 700pts plus to be a very respectable total, and I've got the majority of my Bosworth project completed into the bargain.


I will get everything out in the next few days and take a big group photo of what I have completed. Then with the Challenge wrapped up the next challenge for me is to keep the momentum going and get those last units completed. I want to have a game on the table by August for the anniversary of the battle and I need to start playtesting the rules and I have some terrain to build. 

Friday, 24 February 2023

Norfolk's Battle at Bosworth

The first half of this week's entry missed the posting deadline last week by just a few hours. I hadn’t quite sorted the flags out and didn’t want to rush the job, so I reluctantly decided to delay posting by a week. On the plus side, it means you get a double helping of 6mm War of the Roses this week!


With Richard II’s independent command of mounted knights completed it's now time to move on to the main fighting contingent of his army. Sir John Howard, the Duke of Norfolk commanded the Vanguard and was in the thick of the fighting right up until he was killed. The loss of the commander would probably have been fatal in armies with better command and control, but in the press of men, how many would realise their leader had fallen? As with other commanders I have based the Duke of Norfolk on his own base with a Standard Bearer. He also brings some foot knights/Men at Arms and Archers to the fight clad in his livery.


Accompanying the Duke in this week's submission is his son, Sir Thomas Howard, the Earl of Surrey. He commands a company of Retinue/Billmen and a company of Archers. Thomas was wounded at Bosworth and imprisoned in the Tower of London for three years. However, he was released in 1489, and his title of Earl of Surrey was restored. He appears to have been loyal to Henry VII and in 1487 was sent north to put down a rebellion in Yorkshire. He remained Henry's lieutenant until 1489 when he accompanied the king to France. In 1501 he was made Lord High Treasurer, effectively entering Henry’s inner circle. He remained loyal to Henry’s son, Henry VIII, and enjoyed significant military success in the king's service in Scotland well into what would be considered extreme old age by the standards of the day.


After falling a little behind last week, this week I have caught up and got quite a bit done. So today I have the infantry of the Earl of Shrewsbury and Lord Zouch, plus three artillery bases and two hand gunner companies. First, we have Sir George Talbot, the Eldest son of John Talbot, 3rd of Shrewsbury. He was Knight of the Bath to Richard III and fight with him at Bosworth, where he was captured. However, he must have been able to retain favor and switched sides as he fought with Henry VII at the Battle of Stoke Field two years later.


Sir John de la Zouch, Lord Zouch was a Yorkist nobleman and politician loyal to Richard III, under whose command he fought at the Battle of Bosworth. He had grown in political power under Richard, mainly because his family's influence in Northamptonshire was of value to the King. Defeat at Bosworth resulted in him suffering attainder and forfeiture of his property, but he was eventually restored to royal favor in the Tudor court, due partly to a marriage connection to the new King's mother.


There are three Artillery pieces. These were typically companies - mercenaries in effect - who were paid to ply their expertise for one side or another.


Lastly, I have two small skirmish companies of Handgunners. Again these are dangerous weapons, relatively new to the battlefield and, at close range, quite deadly. Sharp-eyed viewers will notice there are fewer figures on these bases than the hand gunners I did for the Lancastrians. There’s no cunning research behind this, I just didn’t have enough figures to put 8 on a base as before! That being said, the Test of Resolve rules are figure agnostic, so a bit of variation is fine so long as the bases remain the same size.


I've got a lot completed now and the end is definitely in sight. Now I will start looking at Sir Robert Brackenbury's command. 

Sunday, 5 February 2023

Wargame for Free

How can we wargame for free in a time of austerity and the rising cost of living? Today's video discusses a few simple steps to continue the hobby we love when money is tight and the hobby budget is being squeezed.

Friday, 27 January 2023

Medieval Town & Church in 2mm

I had intended to get the last units of my Tudor army finished this week but time got away with me and so I decided to do something ‘easier’ by skipping ahead to some medieval buildings. As it was, they were decidedly more tricky and intricate than anticipated…painting medieval wood-framed buildings in 2mm is very fiddly! All the buildings are from Brigade Models and are wonderfully detailed for such small buildings. The surfaces also have a bit of texture to them which makes painting flat surfaces like plain walls or roofs easier.


This small town has a large church, which may be associated with a monastic order or a saint. There is a network of streets, and buildings of various sizes, all tightly clustered around muddy roads. As would be typical for a market town I made the main street a little wider than the side roads. For the groundwork, I used my usual mix of turf with some lighter-colored grass patched for contrast. The penultimate stage was to soak a few small clumps in PVA and clued them into place to represent a few trees. The last step was a dabble of textured paint (European Mud, by Vallejo) to blend the roads and bare patches in a bit better. Overall I’m pretty happy with this for my first foray into 2mm town planning!


The next piece I did was this small country church. There’s not much to say about this other than the detail is very fine for such a small model and there was little to zero cleaning required prior to undercoating.


I wasn't sure how many points I would get for these in the Analogue Hobbies Painting Challenge but in the end, I was awarded a very generous 30 points. Pretty chuffed with that and it makes the effort all the more worthwhile. No, time to get back to painting Lancastrian Billmen and Archers! 

Saturday, 21 January 2023

Sir Hugh Peshall and Sir William Stanley

I have nearly completed my Tudor/Lancastrian army for Bosworth and these two units get me to within sight of the end…before I start all over again with the Yorkists! This week I have Sir Hugh Peshall’s troops and those of Sir William Stanley.


I couldn’t find a banner for Peshall but I did have a description from one of the Heraldic Banners books by the Lance and Longbow Society. The description was clear enough for me to recreate the banner and be reasonably confident it is ‘close’ to accurate. Certainly close enough for a 1cm square flag! Sir Hugh was an indentured retainer of Lord Hastings so it's unsurprising he would be fighting for Henry Tudor following King Richard's execution of his former patron. Sir Hugh must have distinguished himself in the fighting at Bosworth because he was knighted later the same day.


Then we have Sir William Stanley, the younger brother of Thomas Stanley. He was a knight of the Body to Richard III and had received numerous land grants in the Welsh Marches. Despite this he eventually committed his forces to the battle, indeed his intervention tipped the balance at the crucial moment, ensuring victory for Henry Tudor. Despite this, he met an ignominious end just ten years later when he was executed for his part in the 1495 Perkin Warbeck conspiracy. Warbeck, for those that don’t know, was a pretender to the throne, claiming to be Richard of Shrewsbury, Duke of York, one of the so-called "Princes in the Tower".


Because Sir William commands his own small army I have modeled him on his own base as a commander

Friday, 20 January 2023

Sir Thomas Stanley & Sir Everard Digbie

Last week I finished the foot troops for Oxford's command and this week I am moving on to some of the more ‘exotic’ units on the table along with the first of the infamous Stanley.


I have been wanting to get started on some artillery and handgunners for this battle but decided to hold off until I had got a large body of infantry under my belt. For my Lancastrian/Tudor army, I have two Companies of Artillery and two large skirmish units of Handgunners. Archaeological evidence from recent digs and surveys of Bosworth has uncovered the largest collection of canon balls from any Medieval battlefield. Their discovery, along with a host of other artifacts including Badges, tackle, and bits of armor, has helped redefine the location of the battlefield. If you get a chance to visit the Bosworth Battlefield Museum it is packed with finds that you would be hard-pressed to see anywhere else.


I have represented these Handgunners as large skirmish units consisting of two bases but with fewer men than a regular infantry unit. Given their relative lack of accuracy and their alarming propensity to explode, I’m sure this dispersed formation was a very good idea! There are some excellent examples of early Handguns on display in the Royal Armouries in Leeds (another recommendation btw!). Looking at these crude firearms I didn’t expect them to be anything more than an annoyance on the battlefield. However, I have since read that experiments with a mid-15th century replica handgun, using period-accurate mixes of gunpowder, were able to fire a lead ball 630 meters with a recorded maximum velocity of 142 meters per second. More than enough to penetrate armor!


With the gunpowder weapons of Henry’s army completed I want to move on to the infamous Stanley’s. This powerful family always seems to have managed to stay in favor without committing themselves to any one side until the outcome was already clear. At Bosworth both Thomas and William Stanley stood back in the early stages of the Battle, waiting to see which side had the upper hand. So this week I am starting with Sir Thomas Stanley on his own base, accompanied by a company of Mounted Household under his command.


Lastly, and also part of Thomas Stanley’s army, we have Sir Everard Digbie. He brings a company of retinue/billmen and a company of Archers onto the field.


Friday, 6 January 2023

Poynings, Guildford, Talbot & Savage

Thanks to a very understanding wife, I have got a lot painted in the Challenge thus far. But I couldn’t avoid work forever and now that I'm back I expect painting time will be curtailed. That being said, I'm happy with what I have got done so far. This week I present the troops of Poynings, Guildford, Talbot & Savage.


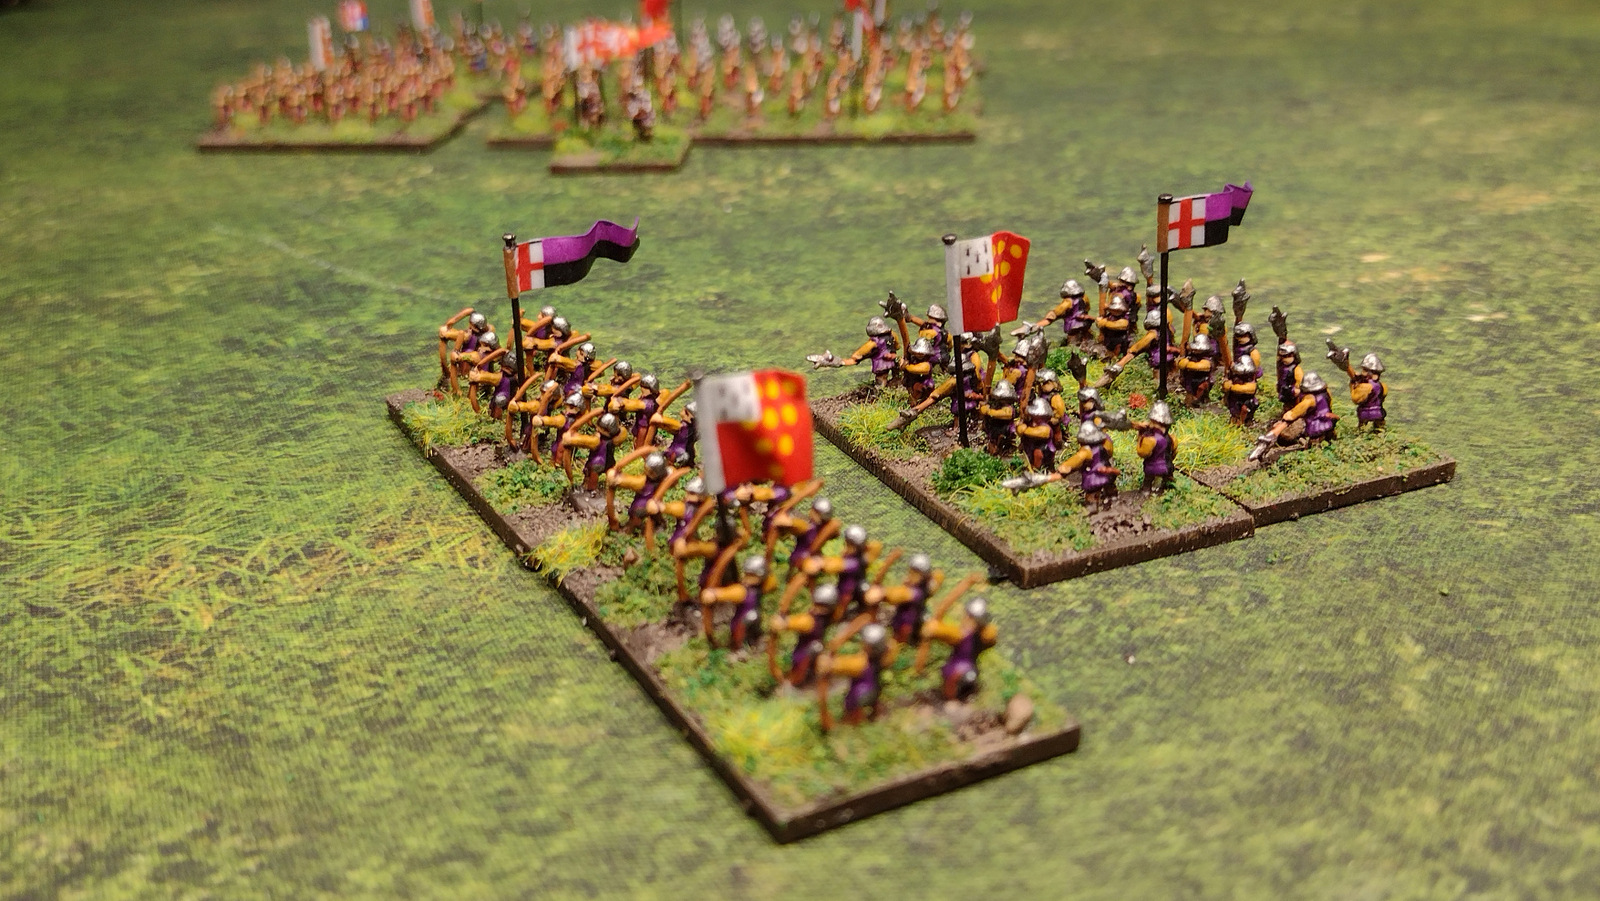
First, we have the troops of Sir Edward Poynings of Southwark. In my army list, he has a unit of pikemen and a unit of archers. It's likely that many of the pikemen that accompanied Henry’s army to England were French and other mercenaries (that depends on the source material and the scholar interpreting them of course). For the purposes of my OOB, I have assigned the to Poynings and they were his red livery. Sir Edward had been amongst those nobles who rebelled against Richard III in 1483 and after their defeat, he had fled to join Henry in exile.


Next, we have Sir Richard Guildford of Halden. As with Poynings, I have assigned him a unit of pike and a unit of archers. I made an educated guess as to the livery for his troops, partly based on his personal banner but also on the fact I wanted to do halved livery (yellow and black). I wasn’t sure how well it would come out but I’m pretty happy with the effect.


The last two units are small skirmish cavalry units under Sir Gilbert Talbot and Sir John Savage. Some of the accounts I have read suggest these were placed on the flanks of Oxford's army when it attacked Norfolk's troops. Various rules treat such light cavalry differently so it's hard to judge how effective they would be but as with all the other variables for this battle, it's something I can experiment with. Any suggestions for research material on how light cavalry was used in this period would be greatly appreciated.


Lastly, I thought I would snap a picture of everything I have completed thus far. This is a little under a quarter of the total project…so I have my work cut out for me! 


Incidentally, thank you to everyone who has left nice comments on my submissions thus far. It is greatly appreciated and keeps me motivated. However, I must correct a misconception…the painting really isn’t that great. Seriously, 6mm is a doddle to paint simply because you don’t have to be that careful or detailed with the painting. My method is to block paint all the main areas and then ink the whole model to add shadows and define one bit of kit from another (the micro equivalent of blacklining a figure). Close up they look terrible…but they look perfectly fine in the 3ft test. I have been putting extra effort into the basing and the flags and these two latter stages - far more than the painting - are what make these look ok at arm's length.

Monday, 2 January 2023

A Trio of Earls: Richmond, Pembroke & Oxford

My second entry to the Analogue Hobbies Painting Challenge is a trio of rebel Earls and their accompanying troops for my Lancastrian army at Bosworth. 


First and foremost, we have Henry Tudor, The Earl of Richmond. Henry had been exiled to France for several years, but now, with the support of the French King, he was making his play for the crown. This was a risky move that would likely see him either crowned King or dead (one way or another). Richard has been modeled with a slightly larger command stand of three mounted figures and bears Henry’s Standard in green and white with a prominent red dragon. He is supported on the battlefield by a company of Mounted Household Knights. This company carries his banner as Earl of Richmond which is also mirrored on the caparison (the cloth covering) on Henry’s mount.


Next, we have Henry’s Uncle, Jasper Tudor, at one time the Earl of Pembroke. He continued to use this title in exile until it was restored to him by his Nephew Henry upon his ascension to the throne. He is represented here as part of another company of Mounted Household Knights. The banner I have used is very similar to that of the Earl of Richmond.


Finally, I have Sir John de Vere, the Earl of Oxford. He commanded the main portion of the Army and the inexperienced Henry was wise enough to leave command in the hands of the much more experienced soldier. Oxford, as a Battle Commander, has a command base that is slightly smaller than Henry’s. He is accompanied by a company of Foot Household/Men-at-arms, a Company of Retinue/Billmen, and a Company of Archers.


As before I have made all the standards and banners myself using artwork scanned from various sources, mostly the excellent Heraldic Banners guides by the Lance and Longbow Society. I hadn’t quite anticipated how much extra work is required to make flags this small. Painting the white edges and ensuring they are varnished properly before adding to the bases seems to be taking ages, but hopefully, I’ll be able to pick up the pace a little with practice. Despite the extra work, I’m more convinced than ever that it's worth it for the final touch on a base of figures.

Next on my desk will be more contingents from Oxford’s command which I want to complete before moving on to the Stanleys and their armies. Having completed the first few companies I am more convinced than ever that I’m not going to complete the whole project by Challenge end. Thus far, the painting portion of making these bases is only half the job, in terms of time commitment. I don’t want to skimp on this element and I would rather take my time and do the best job I can on these than rush just to get stuff completed. I still estimate that I will have about two-thirds or more of the project completed by the end of the challenge and hopefully the momentum I have built up by that stage will see the project ‘completed’ by summer... I hope! Otherwise, this may have to be a double-challenge project!!

Friday, 30 December 2022

The Wars of the Roses: Bosworth Project begins

The 13th Analogue Hobbies Painting Challenge started last week and I have started my 6mm Wars of the Roses / Bosworth project. Due to some shenanigans with a delayed parcel delivery I wasn't able to start with Henry Tudor as planned. Instead, I picked a couple of his supporters and their troops. 


Sir Rhys ap Thomas and Sir John Wells 

I have been thinking about this project pretty much since the end of the last Challenge in March, and hopefully, the planning and considerable preparation will pay off over the next three months. There is a huge amount to do and in all honesty, I don’t think I will get everything finished by Challenge end. These first few units have taken a lot longer to complete than I thought. However, If I can get at least half the project finished, I will be happy (and hit my personal points target).


I’m planning on using the Test of Resolve rules for this period so each ‘company’ consists of two bases presented in-line for deep units like billmen, or abrest for wide units like archers. So here we have a unit of Retinue Billmen and a unit of Archers for each nobleman. I have compiled a detailed order of battle for the Lancastrians and Yorkists at Bosworth and when I have finished I will have 38 Noblemen represented on the table with over 125 individual bases of troops…each with their own flag! I decided early on that I was going to use fewer figures on each base to allow for better base dressing with turf and grass etc but to compensate I would have a flag on every base. I may come to regret this decision because that's a lot of extra work…but I think the end result will look awesome and I can’t wait to see it all completed and arrayed on the tabletop.

So today I present the troops of Sir Rhys ap Thomas and Sir John Wells who fought on the Lancastrian side at Bosworth. The former was a Welsh lord who committed his troops to Henry’s cause, but only after the latter had marched nearly all the way through Wales. Maybe he was sizing up the young Tudor and trying to make up his mind? It's claimed that Rhys ap Thomas dealt the fatal blow that killed Richard III but didn't want to take credit for it because he didn't want to be known as a regicide. This claim is hotly debated and given the paucity of reliable evidence I take it with a pinch of salt. Chalk it down as a possibility rather than a probability. 

That's enough of me waffling on, I need to get back to my paint desk. I have 117 more bases of troops and flags to be getting on with!

Wednesday, 7 December 2022

Update from the Operations Room - December 2022

Another look back at what I have been working on last month. Preparation for the Analogue Hobbies Painting Challenge has been the main theme, both in terms of researching the period I want to fight (Bosworth) and preparing the miniatures ready for the competition.