Thursday 30 May 2019

Another historical weekend away

I've been away on yet another short weekend trip, this time down to 'Hells Corner' in sunny Kent. We had to dodge a few showers but on the whole, the weather was pretty good and we had a great weekend. We have been taking full advantage of our English Heritage membership, re-visiting sites we haven't been to in several years. The weekend started with a relatively short trip over to Rochester and from there we travelled on to Dover Castle and the coastline of the Cinque Ports. 

The 12th Century keep of Rochester Castle

The internal floors are missing, but the walkways through the walls are still accessible.

The view from the top is stunning, especially when the sun is shining. This is the view across Rochester towards Chatham and the building in the foreground is Rochester Cathedral. 

Another view of the Castle, this time from outside the curtain wall. 
Then on Monday, we drove down to Dover for a WWII weekend inside arguably Britains most important castle. Dover castle had a special WWII themed event this weekend so we decided to make the relatively short trip down to the coast and stay overnight. This corner of Kent was literally on the front lines in the second world war, with German-occupied France clearly visible across the Channel. Dover itself was the target of many air raids and was even under direct shellfire from German railways guns and coastal batteries. Over 10000 properties in the city were damaged during the war with the loss of 216 civilians. 

One of many AA guns positioned around the site. This corner of Britain was known as Hells Corner as it was in the front line. Dover itself was bombed many times in both the first and second world wars and in WWII it was also inside the range of German railway guns in France. 

Admiral Ramsey, the mastermind of Operation Dynamo, the evacuation of Dunkirk. Ramsey initially estimated that he could save about 30,000 men of the British Expeditionary Force trapped in northern France, in the end, he was able to rescue over 330,000 British and allied soldiers. 

Another AA gun this time with shell cabinets and a mock crew. 

Smaller 25 pounders still had a maximum range of about 7.5 miles so could also be used to defend the harbour. 

The event had several reenactment groups present and some brought larger equipment for display, like this Dodge Carrier. 

Up on the battlements of the central keep at Dover, the highest point of the site. As with Rochester the view from up here is stunning. 

Looking West across Dover itself. The town was heavily damaged during the second world war. Less than 26 miles from the coast of France this part of England was on almost continuous invasion alert. 

Looking out towards France. The French coast can be seen very clearly when the weather is good and guns from both sides of the channel would exchange fire. 

One of two monuments on the hills overlooking Dover dedicated to aircrew and Artillery crew who served in the defence of the area. 

Part of the Chain Home radar station built in 1937 and operational the following year. They formed a vital part of the, the Dowding system, a ground-controlled interception network which collected and filtered this information on incoming air-raids.  
The next day we headed off to Walmer Castle, a 16th Century castle built by Henry VIII as part of the defence of the Cinque Ports. I wanted to come here as this was for a time the home of the Duke of Wellington until his death in 1852. There is an extensive collection of memorabilia related to his tenure, including his Death Mask and items relating to his funeral. Unfortunately, photography inside the building is not allowed. 


The entrance to Walmer Castle. 

Photography isn't really allowed but I managed to snap a cheeky picture with Old Nosey. 

The real value of Walmer Castle was its seaward facing guns which could protect a large area of sea known as the Downs Anchorage. 
I'm still feeling the after-effects of all the walking we did over the weekend but when the weather is good, Britain is a beautify place to holiday and take in some heritage.

Monday 27 May 2019

"Your Graveyard is in the Post"

Way back in April I headed off to Salute 2019 with a very long shopping list. One of the items I wanted was a set of 15mm gravestones to accompany a church I have for my Normandy setup. I wanted to get the MDF 4Ground ones but by the time I got to their stand they had sold out. Thankfully though they offered to order them for me and send post free, so I paid for them and tucked the receipt into my wallet... and then promptly forgot all about it. Then last week I received an email from an unknown email address with the above-mentioned subject line and for a moment several thoughts passed through my head, including "This is a rather unusual spam email...", "The local undertakers have taken marketing to a new level...", "My wife has bought me a plot and not told me about it!!",  and finally (as the penny dropped) "Hang on a minute, didn't I buy something at Salute...".

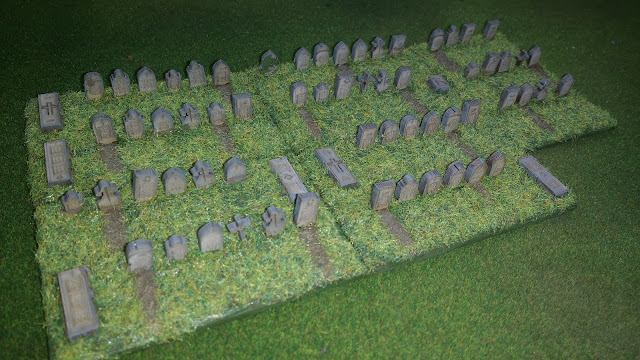
A few days later a little package arrived in the post and settled the question, it was my order from 4Ground, a little later than expected but non-the-less welcome. So I have worked up the gravestones and made five bases that can be arranged however I need them around my Church building. 


Although these come 'ready painted' I needed to give them a lick of grey to cover the burned MDF edges and make the stones look a little more realistic. There are several fresh plots...maybe one of them is mine and the wife hasn't told me yet. I wonder if this has anything to do with the Insurance documents she had me sign a few weeks ago?!*

*Incidentally our Will's give everything to the surviving partner, so technically she's the half owner of a very impressive Lead Mountain. Strangely she didn't look terribly impressed when I pointed this out to her. 

Wednesday 22 May 2019

More To the Strongest!

I got in another solo game of To the Strongest! yesterday...well almost. I actually spent most of the day working in the garden and consequently didn't get to start my game until later afternoon. The garden did desperately need attention though; it was starting to look like the Velociraptor pen in Jurrasic Park. I wasn't able to complete the game before the family started to come home but I got a few turns into it and was able to correct a few of the rules mistakes I made in my last game. I won't be writing this up as a battle report but I will revisit this scenario and order of battle at a later date. In the meantime here's a couple of pictures from what I am calling a 'test game'. 

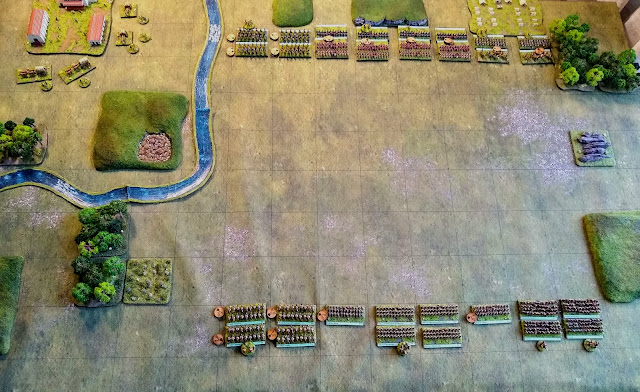
The setup: Romans at the top, Carthaginians at the bottom of this picture. A Roman farmstead can be seen hastily evacuating in the top left. The river has two crossing points and the Roman army has a camp over in the right. 
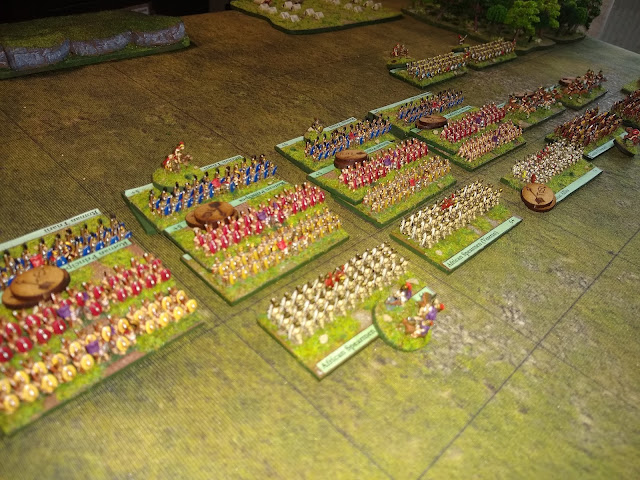
The Romans advanced as aggressively as the Carthaginians and battle was joined quickly. 
I will come back to this and have a second go at it in a few weeks. 

Monday 20 May 2019

More terrain for 6mm wargaming

Following on from the Hills I made last week I have been trying to make a selection of different terrain types that can be used in my 6mm games using the To the Strongest! ruleset by Simon Miller. For these small terrain item's I have used 70mm rounded edge bases as these fit just inside the 75mm squares on the game mat I am using.


  • Rocky Outcrop - This is classed as Impassable Terrain and is tall enough to block line of sight for units at ground level. Troops on low hills, however, can see over this type of terrain. 
  • Vegetation - Thick ground vegetation such as bushes, briars or heather is counted as broken ground because it impedes movement. This counts as rough terrain to mounted and phalangitae, only and doesn’t block line of sight.
  • Boulder Field - This is Broken Ground which means that only skirmish units can pass through it. While the broken ground may make the movement of formed units impossible it isn't sufficiently elevated to block line of sight. Boulder fields do provide cover. 
  • Muddy field - This is classed as Broken Ground and counts as rough terrain to mounted troops and phalangitae, only. 
  • Marsh - Like the lake this flat terrain feature doesn't block line of sight or provide cover, but it is classed as Rough Terrain. 
  • Lake - Again classed as Impassable Terrain but being flat does not provide cover or block line of sight. 

Between these, the hills I made last week, and the rivers I bought some time ago, I now have quite a lot of suitable scenery for my TtS! games. Now I just need to get on and play some more games! 

Thursday 16 May 2019

Terrain - Hills for 6mm wargaming

I've been working on some more terrain items, this time specifically for playing 6mm wargames using the To the Strongest! rules. My game mat is divided into a 3" grid so when I'm building terrain elements for use with these rules I try to make them fit comfortable inside those dimensions or multiples thereof. My current set of hills is rather limited, especially now that I have expanded my games surface to 3x4', so I have started to build a set of extra hills that allow for a bit more variety.

The following pictures illustrate the technique I have used and show some of the variety of hills I have managed to create using it.

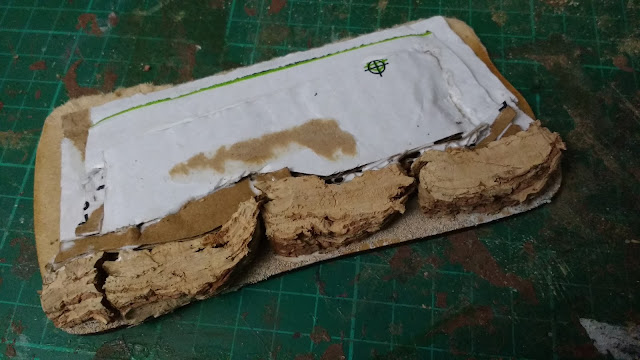
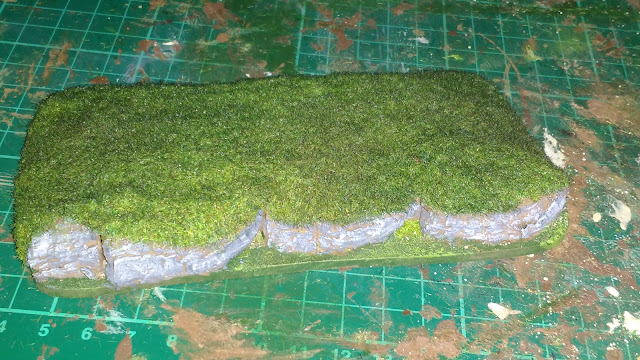
I cut slices of cork bark with a model saw and lays then along one edge of the base to make a line of cliffs. Then I built up the hill behind the cliffs using layers of corrugated cardboard cut to fit. I filled any gaps with little offcuts of the card until I had the rough shape of the hill. The whole thing was glued together with lashings of PVA glue and then left overnight to dry thoroughly. 

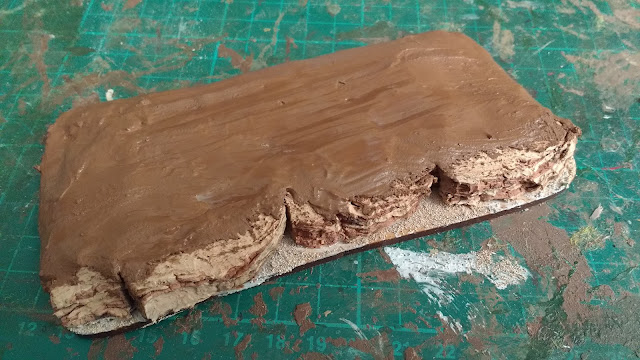
The next morning I used a wood filler to shape the hill slopes and of course to fill any gaps. Left again for several hours to dry and the result is a hard but lightweight terrain item ready to be base coated and painted. Building up from an MDF base means the whole model is nicely rigid and doesn't warp. My base was 3mm thick but thinner MDF or foamboard would work just as well. 

Some of the other hills I have created using layers of corrugated Cardboard to 'sculpt' the general shape before adding plaster to round the edges. 

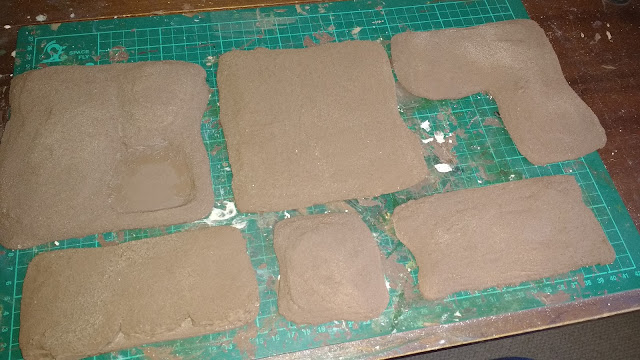
I added a layer of sand to the ground to add a little texture. Once this was dry I base coated the whole model. My preferred method is spray paint with Army Painter Brown Leather.

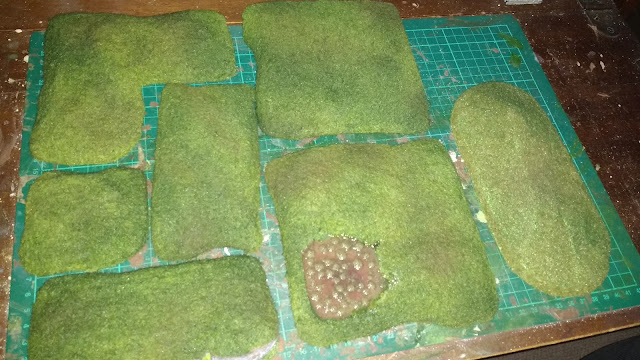
The  final stage was to paint the model and add turf and flocking. I tried to match my existing hills and got them pretty close in colour (an old hill is shown on the right for comparison).

The finished escarpment model. I may do more of these in the future.

One model included a depression to add a marshy lake. I painted the bed of the lake with darker colours in the centre and then used a thin layer of Vallejo Liquid Water. This self-leveling liquid takes several hours to set so I took the time to partially submerge grass tufts in it to make the end result look like a marsh.

With my old hills I now have more than enough for my modest 3x4' table.

Friday 10 May 2019

Battle of Secutium River

Tuesday was my day off and I decided to make the most of the free time to play a solo game with my Punic War forces. I have recently been reorganising my Carthaginian army and during the painting challenge, I added several Gaul and Iberian units to the collection so it was high time these were played with. I also recently bought a new gridded game mat from DeepCut Studios and this was an excellent opportunity to christen it in battle.


The Setup
This game is a fictional battle set on the banks of the Secutium River somewhere in northern Italy. Both armies came in at 200 points apiece so this was going to be a relatively large game and more importantly it was going to be played solo. To add a certain level of 'automation' to my non-existent opponent controlling the Romans I decided to randomise the deployment of the cavalry command so it could have been on either the left or right flank. I also diced to determine the level of 'aggression' the Roman army would show in their actions. Would they be cautious and stand on the defensive; move forward timidly or press forward in a full-throated attack? After that, it felt like most of the Roman actions would be determined by the circumstances on the ground; ie who was attacking them, who was the priority target for missiles etc. Whenever it felt like there was a split decision I rolled dice to pick an action but for most of the game, the Romans were reacting to the Carthaginian plan. 

As before I have used 10 sided dice rather than cards to determine activation, partly because I prefer dice but also because at this scale there just isn't space on the games table for playing cards.


Order of Battle
Carthaginian Army c/o Hannibal Barca
1st Command
    General Senior/Brilliant
    3x Punic Cavalry (1 with Hero Attached)
    1x Punic Cavalry (Veteran)
2nd Command
    General
    4x African Spearmen (3 with Attached Hero's)
    2x Iberian Scutarii (Veteran)
    2x African Elephants
    2x African Skirmishers
    Camp
3rd Command
    General
    3x Gauls (with attached Hero's)
    2x Gauls (Veteran)

Roman Army c/o Claudius Marcellus 
1st Command
    General  Senior/Brilliant
    2x Equites Romani
    2x Equites Latini
    1x Equites Extraordinarii
2nd Command
    General
    3x Velites
    3x Hastati/Principes (1 with Hero Attached)
    3x Triarii
    1x Ballistarii
3rd Command
    General
    2x Velites
    3x Hastati/Principes
    3x Triarii


The Action
Initial deployment. Both cavalry commands face off against each other with woods restricting their movement somewhat. The Carthaginians have weighted their right flank with their veteran Gaulish allies and in the centre, the elephants prepare to advance. The Romans are deployed in their deep formation with a screen of Velites out front. 

The triple line of the Roman maniples with light infantry out front. The line exchange rules make the Hestati/Principes a tough egg to crack. 

The Punic cavalry moves forwards. On paper, they are outclassed by the Roman cavalry but both the Carthaginians and the Romans have attached their senior generals here. 

An early setback for the Carthaginians as the first unit to test in the centre command rolls a one and can make no further actions this turn. 

The third command, the Gauls, have better dice and begin to advance. I deliberately advance slowly to give the elephants time to cross the field to the Roman lines. 

The Romans open their moves by sending the Velites forward to throw their Javelins at my troops. A perfect set of dice allows these two units to cross the field and deliver a volley of pointy sticks at my troops. Thankfully my saving rolls are good and I don't take any disordered markers at this early stage of the game. 

The Cavalry of both sides slam into each other and melee back and forth for most of the battle. Disordered units have a red token on them but I'll get a chance to attempt a Rally in my turn. 

In the centre, all the light infantry are busy exchanging Javelins but with a relatively light outcome. One unit of Gauls is disordered but thankfully little else. The Velites should have withdrawn at this point but failed to do so and several were destroyed ceding victory points to the Carthaginians. 

Now the Carthaginian Elephants slam into the Roman lines. Despite getting an extra attack dice in the first turn of melee they fail to break the maniples. However, some of the Hestati have had to fall back and exchange with the Principes behind them, prompting a hail of Pilum at the Elephants.  

Pressure on the centre continues but good Rally checks save the Roman line on several occasions. 

My African Spearmen now approach ready to exploit any break in the Roman lines...maybe a little too close to those elephants? 

Oh dear. One of the Elephant units is destroyed, but not before rampaging back through one of the veteran Spearmen units disordering it.

A bitter blow but also a lesson to be learned!

The Cavalry clash is heating up. One of the Punic Cavalry units has broken through and hit the Equites behind. The roman unit is destroyed and the commander, the attached general is killed! The victory points are stacking up on the Carthaginian side, but so are disordered markers.

The Gauls are now in contact with the Roman lines and have destroyed one of the Hastati/Principes units. When the Romans have "Gone to the Triarii" things are looking bleak. 

Meanwhile, the victorious Punic cavalry has turned around and hit the remaining Romans units in the rear. Lucky Rally checks have kept the remaining Punic Cavalry in the fight and now the Roman Equities are feeling the pressure. 

The Gauls sweep aside another Hastati/Principes and the Roman flank starts to turn as the last Roman victory medals are won by the Carthaginians. The Roman Army withdraws from the field defeated. 

Analysis
Despite playing solo I was able to get this whole game completed in about 2 hours. I set up the night before to save a little time but the rules play fast and I was comfortably able to complete the game and get everything back in their storage units by lunchtime. I need to recheck some of the rules before I play again because I'm sure I got a couple of things wrong. I really need to play more often and I'm determined to do just that over coming months. 

Wednesday 8 May 2019

All the Kings Horses at Audley End

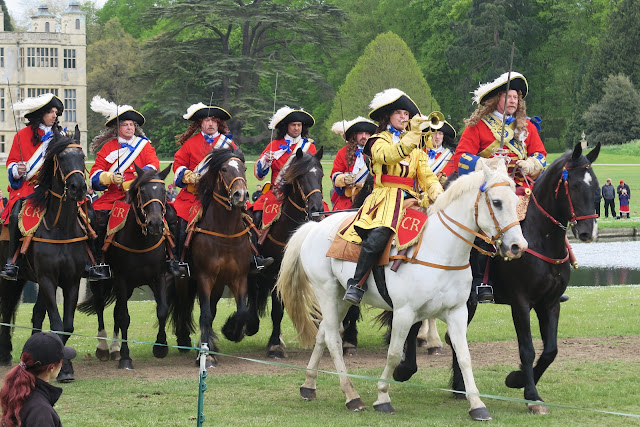
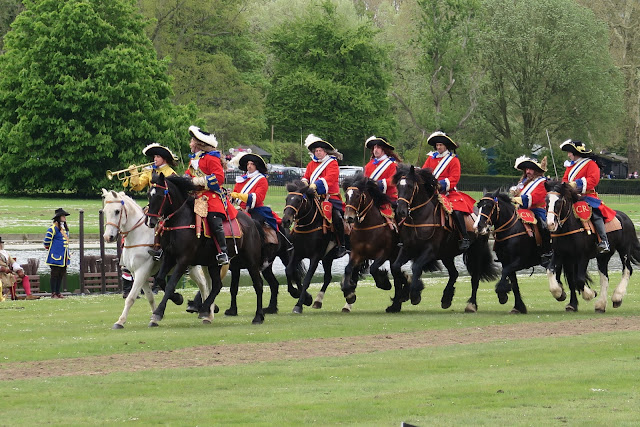
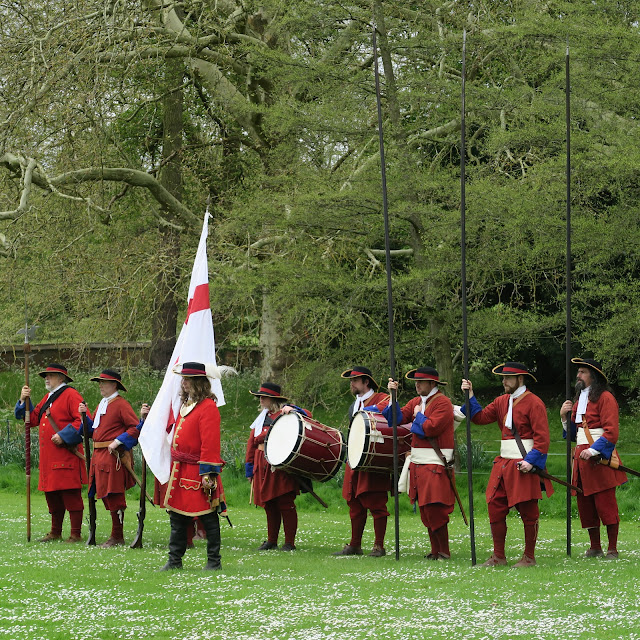
On Monday we visited Audley End near Saffron Walden in Essex. We've been here plenty of times before but not for several years. This weekend they were hosting a special event "All the Kings Horses" for a Restoration period reenactment. The theme is 1670 and King Charles II has recently purchased Audley End and is hosting a horse race on his way Newmarket. The Kings Cavaliers show off their exceptional horsemanship while the Merry Monarch indulges in the fun of the Restoration period.

I'm thinking "Ray will love this, all curly wigs and frilly cuffs..."

Ready for a charge

At the canter

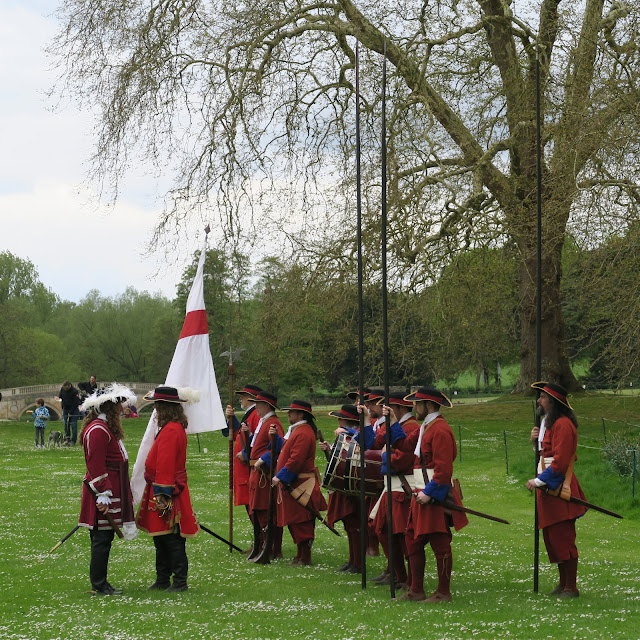
A figure ratio that every wargamer will recognise! 

I've seen these guys somewhere before...?

Big flags. It took skill to handle these properly, especially in high winds. 

Its a pity the weather was a bit inclement on Monday otherwise we would have stayed longer.