Showing posts with label Guest Player. Show all posts

Saturday, 8 September 2018

Battle of Fort Christopher

On Friday the Rejects gathered for a rare evening game featuring our special guest Christopher (aka Axebreaker) of Bunker Hill. Chris has been in the shed-o-war before but sadly I missed that game so it was good to meet him this time around. After his previous visit he had already joined the hallowed ranks of the 'Honorary Rejects' but the fact he came back for second helpings means we must be doing something right. Postie put on an excellent French Indian Wars skirmish, and equally excellent supper as most of us had to come straight from work in order to fit this rather large game into an evenings play.

Setup
Fort Christopher overlooks a colonial village and farmland, constantly under threat of attack by the French and their Indian allies.  They expect a raid could be imminent but have no idea where it may come from so at the start of the game, in addition to the garrison, there are several patrols of Light infantry and Rangers widely dispersed across the whole area. Meanwhile the French are using the enclosing woods to spring their attack from multiple points. Their mission is simple; burn, kill and plunder as much as possible.

Order of Battle
British/Colonial Forces
C/O General mounted (Christopher)
   44th Foot (24)
   80th Light Infantry (Gages) (16)
   55th Light Infantry (Howes) (16) 
   Indian Character
   Mountain Man/Adventurer + Mule
2ic Captain of Foot (Lee)
   Virginian Provincials (20)
   Rodgers Rangers (12)
3ic Captain  (Judge Hogg) Militia (Richard)
   Militia/Colonials (Civilians) (42)

French/Indian Forces 
   General on Foot (Ray)
   Indian Character
   Indian Torch Carriers (2)
   Guyenu Line (20)
   Indian Warband (12)
2ic Colonel of Foot (Mark)
   Compagnes French de la Marine (12)
   Indian Warband (12)
3ic Major on Foot (Surjit)
   Trois Revienes Militia (12)
   Indian Warband (12)


Action
As always I'll try to start with an overview picture of the initial setup. However as pretty much all of posties table was being used its hard to fit into just one picture. 

View down the table from Fort Christopher (bottom right) through the village
and onto the river and forest beyond.
 
Chris had the 44th Foot inside the Fort and quickly decided it would be wise to bring at east some of these guys out to help defend the village. Out of shot toward the top one of his Light Infantry units was on patrol and the second Light Infantry unit was off table to the left beyond the river and would come on in the first turn. 

My troops were the Virginian Provincials (the blue unit on the road) and Rodgers Rangers (in green) ahead on the road approaching the river. Richard controlled the militia inside all the various buildings, although many of these civilians actually turned out to be unarmed! 
The Infantry in the fort quickly organise themselves to leave to help in the defence of the farmsteads. A handful of troops were left inside just in case those tricky French were foolhardy enough to attack the fort. 

One of the Light Infantry patrols. All the units out on patrol had to continue to follow their starting movement until the alarm had been raised or the enemy spotted.

My Rangers spread out when they spot the first Indian warband exit the forest and begin crossing the river. One of my men takes a shot in their direction. Unfortunately my target is just out of range but the gunfire alerts all the other British units that something is happening. 

A large Guyenu Line unit emerges from the forest and starts to cross the river. This is a big unit and will be very difficult to stop. They advance with the Indians ahead.

Meanwhile more French (in this case Marines) and Indians cross at the lower ford. 

With the knowledge that the French and their Indian allies are crossing in force at this end of the settlement I decide to pull back and take up a defensive position in the centre. My Rangers occupy the fenced yard around one building and the Provincials and some of the Militia occupy the ground around a farm in the middle. All my men are now behind hard cover although there are plenty of gaps the Indians could exploit if they decided to charge into melee. 

Meanwhile down the other end of the settlement more Indians have come out of the forest and quickly moved to attack the rear of the 80th Light Infantry who were patrolling the road. 

Christopher quickly moves these troops across the fences giving them some protection in the ensuing firefight. Non the less the first casualties go down with arrows in their backs and it looks like the Infantry may be in a precarious position. 

Fortunately Christopher's other Unit of Light Infantry (the 55th) have come onto the table and begun to pursue the noisy Indians through the forest. The 80th LI now return fire on the Indians and one of the first killed is their war-chief! Meanwhile the 44th Foot have also left the fort and are now marching as fast as they can into the settlement. 

While Chris fights off the Indians at one end of the town me and Richard are trying to defend the other end from the larger group of invaders. Richard has mustered a handful of Militia to take a few shots at the advancing Indian's and French Line regiment. They kill a couple but are soon peppered with arrows. There is little to stop the Indians plundering and burning the town. On my side of the table Mark moves his Indians and Marines wide of my position. I expected him to use the woods to advance into my weakly defended centre along the yellow lines indicated, but instead he hugs the edge of he table and swings around following the blue line of march. I'm not entirely sure what his plan is, but I'm grateful whatever it is. I've lost a few men but nothing my large Provincial Regiment can't handle.  

At this point its worth explaining some basic concepts for how Posties rules work. Turns start with initiative and then each individual soldier has two actions per turn. Moving, shooting and reloading cost one action each and can be used in any order. Running uses two actions. Crossing barriers or opening doors uses one action and troops that do this cannot use their second action to reload. Troops that fire must spend a whole turn reloading so in effect can only fire every other turn. The Indians are best in forests and suffer a penalty in the open, but they are still deadly in melee as most carry two weapons. Bow wielding Indians are nasty because they are accurate and don't have to spend a turn reloading. Troops in forests can move up to the edge and still retain a cover bonus unless they give their position away by firing. So I expected Mark to make full use of this by getting his troops right to the edge of the woods then waiting to win initiative to charge my soldiers while they reloaded.

Mark's Indians and Marines finally appear and in two turns have killed the small cohort of defenders I had put behind hard cover next to the fish house. The Indians then hide in close formation behind the wall (?!) ignoring the rear door to the building. Two Indian's then cross the wall and charge at my three Provincials taking cover behind a log across the road. The remaining Indians swing around the yard but are at least a turn away from being able to charge into melee. Meanwhile Mark uses his Marines to take pot shots at my men and my Rangers take a few shots back. Casualties mount on both sides. 

While all this is happening Chris has managed to bring his 55th Light Infantry through the woods and appear behind the French Indians attacking the 80th LI. The resulting crossfire was eye watering as Chris rolled 20 after 20 decimating the war-band. 

The Indians and Militia that remain are forced towards the centre of town. Despite being in this choice position they fail to steal a single cow or burn a single building!

Chris had been bringing up his 44th Foot (from the Fort) to support his Light infantry but now with the Indians effectively a spent force he decided to change their direction. A turn to reorganise and the 44th begin to run down the road towards my position.  

There is a lot going on in this picture. Chris's 44th Foot are running up the road to support me. Marks Indians have swung around the smokehouse yard while two have charged my Provincials across the road. I move up five men and fire at point blank range killing just one Indian! Meanwhile Mark moves his Marines along the forest edge presumably to launch a charge next turn. My remaining Provincial troops and Rangers are firing in all directions (denoted by the Red lines). I have moist success against Ray's Line unit advancing (around the top in this picture) killing most of his front rank of troops. 

Darkness is quickly forcing an end to this raid and with a final flurry of shots the game comes to an end. My Provincials and Rangers have been defending that triangle of land around the farmhouse the whole game, moving from one side to the other as the threat demanded. However in the final volley my Provincials drop to below 50% forcing a Morale check (my second of the game) and I fail miserably. Had the game continued they would have been forced to retreat for two turns but as this is the end of the game the failed check as little impact on the end result. 

So have the French/Indians done enough damage to win this game on points?


Analysis
The short answer to that last question is; No. The British ended the game on 108 points, mostly from killing Indians who are worth more points. The French forces did a lot of damage but they end the game on just 60 points so this was a decisive victory for the British! Tactics aside the reason this didn't work for the French is that this was a raid and they would have score points for stolen booty, destroyed crops and burned buildings. They failed to loot a single item and didn't so much as set fire to a haystack let along any buildings. They may have dealt a lot of casualties to the British/Provincial troops but they only did so by completely ignoring their mission objectives!

That was an excellent game and great fun for all involved I think. Once again Posties FIW rules proved simple and easy to understand and resulted in relatively fast play and decisive action.

Sunday, 17 December 2017

Battle of Tchorgoun 26th Sept 1854

On Saturday the Rejects gathered in the Shed-o-War for our last game of the year. This was a special event as we were being joined by Miles (of Lair of the Uber Geek fame) and for this Postie put on a real corker of a game. 

Setup
It is the 26th September 1854, the Battle of Alma was fought six days before and won by the British, French & Turkish allies. The beaten Russian army retreated back to Sevastopol to reorganise but has departed for fear of the main army in the area being trapped inside the town. Prince Menshikov has led his men to the open plains North East Sevastopol. 

Heading slowly south to invest Sevastopol the combined armies make what was known as the 'Flank March' to avoid the towns big guns, spending the night of 25th September in their encampment at Machenzies Farm and around the Traktir Bridge. The British, French and Turkish forces have decamped and are heading south to invest Sevastopol in a bid to secure the vital supply  ports of Balaclava and Kamiesh. 

The game is a 'What if' scenario; What if the Russian Army under Prince Menshikov had decided to threaten or attack the Allies on their Flank March. Scouts have spotted Russian troops gathering on the heights near the village of Tchorgoun not far from the Traktir Bridge. Lord Raglan being informed of the situation does not wish to be caught with his troops in march order, so orders those units which are close by to engage the Russian forces that are now in his rear and flank, while the rest of the army continues on its way. Mist hugs the battlefield and neither side can be completely sure where the enemy troops are at the start of the game...indeed some of their own units have become a little lost on the mist.

Order of Battle
Russians -  C/O Prince Menschikov (Overall Commander Miles)
  16th Div  c/o Lt Gen Kvetzinski (Miles)
     1st Battalion Vladimir (4), Susdal (4)
     2nd Battalion Uglutz (4), Kazan (4)
     2x Heavy Guns, 2x Light Guns
  17th Div c/o Lt Gen Kiriakov (Lee)
     3rd Battalion Moscow (4), Butirsk (4)
     Attached 6th Schutzen Battalion 
     1x Heavy Gun, 3x Light Guns
  6th Cavalry Div c/o Lt-Gen Ryzhov (Ian)
     6th Battalion  11th,12th Hussars
     6th Battalion 11th Uhlans (4Sqn), 53rd Don Cossacks
     2x Horse Artillery Light Guns
  Reserve 14th Geavy Gun & 14th Light Gun
(660 Infantry Figures, 78 Cavalry Figures & 12 Guns)

British - C/O Lord Raglan
  1st Div  c/o HRH The Duke of Cambridge
     1st Battalion Grenadier, Coldstream and Scots Fusilier Guards
     2nd Battalion 42nd, 79th & 93rd Highlanders
     2x Medium Gun
  2nd Division  c/o Sir George Lacy Evans
     1st Battalion  41st, 47th & 49th Line
     2nd Battalion  30th, 55th & 95th Line
     2x Medium Guns
  Light Cavalry Division c/o Lord Lucan / Brigade c/o Earl of Cardigan
     Cavalry Battalion 8, 11th Hussars, 4th & 13th Light Dragoons, 17th Lancers
     1x Horse Artillery Light Gun
French - c/o Marshal St Arnoud
  1st Div c/o Canrobert
     1st Chasseurs aPiel, 1st Zouaves(2), 7th Line (3)
     1x Heavy Gun
  2nd Div c/o Basquet
     2nd Battalion 3rd Zouaves (2), Algerian Turcos (2)
     Light Cavalry Brigade   1st, 4th Chasseurs d'Afrique
     Heavy Cavalry Brigade  6th Curassiers, 6th Dragoons
     2x Medium Guns
Turkish c/o Suleiman Pasha
  1st Division c/o Selim Pasha
     1st Battalion  Line Battalions (6)
     2x Medium Guns
(426 Infantry Figures, 86 Cavalry Figures & 11 Guns)

The Action
The game started with the Russian 16th Division on the far left of the picture looking across the valley at a thin red line of British. My 17th Division are in the middle looking towards Elite french infantry. 

On the right side of the Russian line the battlefield was much more open, with Russian Cavalry and some Cossack's facing the British Light Cavalry Division. Postie can be seen explaining the forces arrayed to Ian (out of shot to the right). 

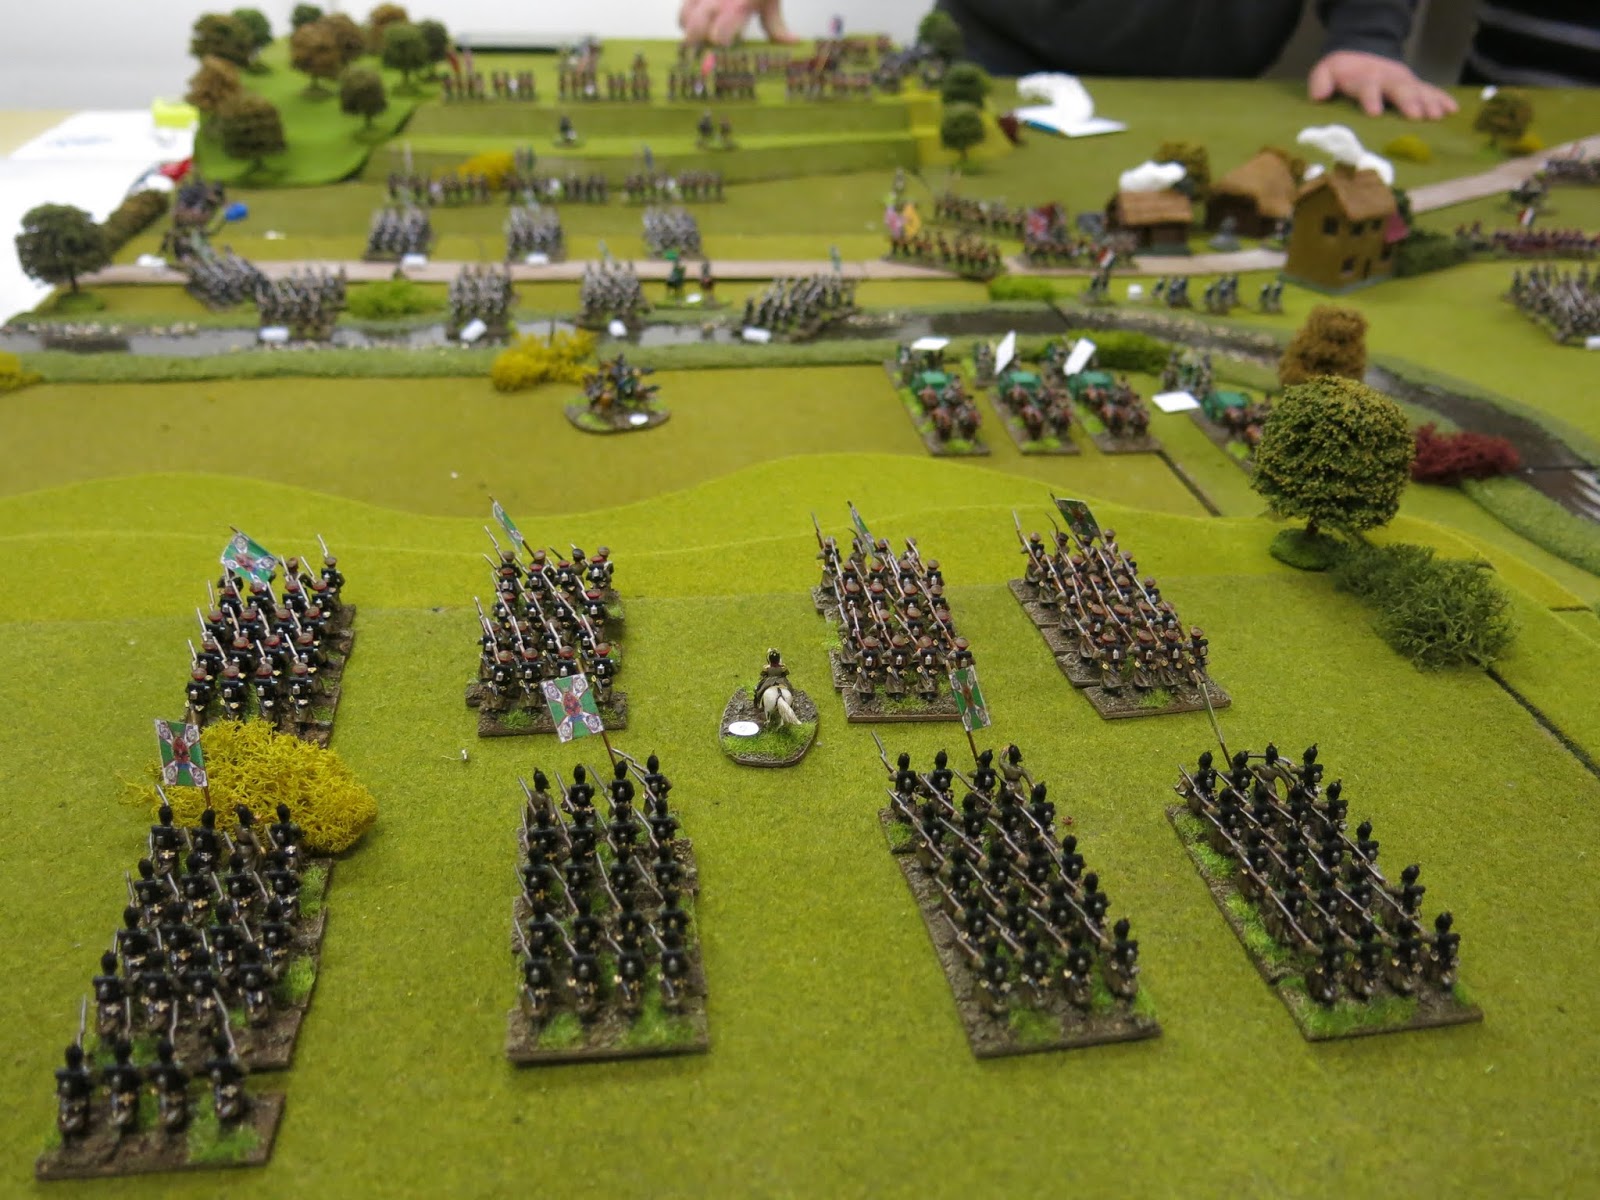
The Russian plan was deceptively simple; smash our columns into the Allied lines and hope we don't take too many casualties on the way in. Our Cavalry needed to keep the Allied cavalry occupied over on the right to keep them off my right flank. My division in the centre would keep the French busy and thereby stop Surjit from providing support to the British Division on the hill. This would isolate the British forces there, forcing them to fight alone and unsupported, which we hoped would maximise the chance of success for Miles' frontal assault on the left. The question was, would this work?


Miles division looks formidable and stares across the valley as just a handful of British units and a few medium guns. 

My Line units similarly have a large open plain to cross. Thankfully there is little by way of terrain here to complicate our advance. 

The game starts and after the Russian moves its the turn of the Allies. Here Surjit measures the movement of his French infantry. 

The French centre advancing means I can get into contact quicker, has Surjit over estimated the quality of his troops? 

The Russian advance presses forward and Miles was quick to move his guns up into effective range as quickly as possible. These four guns proved invaluable and dealt a lot of damage to the Allied line during the course of the game. 

Looking across from the British perspective... Postie is laying out much needed Russian reinforcements (more cavalry!) while Miles looks on and wonders why he volunteered to spend the day with such an unruly group of rejects! 

Postie places yet more Russian Cavalry reinforcements, while Ian looks utterly unimpressed and miserable. 

Now for some British reinforcements... a Battalion of Grenadier, Coldstream and Scots Fusilier Guards right where the Russians least wanted them! 

My Columns position themselves for a well times and coordinated assault. I move one of my light guns to shield the infantry and while it is knocked out quickly it buys my infantry another turn free from casualties and lets them get into position unscathed.  

Looking at the Russian advance and everything still looks quite orderly...it won't be this tidy for long!

Miles takes a look at the game from the Allied perspective. 

Now the action begins as the Russians start to get within charge range. One column chases off the British gun on the left and another moves to secure the right flank. Russian guns have now set themselves into a position they will occupy for most of the game. 

My columns in the centre have reached charge range unscathed and in perfect order (amazingly!!). I use some skirmishers as a screen to protect my units from the French gun on the right while I move another column on the left as a shield for the right...I expect these to take a battering but its a price the Russians know they need to pay. 

Wooohoo! Russian reinforcements!! Miles gets eight more columns appear. It'll take a while for them to reach the action, but they will be marching as fast as they can in the meantime. 

Likewise I also get eight more columns of infantry. At first I am a bit undecided how to use these but know that directly opposite the take I now face a Turkish Division. However on my right (just out of shot) these is a massive build-up of Russian and British Cavalry about to have a massive melee...if the Allies win this decisively they can sweep round and hit my flank.  

The British under Ray form an orderly retreat ready to fire on the Russian Charge. meanwhile Surjits French and Turks advance providing a very tempting target for my infantry. 

Ian's Cavalry lines up ready to face off against the combined French and British Cavalry. Ian is convince this can only go one way and can be heard plaintively bemoaning the fact that this can go only one way...The words "We can't win this game. 100 percent, 100 percent" are heard by all. Such confidence from the General charged with protecting my flank is not entirely reassuring!

Ignoring the negativity coming from the other end of the Shed-o-War, Miles send in his columns and begins to assault the British lines. 

Likewise my attack starts and I force back some of the French Artillery and an infantry unit. Some of my columns have taken a severe battering but the attack presses forwards non the less. 

Ian had to leave early due to a family emergency so I had to take over his cavalry just at the crucial moment. Despite his earlier assessment of the chances of success I thought this mixed bag of units would probably produce a messy result for both sides. A massive cavalry clash now takes place as both the Russian, British and French units smash together. 

Ray is starting to look a little hard pressed. However he still has a strong position and a a secure flank. 

My reserve infantry press forwards despite the risk from the enemy cavalry on the hill. My hope is that enough disruption will be caused up on the heights that the Allies will not be in a position to sweep around my flanks. 

Russian infantry steamroller into the British positions while their guns pound any Allied unit that gets too close. Meanwhile my skirmishes - having done their job of shielding my advance in the centre - are now free to harass the flanks of the British on the edge of the village. 

A crucial moment as the Russians prepare to charge uphill into the Guards. On the right a British unit that had already fled after being assaulted disrupted one of the guards units as it passed through. Now Miles aims one of his Russian columns at this weak point. 

Up on the hill the Cavalry battle has resulted in something of a mixed result. Two melee were won by the Russians but both sides lost many brave men in the clash. Only one unit of British came away relatively unscathed and now threaten my reserve infantry in the centre. 

The second wave of Russians starts to cross the valley. Meanwhile two of their guns continue to pound the closest British units and my Skirmishers continue to harass the enemy in the village. 

In the centre my Russians reform and prepare to continue their attack on the second line of French and Turkish troops. The fallback means that the Russians must endure more casualties but the continued advance means the French cannot send any support to the hard pressed British on the hill. 

More Russian reserves...an utterly superfluous ammunition wagon!  We had two arrive but they are so far from the front lines as to be utterly pointless. Thanks Postie!!

The British cavalry charge down the hill and into contact with one of my columns. I decide to leave a second column to occupy the cavalry but continue the march of the remaining six columns. They can see the Turks ahead of them and have set their sights on this apparent weak spot in the Allied line. 

Miles Russian steamroller continues on. Troops pour up the hill and into a Guards unit. All the while the Brits are loosing leaders and crucially a Divisional General in this encounter. 

The Russians have pretty much broken through what at one point looked like an impregnable red wall. The British now face several Battalion and Divisional moral checks. 

Over on the right flank the cavalry skirmishes continue as the remaining units keep each other busy in a series of hit and run melee the see little battles taking place all over the hill and valley beyond. 

Rays' face tells it all. The combined British and French forces have taken a battering but more importantly they have lost a lot of leaders in the process and several units have also lost their colours. These vital victory points will count heavily against the Allies in the final tally. 

Analysis
This was a really tough game with both sides having to show a lot of nerve. The Russians had the simpler task as it was a matter of lining up our columns and trying to smash through the allied lines. Having said that the British didn't make it easy for them and the Russians had to endure a lot of casualties before they could deal back some pain to the allied army. The British French and Turkish forces had a somewhat harder job in they they had to hold their nerve as the Russians advanced. When the columns finally hit the British in particular had to use every ounce of reserve to stop a breakthrough, and by the end of the game they had taken serious casualties, including many Battalion commanders and one Division General.

Despite Ian's dire predictions of disaster early on, the remaining Russian commanders stuck with the plan and won the day. When Postie added up the final points tally the result was 23 points to the Allied Army and a resounding 33 Points to the Russians, although much of that was for enemy generals killed and unit colours taken in Melee.

This was a thoroughly enjoyable game that tested both sides and where the outcome was in the balance for most of the game.

UPDATE: I've had a couple of people ask me who makes the figures used in this game. I'm reliably informed that pretty much all the figures are by Minifigs. Only the French Cuirassiers and Dragons are by other manufacturers and we're not sure where they are from.