Showing posts with label D-Day. Show all posts

Friday, 12 April 2024

Hunting Big Cats in the Normandy Bocage

Tiger Tanks and Panzerschrek teams lurk in the woods and Bocage of Normandy 1944. This What-a-Tanker battle report combines several games testing out my supplementary rules that bring Panzerschrek anti-tank teams into the game.   


The rules are nothing fancy, just an A4 sheet of very basic rules using tokens (some of which are Blinds) for the movement of Panzerschrek teams in the Normandy Bocage in the summer of 1944. If you want a copy just drop me a line with your email address and I'll be happy to send them to you.

Sunday, 6 June 2021

D-Day Normandy MDF Buildings from eBay

If you are wargaming on a budget most MDF buildings will be too expensive to have more than a few. I recently bought a set of buildings from a small independent manufacturer selling on eBay which were excellent value for money. The details are basic but with a good paint job, they will enhance any wargames table at a fraction of the cost of other commercial products.


I don't often single out a manufacturer like this (and no, I'm not on commission!) but these were such good value I had to do a video to show them off. 


Tuesday, 25 May 2021

New Projects and the future

I have recently been quite busy making terrain for my Normandy games (although much of it is generic and could be used for other periods/settings). Over the next few weeks, I'll be sharing some videos showing off some of this work, but right now I am working on a new project. I'm still sticking with Normandy 1944 and Chain of Command, but I'm starting work on some late war British Infantry that I recently bought from Skytrex. If you watch the 'unboxing' video in the link you'll see how nice these 15mm metal figures are, and now that I have started work on them I like them even more.


My eventual aim is to have a couple of different platoons for both sides that can fight alongside each other in a big multiplayer game down the shed-o-war with the Rejects. This is a long way off and I need to prepare well for such a complex undertaking. Not least because I'll need all my umpiring skills to manage four newbie players simultaneously. The hope is that eventually, I will be able to run this game on a much larger table, in effect playing out two games simultaneously side by side but with linked objectives and of course an overall outcome. Maybe I'm slightly crazy, but the idea has got me excited and I have no doubt I'll live to regret it!! 

In the meantime, I have a 'New' project to keep me going. The miniatures are hopefully on their way to me right now...a long awaiting delivery of 6mm Celts from Baccus. I didn't purchase a whole army because I already have several bases of Celtic/Gaulish warriors for some of my other armies so all I needed to do was add some commanders, cavalry and chariots and I have the ability to field a Celtic/Gaulish Army against my Romans or Carthaginians. These miniatures have been on order for a long time but I have been happy to wait for their arrival. When they do I'll have the 'fun' task of assembling the Chariots... and after the Indian Chariots I painted a few years ago I know I will need all my patience for that particular task! 

On a side note, I'm quite enjoying making the YouTube videos for my channel Miniature Adventures so expect to see more of these in the future. I realise that most of my posts here have been links to these films and judging from the amount of visitor traffic they have generated the combination seems to be popular. Certainly, I feel the two platforms complement each other and my only regret is that I didn't do this years ago.... mind you, it's only the availability of my still relatively new Operations Room that has given me space to make videos and play solo games so maybe now is my time, stop regretting what wasn't possible, and focus on the future. 

Friday, 14 May 2021

Unboxing - Old D Day Maps

Today I have a short video showing off a couple of reproduction D-Day maps published by Godfrey Edition. These have all the D-Day Bigot planning annotations on the maps and will keep me engrossed in the detail for days to come. 


I plan on using these to enhance my setting up of terrain and possibly for a campaign series of linked games sometime in the future. 

Friday, 7 May 2021

The Road to Breville: A 30 Minute Battle Report

Last weekend, I used my newly enlarged games table for the first time and played a solo game of Chain of Command. The battle is set on D-Day, east of the Orne River and Canal near the landing ground of the 8th Airborne Brigade. While the action is fictitious the landscape is as close as I could get it for the location. I used Scenario 6 in the rulebook, attacking an Objective, with the Germans defending a critical crossroads. 


As before, I am trying to keep these video battle reports to about 30 minutes (give or take), so I didn't film every dice roll except for a few critical ones towards the end of the game. There are plenty of great Chain of Command games played in their entirety on youtube, which is great if you have a couple of hours to spare. However, I wanted to offer something a little more 'bite sized' without the spectacle of watching me fumble my lines, flicking back and forth through the rule book while muttering to myself. I hope you enjoy this shorter format and of course if you do please hit the like and subscribe buttons. 

Friday, 23 April 2021

Battle Report - Assault on Morris Battery

My latest solo game at home has seen me get my newly painted British Airborne out on the table for a very exciting game of Chain of Command. As before I have made a 30 Minute Batrep video to record the game which you can see below. 


This was a very exciting game and thoroughly enjoyable. Here are a few pictures from the game but you'll have to watch the video to find out who won! 

The game used a lot of scenery that I haven't had on the table before, including these trenches and barbed wire fences. 

I also had some of my farm building on the table although they ended up playing no part in the game. 

The British have been tasked with assaulting and knocking out a fortified german gun battery overlooking the D-Day Beaches. They have a lot of open ground and barbed wire to cover. 

The British are Elite troops so get six command dice which is a huge advantage giving lots of flexibility in the game. 

British Para's get stuck in and earn their nickname The Red Devils. 

A very enjoyable game and I hope you enjoy the video. 

Wednesday, 21 April 2021

Fields full of Hedgehogs

No, I haven't started painting cute garden animals for a fantasy game (relax Ray!). I'm talking about the Czech Hedgehog variety that often littered the beaches and fields of Normandy.  I'm always on the lookout for small battlefield items that can 'decorate' my games tables and this was a case of desire meeting serendipity in a most satisfying way. 

Wednesday, 2 September 2020

First Playtest with Chain of Command

Last week I published a video on my YouTube Channel about learning new rules and I guess that means I have to put my money where my mouth is and learn a new set of rules! Actually, I can't really call Chain of Command a 'new' set of rules because they first hit the hobby scene in 2013, and I bought my copy over four months ago. Since then I have been converting some of my 15mm Flames of War figures for use with this ruleset while trying to learn the rules. As I explained in my video, I find it very hard to just sit down and read a rulebook, so I have been watching a lot of how-to videos, playtesting and otherwise 'dabbling' with the rules on my own. Now its time to play a proper game, bringing together the various elements I have been working on over the last few months. 

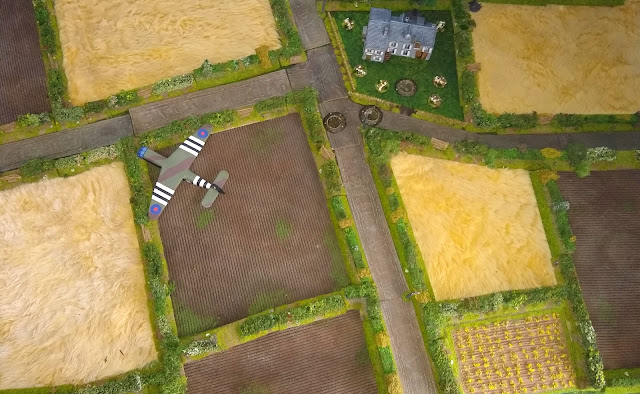
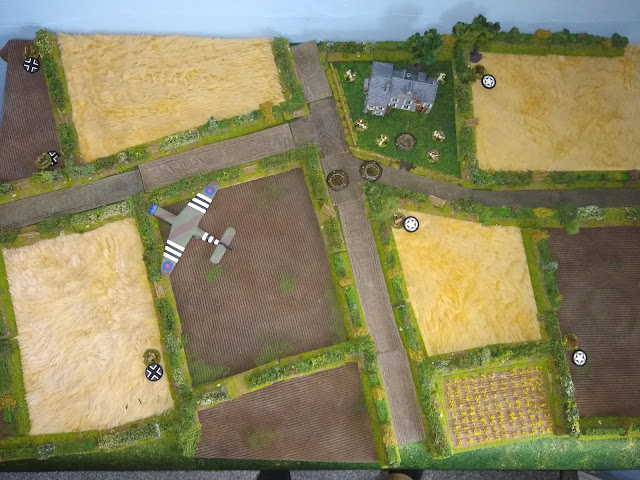
I started by setting up the table, making use of my recently completed ploughed fields and wheatfields, along with my collection of homemade Bocage hedgerows and gates. My table is a bit small for this game (just 4' by 2'6") although I have plans to make this a little bigger in the future. Despite this, it is still just about big enough to play a solo tester game on and start reviewing my understanding of the rules, figuring out what I don't know or don't understand. 

Space is a bit tight in the Operations room at the moment, what with it doubling as my work office two day a week and a studio for the YouTube Videos I have been doing as well as my painting and gaming space. Just moving stuff around is an intricate dance, shifting boxes from A to B and moving tripods and stands...the list goes on. I expect I'll be spending more time in my actual work office soon so I can get my operations room back into some sort of order and use it as intended, i.e. for gaming! In the meantime, I'm having to use some of my storage boxes as a temporary table for dice, tokens, figures and Morale Trackers. 


So I started on the playtest game and decided that because my table is a bit small I would use only three Patrol Markers per side in the Patrol Phase of the game. The Americans were able to secure an important field dominating the road junction while the Germans were pretty much relegated to the edge of the table. 

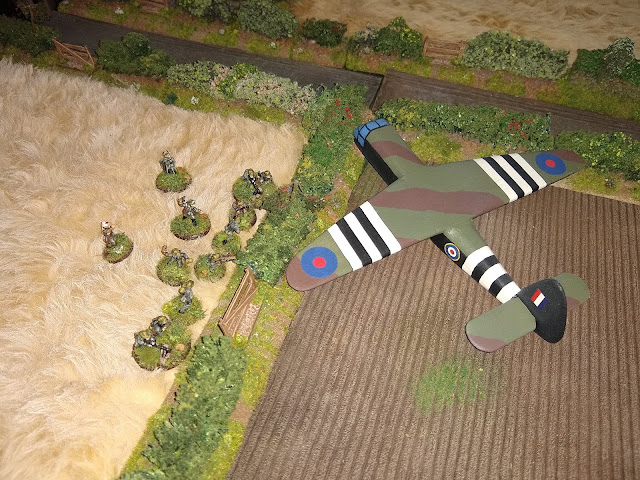
The Panzergrenadier HQ and one of the MG Squads deploy in a field next to a crashed Glider. The point of this 'game' was for me to test myself and find those bits of the rules that I was unclear on (a lot as it turned out!). One of the things I think I need to do is highlight some of the bases for leaders to make it easier for players to see. They are on slightly larger bases than the infantry, but its sometimes not very clear so I think a coloured band on the base edges will be helpful. Another thing I think I will do is make some Squad ID labels, again just to make it easier to remember which squad is which. This isn't required in the rules but I'm thinking of running this game system for the Rejects using Zoom and I think it would be helpful. 

The German HQ and its associated Squad have a large field to cross, but at this early stage of the game, the Americans haven't managed to occupy the farmhouse so there is no LOS on this area. This helped teach me an important lesson about the order in which units should be deployed and in the importance of securing a good fire position early in a game. 


An American MG Squad can be seen behind the hedgerow next to the house. I should have moved these early in the game to capture the Farmhouse. 


As the game hots up there is a LOT of close quarter shooting taking place. However, with everyone in Hard Cover casualties are relatively low. Shock, however, starts to build as combat fatigue begins to become a factor. I know this is a rule the TfL have used before and I really like it. 


One mistake I made early on was forgetting the supporting teams in the same squad (ie within 4" of each other) can share Shock inflicted on a one exposed team. As I said, this is a test game and when I realised my mistake I redistributed the shock markers to both teams. 


I played this test game a little at a time over three days (the advantage of having a dedicated games room) so it was inevitable that I would stop and pose for a selfie at some point!


Because this isn't a proper game - it's more a training exercise for myself - I didn't take as many pictures as I would normally, and didn't fully finish the game. I did get a chance to play out my first Melee, with the Germans overextending themselves in an attempt to capture the farmhouse and then getting counter charged by overwhelming numbers of Americans and basically having their backsides handed to them. 

After that encounter, the Panzergrenadiers were in a dreadful position, bleeding troops and now overlooked by American MG's firing from the upper floors of the Farmhouse. Eventually, I reached a point where I decided I had learned enough from this test game and brought it to an end. However, I have decided to keep the layout largely the same and immediately play another test game with the sides swapped around. I'll start from the beginning again, carrying out the Patrol Phase and seeing if I can play with fewer mistakes next time. 

So what have I learned from this solo test game? First, no matter how much I try to read and absorb the rules, I really learn from playing with them. Second, I need to keep a list of rules or topics I am vague about, so I can focus my attention on those bits of the rulebook. Thirdly I have found navigating the rulebook a little confusing at times so I think I'll add some 'tabs' to key pages in the rulebook so I can jump to them quickly. The fourth thing I already alluded to, highlighting the leaders a bit more so I can see them easier on the games table. 

I expect I'll have to play quite a few more games like this to 'master' the rules. Certainly, I need a better grasp on them before I try to run a game of CoC for the Rejects. Looks like I have my work cut out for me over the next few weeks!

Wednesday, 19 August 2020

Ploughed Field Terrain

Over the years I have made a lot of custom terrain and repeatedly return to the need for fields and crops for use in different periods and scales. Last year I made some small fields using thin MDF and brown plumbers caulk. They looked quite good but I have since found that their small size, and rigid nature, makes using them difficult, especially on my small table. I started toying with the idea of making some larger, more flexible fields a long time ago, but I have finally got round to making some ploughed fields using brown corduroy fabric as my base material. 

The fabric I bought came on a 1.5m wide roll so a 1m offcut gave me enough material to make 20 reasonably large fields for my games, more than enough to cover my modest games table, but also suitable for bigger games at Reject HQ. 


Once cut to size the fields were given a simple three-step makeover to finish them:

  • Although the material was called chocolate brown it had a bit of a purple undertone to it so I sprayed all the fields using Amy Painter Leather Brown. 
  • When this dried I gave the ridges a very light drybrush of sandstone from a tester pot of household emulsion paint. This has to be done sparingly, just enough to highlight the ridges. Try not to be too even with this, it looks better if some areas are lighter than others because real ground is rarely even and monotone when you look at it. Slight depressions will look darker than better-drained lumps and bumps. 
  • Then I added a few turf patches to some of the ridges. This looks a bit like grass growing in patches on the untended field. I used a large flat brush to apply the PVA to the ridges, using a very light drybrush-like stroke to get the PVA only on the ridges. The turf I then scattered on only adhered lightly and, after shaking, only a little bit remained glued in place. The result looks like sparse weeds growing in areas of deeper soil, or where the drainage is better. 
Additional details could be added, like patches of flowers or actual plants, but I wanted these to be simple. The only 'special effect I went for was one field where I added a hint of a crop ring in the field. 


I need to thank fellow Reject, Ray (Don't Throw a One) who helped with the colour and suggested the weeds which make these look so much better. Cheers, ol' fella! 


Wednesday, 5 August 2020

US M2 Flamethrower Team

This week I finished another support team for my US forces in Chain of Command. The M2 Flamethrower is both a terrible and terribly effective weapon when used against fixed fortified positions like bunkers or pillboxes. Its effectiveness is all the more surprising given that the US didn't start the war with any flamethrower weapons in its arsenal. Instead, they threw together a temporary weapon (it took just 90 days to go from design phase to production), but even before it was issued to troops, plans were already afoot to build its successor. The Army then went out and acquired examples of German, French and British equipment and designed something better ('better' is a matter of perspective, given these are designed to burn people to death!).


The resulting weapon, the M2 went into production in early 1944 and saw service through the rest of WW2, into Korea (where it became the M2A1) and even saw service in Vietnam. When filled, it weighed 70lb and held 4.75 gallons of fuel providing about 6-7 seconds of firing time. When using liquid fuel it's effective range was about 20 yards, but when filled with a gelled fuel (napalm basically) its range was doubled to 40 yards. 


The unit is made up of a backpack and a gun attached by a pressurised hose. The backpack consists of three tanks. The two larger ones contain the fuel (filled from the valves at the top) while the smaller tank contained compressed Nitrogen at 1500psi which pressurised the whole system to about 300psi via a regulator valve at the bottom. If the valve failed for any reason, there was a pressure release valve, which in the M2 consisted of a small valve and tube assembly on top of one of the fuel tanks. The later M2A1 moved this to a less exposed location at the bottom of the unit but both versions were designed to release pressure (and fuel) safely away from the operator. The harness also had a quick release buckle so the unit could be dumped quickly in an emergency. 

The Gun part of the unit was connected to the tanks by a multi-layered high-pressure hose. The Gun itself consisted of two triggers. The rear one was a handle grip trigger that realised the pressurised fuel into the gun and opened the valve at the front allowing the fuel to be released towards the target. The Forward trigger (which looks like a regular trigger) ignited the fuel. Hollywood flamethrowers often have electrical arcs igniting the fuel but these don't work very well in damp conditions and not at all when the battery dies. The M2, however, used a cartridge of five mini flares, each of which would burn for a few seconds. This means the operator had a maximum of 5 'shots' with the M2 with a combined maximum of 6-7 seconds of fuel capacity. 

Later in the war, the use of armoured flamethrowers like the Crocodile made the use of man-packed weapons less prevalent in Europe, however, they continued to be effective in Jungle fighting against the Japanese. Eventually, all flamethrowers (indeed the use of all incendiaries against people) were banned by Protocol III of the Geneva Convention, but this did not come into effect until 2005! As I said earlier a terrible weapon, but also a terribly effective one which is why pretty much everyone had variations of these in their arsenals. 

Wednesday, 29 July 2020

US Combat Engineers with Satchel Charges

Combat Engineers are often described as 'Force Multipliers' because they enhance the survival of regular troops. In the US Engineer Soldiers Handbook (Field Manual 21-105 issued June 1943) it goes further, telling new engineers... "You are going to make sure that our own troops move ahead against all opposition, and you are going to see that enemy obstacles do not interfere with our advance". While this may mean building bridges or laying communication lines, there are also combat tasks that need to be performed that require an engineer at the tip of the spearhead. 


Chapter 9 of the Handbook is entitled Assault of a Fortified Position and describes how multiple teams of engineers can work towards fixed enemy positions to destroy them. Brevity must have been the order of the day when writing this chapter because it consists of two short pages. Reading it you are left in no doubt that some of the duties of a combat engineer were highly dangerous. 
"A typical prepared defensive system of fortifications consists of a number of mutually supporting strong points, such as concrete emplacements called 'Pill-boxes'. The best way many of these can be destroyed is by foot troops armed with special weapons. It's a difficult combined-arms job to which engineers are often assigned. It requires aggressiveness, skill, speed, teamwork, courage, and determination."


These models by Peter Pig are carrying M2 Demolition Satchel Charges. In the post-war period they were called M37 Demolition Charges but these later versions used C4 (not invented until 1956) while the second world war versions were filled with eight blocks of TNT. They included two priming assemblies and a 'ripcord' type pull igniter. Try as I might I haven't been able to find out what the timer length was on these (if you know, please leave a comment below) although I imagine it could be set by the engineer depending on how it was being used. 

Sunday, 15 March 2020

Spring Skirmish - Rejects go on a Tiger Hunt

Somewhere in the tangled lanes and tiny field of the Normandy Bocage, there is a Tiger Tank on the loose. Reports have come in of allied vehicles being destroyed and bad weather has made aerial recon impossible. This one tank (let's hope it is just one tank) could hold up the entire advance in this area. It needs to be rooted out and destroyed and a British tank commander has been given the unenviable task of dealing with it. It doesn't help that there are also reports of German Panzerfaust teams lurking in the countryside... this mission is going to be rough. 

Just three weeks ago the Rejects decided we would put on a demo game at the Skirmish wargames show in Sidcup, and somehow I got volunteered to put together a game. I'm still not sure how that happened, but despite the short preparation time, I think we were able to put on an entertaining game and a visual spectacle for visitors. I already had pretty much everything I needed for the layout and thankfully the What a Tanker! rules are easy to play. My main task (aside from a little painting) was to come up with a twist that made this game a unique and interesting element both for players and visitors. I wanted to bring in some infantry, namely Panzerfaust teams, to give the allied player something extra to think about. I'll publish these rules on the blog tomorrow, and I have tried as far as possible to keep them simple and in keeping with the basic ruleset. 

As usual, I took a lot of photo's but let's start with a few shots of our Demo Game before I move on to more general pictures of the show.

The Setup was planned with my available terrain in mind. As usual, we did a handout and table sign for anyone that was interested. 

At least two of the four British tanks had to start on the two roads. 

Airbourne troops have been here before...but none of them are around now. 

Several woods dot the area...any one pf which could be harbouring a Tiger!

The Big Cat is finally exposed when it opens fire, destroying a Sherman M4 with one shot in its side armour. 

It was mid-day and I still hadn't even looked at the other games! 

A burning Sherman and several half-tracks litter the battlefield. 

Postie won both games and poor ray could only look on and photobomb!

In between running the game we also found time to look at the other demos on display. There is always an eclectic mix here with Skirmish games next to full wargames and historical battles cheek by jowl with sci-fi. Not everyone's cup-of-tea, but I like it. 

Rainham Wargames Club were also playing What a Tanker, but they stuck to the brief and set in in 1940. 

Their game features a Char B1 and some Panzer Mark I & II's

Next to them were the guys from Skirmish Wargames. I did take one of their excellent handouts but try as I can't find it! Sorry guys! 

The Camera Team captures it all from above. 

The Privateers of London running their game Operation Catapult. 

Maidstone Wargames were using another Lardie ruleset, Chain of Command. Very impressive terrain...I was taking notes!

28mm looks really good with all this terrain. 

Milton Hundreds Wargames Club run a game called Enter the Zone

Nicely done chaps. 

Gotta love a bit of Star Wars. 

The Young Padawan would have loved this... it's her own fault for not coming to the show with me. 

The Old Guard

The Painting Demonstrations

Tunbridge Wells Wargames Society


There are only a handful of traders at Skirmish, with a bit of a lean towards model builders and toy soldier collectors. Having said that I always find something to buy and this time was no different. In particular, I made a special request of Debris-of-War and they made me a couple of packs of their winter tufts so hats off to them for being so customer responsive. I ended up going back to their stall and buying more stuff (yet more resin terrain). The Magazines were freebies being given away by the show organiser. Very nice, I'll enjoy looking at these. 


I think we will definitely run more games at Skirmish. Maybe next time we can get Ray to run a Donnybrook game? That is, of course, if it goes ahead. It looks like many of the larger wargames shows could be impacted by the growing Coronavirus crisis (not to strong a word now I think) an Skirish may be the last show were get to for some time. Let hope things have settled down by the Autumn when this show is back on in September. 

Sunday, 8 March 2020

Normandy Utility Poles

So these were not on my original plan for the painting challenge, and it's all Ray's fault! Ray suggested our group, Posties Rejects, run a demo game at a very small show called Skirmish based in Sidcup. We routinely go to this show and we are always saying we should run a demo game there and so when Ray suggested it I blithely said, yeh I'll throw something together...not realising I had just three weeks to do it in! In the end, we have decided to run a Normandy/Bocage game of What a Tanker, primarily because I have all the terrain ready. All except these utility poles; hence their unexpected appearance on the Painting Challenge.


Now I can't remember where I bought these. I got them last year, but try as I might I can't remember where I got them, which is a shame because they are nicely cast in white metal and pretty good quality. They are suitable for 15mm of course and will fit in nicely with the rest of my Normandy terrain.