Wednesday 30 December 2020

AHPC XI - Week One in a Fantasy World

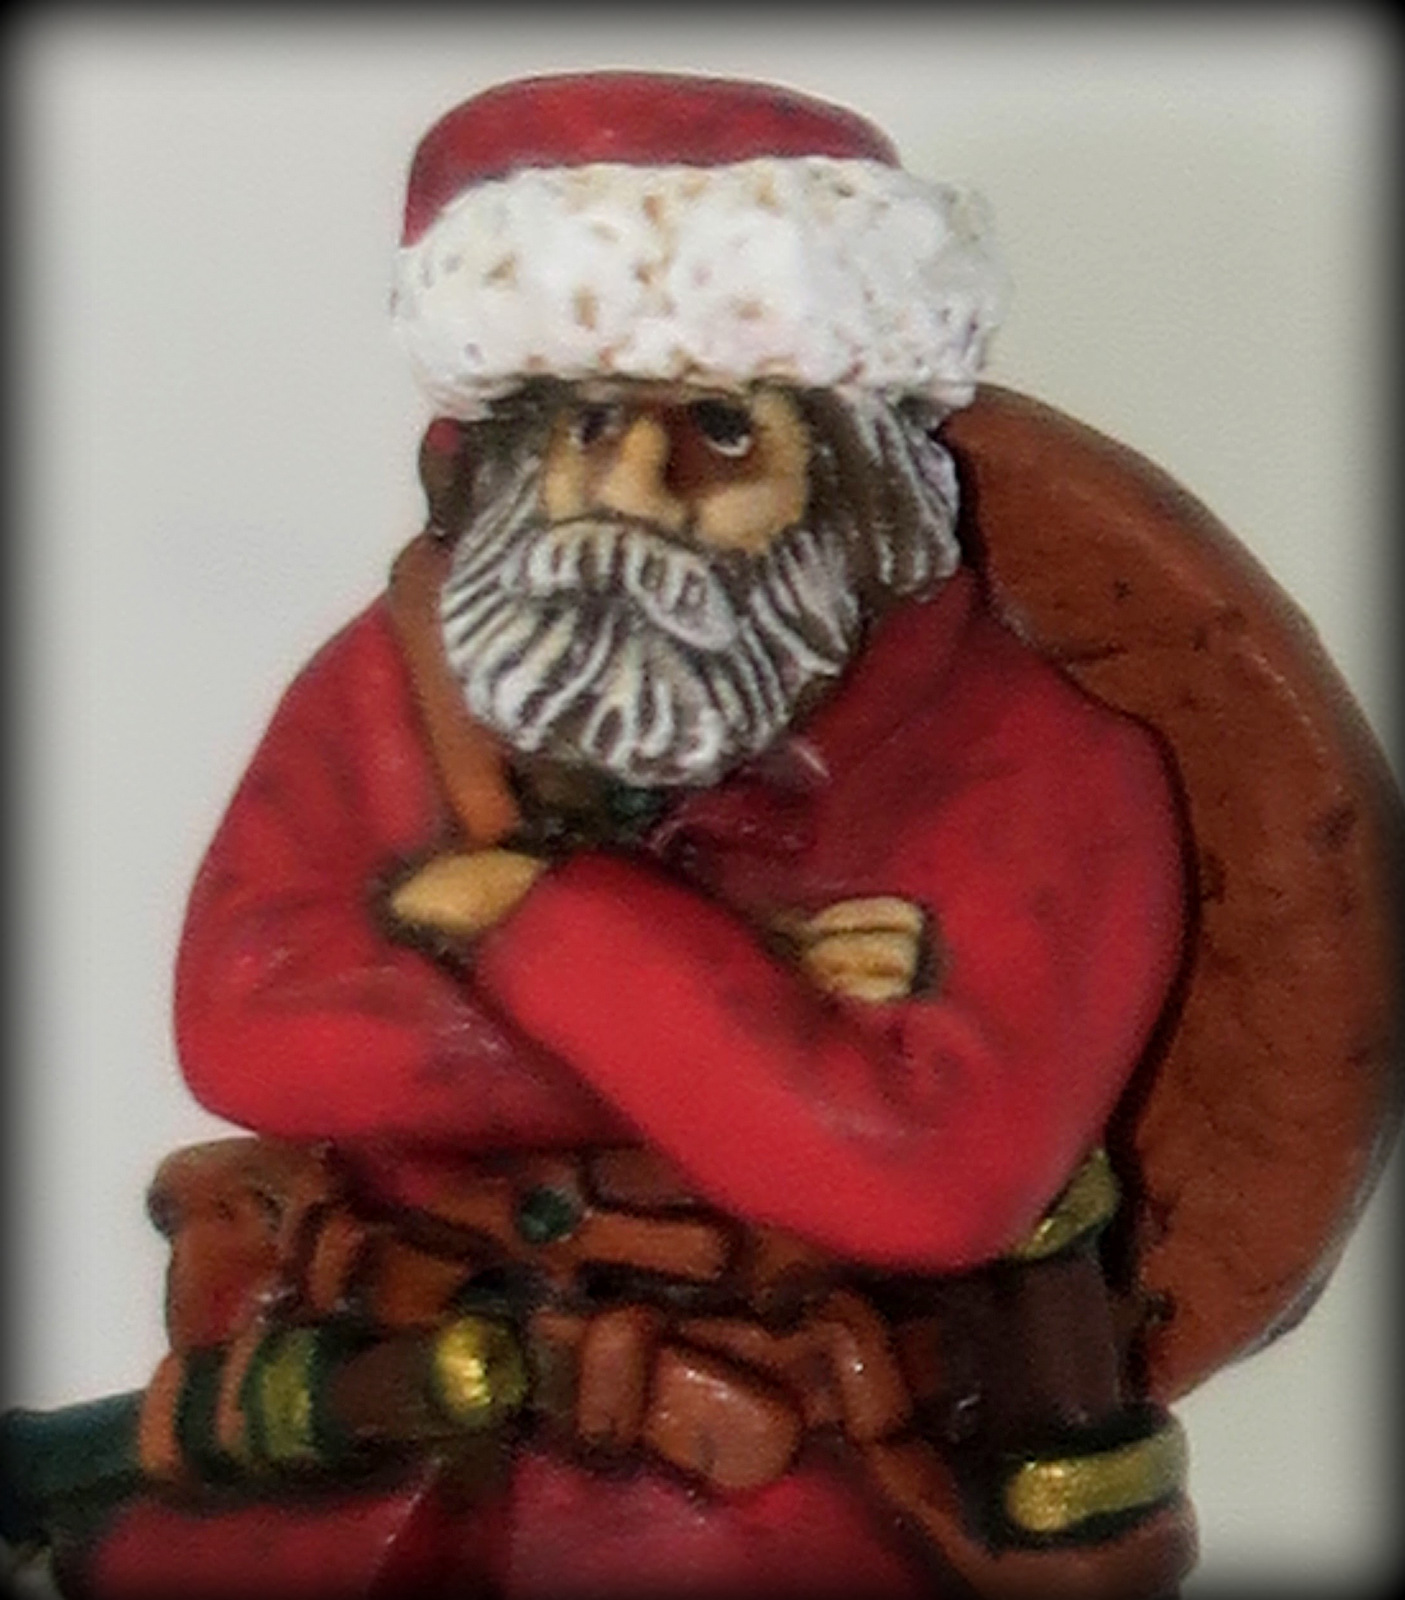
Ten Days ago the Analogue Hobbies Painting Challenge got underway and I've been using some of my Christmas Break to get stuck into some early submissions. I've already posted a picture of the Viking Santa I did in the first few days and I quickly followed this up with the figures shown below. I tend to work on multiple models at the same time so while I'm painting model B, model A is drying etc. So at one point, I had five different projects on the go at the same time, something that only happens during the Painting Challenge. 

Ghoul Lying in Wait

My second entry to the Challenge was the first in a series that is part of the 'bonus rounds', an optional side challenge to the main competition. Participation here will net quite a few bonus points and gives me a comfortable start on my campaign for this year's event. Some of the categories will be a challenge to fill, but I reckon I can get some really old figures painted and on the games table this winter. 


And so I light my lamp, ready my sword and descend the stairs into the notorious dungeon known as the Chambers of Challenge. The first room I encounter is the Hall of Traps and here I find a Ghoul has taken up residence. Hiding behind a column the Ghoul lays in wait for the unwary or inexperienced hero. Many an adventuring career has been cut short in this room... but not today. This is figure is 25mm tall and was made by Grenadier sometime in the 1980s. The date cast into the bottom of the solid base was partially filed away so all I can say is it was sometime in the '80s which makes this ghoul quite an old boy. I've also painted the column he is hiding behind and mounted it on a custom base so it snugs up next to him (so I could say he was lying in wait) but that's such a basic paint job I don't expect any points for that.


My gaming origins are very much in D&D and the old Red Box version of the rules. I was introduced to the game by a good friend of mine at school and over 35 years later I'm still playing with him and others from those early days of gaming. So when I saw the bonus rounds would be the Chambers of Challenge, and then looked at my pile of unpainted figures from that period, I knew it was a match made in heaven. Although it has to be said most of my roleplaying takes place online now, so the need for figures is much reduced. So instead of painting models for D&D, or just for display as in previous years, this time my bonus entries will be painted for use playing Frostgrave. 

The Pink Wizard

Having scratched my head and come up blank with the Pit of the Pendulum I decided I needed to skip that room on the Chambers of Challenge map. This can be achieved by being 'teleported' anywhere on the same level by the Sorceress. The cost for such an act is a female figure and so I decided to have a rummage in my Fantasy Lead Mountain to see if I had an appropriate figure. My third entry was therefore a Female Wizard with shimmering pink hair! Once again I have painted this model for use with my Frostgrave collection and have based her appropriately to fit the theme for these figures. 


I'm not sure where I got this figure, like much of my collection it was probably an impulse buy somewhere back in the mists of time! Indeed I recently found another box of figures hidden in a cupboard that missed the big tidy up when I got my games room together last year... I wonder how many more surprises await me in fark corners of the house. I have this rather macabre image of my poor wife finding boxes of figures long after I have shrugged off this mortal coil, muttering under her breath about my silly hobby! 

The Golems Haunt and a Tomb Wraith

My fourth entry this year was another fantasy figure for the Chambers of Challenge. I'm quite enjoying working through my fantasy lead mountain finding figures I had forgotten I even bought! So, having materialised in the Golems Haunt after transport by the Sorceress, I find myself face to face with the ghostly apparition of a Tomb Wraith. 


I stretched the definitions for this category just a little, but I decided that a Wraith could be considered to be 'reanimated' or re-created and it justified painting this wonderful 2003 Reaper Miniatures figure. Solid metal, it has got quite a heft to it and the flowing billowing cloak is just wonderful. I've painted Wraiths before (in classic LOTR movie-style black and white) but this time I wanted a bit of colour so went for muted greens instead. Multiple dry brushes were required and it took longer than I thought it would, but I'm really happy with the finished model. Once again I have based it for use in my Frostgrave games. In the past, many of my bonus round figures have been 'display figures' only, but this year I'm trying hard to make sure as many as possible are usable on the games table.


Having completed one monochromatic figure I found myself contemplating moving on to a much more challenging task, greyscale! In over 30 years painting miniatures I've never attempted that before, so the Chamber of Darkness will be a real test of my meagre skills. That figure will be up on the Challenge blog today and I'll repost it here in net weeks painting roundup. 

Until then, stay safe everyone. 

Thursday 24 December 2020

Plan B

"Plans are made to be broken"..."No plan survives contact with the enemy"..."The plans of mice and men."... Take your pick from any of these stock quotes and they could be aptly applied to the UK this Christmas. And like many families in the South East of England (and elsewhere), we are having to replan our holiday season around staying at home and not seeing family. To be fair, we already had a well established 'Plan B' in place because it was rapidly becoming quite obvious (to everyone except our Glorious Leader) that 'Plan A' was crackers! On the plus side, it means I have even more time for painting and playing games with the young Padawan.

The Analogue Hobbies Painting Challenge started on Monday and I have been working on my first entries. I'm taking a more sedate pace this year, even though I'm likely to have more time on my hands, simply to reduce the pressure a bit (got enough of that at work!). As is traditional for me, I have kicked my AHPC campaign off with a Christmas Themed figure. I normally buy these early back in January I had purchased my 2020 Christmas figure for this year's Challenge. Unfortunately, it was the excellently sculpted Death dressed as Santa from Terry Pratchett's Discworld novels, and I thought that was just a little too dark given the year we have had. I'll save that for when this mess is all over (so who knows when he'll see the light of day!). Instead, I have painted a Viking Father Christmas made by Foundry. 


One of the conventions of the challenge is that participants post pictures of their entries on the Challenge blog with 24hrs exclusivity before reposting on the painters own social media. I only managed to get this guy finished and posted yesterday morning, hence the reason my usual Wednesday post has been shifted to Thursday this week. I have some other entries ready for the Challenge and I'll post them here next week with a roundup of what I have completed and what is on the workbench. 

Until then I'd just like to wish everyone a very Happy Christmas and hope that you are keeping well and trying to make the most of a tough holiday season. 

Sunday 20 December 2020

Merry Christmas!

It's a little bit early but today's episode of The Quarantined Wargamer Merry wishes everyone a very Happy Christmas. I'll be taking a couple of weeks off so there won't be a TQW next weekend but I'll be back in the new year with fresh content and more of my trademark rambling nonsense! 


The next episode of TQW will be on the 3rd of January and, hangover permitting, I plan to discuss the perennial favourite of wargamers across the word, our hobby-related new year resolutions.

While I'm taking a week off with the Channel I will continue to be posting stuff here on the blog because the Analogue Hobbies Painting Challenge begins tomorrow and I'll be using my Christmas break to wrap up some early entries. The usual rule is that the Challenge blog gets exclusivity on your entry for 24hrs after which photo's can be reposted on your own blog if you have one. The submission format is a little more 'free form' this year so we won't be corraled into a fixed posting schedule but I'm planning on doing a weekly wrap up of my entries for the normal Wednesday posting slot here on BLMA. 

Keep safe, have a lovely Christmas, and keep rolling high!

Wednesday 16 December 2020

The Calm before the Storm

This week, around the middle of December, is one of my favourite times of my gaming calendar. No, it's not anticipation of hobby related presents to come next week (although I am looking forward to that). And it also Isn't the fact that I have time off work over the Christmas break and have a string of games with friends and family arranged (some remotely, some not) over the next few weeks. What I always look forward to at this time of year is the Analogue Hobbies Painting Challenge which starts on the 21st December. And this week, as every year, the excitement is building and the preparation is pretty much complete so I find myself with a few days to relax, to think, to write and to enjoy the building anticipation of the competition to come. 

Swapping the Brush for a Keyboard

If I said I haven't picked up a brush in over a week I would be lying, but while I haven't 'painted' anything I have been busy priming figures ahead of the challenge start on Monday. No doubt my 'plan' for the competition will evolve over the three months it takes place - there is always something unplanned that sneaks in before the finish line appears - but for the time being everything I want to paint is ready and waiting for the starting pistol to fire. So, with a little bit of time on my hands and no painting to do just yet, I have been doing some writing instead. I have three Quarantined Wargamer scripts ready for next year, and several more at the draft stage. Counterintuitively I'm finding that without a deadline breathing down my neck I suddenly find it easy to get my ideas down on paper. I'm definitely not going to waste this flush of creativity and I hope to have several more outlines for future episodes of my silly ramblings prepared by the end of the day. 

I'm also working on several blog posts for the upcoming weeks. As I have mentioned before in one of my videos, I try to have blog posts written well in advance of the publishing date so I can stick to my schedule (today's post is a notable exception to the rule!). As I know what I want to paint in the opening days of the Challenge I have already started drafting some words to accompany the pictures I will take as each project is completed. It saves a lot of valuable painting time once the competition is underway and again, it takes away the pressure to perform and allows me to enjoy the opening days of the competition and still enjoy some much family time over the holiday. 

Sunday 13 December 2020

Winter Painting Challenge

The Analogue Hobbies Painting Challenge is due to start in a little over a week so I thought I would do a video to explain what it is, to those unfamiliar with it, and to talk about my plans for this year's event. 


If you are taking part I look forward to seeing you on the field of battle! If you are just a spectator, get yourself a comfy seat, it's going to be a spectacular event. 

Wednesday 9 December 2020

German 81mm Mortar Teams

This week I have been finishing off another set of models for my 15mm Germans for Chain of Command. These are from Peter Pig and aren't really suitable for the game, as mortars of this size are usually off-table support and don't require a model. I'd already bought the figures when I realised this so painting these was more a case of "well I've got them now...". Unlike other teams I have painted, I decided to base these on slightly larger round bases to accommodate all three crew. Practical experience has taught me that marking off casualties on these teams is easier than basing them individually. Now that I have finished them it would be a pity not to see them on the games table so I'll have to find an excuse to use them, regardless of what the rules say! 

A simple piece of kit

The 81mm Mortar (the Granatwerfer 34) was designed by Rheinmetall, went into production in 1934 and was used throughout the war with relatively little modification. I think it's fair to say the Mortar is a fairly simple weapon and the design was so elementary it was incredibly similar to the American M1 81mm mortar which saw service in WWII right up to the '50s. I found a great little training manual for US troops which illustrated the similarity perfectly describing to the US serviceman how anyone familiar with the M1 could operate the German equivalent easily, should they capture one and need to use it. 

As with the American version, the Granatenwafer 34 broke down into three parts for ease of transport, with the smoothbore barrel, bipod and baseplate being carried by different members of the team. The aiming mechanism was attached to the bipod and consisted of a traversing handwheel, a cross-levelling handwheel and a panoramic sight for fine adjustments. The weapon had an effective firing range of between 400–1,200 m (440–1,310 yds) and a maximum range of 2.4km (1.5mi) although it lost a lot of accuracy at that range. A well-trained team, with plenty of ammunition, could get a rate of fire of between 15-25 rounds per minute although from what I have read that would rarely be sustained for very long. 

Over 75,000 of these were manufactured so they can often be found in museum displays and I have even seen them for sale at historical reenactment events. I'm not sure if my long-suffering wife would approve if I lugged one of these home. 

Sunday 6 December 2020

My Four Coat Varnish Method

This week The Quarantined Wargamer discusses my uniquely long-winded method for varnishing my miniatures. Over many years I have developed and settled into a routine four coats of varnish on my models. It's an approach that works for me, although it does require a lot of patience. The end result, however, are miniatures that look the way I want them to and are tough enough to survive my ham-fisted handling of them on the games table. 


As always I'd love to hear how you approach the varnishing of your figures. Do you have a preferred brand of varnish that you swear by? Or have you learned to avoid other brands that you want to swear at? Please leave a comment below in the comments, or over on the YouTube Channel. 

Keep safe everyone and until next week, keep rolling high!

Wednesday 2 December 2020

Panzerkampfwagen IV Ausf F2

This week I've decided to paint something slightly different in that today's AFV hasn't been painted for use in my Normandy games. I bought this last year for use with What a Tanker! but never got round to painting it until now. To be honest, over the next few weeks I probably won't be painting much for Chain of Command. Instead, I will be working hard to prepare for the Analogue Hobbies Painting Challenge which starts in a few weeks time. Former participants will know that you can prepare your figures in advance of the start date so long as you don't apply any colour (other than Primer). So for the last week or so and probably the next couple I will be cleaning up and preparing models ready for the start of the challenge on the 21st of December. I booked a couple of weeks off over Christmas (pretty much the only holiday I've had this year) and I'm looking forward to having some family time and getting a bit of painting done. 


Painting a Panzer IV Ausf F2 gives me a chance to try a different paint scheme. It is a much earlier vehicle than the Normandy tanks I normally do, so I've decided to paint it with one of the many mid-war camo schemes used by the Germans. So this vehicle has a base of German Grey with patches of Middlestone. This model is from Peter Pig and is 'battle-hardened' which basically means it has got some pieces of equipment and stowage on the decks as well as items like track welded on the front and the turret. The model probably won't see the games table in a Chain-of-Command game but will be ideal for some What a Tanker action, which is what I originally bought it for. I have even got a Russian T34 somewhere so it might be fun to paint that up just as a something different. Don't go getting any ideas, I'm not about to switch my interest to the Russian front, at least not in the foreseeable future ... never say never! So on with something about the Panzer IV F2

We're gonna need a bigger gun

The original Ausf F1 version started production in early 1941 but after encountering KV1's & T34's in Russia it was decided that a bigger gun was needed. Krupp was given the task of trying to adapt the existing PAK 40 L/46 gun into the turret and the result was the 75mm KwK 40 L/46. This could penetrate 77 mm of armour at a range of 1,830m and would be very effective against Russian Armour. The downside of this weapon was its significant recoil,  so the barrel was given a muzzle break and this combined with the longer weapon made the tank rather front-heavy, reducing its manoeuvrability. Three months after production started, and with a few minor improvements, the vehicle design was redesignated as the Ausf H. That version came with side Schurzen plates but this model is the slightly earlier F2. 


The Aust F2 had 50 mm of frontal armour and 30 mm of armour on the sides. This wasn't necessarily effective protection from a T34 but the main battle advantage this Panzer brought to the game was its gun and ammo combination. The Panzer IV F2 carried 80 rounds of 7.5cm armour-piercing capped ballistic cap (APCBC-HE). This type of armour-piercing shell has excellent aerodynamics and in guns of sufficient muzzle velocity, over shorter ranges, they are incredibly accurate. Combined with the excellent optics found in all German tanks they were a formidable weapon system. 

I'm probably not going to get anything else painted this week so my next post will be Sunday when the next episode of The Quarantined Wargamer will be discussing my well developed (some would call excessively developed!) four coat varnish method. 

Soft-Edged Camo without an Airbrush

I used a new brush on this model and it has been something of a revelation for me. I have been resisting buying an Airbrush for a long time, partly because I haven't had a suitable 'workshop' to use it in but mainly because it's a whole new skill to learn. So for a long time now I have been trying to perfect a soft-edged camo technique using just brushwork. I have tried a lot of different hair types and shaped heads and I have even had a go at trimming a brush to the desired shape, all without much success. Don't get me wrong, I have been satisfied with the results, and its got models on the tabletop, but I have never been completely happy with them. Now however I think I have found something that works.


I recently picked up a pack of the Army Painter dry brushes to try out because the rounded short hair brushes looked ideal for what I wanted. The pack contains three brushes and the two larger ones are a bit big for what I need, but the smallest brush is just about suitable. The brush head is about 6mm and the short soft domed head is ideal for 'stipple dry-brushing' soft-edged camo. Basically, I dip the brush in the desired colour and rub probably 95% of the paint off the brush. Then, rather than stroking the brush over the surface to highlight the ridges, I dabbed the brush vertically onto the surface. This slowly built up a soft patch of colour with nice graduated edges. In the example of this tank, I then brushed solid colour in the centre, producing something that looks very like it has been airbrushed. 

Needless to say, I am very happy with the result and plan on having a play with this brush/technique combo to see how detailed I can make it. I'm on the lookout for a similar style of brush that's a little bit smaller so I can try the technique out in more detail. I can feel a tutorial video coming out of this discovery, maybe early in the new year, so keep your eyes peeled if you are interested. In the meantime any advice or suggestions are welcome, I can't be the only person to have 'discovered' this technique.