 |
| US Parachute Rifle Company - HQ plus Two Platoons |
This force is worth a total of 820pts. The HQ is 35 pts plus 20pts of each of the three extra Bazooka teams. Then each of the two platoons consist of three Rifle Squads and a Mortar Squad for 365pts per Platoon.
 |
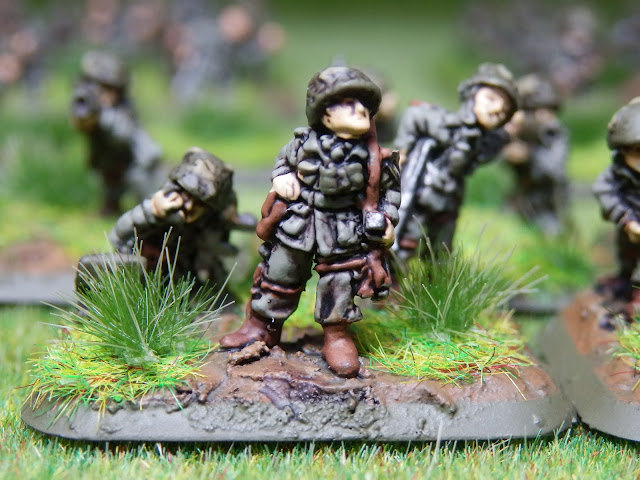
| Company CO |
I'm already preparing an additional Machine Gun Platoon from some models that the Angry Lurker gave me a while back. This will give my force some much needed additional firepower. Hopefully I will also be able to pick up some 81mm Mortar teams when I'm at Salute next week to beef up the Company some more. I can also use my Stuart Platoon as Divisional support or even a platoon of Sherman's to make this an effective fighting force.
 |
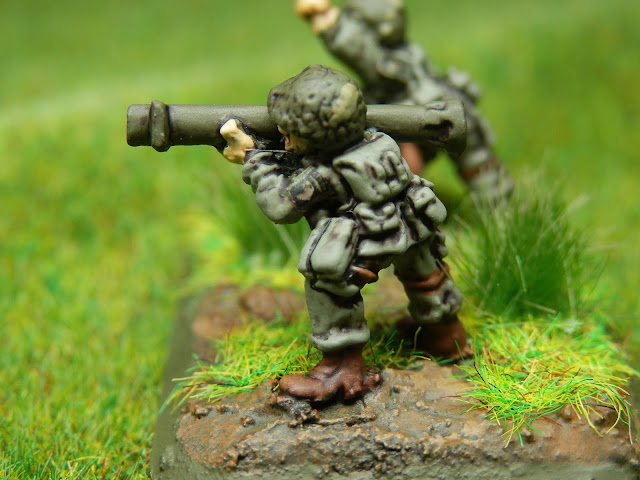
| Bazooka Team - Note the Screaming Eagle shoulder patch on the upper left arm |
Having said that this Company comes with five Bazooka teams which should make any German tank forces think twice before assaulting these tough hombres!
 |
| 60mm Mortar Team |
I'm glad I have finished these now because I can go to Salute next week fired up and ready to look for the next platoon to add.
| This is just the start of my 101st Airborne Company |
Having the Easter break off work helped me crack on and get this finished quicker than I expected and I've even started preparing my next project although it won't be quite so large and daunting this time.

Nice work there. I'm becoming more and more sold on the idea of serious gaming in 15mm when I see stuff like this. I can't see anyone not being proud to have those in their collection.
ReplyDeleteGreat work Lee, they look very nice!! Did you get my email???
ReplyDeleteThey looks great Lee, lovely basing as well. So getting more tempted todo 15mm.
ReplyDeleteGreat looking force
ReplyDeleteLooking good mate.. and like Jim it is work like this that makes me want to get into this more and more as well!!
ReplyDeleteNice stuff Lee.
ReplyDeleteCrap.
ReplyDelete(Only joking, they're fantastic!)
You had me going for a moment...until I scrolled down. Phew!
DeleteReally lovely work Lee, great looking unit, polo shirts have been collected, send me your email address if you want pictures?
ReplyDeleteNice job, Sir.
ReplyDeleteThese are absolutely fantastic Lee. Great work.
ReplyDeleteNice work Lee!
ReplyDeleteVery nice Lee ;) oh, that is fast work BTW; if it was me I'd probably have completed two bases maximum - nice one :)
ReplyDeleteRegards,
Monty
Lovely work Lee. The time eclipsed on the project seems well worth it.
ReplyDeleteNice stuff. I need to use a darker wash on my WWII. Your stuff looks 'Just Right' and much darker than what I use. Your beautiful figures have convinced me to 'go dark'.
ReplyDeleteI used GW Devlan Mud wash on previous projects but decided it was just a tad too dark. This time I used W&N Peat Brown Ink, neat from the bottle (thank's to Ray from the Rejects for the tip). It gave much more defined shadows without darkening the overall tone too much. I could have gone back and redone the highlights after this to perk up the color's but I was happy with the way they looked so didn't bother.
DeleteYou should make a post about how you painted your 15mm paratroops to look so good.
ReplyDeleteNice. I have these figures as well so I know what it takes to do a good job on them.... which you have.
ReplyDeleteVery nice Lee, are the screaming eagle decals Company B or another supplier? I found 28mm decals 'interesting', not sure I would want to go down the route of 15mm!!!!!
ReplyDeleteIan
These were from Mustang Games (I wrote about them here). The decals are printed on white backing so need to be trimmed exactly before application. The result for the shoulder patches were decals about 1mm square!!
DeleteThe first platoon were a bugger to apply but by the time I did the second platoon I'd figured out the best way to do it. I painted the upper arm with Gloss varnish, slipped the decal into position then dabbed some more gloss on top. This helped the decals stay in position and helped them adhere nice and flat (the first batch applied with water only were a bit rigid and didn't conform to the rounded shoulder).
I had enough fun with the 28mm decals so respect is high for this one!!!!
DeleteIan
The only problem with taking close up pictures of the finished models is I keep seeing things I missed. I've found at least one entrenching tool handle not painted and lost of leather straps that I missed! They pass the 2 foot test and that's all I need for now...time to get a game in!
ReplyDeleteGreat job on these. I love the Screaming Eagle decals. 1mm decals, those must have been a bear to get right. Excellent job.
ReplyDeleteNice work on that minis, and with decals - great!
ReplyDelete