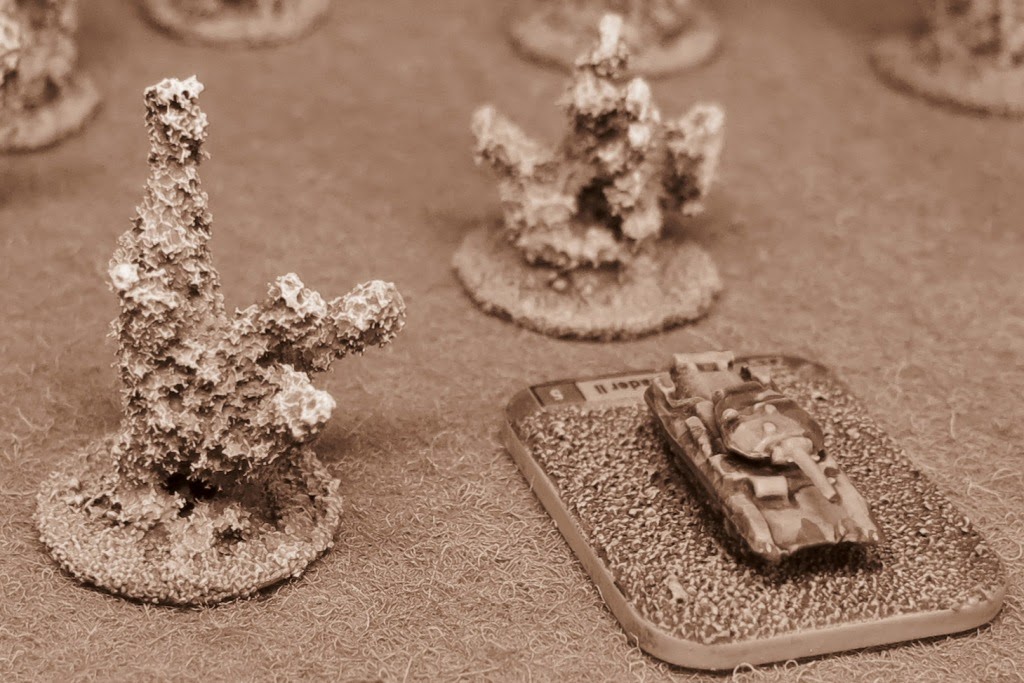
Another little project has come to fruition after spending some time on the drawing board. I wanted to make some small explosion markers for my 6mm North African desert games. Unlike the smoke markers I made last year to show knocked out vehicles these markers are not columns of smoke but much more dynamic bursts of dust and rock caused from either mines, artillery fire or bombs dropped from aircraft. I was inspired by several recent documentaries I have watched in which troops and tanks are shown during artillery barrages and it struck me that while Hollywood depicts every explosion as a fireball with black smoke, in reality many of the explosions I saw were just clouds of dust and flying rocks.
Here are a few examples of pictures taken in North Africa during WWII and they amply illustrate what I wanted to achieved with my new explosion models. I will still use the black smoke markers to show knocked out vehicles but for barrages that just hit dirt I need something a little different.
 |
| An Anti-Tank mine explodes near a truck. |
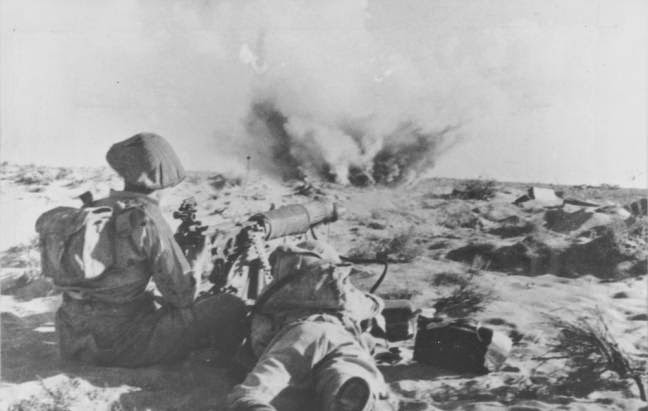 |
| An artillery shell explodes near British positions |
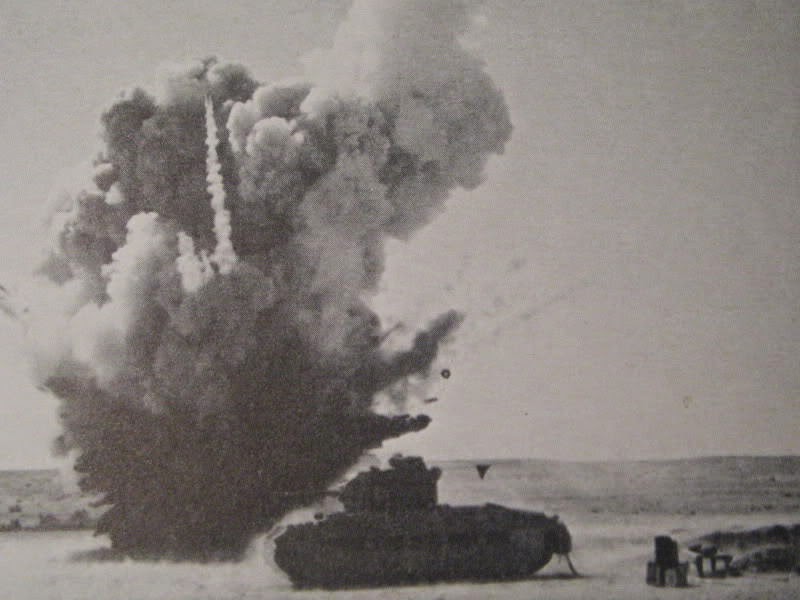 |
| Probably a mine exploding next to a British Matilda tank. |
I have basically used a similar technique making explosions to that which I employed for my Smoke Markers. However unlike a fast rising column of hot smoke, the explosion markers are smaller and much more dynamic bursts of dust. The below picture shows the various stages of the construction that I used, followed by a set of detailed step by step instructions:

(1) Create an armature on which to model the explosion
- Cut a 12-15cm length of wire and twist the middle twice around a brush handle to create a circular core or base from which the rest of the armature will extend.
- Fold and twist the remaining lengths either side of the 'core' into four or five arms no more than 1-2cm long. Two pairs of needle head pliers are ideal for this stage.
- The whole thing should then be superglued to a 1cm washer and left to dry.
(2) Next add clump foliage
- Coat the wire in glue - I used superglue but you could use PVA - and then 'dunk' the wire armature into a pot of fine grained 'turf' foliage. (I used Woodland Scenics turf because it doesn't clump together and covers the armature in a nice thin layer)
- Shake off any excess turf. Bare areas can be touched up with more glue and turf applied by hand until the whole armature is covered and the desired shape achieved.
- Don't worry if you can still see the wire armature in places, this will be covered by paint in the next stage.
- When the turf foliage is dry coat the whole model in dilute PVA (50/50 with water) and let this dry. I made up a small cup of the PVA solution and dunked the turf covered armatures into it.
- Leave to dry on a drip tray overnight. The result is a hard and resilient model ready for painting.
- The last thing to do at this stage is to apply basing sand to the remaining uncovered areas of the washer. Use a good quality wood glue for this and be sure to cover the edges of the washer to cover the shiny metal.
(3) Base paint the model
- When the glue is dried thoroughly base coat the whole thing using a spray paint. Brush applied paint will take ages and will almost certainly miss areas whereas I found a spray is not only quicker but gives much better coverage.
- I used a spray can of English Uniform (from the Bolt Action Primers range).
- Make sure the washer is covered completely in paint to conceal the metal.
(4) Drybrush and Varnish
- The last stage is to dry brush using whatever colours suit your battlefield. For my desert setting I stuck with the colours I use on my bases - Tan Yellow (Vallejo 912) and Ivory (918).
- Leave to dry thoroughly and then add a coat spray varnish to seal the surface. Be sure to add some dull coat afterwards otherwise it will just look shiny and weird!
 |
| A troop of Churchill's driving through an Artillery Barrage |
I think the finished results look pretty good and now that I have made a test batch I'll crank up production and turn out a dozen or so more to use in my games.
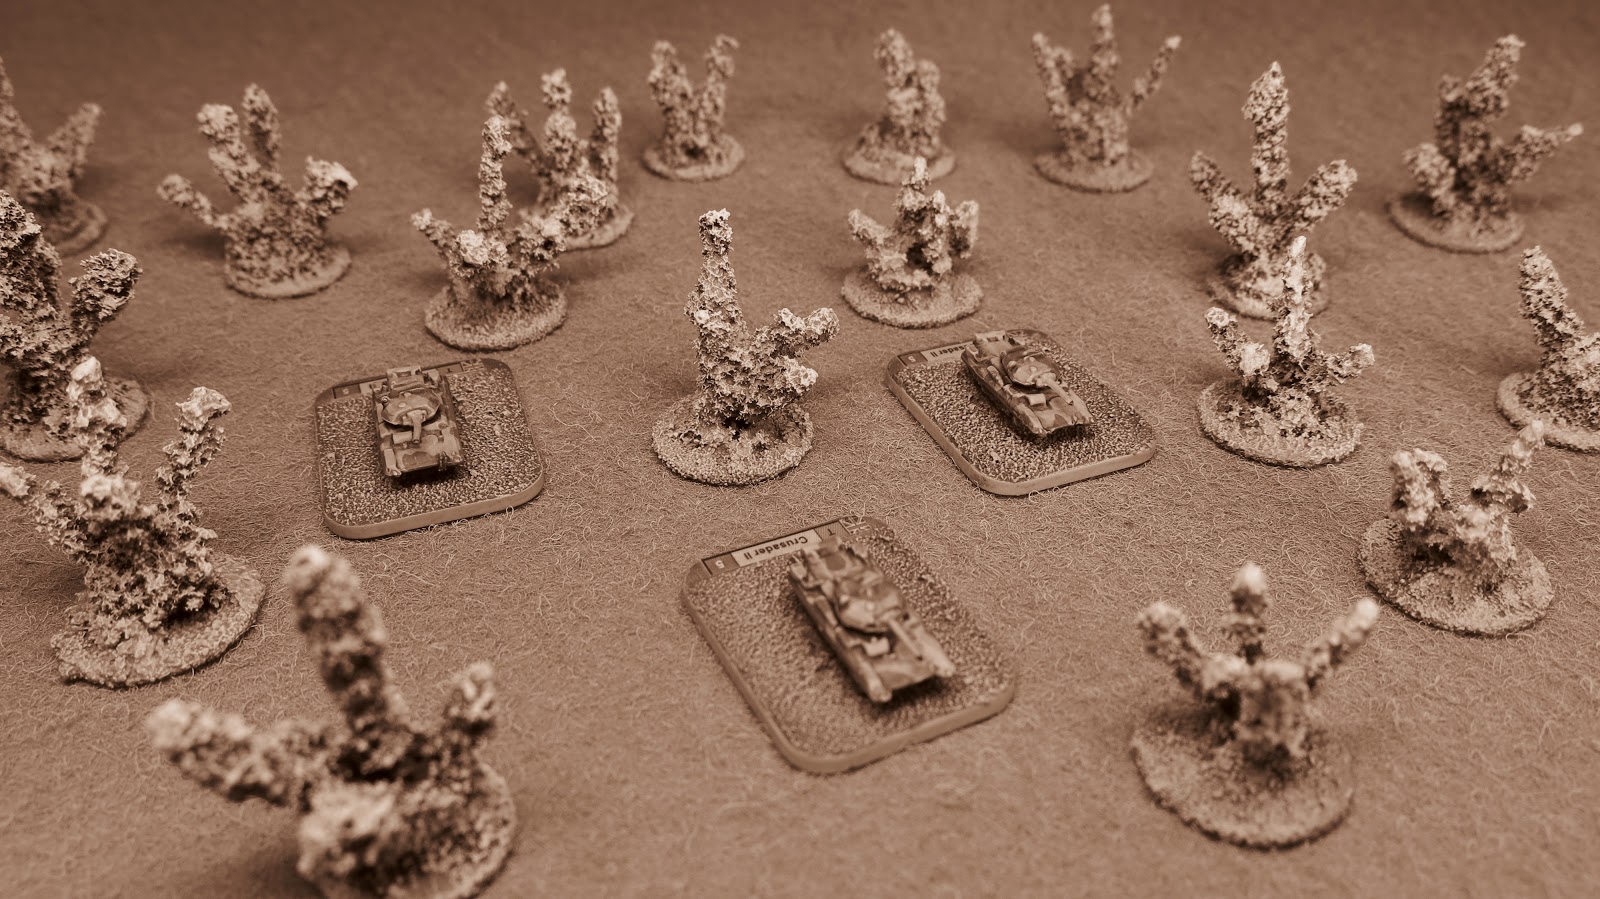 |
| A Troop of Crusaders under intense Artillery fire. |
Improvised FOW Rule
There isn't a specific rule in FOW about Line of Sight being obscured by dust from Barrages, but there are plenty of contemporary accounts describing the almost fog like effect of heavy shelling in the desert. I'll use a modified version of the existing Dust rules to simulate the effect on visibility that such attacks caused.
If line of sight from a shooting or spotting unit passes through a dust cloud the target team is treated as Concealed and Gone to Ground. Visibility is reduced to 16" if line of sight passes through a dust cloud. Remove all dust clouds from Barrages in the previous turn during the Starting Step.
Nice Work, Lee, explosion markers are perfect to bring the game to life!
ReplyDeleteThanks. I like the visual appeal of this sort of thing, even if it has little in-game significance. Applying the dust rules above gives them some relevence and removing the markers in the starting step means that whatever effect they have is short lived. It does however give artillery commanders something else to think about when deciding where to taget their attacks.
DeleteThey've worked perfectly Lee, what a great job Sir.
ReplyDeleteThank you, I'm rather chuffed with them myself.
DeleteThese work very well indeed. I shall have to get some done for SCW with the Rejects. The bar has gone up slightly higher again.
ReplyDeleteI like to belive that no games table can be harmed by the addition of a few asthetic elements.
DeleteSuper tutorial!
ReplyDeleteThank you. I hope its useful.
DeleteGreat ideas and execution - those will greatly add to the visual appeal of your games.
ReplyDeleteThanks.
DeleteCheers!
ReplyDeleteTop job Lee. Yet more tactical choice to be made in your games. Great stuff!
ReplyDeletecheers
Excellent work there Lee!
ReplyDeleteThose look the part nice work indeed
ReplyDeleteAnother good idea. For some variation you can also use twisted and folded pipe cleaners, PVA and sand with bigger bits still in it, so you can use your clump foliage for...foliage. Normal sized ones for 6mm and the craft ones sold in Poundland for bigger scales. Got an example on my blog here::
ReplyDeletehttp://thewordsofsubedai.blogspot.co.uk/2011/05/had-half-crown-moment-there.html
I have used pipe cleaners for making explosion and smoke markers but I felt they looked too large for 6mm scale stuff, hence the method I eventually settled on in this article. Thanks for the feedback though, always good to share ideas!
Delete