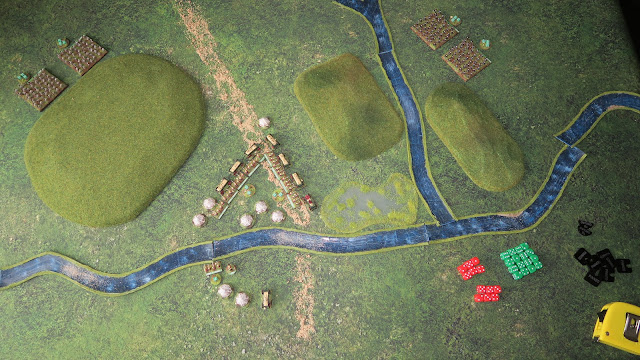
Following on from my post last week about adapting TMWWBK I have now had a chance to run a couple of play test games. What I decided to do was play a couple of variations of the Battle of Ntombe. This relatively small engagement was none the less significant because once again units of the British army were soundly beaten by "spear wielding savages" (as they were described in the press). The historical battle involved just one company of Infantry against approximately 500-800 Zulu's and was another classic example of poor leadership, poor field craft and a complete underestimation of the enemy.
Setup/History
With the commencement of the Anglo-Zulu war in January 1879 the village of Lüneberg, situated in the disputed territories of Northern Zululand, felt very exposed to attack. Four companies of the 80th Regiment of foot were sent to reinforce the local garrison but by the end of February they needed resupply. 18 wagon of supplies were sent to the town and were escorted from the boarder by one company. However heavy rains had swollen the rivers and softened the ground resulting in serious delays. Eventually some wagons were able to cross the Ntombe Drift but six remained on the 'enemy' side of the river. Major Tucker dispatched Captain David Moriarty with about 100 men (just shy of a full company) to laagar the wagons on the far bank and wait for the waters to recede.
 |
| Add caption |
My initial game recreated the historical setting so I attempted to replicate the surprise nature of the night attack by putting the Zulu's within charge range of the camp at the start of the game. I have also made them Veteran units to compensate for the fact the British are behind cover. However I elected to put all of the British inside the laagar whereas in reality the command was divided with some men on the other side of the river under the command of 2ic Lieutenant Henry Harward. In the real battle they provided some covering fire from this position, before Lt Howard abandoned his men and rode away "to get help". Howard would later face a Court Martial for this action but amazingly he was acquitted and returned to duty! Sir Garnet Wolseley took a very dim view of Harward's apparent cowardice and refused to confirm the findings of the court. Instead he put out a statement that made it quite clear what he thought of Lt Howard:
"The more helpless a position in which an officer finds his men, the more it is his bounden duty to stay and share their fortune, whether for good or ill."The Duke of Cambridge endorsed this comment and ordered it to be read out to every regiment in the army. Lt Howard may have escaped punishment for his actions but his career was over and he resigned his commission in May 1880.
Order of Battle
British
c/o Captain David Moriarty
1 company British Regular Infantry (80th Foot)
Zulu's
c/o Prince Mbilini waMswati
2 Regiments of Tribal Infantry - Veteran/Married
Action
 |
| The Zulu's charge in and meet the British across the barricade. |
 |
| The British score two hits on each Zulu regiment and the Zulu's also score two hits on each half of the British infantry...a Draw means the Zulu's must retreat half a move facing the enemy. |
Well I didn't expect that! Mind you it has to be said I gave the British full advantage of the barricade which made all the difference in the melee. Historically the Zulu's breached the barrier before many of the British infantry were able to react.
In the second game I tried to recreate historical setting but on a slightly larger scale. I increased the British to two companies inside the laagar and four regiments of Zulu's attacking them.
 |
| The Zulu's attack in force but by the time they arrive at the barricades they have already taken some casualties. None the less they still have a huge advantage of numbers. |
 |
| The Zulu's force back the British but are immediately subjected to a volley of gunfire which stops them in their tracks. Three Zulu units are now pinned in plain view of the British rifles. |

Analysis
Well considering I was playing the rules for the first time, and playing them solo, both games went really well. I learned a lot, the most important lesson being that TMWWBK can work at 6mm. Moving the units and managing the casualty counters can be a bit fiddly but I'm sure I can find a solution to that. I'm happy with the slight modifications I made to the rules but I need to play some bigger games to be sure I have everything right. There will definitely be more AZW games using these rules so keep a lookout for future battle reports.


That was very cool Lee!
ReplyDeleteThanks mate
DeleteLooks bloody marvellous Lee! Looking forward to more.
ReplyDeleteGlad you liked it.
DeleteLooks great, nice report and impressive attack!
ReplyDeleteIt was touch and go, especially in that second game.
DeleteLooks well cool, Lee!
ReplyDeleteThanks. Still needs work but the idea has legs!
Deletegreat report and cool figures
ReplyDelete... but if you are looking to replicate the zulu wars i would advocate black powder over tmwwbk everytime...
Enjoyed that Lee! Great work.
ReplyDeleteVery nice! I am looking for rules to play Anglo-Zulu War with Baccus 6mm, so this will come in handy. I already have TMWWBK rules on my shelf also.
ReplyDelete