Friday, 18 January 2013

North Africa 1942 - Army Lists

Thus far my foray into 6mm wargaming has been a little bit haphazard. I've painted several platoons and the core of a number of companies but without a clear idea of what I am aiming for. So over the weekend I sat down with a copy of the North Africa source-book and worked out several Company lists that I am aiming to build. 

Much of what I need has already been painted but there are several platoons that are missing and still need to be built. I have some old models that I am in the process of cleaning up ready for repainting and I have ordered a few more (mostly Grant Tanks from Skytrex) to finish off my two British Companies.

When this lot is painted I will have four viable armies (2 Axis and 2 British) that work out about 3200 points per side. I can then think about fleshing out these units with Divisional Support platoons, AA Units and some specialist engineer teams and later still with additional support companies.

The platoons marked below with a ** have yet to be painted. I have the models already and will be working through these over the coming weeks. The platoons marked with a °° are currently on order and will be added to the to-do list as soon as they arrive. 

Panzerkompanie (21.) - Confident Veteran - German Armoured Company
Company HQ - 2x Panzer IV F1   200pts
Panzer Platoon - 4x Panzer IV F1   400pts
Panzer Platoon - 5x Panzer III J (early)   450pts
Heavy Anti-aircraft Gun Platoon - 2x 8.8cm FlaK36   240pts **
Heavy Panzerspäh Platoon - 4x Sd Kfz 231 (8-rad)   170pts **
Air Support - Priority Air Support Ju 87D Stuka   175pts **
Company Points: 2035

Compagnia Carri - Elite - Italian Tank Company
Company HQ - 1x M14/41 60pts
Carri Platoon - 5x M14/41 300pts
Self-propelled 75/18 Platoon - 1x Carro Comando & 4x Semovente 75/18  320pts **
Armoured Car Platoon - 4x AB41 125pts **
Limited Air Support - Macchi C.200 Saetta 125pts
Company Points: 1230
Axis Total - 3265

Infantry Tank Company - Confident Trained  - 8th Army British
Infantry Tank Company HQ - 2x Matilda II 145pts
Infantry Tank Platoon - 3x Matilda II 215pts
Infantry Tank Platoon - 3x Valentine II 160pts
Rifle Platoon (8th Army) - 195pts
Field Battery, Royal Artillery (8th Army) - 4x OQF 25 pdr gun 215pts
Company Points: 1250


Heavy Armoured Squadron - Confident Trained  - 8th Army British
Heavy Armoured Squadron HQ - 3x Grant 280pts °°
Heavy Armoured Platoon - 3x Grant 280pts °°
Heavy Armoured Platoon - 3x Sherman II or III 340pts °°
Light Armoured Platoon - 3x Crusader II 155pts **
Armoured Car Platoon (8th Army) - 3x AEC I 150pts **
Company Points: 1980
British Total - 3230

As you can see I still have a long way to go but having a clear plan (and the models to back it up) will help me focus on getting it all painted quickly. I've no idea how much this lot would have cost to recreate in 15mm but I'm sure it would be a small fortune and probably well beyond most wargamers means.

Wednesday, 16 January 2013

An Italian Striptease

Stripping miniatures down to naked metal can sometimes be a bit of a tease. Over the years I have found that removing acrylic paint from a miniature can either be easy or it can be an absolute pain in the posterior. I'm trying to strip old paint from some of 6mm Italian Tanks and normally I have found that a good long soak overnight in very soapy water softens the paint. A quick scrub with a brush and the paint usually lifts off easily... but this time it just isn't shifting.

*Removing paint from old miniatures can be difficult. There are lots of techniques for stripping acrylic paint from metal, but most require some patience and a little bit of elbow grease. The basic method is to soak your miniatures in one of the paint removing mediums listed below for 6-12 hours and then use an old toothbrush to remove the softened paint. This process may need to be repeated several times to get all the paint removed. I've used several products over the years so here are a few of the more popular examples for returning your lead miniatures to bare metal ready for repainting. Some of the products listed may not be available in every country so I have tried to give generic names or alternatives where possible.


Washing Detergent - Normal washing-up liquid can help soften acrylic paints although it takes 6-12 hours of soaking and some scrubbing with a toothbrush afterwards. 

Pinsol / Pine oil - Good on Acrylics and Enamels. Soak miniature for at least 6 hours, longer if possible & remove with a soft brush. May require several applications. Best not to use this on plastic models but can produce good results removing acrylics from metal after only 2-3 hrs.

Dettol - This is a method endorsed by the Angry Lurker and has the advantage that the waste liquid is biodegradable and safe for the environment. Only use the original 'brown' version of this antiseptic disinfectant; it'll stink the house out so this might be worth doing outside or in a well ventilated area. 

Castrol Super Clean - A non smelly product that is also bio-degradable and is safe to use on plastic models as well. This product contains Sodium Hydroxide and can produce excellent results after only 6 hrs. The main drawback is that this product comes in a gallon can which is probably more than anyone needs for this type of job.

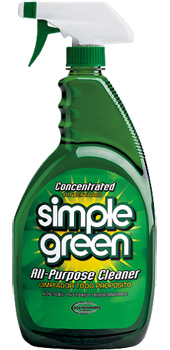
Simply Green - A 2-Butoxethanol based product that can be used on Plastic or metal models. Best used as a soak rather than sprayed or brushed on. The product is Non Toxic, Biodegradable and non corrosive. Gives good paint removal after only a couple of hours but for best results soak for 12 hours.


Oven Cleaner - This is another product that uses Sodium Hydroxide as its main active ingredient. There are lots of different products available but the one that get mentioned often in various miniatures/painting forums is Easy-Off Oven Cleaner. Soaking produces the best results after 6hrs.

Brake Fluid - Can be bought in relatively small quantities from any garage. Brake Fluid gives best results after 24hrs soaking so this isn't a fast option. Safe to use on plastics but needs to be disposed of responsibly as it is harmful to the environment.

Dawn Power Dissolver - Recommended by the guys at From the Warp this product can produce results in a little as 20 minutes. Because it is a foam it can be sprayed on to the model and left to do its stuff, but be careful not to spray it onto anything you don't want stripped!

Nail Polish Remover / Acetone - Easy to acquire but smelly as hell. Use in a well ventilated area and soak your model for at least 6 hrs. Do not use on plastic miniatures unless you want them to turn into slag.


There are several other products that I have read about, but the application and results are (allegedly) broadly the same. Some of these such as Linseed Oil and regular DIY store paint stripper are fairly logical options. Others like Lighter Fluid sound distinctly dangerous and then there are the weird and wacky options such as Coca-Cola and Distilled Water.

Aside from the paint removing medium you will need some or all of the following tools to clean your models. Most people won't have a problem with any of the products listed but some may have a chemical allergic reaction so its always a good precaution is to wear some latex gloves. A ceramic or metal container to soak your miniatures in. An old toothbrush is also essential. Regardless of what method you use an good scrub with a toothbrush can help lift loose paint and get in those hard to reach spots. An absorbent cloth or paper towel to mop up spills... trust me this is essential. A small bit chamie leather to grip the model with while scrubbing. This is soft enough not to damage the casting and can be washed out between uses. The tool of last resort is the dental pick which lets you get in the deepest recesses and remove those stubborn bits of paint.

*I first published this article in December 2009 but thought it worth a second posting (with a few updates) considering the problems I have recently encountered cleaning old miniatures. I'll be using the Dettol method (its the 'Reject Way' apparently) and will report back here on the results. 

Monday, 14 January 2013

The Battle of Snake Hill

Posties Rejects gathered on Sunday for an American Civil War game using the Fire and Fury rules. Ten of the Rejects were in attendance including our leader and umpire for this game, Postie. To accommodate nine players the games table was a massive 6ft by 12ft long with nine whole divisions of troops on the battlefield. The game that followed was challenging and tough on both sides but was ultimately much more decisive than it looked. As usual keep an eye out for other (better) reviews of this battle on Fran and Ray's blogs over the coming days.


The game started with both forces having encountered each other the day before. They had skirmished and then both sides had pulled back with the intention of re-joining battle the next morning. Both sides had to roll to see if any casualties had to be removed for the previous days skirmish and Ray (the Union Commander) rolled a massive six casualties, one from each of his regiments!

The terrain however was probably some of the most challenging we have encountered for some time. Across most of the centre line a series of ridges blocked line of sight to both sides. Worse still each ridge also had a face of impassable cliffs on one side effectively reducing the centre 6ft of the table to just three narrow choke points. It was towards this ridge line that the Confederate and Union forces were marching towards when the game commenced. 

The centre hill had a sheer cliff facing the Rebels while the two either side had cliffs facing the Union troops. Two crucial passes through these hills can be seen here. 


Most of the Union and confederate infantry faced this ridge or were to the left of it (from the Confederate point of view). On the right the troops were thinner spread but roughly equally matched. The extreme Confederate right was held by a small division of cavalry.

The Confederate right flank


Both the Confederate and Union forces moved to take and hold the hills in the centre of the battlefield but the cliff faces made manoeuvre and positioning quite difficult. One hill in particular was heavily contested throughout the whole game with the front line ebbing and flowing across its crest all day.

Those Union Zouaves were a pain in the posterior! It took the whole game to get the buggers off that hill and they definitely earned some accolades in this battle. 


The critical battles however centred on one narrow valley between this hill and the next. Because of the cliff edges this was the only passable route for infantry and was therefore fought over for the entire duration of the game. Initially the Union forces held the valley but multiple assaults by the Rebels forced the Union troops back and by the end of the game the confederates held the valley and the hill to its right. But the cost in terms of worn and spent units (earning victory points for the Union) was too high and had the battle continued the Rebs would have been pushed back again I'm sure.

The Valley of Death. This narrow pass saw the fiercest fighting in the game.


I'm sure there will be some dissenting voices from within the rejects but with these rules I think the Confederate forces have no choice but to attack vigorously and hope to knock out the Union forces in melee rather than in a fire-fight. The Union regiments are so large their massed firepower would quickly reduce Confederate effectiveness to nil and the only way to counter that is to get in close, quickly, and beat them in Melee. The odds still seem to be stacked against the Confederates but in some respects this is a historically accurate scenario that was repeated throughout the war.

The Rebels finally took the Pass but at a very heavy cost.


Meanwhile on the Confederate right flank little was happening. On the far right neither side felt strong enough to launch into hand to hand fighting and therefore remained in a stand-off throughout the game. However one area that could have seen more action was the centre left area where half of my Division held the second of the narrow passes in the cliff lined hills. From the opening turn I had decided to split my division and left a token force (plus my artillery) here. I felt confident in doing this as I was facing Surjit, a player who I know from previous games to be fairly cautious, and particularly artillery phobic. True to form he held back from a frontal assault and I held the pass with two understrength regiments to his four.

Two regiments and a battery of artillery hold back a whole division of Union blue bellies. 


Unfortunately he had to leave early and handed over command to Richard who was much more aggressive player and immediately moved more regiments into the unoccupied ground before me. Within two turns I was retreating back through the pass and preparing to defend this choke point with another unbloodied unit which I had moved into position. Fortunately the game ended at this point and my weakened defence of the pass was never tested, but the whole episode just showed how a situation can change dramatically with a change in command.


In this game the battle ebbed and flowed, as it always seems to do with these rules. Although the confederates were winning ground on their left and were steadily pushing the Union back this was a false hope. The Rebels may have taken much of the battlefield but they were unable to hold it. The end result was an unqualified victory for the Union, 20 points to 13, although it felt a lot closer than that from my view on the rebel side of the table.

Union Victory


Once again I found myself on the loosing side, but you know what, I didn't mind at all. For a start my dreadful luck with the dice seems to have burned itself out after the last game. I had some good luck on the dice and one of my regiments outdid itself winning two melee pretty much on the dice rolling along despite the modifiers stacked against it at the time. 

The other reason I enjoyed this game was the atmosphere. All the rejects were able to make the game and the banter was passing across the table thick and fast throughout the day. I'm not sure what Posties neighbours think happens in his shed but I suspect the roar of a dozen wargamers cheering the result of a melee dice roll must carry a long long way!

Friday, 11 January 2013

25-pdr Artillery Troop

I started putting this troop together before Christmas but the holiday season brought things to a shuddering halt for a couple of weeks. But with the kids back at school, year end out of the way and my job settling down to it's normal level of insane hyperactivity I have finally be able to pick up my brushes and resume the project.

The 25-pdr Field Gun was introduced just prior to WWII but due to its versatility, rate of fire and accuracy it remained a primary artillery piece well into the 1960's (and beyond in some commonwealth countries). These examples are towed by Morris Commercial C8 Field Artillery Tractor's, more commonly known as 'Quads'.

I was able to scrounge together all the pieces for this gun troop from the models I bought before Christmas without having to buy anything new. Some items need to be repainted while others were just bare metal. One of the 25 pounders is slightly different from the others as it probably came from another model company but when painted up the difference isn't that noticeable. Also hopefully unnoticeable is one gun loader I managed to mount facing the wrong way! I also had to scratch build a map table for the Staff Team which was rather fun. 

I only finished the Troop this morning and managed to take this quick photo before leaving for work. All I need to do now is magnetise the bases ready for storage and decide what my next project will be.