 |
| Legate Lucius Caedicius |
Another weekend and another battle with Romans, but this time it's an 28mm Imperial period battle. Set about 9CE (or AD in old money) this battle follows on from the disaster of the Teutoburg Forest where three whole legions were destroyed by Germanic 'barbarians'. Fired with blood lust the Germans have pressed on and encountered a Roman outpost.
Order of Battle
Germans (Surjit & David)
Army c/o Arminius
Army Standard Bearer
2x Warband (Fanatics)
2x Warbands
1 Javelinmen (Skirmishers)
Chieftain 2
3x Warband
1 Archers
1 Javelinmen
Chieftain 3
3x Warbands
1 Archers
1 Javelinmen
Chieftain 1
Cavalry (Nobels)
2x Cavalry
Sorceress (Witch)
Romans (BigLee)
Legate Lucius Caedicius
Army Standard Bearer
3x Legionaries
1x Auxiliaries
Legion Cavalry
Centurion Primus Pilus
Legionaries
Archers
Auxiliaries
Auxiliary Cavalry
2x Ballista
Watchtower Garrison Archers
The Action
 |
| The Germans are coming! A massive barbarian hoard emerges from the gloom of the forest |
 |
| Meanwhile a relief force rushes to their aid...but can they arrive in time. |
 |
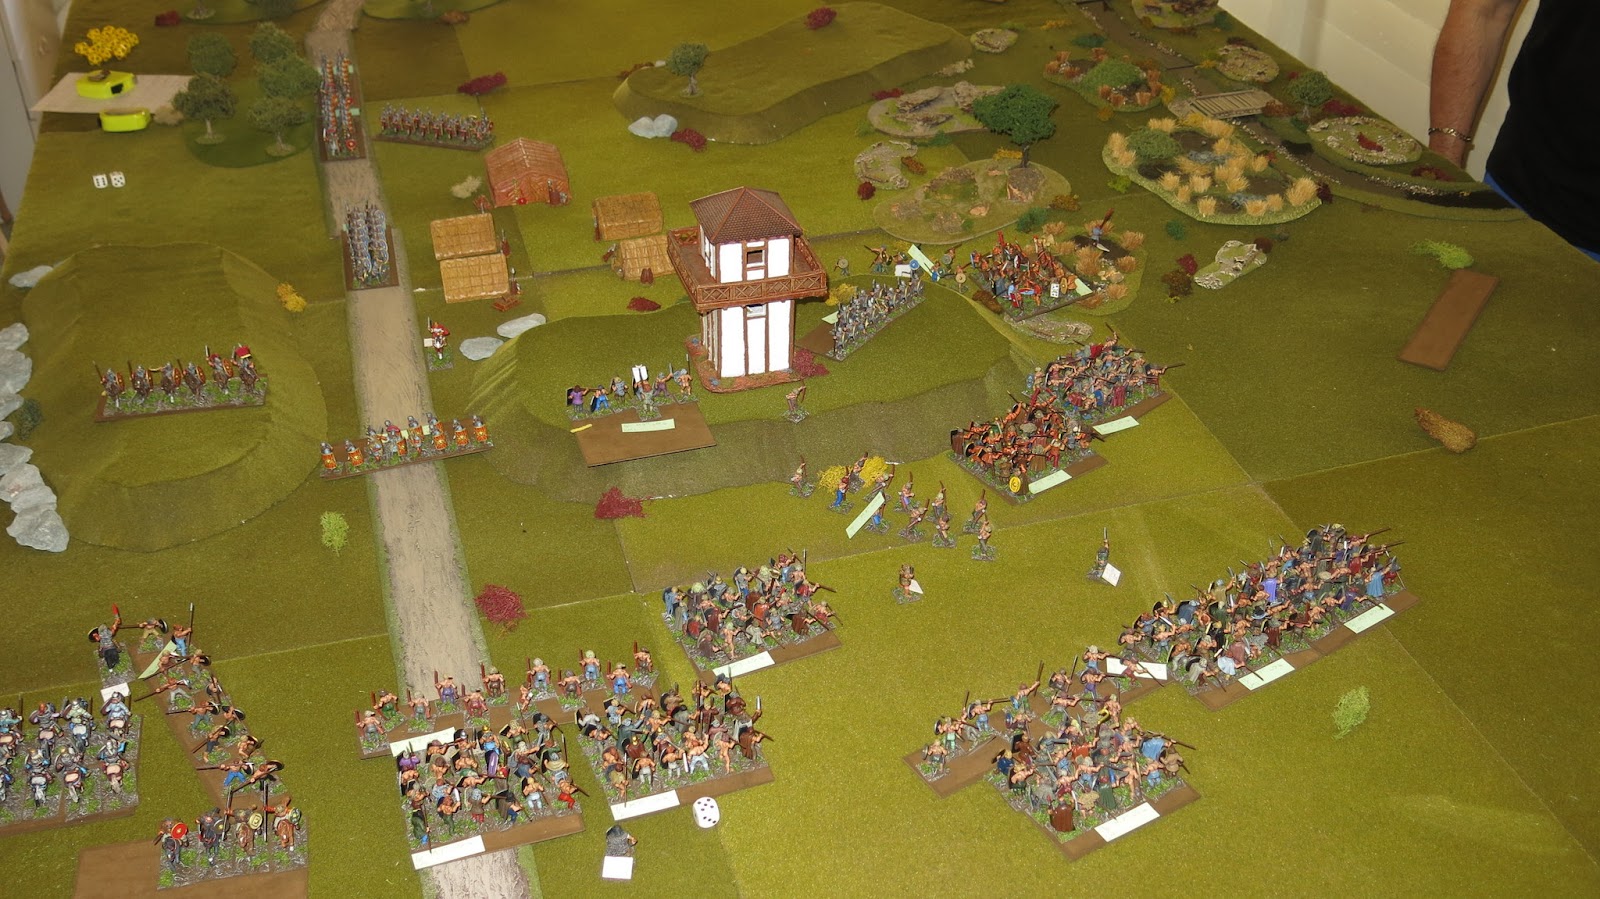
| The forward Roman forces look across to the Romans on the edge of the forest. |
 |
| The full 6x12 table was used for this game. |
 |
| Why do I look so happy? The fool. |
 |
| The Germanic tribesmen surge forwards. My Auxiliary Archers deal out a lot of damage but the distance is closed far too quickly. |
 |
| My Heavy Cavalry and the German Cavalry slam into each other. Despite the difference in numbers the melee is a draw. But with my unit being so small already it is reduced to just one figure and the unit is removed. |
 |
| German Skirmishers start to close in on the troops around the watchtower. |
 |
| My Archers are forced into melee where they drop their bows, draw their Gladius and act as heavy infantry. |
 |
| Barbarian Warbands start to wrap around the flank of the Romans. The marsh restricts movement but doesn't prohibit it and barely strops the German advance. |
 |
| More warbands emerge from the forest. The Romans on the hill are starting to wonder why they were not pulled back! Note the Roman Archer unit has been wiped out and no there is a gaping whole in the defensive line. |
 |
| Onwards sweep the barbarian hords |
 |
| The Auxiliary Spearmen on the hill are hit by two Warbands. Only lack of space stopped Surjit from throwing in a third unit. |
 |
| Finally my reserves have advanced down the road and are starting to reach the battle. But by now the swarming \Germans are pouring across the hill and all I am doing is reinforcing a defeat. I effectively admitted defeat at this point. The battle was lost but it was still early, so I decided to play on a few turns just to let events unfold and give the German players a game. |
 |
| The Barbarians close in and their Nobel Cavalry prepare to charge a fresh Auxiliary unit on the hill |
 |
| Slam! Amazingly this was another draw but the German Cavalry were able to pull back in good order. |
 |
| The Nobel Cavalry try again, but this time Legate Lucius Caedicius has joined the Auxiliaries. |
 |
| The Barbarians have swept around and completely enveloped the Romans. |
 |
| Two fresh Legionary units arrive but now they are just lambs to the slaughter. |
 |
| The Romans go down fighting non the less. |
 |
| The Barbarians are an unstoppable force... well not stoppable by this numpty General! |
Analysis
Another disaster! A combination of factors came together to make the outcome almost inevitable. First I fluffed the 'additional movement' dice roll for the Romans. If I had had two or three extra moves I may have been able to get the two halves of my army together before the Germans hit. Secondly I should have pulled back off the ridge as soon as I fluffed that roll. Fighting where I stood meant the Germans could destroy me piecemeal and my reserves were just fed into the meat grinder.
Good to see my old collection in action, the shed looks very tidy!
ReplyDeletePostie made a nice job of renovating the shed. Being able to get all the way around the table is a welcome bonus.
DeletePostie made a nice job of renovating the shed. Being able to get all the way around the table is a welcome bonus.
DeleteImpressive collection and great report. A pleasure to view and read.
ReplyDeleteCheers,
Aaron
Ahh well there will be other games. Good to see you and the shed in action once more. A nice report.
ReplyDeleteGlad to see you still can't be trusted on your own....tut tut! Great looking game though, kinda glad I missed it now, coz I would have been on your side????
ReplyDeleteI should have pulled back my advance units and regrouped. But even then, missing out on the free moves would have made withdrawal even more difficult. With hindsight forming up further back as one army would have given me a much stronger position... But that's easy to say now the battle is over and the result obvious.
DeleteGreat pictures and armies for this disaster...A real pleasure!
ReplyDeleteA great batrep and truly awesome pictures of a great and well played game.
ReplyDeleteCheers, Ross