Saturday 30 March 2013

Terrain Day

I'm taking advantage of a relatively quiet holiday weekend to get some big terrain projects under way. I'm making some more Dust Markers to add to the ones I finished last week and I am starting on making some minefields. This latter project has been waiting to get done for a few weeks and I have made big progress in just one afternoon. Hopefully I will have something to show you by the end of the week but in the meantime here's a quick picture of my painting desk just to show off some of the stuff I'm working on. 


This isn't everything of course, my desk is far too small for my needs, and I have half made terrain all around me in the living room, on the window sill and drying in the boiler cupboard... Mrs BigLee (bless her) doesn't look too pleased although she hasn't said anything yet! I guess I had better tidy up properly when I finish for the day! Oh to have my own man-cave!!

Thursday 28 March 2013

6mm Desert Terrain: Dust Clouds

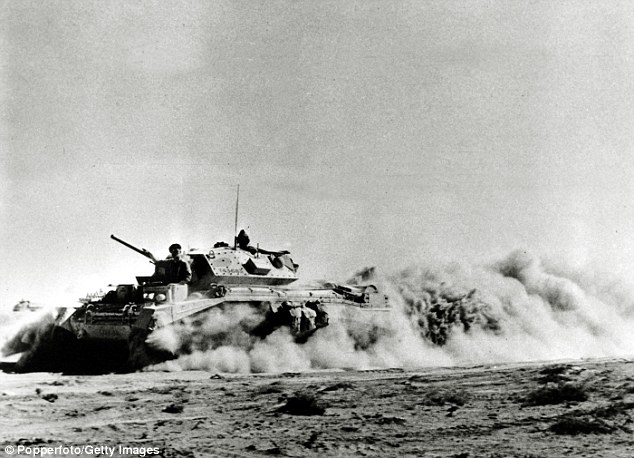
One of the things I definitely want to recreate in my desert games is poor visibility. This can be caused by several factors such as heat haze, sun glare, or simply because the viewer has sore and tired eyes. However the single biggest factor in determining visibility is dust. Time and time again I have read first hand accounts that say that it was not uncommon for observers to find it impossible to discern vehicles in a dust cloud until they were almost upon them. Dust clouds might conceal a whole company of vehicles or they might just be the result of strong winds, deciding which may be a matter of life and death. If I want to accurately recreate the mayhem and confusion of the desert war it is clearly vital that I make provision for dust clouds on the table.

Dust clouds from movement were inevitable in the desert
Making Dust Clouds
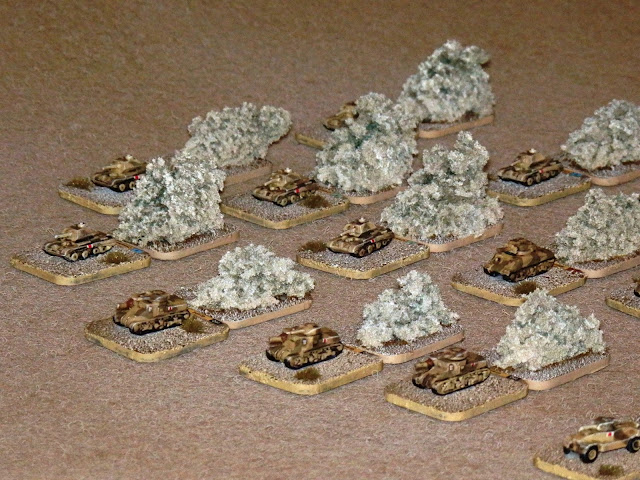
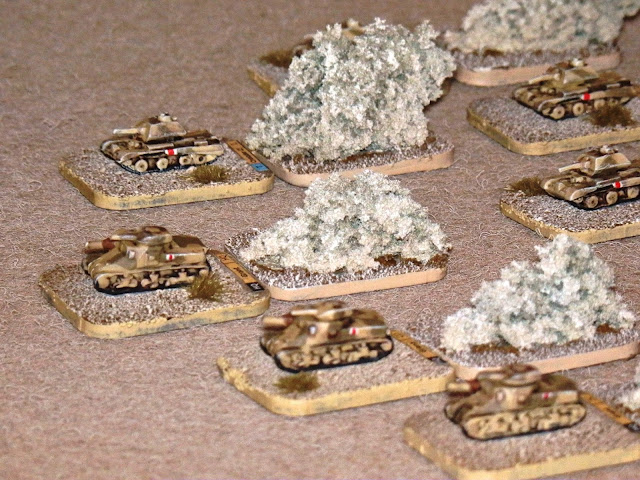
Battlefront make a set of dust cloud models for their 15mm models and I wanted to replicate this if at all possible for my 6mm forces. This meant making my own models as I have been unable to find anything suitable for micro armour. I experimented with several ideas but eventually settled on what turned out to be the most labour intensive - but aesthetically pleasing - method for creating dust clouds. I tried using fur but it just didn't look right to me. I also had a go at dying cotton wool and synthetic stuffing material to make dust clouds but again I just didn't like the result. In the end I fell back on the tried and trusted method I used for making my smoke clouds, painted clump foliage.


This first batch haven't quite come out how I wanted them but I know what to do on the next batch. The main problem is that under the bright glare of a flashgun some of the green foliage can just be seen peeking through the deepest recesses of the models. Its not noticeable in normal light but for the next batch I will soak the clump foliage in PVA mixed with sandy coloured paint rather than just water. Hopefully this will saturate the clump all the way through and provide a 'built in' base-coat on which to paint. I haven't tested this method yet but I will report on my results when I do. Having said this I still think these look pretty good and I'm really happy with them.


Rules for Dustclouds
The FoW website defines the rules for dust clouds in their 15mm games thus:
Place a 2”/5cm diameter Dust Cloud marker behind each vehicle moving more than 4”/10cm in the Movement Step. If the vehicle moves later in the turn, the dust cloud moves with it staying on the same side of the vehicle, even if it changes direction (you can’t hide in your own dust!). Vehicles moving 4”/10cm or less do not create dust clouds. Remove all dust clouds from your vehicles at the start of your turn. Troops behind a dust cloud count as Concealed.
The problem with this definition is that it doesn't actually mask the unit kicking up the dust (although it does provide concealment to those behind) and that just doesn't tie in with the documentary evidence I have read from the period. So I propose the following house revision of the 'Dust' rule for my 6mm games which incorporates some of the rules on smoke.
Unidentified platoons outside line of sight are represented by Hidden Markers until spotted. Once spotted, place the observed units on the table. Place a dust cloud (small base) marker behind each vehicle moving more than 4” in the Movement Step. If the vehicle moves later in the turn, the dust cloud moves with it staying behind the vehicle. 
Teams creating dust clouds are harder to target accurately and count as partially Concealed by their own dust. If line of sight from a shooting or spotting unit passes through a dust cloud the target team is treated as Concealed and Gone to Ground. Visibility is reduced to 16" if line of sight passes through a dust cloud. 
Remove all dust clouds from your vehicles when movement drops below 4" or less. 
This should mean that until line of sight can be established there is some element of uncertainty regarding the cause of the dust cloud. Once identified as an enemy unit the dust and heat haze make accurate targeting of the lead vehicles difficult and therefore provides concealment to them. It is is even harder to see units behind (ie through) a dust cloud and the effects are comparable to targeting through smoke screens. So it can be seen that a wily commander could used advance reconnaissance vehicles to mask following units in its dust plume. This doesn't make them invisible, but it does make them harder to target accurately. 

Tuesday 26 March 2013

Vietnam : A Soldier's Eye View

If you have any interest in the Vietnam War then you absolutely must check out these rediscovered pictures from Vietnam. Charlie Haughey was drafted into the US Army in October of 1967 when he was just twenty four. After 63 days in Vietnam, he was made a photographer, and shot thousands of photographs between March 1968 and May 1969 for the Army and US newspapers. When his tour ended he took the negatives home and tried to put the war behind him. Now 45 years later this body of work is being digitised and made available in a special exhibition. Some of this evocative and intimate collection is now available to view on Facebook and Flickr and is well worth visiting if you are interested in this conflict.

© Charlie Haughey
© Charlie Haughey

Monday 25 March 2013

Turning Point

I was chatting to a friend the other day about my North Africa 1942 Project and he asked me why I chose that particular moment in the Desert War to focus on. To be honest he stumped me for a few seconds because when I got started late last year I picked this particular point rather quickly without really understanding my motivation for it.

So I pondered his question for a moment and reviewed the things I had wanted to recreate on the table. The mix of vehicles with Panzer IV's and US Grants and Sherman's coming onto the scene is an important factor. As a painter I was definitely looking forward to working with these tanks as well as some of the older machines still in service at this time. I'm also a bit of a Montgomery fan and you can't be an admirer without also having a special affinity for his first big victory. But when I really thought about it, the simple reason I'm so interested in this particular point of the Desert War is that it was a turning point.

Like Stalingrad on the eastern Front, El-Alamein was an unequivocal disaster for the Germans and marked a clear and decisive change in the direction of the war. There would be many more disasters like this ahead for the Germans, as Churchill prophetically announced... "Now this is not the end. It is not even the beginning of the end. But it is, perhaps, the end of the beginning."


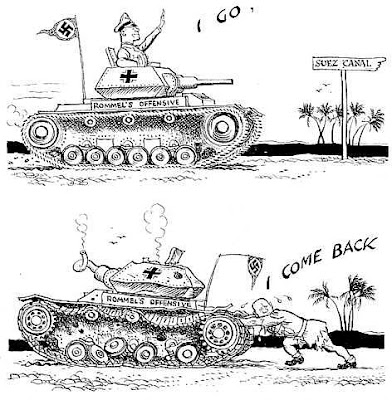
So if I'm really honest it's the fact that El-Alamein marked the end of the Benghazi Steeplechase and proved that while Rommel was certainly a tactical genius he most certainly wasn't invincible or infallible.

Friday 22 March 2013

WI 306 and Hidden Movement

I received my issue of Wargames Illustrated yesterday and have just about had time to peruse its contents. The Theme this month is Vietnam which - not entirely unsurprisingly - coincides with Battlefronts release of its new Vietnam Rulebook, Tour of Duty. If this is your period then you'll love this issue with articles on the development and contents of the new book and sneak previews of new models. However if you aren't into this period you may find this issue a bit 'Nam heavy. 

Having said that there are articles on a variety of other periods, as always. Deus Vult looks at Fireforges new game set in the time of the Crusades. This is a really interesting looking period with still have relevance and resonance in modern times. The Battle of Jersey is another interesting article as it deals with Frances attempt to invade Jersey in 1781 to remove the threat the island posed to French and American shipping in the American War of Independence. Air Combat Wargaming by Rob Wubbenhorst fills a niche that is often overlooked in wargaming magazines and writes about fighting in the skies.

However one article in particular caught my attention as it is a subject I have been thinking a lot about in relation to my North Africa Project. Hidden Movement by Pete Brown of the Worcester Wargames Club reviews several methods for introducing the fog of war into a game. This is a well researched article with interesting photo's illustrating the seven methods described and I think will be of interest to most wargamers, no matter what period they play.

Some of the methods listed, such as 'Duplicate tables' or the 'Three Room' method strike me as the sort of thing that can only be achieved by a wargaming club or the richer sort of wargamer (no Ray, not me). These require either lots of room, or lots of terrain and miniatures, or both. Other methods such as the Shield or Blanket method are much more practical. I used this method regularly when I played Warhammer Fantasy Battle several decades ago, but most recently I have seen it used by Postie in a Crimean game where the Fog of War was literally fog that obscured movement of friend and foe alike.

The curtain goes up...and Ray's laughter could be heard across town. 

The 'Token' or 'Blind' method is another technique that has been around for a long time. The likes of Donald Featherstone were using this technique thirty or forty years ago and is employed in modern games like I ain't been shot mum! to simulate uncertainty. Its also the method I favour for my desert games, although I have yet to figure out how to fit it into the Flames of War rules. One of the things I have read a lot about was the effect of dust, heat haze and the glare of the sun to reduce visibility and confuse the senses for all the combatants in the desert. Utilising a larger table, smaller 6mm models and 'dust/hidden markers' will give me a chance to simulate this effect on the table and hopefully will introduce some much needed confusion and uncertainty into the game!

I'd be interested to hear what method other gamers have used and how they got on with them. In particular any advise or ideas with regards using markers would be appreciated as there seems to be a dearth of information on the 'interweb' regarding this (maybe I was Googling it wrong, as the Vicar said to the Nun). 

Barrage Baloon

Continuing the occasional series of pictures of Toy Soldiers.


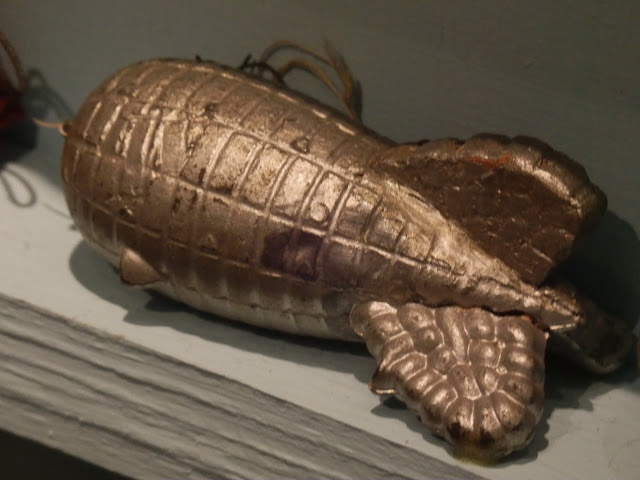
This is a great little 'toy' from the 1940's and shows that the Model companies like Britain's were responding to the potential market of young boys in wartime. Nowadays I guess we would be horrified if a toy manufacturer brought out an 'Afghanistan Line' of Taliban v's British/American toys specifically targeted at children, but in 1940's Britain this clearly wasn't a concern! This reminds me of an recent discussion over on the Terminus Omega blog about comfort zones, particularly in relation to us wargamers. It makes some interesting points and well is worth checking out. 

This particular model can be seen at the House on the Hill Toy Museum in Stansted Mountfitchet. Made by W.Britains c 1940 this Miniature Barrage Balloon Unit comprises an OO Gauge 6 wheeled lorry with a winch and 10ft of twine linked to a latex rubber three fin Barrage Balloon also OO scale.

A Briton's latex rubber three fin Barrage Balloon in OO scale

They even have the box showing the OO Gauge 6 wheeled lorry with a winch which came with the Baloon

Thursday 21 March 2013

BLMA gets a Dynamic Facelift

You will probably already have noticed that BLMA has been given a makeover, and I'd like to know what you think of it. Way back in 2011 Blogger introduced Dynamic Views as a template option for blogger Blogs. Although I liked a lot of what I saw I decided not to enable Dynamic Views because it wouldn't carry over many of the Widgets I had working in the sidebar. More importantly it wasn't possible at that point to insert a header picture which meant my 'hand crafted' logo art would disappear.  However most of my initial concerns have now been addressed and after some fiddling with the template design I decided to shift BLMA over to the new template. 

One of the major benefits of this new layout it that it has increased traffic across my blog, literally overnight. One reason for this is that it is easy to see and access several of my most recent posts from the home page without having to scroll down to find them. This means that new visitors to the site are now presented with five posts to catch their attention rather than just the latest one and are therefore more likely to look around. I have also read (but con't confirm if this is true) that blogs with Dynamic views get a higher page ranking in Google Searches which also increases traffic on the site. Obviously my priority is to communicate with existing readers but if I can attract more followers and add to 'the conversation' then that isn't a bad thing.

Most of my sidebar widgets work fine in this new layout (now that I have tweaked them that is) and I have been able to fix the 'header issue' and insert my own artwork. The only problem I have encountered so far is that the new width settings have caused some minor formatting issues with older posts. I'm working on this issue now so hopefully that should be resolved soon. I have also opted to drop some of the less popular Pages to make the header bar less cluttered.   

As with previous changes of layout I can promise a few things. Firstly BLMA will remain a non-commercial site, meaning no adverts. I doubt if I would ever have the sort of site traffic that would generate much income but from a purely aesthetic point of view I don't want the site cluttered up with  adverts over which I have no control.  Secondly BLMA will continue to feature lots of my pictures and in that respect Dynamic Views really is the best way to present my posts. 

So what do you think? I'd really appreciate your views and feedback on the new layout and if there are any major problems please let me know and I'll do my best to resolve them.

Tuesday 19 March 2013

The Battle of Uccle - Napoleonic BatRep

On Saturday the rejects got together for a Napoleonic wargame using Posties own rules and a small portion of his massive collection of figures. This was a fictional battle and followed on from the Battle of Hal which was itself a 'what if' scenario based on the premise that Wellington had lost the Battle of Waterloo and been forced to retreat to prepared fall back positions.

The Setup
The Battle of Hal was a bruising defeat for the French under Reille and Napoleon was not best pleased with the result. The French have now reorganised and Reille has been sent forward again to assault the Anglo-Allied positions which now straddle the small village of Uccle just 3 miles outside Brussels. The position is a good one - anchored on three hills with the village in the centre - but the allied army is of mixed quality with a number of poor quality line troops and militia making up its numbers. They are faced by a battle hardened but tired and weakened French army, determined to redeem themselves after their defeat at Hal.

French Forces
Fran - Prince Jerome Bonaparte, Comte Foy, 9th Div
Smiffy - 6th Division
Lee - Kellerman 3rd Cavalry Corps
Ian - 5th Division, Gen Baron Bachelu

Anglo-Allied Forces
Surj - L/Col HH Mitchel - 4th Brigade,
Clint - Col Olfermann - Brunswick C/O
Brian - L/Gen Colville 4th British Division
Ray - Prince Frederick of the Netherlands C/O

The disposition of both armies at the start of the game (French on right and Allies on the left)

Postie details the forces under the Allied command and gives our guests Clint and Brian a brief overview of the rules.


The French Columns begin their advance towards the Allied centre
Surjit's tiny cavalry brigade advances towards the French guns
Two French brigades wait patiently for their chance to attack
The French columns continue to advance behind a skirmish screen
Mid way through the game as the lines begin to approach each other
The French infantry advance is relentless but its the arrival of a French Heavy Gun (seen here on the road heading towards the front lines) that would ultimately prove pivotal to the battle. 
Meanwhile I moved four Cavalry Brigades round to the right flank to 'persuade' the British infantry opposite them to stay on their hill and therefore not advance against our weakest infantry position. 
Surjits Cavalry overrun the French Guns but find themselves flanked by infantry and faced by two French cavalry Brigades. 
The enemy lines are almost touching now
French Currasiers slam into the enemy cavalry that dared to overrun their guns. The Allied cavalry were wiped out.
Meanwhile French heavy re-enforcements arrive on the left flank. Although they would not play any part in the battle they may have convinced the Allies to move their own re-enforcements to their flank rather than their precarious centre.  
A panoramic view of the whole table at the height of the battle
The French columns finally reach their target and slam into a fairly one sided Melee
View across the field from the French left towards the centre where the crucial fighting was taking place
The centre turns into a large infantry slogging match
The village of Uccle was defended my Dutch conscripts. When the newly arrived French Heavy Gun arrived it fired into the village and killed the Divisional commander...precipitating a retreat by the while Dutch division in the centre.

With their centre dissolving the Allied commander (Ray) decided to break off and admit defeat. His army was still largely intact and he was clearly thinking about yet another fall back position and once more chance to defeat the little Frenchman. 
Thanks to Clint (L) and Brian (R) for joining us for the day. I hope they had a good time and both went home with a small token to remind them of their day as honorary Rejects 

Conclusion
The Anglo Allied commander decided to fall back and preserve his forces. He has done his job and delayed the French for another day, buying more time for Wellington to reorganised and rest his battered army back at Brussels. The scene is set for a final climactic showdown as both the French and Allied armies converge towards a battle that could finally decide the outcome of the war

For a different perspective on the events of this battle check out Rays BatRep here. Clint also did a write up of the game and posted some pictures of his own here. Also keep an eye on the Angry Lurkers blog as I expect that when he has recovered from his St Patricks Day hangover he will also post some pictures. And last but not least check out Brian's blog Lead Legion. For more of my pictures from the game my Picasa album here

Monday 18 March 2013

Skirmish 2013

On Sunday morning I crossed the Thames for the second time in two days (a Rejects Bat Rep will be posted in a day or two) to go to Sidcup and the Skirmish Toy Soldier show. I was hoping to bring my youngest daughter along as I have in the past but she was feeling poorly and in the end I went to the show on my own. I didn't have a shopping list with me this time as I didn't expect to find anything for 6mm scale gaming amongst the traders or on the B&B. I was right and came home empty handed except for some pictures and some plastic figures for my daughter. 

The Skimish show is definitely growing in stature and had expanded slightly this year with more display  and participation games on offer. The Bring and Buy stand was moved to another room which meant it had more space to lay out the items on sale and meant that more games could fit into the 'hall'. The only problem with this setup was the very harsh strip lighting which bathed everything in a blueish hue. This isn't a problem if you are buying a book but if you want to buy a set of models this might be problematic. As it was I didn't find anything on the B&B and didn't even come away with any books from the traders...I must be loosing my touch! 

Anyway, here are my pictures of some of the games at this event:

The blue glow of the B&B is really evident in the pictures I took
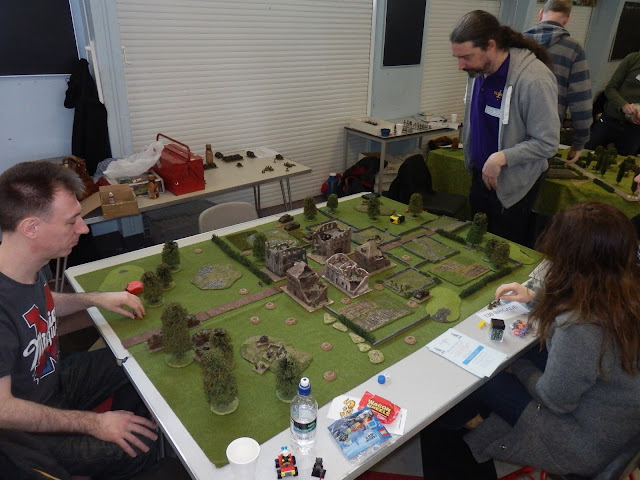
Two of the guys from Hornchurch Wargames Club playing Bolt Action
German infantry squad advancing in the Hornchurch Bolt Action game
The Gravesend Wargames Club playing a large Warhammer 40K game
A Chaos Land Raider rumbles through the devastated city
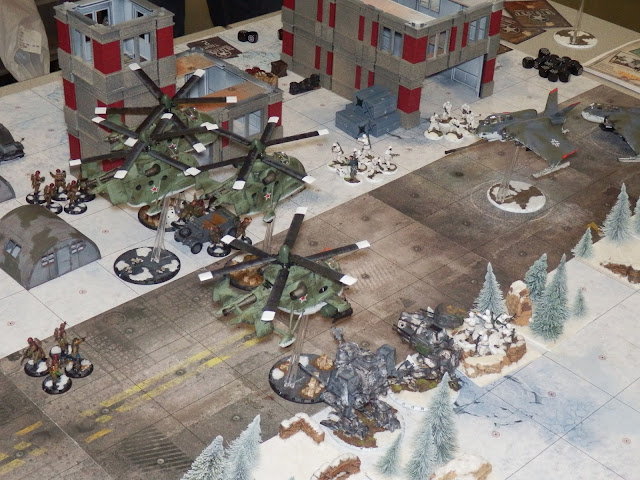
The Medway Wargames Society play Dust Warfare
I really love the look of this game and the models are awesome! 
The North London Wargames Group playing 40K (I think)
136 Brigade playing The Road Ends at Falaise with 20mm figures
Two guys from Welling Model Club and some of their work.
A diorama by members of the Welling Model Club - A Russian Maxim team from WWII
South London Warlords playing Skirmish in the Hedgerows, a WWII 28mm Bolt Action Game
A close-up from the South London Warlords game
At this point an apology is in order. The next game was Operation Sealion by the guys from Crush the Kaiser. I was chatting to them for quite a while about their up-coming "top secret" game for this years Salute show. All I could get out of them was its a medium sized table of 'sculpted' terrain and, in their own words "It's probably our best table yet", which is quite a statement coming from the guys that brought us the shell blasted landscape of no-mans-land when KTC came out a few years ago. I look forward to seeing what they come up with. The problem is I spent so much time chatting to them I totally forgot to photograph the game they were putting on at Skirmish! Sorry about that guys!!

An Old West game with 54mm Figures by the Skirmish Wargames Group
Most of the figures are by Timpo, Airfix & Britains
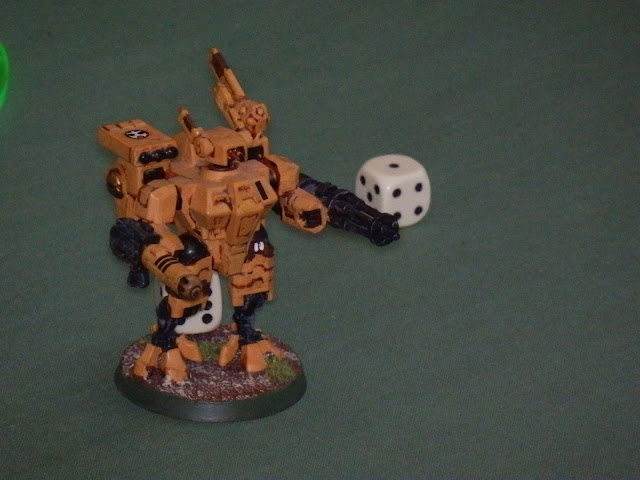
The Games Hub put on a Warhammer 40K game called Ork Siege
Closeup of a Dreadnought
The Hornchurch Heroes show off the X-Wing miniatures game
Closeup of an X-Wing fighter
Two reenactors from the Sealed Knot Society
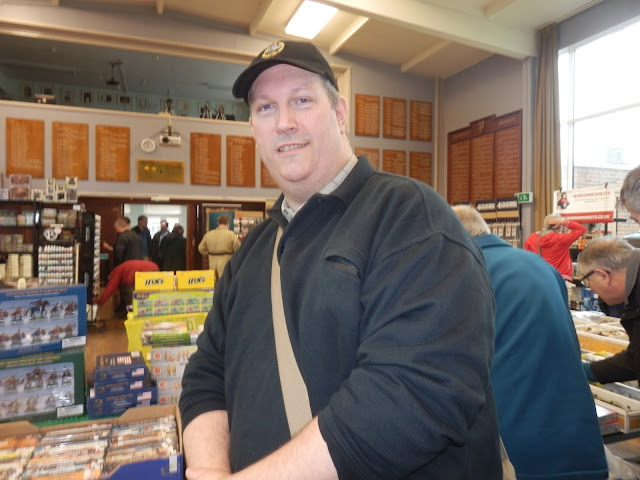
Good lord! Who's that big ugly git blocking the aisle! Oh, its me... [note to self, no more self portraits!]
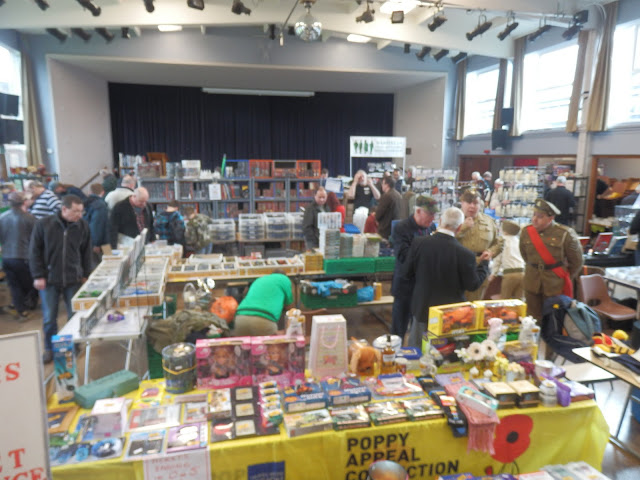
The trader hall at Skirmish. It seemed a little quieter than usual but the car park outside still looked as full as ever. 

I really enjoyed this little show, even if I did come home empty handed. It was good to meet up with fellow bloggers such as David Crook and Bob Cordery (both of whom have already written about the show) plus many others. This is a nice low key but friendly event with enough to keep most people happy for an hour or two. To use the language of Orwells 1984 it was double plus good!