Sunday 28 January 2018

Battle of Khambula - 29th March 1879

Last weekend I had my second game of the year over at Reject HQ, Posties Shed-O-War, and the result was very close and very enjoyable. Stuart decided to recreate a historical battle from the Anglo Zulu War and chose one that would bring out a significant portion of his vast Zulu War collection of figures. Once again the young Padawan joined us for the game and this time she found herself alone commanding the British while myself and Surjit commanded the Zulu's against her.

The Setup
After the disaster at Hlobane, Colonel Evelyn Wood prepared to resist an attack by the entire Zulu impi of over 20,000. Many of the Zulu regiments were veterans of Isandlewana and Hlobane and were armed with rifles taken from British dead.  The defences at Khambula however were strong with laagered waggons, parapets and trenches on high ground overlooking clear lines of fire.

Order of Battle
British (2,100 Men) - No4 Column C/O Col Wood (Emily)
   90th Foot 9 - 8 Companies
   1/13th Foot - 7 Companies
   No 11 Battery 7th Brigade Royal Artillery 6x7pdrs
   Mounted Infantry - 1 Squadron
   Frontier Light Horse - 2 Troops
   Raafs Transvaal Rangers - 1 Troop
   Bakers Horse - 2 Troops
   Kaffrarion Rifles - 1 Troop
   Weatherleys Border Horse - 1 Troop
   Mounted Basutos - 1 Troop
   Natal Native Horse - 1 Troop
   Royal Engineers - 1 Section
   Dutch Burghers - 1 troop (left battlefield before start of battle)
   Woods Irregulars - 1 Company
   Rocket Teams - 2 Batteries

Zulu's (23,000 Warriors) - C/O Chief Kangqengelele (BigLee), 2ic Chief Kamahole (Surjit)
   Right Horn
      inGobamkhosi - 4000 Warriors
      uVe - 2000 Warriors
Centre Right
      uDhloko - 2500 Veteran Warriors
      uDududu - 1500 Warriors
      iSangqu - 1500 Veteran Warriors
      uMbube - 500 Warriors
      uThulwana -1500 Veteran Warriors
      iNdluyengwe - 1000 Warriors
      iNdlandlo - 1000 Veteran Warriors
  Centre Left
      uNakhenke - 2000 Warriors
      uMbonambi - 2000 Warriros
  Left Horn
      Khandempemve - 2500 Warriors
      Amakwenke - 1000 Warriors

The Action
Khambula - A strong British position ready to resist a massive force of Zulu's


The Encircling Zulu army had a lot of exposed ground to cover and their commander (me!) expected to take a lot of casualties on the way in. 


The Padawan and Surjit are the image of Nonchalance...but this will be a tough fight for both sides. 


Some of the British and Boer Cavalry. These units were a constant annoyance to the advancing Zulu'd on the Right Horn. The iNgobamkhosi in particular were harassed relentlessly throughout the battle. 


British Artillery was also very effective. Once again the Padawan's preternatural dice skills served her well. She was rolling well above average all day and the guns did a lot of damage to the slow moving Right Horn. The iNgobamkhosi and uVe regiments can be seen starting to move onto the table... they didn't move much further with Surjit creeping them forward before stopping them almost entirely once they were if effective range of the British guns.  


Equally effective were the British Rocket teams firing on the Zulu Left Horn. Rocket after rocket rained down with unerring accuracy causing significant casualties to the kHandempemve Regiment.


The Padawan seems unmoved by the Zulu advance.


The Zulu centre and left Horn move in. There must have been a slight miscommunication because I was under the impression my sub commander was going to move his left horn around the rocky dead ground to hit the British camp from behind. Instead he aimed for the front of the fortified hill forcing my regiments to slide to the right throughout the advance. 


The encircling Zulus seen from the British position. Scary! I felt the British missed an opportunity here as the Padawan didn't move any of her infantry to face the front and instead concentrated all her firepower on the two horns. As a result my regiments in the centre advanced right up to the bottom of the hill without a single casualty. 


As the Zulu's got closer they opened fire however poor marksmanship reduced the effectiveness of this fire. Some casualties were scored and this weakened the British positions before the main charge. 


All the British positions are firing now and Zulu casualties are mounting. At last the Padawan starts to move some of her unoccupied infantry to support the threatened front. 


The Padawan; Cool, calm, collected (and calculating!). Once the Zulu's started closing in her defence of the hill was textbook and well handled for the most part. 


The First Zulu charge rushes up the hill and into the weakly defended redoubt. The melee looks one sided but charging uphill, against well armed British troops in fortified positions will not be easy. 


As predicted the first assault fails and two Zulu regiments are forced to fall back. The British however have lost a lot of defenders and now my Veteran regiments are ready to surge uphill in a second wave attack. 


Hopelessly outnumbered by Veteran Zulu's the remaining British in the first redoubt don't stand a chance. Meanwhile another of my Veteran units charges the British guns which had been moved forward rather than pulled back (the only significant mistake the British made the whole game). 


Gunfire and bloodied spear tips!


The first redoubt is overrun by my Veterans and the British guns are captured as their crews flee a massacre. With their blood up (and the melee so one sided) my regiments get to follow on and are able to surge into the rear of the Barricade defenders. 

With the front half of the hill overrun, and Sujit's troops mopping up survivors, my uDhloko regiment charge into the defenders of Wood's main redoubt. They smash the first line of defenders and surge into a second line that the Padawan has quickly and skillfully thrown together. With most of the Zulu regiments spent everyone knows this melee will be crucial. Victory for the Zulu's will clinch another great victory over the white invaders. But if the British win this melee they will be able to turn all their remaining firepower on the already spent Zulu regiments. 


Surjits troops are also in a final decisive melee which could see them sweep the British defenders from the rest of the hill. 


Disaster! Both Zulu assaults fail badly and both regiments rout back off the hill and are effectively out of the game. The British have managed to keep hold of the main redoubt while inflicting massive, unsustainable losses on the Zulu Impi. The British have won! 

Cool as a cucumber, the British commander asks her batman to prepare afternoon tea and turning to the retreating Zulu army utters those famous words "Get off my Lawn!". 

Analysis
Well after that battle I am tempted to hang up my dice bag for good! And as for the Padawan, I'll have to stop calling her that from now on. This so called trainee wargamer saw off two members of the Rejects, with hardly a wrong move made. Her dice rolling can only be described as phenomenal. The British guns should hit their targets roughly 50% of the time but her average through the game had to be well into the 70% range, and then she started rolling for damage...oh my.

A very well deserved win for the British in an exciting and thoroughly enjoyable game that closely mirrored historical events (the Battle of Khambula was a turning point for the British). 

Thursday 25 January 2018

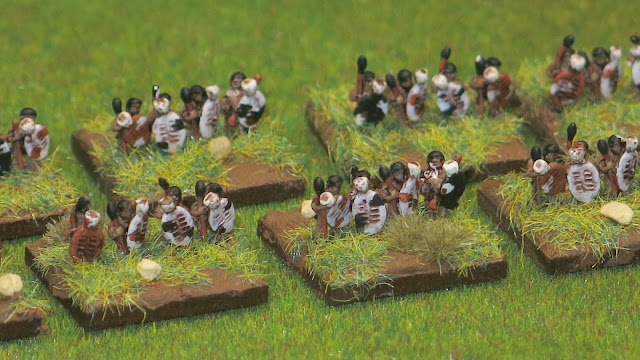
umCijo Zulu Regiment

My next regiment of Zulu's is the umCijo ("the sharp pointed") and fought as part of the central "chest" at Isandlwana. This is an unmarried regiment, hence the black shields, made up of warriors with an average age of about 28. It Isandlwana the umCijo were very keen and actually launched an attack prematurely which had to be brought under control.


The leader of the regiment Mkhosana kaMvundlana then had to get them going again and keep them moving after their initial assault was stalled by British volley fire. He was subsequently killed in the charge but the umCijo were instrumental in driving the British back to camp, precipitating their collapse. The umCijo also fought at Khambula and at Gingindlovu so they will see plenty of action on the table top.


I'm rather pleased with these models as I 'discovered' a new technique for painting them. With all 6mm figures I rely heavily on the use of ink washes to add shading and depth to the base coated figures. Baccus Zulu shields have a series of grooves in the surface for the straps that hold the central shaft and rather than hand paint these straps on every shield I use ink washes to bring out the detail. For units with white shields a brown ink wash shows up the straps on the shields really well but for units with black shields I have struggled to do the contrasting white straps. For these figures I experimented with a 'white' wash, something that until now I didn't think was possible. I used Vallejo Thinner Medium in the ratio 5 parts thinner to 1 of white paint. The resultant thin 'wash' flows into the grooves on the Zulu shields where it concentrates the white paint enough to leave a clear white line but is thin enough that it leaves little or no white residue on the rest of the black shields.


These are the last of the Zulu's for a few weeks because I have run out of models! I've ordered some more figures but I don't know when they will arrive, or even if they will be delivered in time to paint before the Challenge ends. I've quickly rearranged my painting plan and I'll start on the British next, hopefully allowing time for more Zulu Regiments towards the end of the Challenge. Whatever happens I'm a happy painter as I am way ahead in terms of progress towards my target. I considered 1000 points a bit ambitious when I set it (considering I paint mostly 6mm) and it now looks like I was being timid!

Monday 22 January 2018

My Challenge Progress - Week 5

Work towards my target in the Analogue Painting Challenge is progressing very well with my current points total two thirds of the way to the finish line at the end of week five. This was largely helped along by a few days off at Christmas (illness free thankfully) which gave me a chance to get off the blocks quickly. Indeed I've done so well I have run out of Zulu's to paint and have had to order some more! While I wait for them to arrive I have rearranged my painting plan to start on the British a few weeks earlier than originally scheduled. 


Hopefully the next batch of Zulus will be delivered in time for me to get some more done before the Challenge comes to an end. However even if they don't make it on time I know I have more than enough points worth of figures sitting in the wings to comfortably hit my target... ironic really as back in December I was wondering if I had been a bit over ambitious!

Cedric Hyde

The torture that is the Analogue Challenge Bonus rounds continues, and again I had a real struggle to find something suitable for this weeks category. The only model I initially found in my lead mountain was a lovely sculpt from Colonel Bills Belt Fed Girls range but as it was a bit NSFW I decided to try and find something a little more PC! Then by sheer chance I came across this figure by Westwind while browsing through one of my favourite model shops in Rochester. So I present Cedric Hyde from Westwind's Empire of the Dead range.


Needless to say the link to the theme is his rather oversized revolver (which reminded me somewhat of the gun wielded by Hellboy). I imagine that targets hit by this impressive hand cannon don't just get large holes in them, they probably explode. If that doesn't count as a BFG I don't know what does.


This was harder to paint than its simple lines would suggest. The large smooth surfaces of this figures bulging physique meant that any detail needed to be added by the painter. In other words this needed a bit more skill than I normally exhibit on a 28mm figure! I've given it my best shot and hope you like it.

Thursday 18 January 2018

Zulu Nokenke Regiment

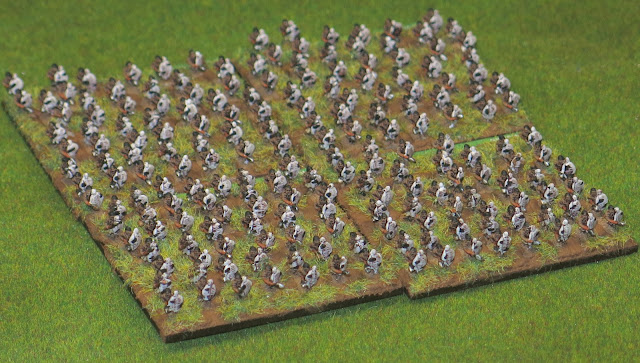
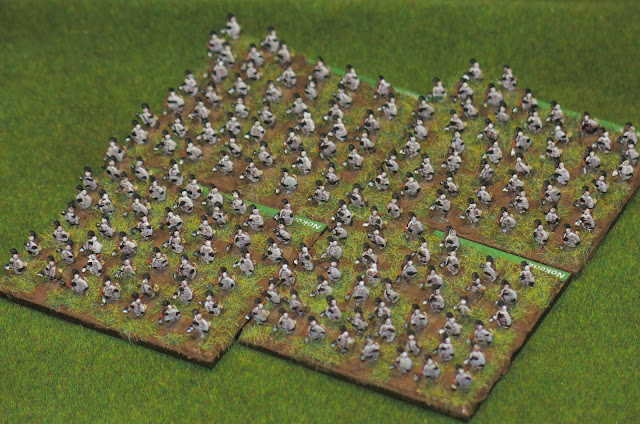
Another Zulu regiment is completed, and this time its the Nokenke Regiment. This regiment fought on the right horn at Isandlwana and after working its way around the British camp eventually joined up with the iGobamakhosi Regiment, sealing the fate of the invaders. The Nokenke we also fought at Khambula later in the year.

Nokenke Regiment

Nokenke

From behind showing the base labels

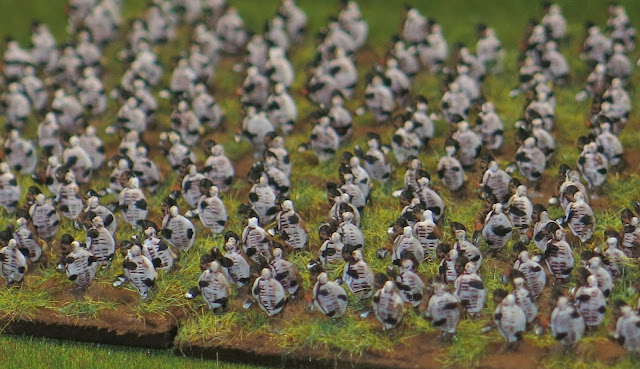
Close-up showing the shields

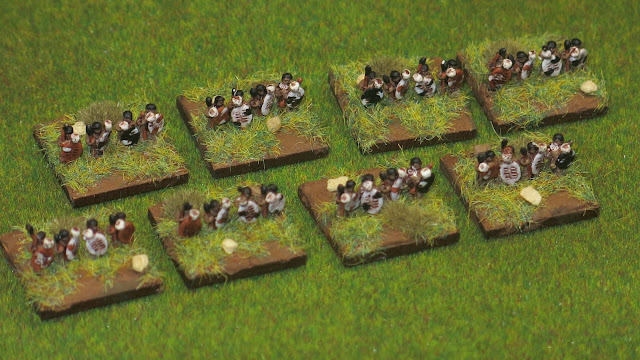
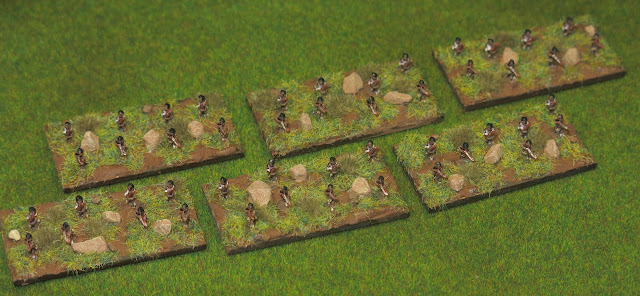
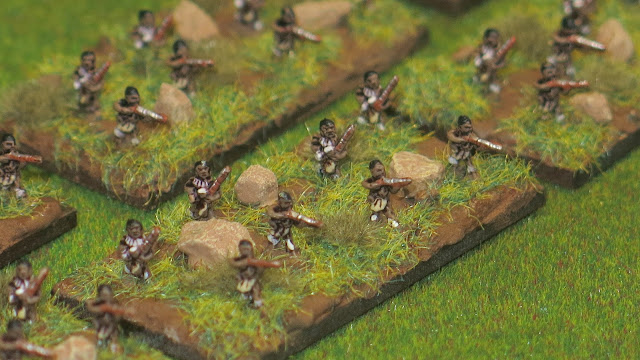
I have also turned out some command stands and some Zulu riflemen units. These are small units with very limited firepower and accuracy...but they can still be a nuisance and a poorly aimed bullet can kill just as easily as an aimed one if it hits a target.

Zulu Commanders

Command stands close-up

Rifle skirmishers amongst the rocks

Riflemen

I've been a very busy boy this week with the Nokenke regiment consisting 192 figures, there are 32 Command figures and 48 riflemen making a total of 272 figures fora respectable 136 Points. I'm racing towards my target and this should take me well past my half way mark, significantly ahead of schedule. I have one more Zulu regiment to paint and them I'll get started on the British.

My progress this week

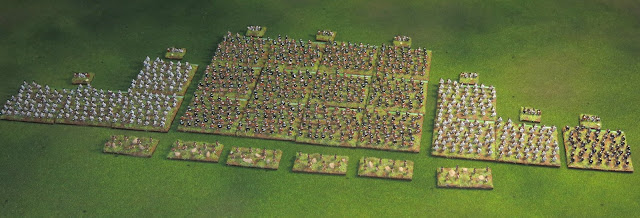
As a final 'treat' here's a picture of my Zulu Impi thus far.

My Zulu Impi thus far

Sunday 14 January 2018

Battle of the Two Cabins

Last weekend the rejects had a French Indian Wars skirmish game in the shed-o-war. Unfortunately some players had to drop out due to illness so in the end it was just myself, Mark and my daughter Emily. She has played several games at Reject HQ but this was her first independent command with an equal share of the French forces and operating as overall commander.

The Setup
The french have snuck up on a British supply column and threaten to cut them off. Dividing their forces into two the Indian Allies attack the head of the column while a combination of Marines, Woodsmen and Militia hit the rear in an attempt to split the British into two separate groups. As the lone British commander I had the advantage that I could handle all my forces together, moving men from one flank to another as appropriate. However that still left me fighting in essence two battles at the same time.  

Order of Battle
British (Commander - Lee)
   Colonel on Horseback (may dismount)
   55th Foot (20 Figures)
   Virginia Provincials (20 Figures)
   Rodgers Rangers (12 Figures)
   Gorhams Rangers (12 Figures)
   Friendly Indians (4 Figures)
   Indian Character (Rife/Sharpshooter)
   Wagon + 1 Crew
   3 Carts + 5 Crew
   Mountain Man (with rifle) & Mule
   Farmers 3 with Rifles, 2 with Muskets

French (Commanding Officer - Emily)
   Colonel on Horseback
   Campagnes Franche de la Marine (16 Figures)
   Quebec Militia (12 Figures)
   Coureur de Bois (12 Figures)
French (2nd in Command - Mark)
   Indian Warband (12 Figures)
   Indian Warband (12 Figures)
   Indian Warband (12 Figures)
   Indian Character (Rifle/Sharpshooter)

The Action
A British column passing through farmland surrounded by woods

The Padawan moving her forces. The Blue disc represent the rough location of units. The British player doesn't know what he is facing yet. 

Mark moves his warbands towards one end of the British line and the Padawan aims hers for the other end. 

I move some of my Indians into the woods to reveal the French units...only to run straight into a units of Marines. 

Meanwhile Mark sends his Indians forward to attack a cabin on my left flank. The Indians attempt to take the cabin by force,,,if they success the British will be cut off. Fortunately I am able to move one of my commanders int melee and kill the Indian commander. The result is a moral test sending the whole warband into retreat for three turns. 

With one third of his forces retreating Mark decides not to press his attack until he can do so with all his forces. 

Looking down the table. The Padawan now has an opportunity to press her attack on the other flank. 

My troops try to tempt the French into an early and ill prepared attack. 

The Padawan isn't fooled and cautiously advances and fires on any exposed British troops

Looking down the table from the opposite end. 

The French Marines cross the open ground relatively unmolested...using the tress to mask their advance. 

Meanwhile I move an assortment of troops and well armed civilians into a fenced field. This becomes something of a bastion for the British an resists repeated attempts to break into it. 

Meanwhile the French Marines finally engage my Rangers in hand to hand combat. My troops come off worse, but still pick off a few of the French. 

Meanwhile on the other flank Marks Indians have regrouped and begin a concerted attempt to sweep away my Rangers.

Another dangerous attack is repulsed with casualties on both sides. 

Meanwhile my Virginia Provincials fall back ahead of the French Marines, keeping a tight formation to hold the flank secure. 

Back on the other flank my rangers (along with several rifle wielding civilians in the cabin) have managed to hold off the first assault of the Indians. 

Mark presses his attack again...casualties mount on both sides but the Indians loose more men in the attack.

The Padawan tightens the noose again with the Marines creeping forwards, but their casualties are mounting and the Quebec Militia have been forced to retreat. 

The game is coming to an end as night draws in. The British will probably have to withdraw but they have given the French a tough fight.

The view from the other end. The British have held their position and its unclear if the combined French and Indians forces have the strength to continue their attack. 

Analysis
This was a tough game to play. The French players kept me fighting two separate battles at each end of the battlefield and I spent a lot of the game carefully moving troops to support the fights at one end or another. When the points were added up the British had scored 111 points while the French had reached just 82 points. So after a long and hard fought game this was declared a British victory, although by the end it did feel something of a Pyrrhic victory.