Wednesday 30 December 2020

AHPC XI - Week One in a Fantasy World

Ten Days ago the Analogue Hobbies Painting Challenge got underway and I've been using some of my Christmas Break to get stuck into some early submissions. I've already posted a picture of the Viking Santa I did in the first few days and I quickly followed this up with the figures shown below. I tend to work on multiple models at the same time so while I'm painting model B, model A is drying etc. So at one point, I had five different projects on the go at the same time, something that only happens during the Painting Challenge. 

Ghoul Lying in Wait

My second entry to the Challenge was the first in a series that is part of the 'bonus rounds', an optional side challenge to the main competition. Participation here will net quite a few bonus points and gives me a comfortable start on my campaign for this year's event. Some of the categories will be a challenge to fill, but I reckon I can get some really old figures painted and on the games table this winter. 


And so I light my lamp, ready my sword and descend the stairs into the notorious dungeon known as the Chambers of Challenge. The first room I encounter is the Hall of Traps and here I find a Ghoul has taken up residence. Hiding behind a column the Ghoul lays in wait for the unwary or inexperienced hero. Many an adventuring career has been cut short in this room... but not today. This is figure is 25mm tall and was made by Grenadier sometime in the 1980s. The date cast into the bottom of the solid base was partially filed away so all I can say is it was sometime in the '80s which makes this ghoul quite an old boy. I've also painted the column he is hiding behind and mounted it on a custom base so it snugs up next to him (so I could say he was lying in wait) but that's such a basic paint job I don't expect any points for that.


My gaming origins are very much in D&D and the old Red Box version of the rules. I was introduced to the game by a good friend of mine at school and over 35 years later I'm still playing with him and others from those early days of gaming. So when I saw the bonus rounds would be the Chambers of Challenge, and then looked at my pile of unpainted figures from that period, I knew it was a match made in heaven. Although it has to be said most of my roleplaying takes place online now, so the need for figures is much reduced. So instead of painting models for D&D, or just for display as in previous years, this time my bonus entries will be painted for use playing Frostgrave. 

The Pink Wizard

Having scratched my head and come up blank with the Pit of the Pendulum I decided I needed to skip that room on the Chambers of Challenge map. This can be achieved by being 'teleported' anywhere on the same level by the Sorceress. The cost for such an act is a female figure and so I decided to have a rummage in my Fantasy Lead Mountain to see if I had an appropriate figure. My third entry was therefore a Female Wizard with shimmering pink hair! Once again I have painted this model for use with my Frostgrave collection and have based her appropriately to fit the theme for these figures. 


I'm not sure where I got this figure, like much of my collection it was probably an impulse buy somewhere back in the mists of time! Indeed I recently found another box of figures hidden in a cupboard that missed the big tidy up when I got my games room together last year... I wonder how many more surprises await me in fark corners of the house. I have this rather macabre image of my poor wife finding boxes of figures long after I have shrugged off this mortal coil, muttering under her breath about my silly hobby! 

The Golems Haunt and a Tomb Wraith

My fourth entry this year was another fantasy figure for the Chambers of Challenge. I'm quite enjoying working through my fantasy lead mountain finding figures I had forgotten I even bought! So, having materialised in the Golems Haunt after transport by the Sorceress, I find myself face to face with the ghostly apparition of a Tomb Wraith. 


I stretched the definitions for this category just a little, but I decided that a Wraith could be considered to be 'reanimated' or re-created and it justified painting this wonderful 2003 Reaper Miniatures figure. Solid metal, it has got quite a heft to it and the flowing billowing cloak is just wonderful. I've painted Wraiths before (in classic LOTR movie-style black and white) but this time I wanted a bit of colour so went for muted greens instead. Multiple dry brushes were required and it took longer than I thought it would, but I'm really happy with the finished model. Once again I have based it for use in my Frostgrave games. In the past, many of my bonus round figures have been 'display figures' only, but this year I'm trying hard to make sure as many as possible are usable on the games table.


Having completed one monochromatic figure I found myself contemplating moving on to a much more challenging task, greyscale! In over 30 years painting miniatures I've never attempted that before, so the Chamber of Darkness will be a real test of my meagre skills. That figure will be up on the Challenge blog today and I'll repost it here in net weeks painting roundup. 

Until then, stay safe everyone. 

Thursday 24 December 2020

Plan B

"Plans are made to be broken"..."No plan survives contact with the enemy"..."The plans of mice and men."... Take your pick from any of these stock quotes and they could be aptly applied to the UK this Christmas. And like many families in the South East of England (and elsewhere), we are having to replan our holiday season around staying at home and not seeing family. To be fair, we already had a well established 'Plan B' in place because it was rapidly becoming quite obvious (to everyone except our Glorious Leader) that 'Plan A' was crackers! On the plus side, it means I have even more time for painting and playing games with the young Padawan.

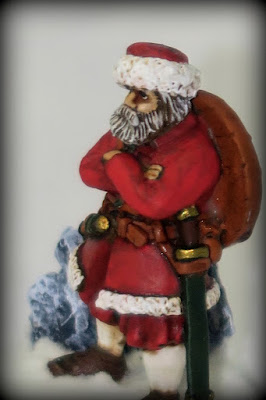
The Analogue Hobbies Painting Challenge started on Monday and I have been working on my first entries. I'm taking a more sedate pace this year, even though I'm likely to have more time on my hands, simply to reduce the pressure a bit (got enough of that at work!). As is traditional for me, I have kicked my AHPC campaign off with a Christmas Themed figure. I normally buy these early back in January I had purchased my 2020 Christmas figure for this year's Challenge. Unfortunately, it was the excellently sculpted Death dressed as Santa from Terry Pratchett's Discworld novels, and I thought that was just a little too dark given the year we have had. I'll save that for when this mess is all over (so who knows when he'll see the light of day!). Instead, I have painted a Viking Father Christmas made by Foundry. 


One of the conventions of the challenge is that participants post pictures of their entries on the Challenge blog with 24hrs exclusivity before reposting on the painters own social media. I only managed to get this guy finished and posted yesterday morning, hence the reason my usual Wednesday post has been shifted to Thursday this week. I have some other entries ready for the Challenge and I'll post them here next week with a roundup of what I have completed and what is on the workbench. 

Until then I'd just like to wish everyone a very Happy Christmas and hope that you are keeping well and trying to make the most of a tough holiday season. 

Sunday 20 December 2020

Merry Christmas!

It's a little bit early but today's episode of The Quarantined Wargamer Merry wishes everyone a very Happy Christmas. I'll be taking a couple of weeks off so there won't be a TQW next weekend but I'll be back in the new year with fresh content and more of my trademark rambling nonsense! 


The next episode of TQW will be on the 3rd of January and, hangover permitting, I plan to discuss the perennial favourite of wargamers across the word, our hobby-related new year resolutions.

While I'm taking a week off with the Channel I will continue to be posting stuff here on the blog because the Analogue Hobbies Painting Challenge begins tomorrow and I'll be using my Christmas break to wrap up some early entries. The usual rule is that the Challenge blog gets exclusivity on your entry for 24hrs after which photo's can be reposted on your own blog if you have one. The submission format is a little more 'free form' this year so we won't be corraled into a fixed posting schedule but I'm planning on doing a weekly wrap up of my entries for the normal Wednesday posting slot here on BLMA. 

Keep safe, have a lovely Christmas, and keep rolling high!

Wednesday 16 December 2020

The Calm before the Storm

This week, around the middle of December, is one of my favourite times of my gaming calendar. No, it's not anticipation of hobby related presents to come next week (although I am looking forward to that). And it also Isn't the fact that I have time off work over the Christmas break and have a string of games with friends and family arranged (some remotely, some not) over the next few weeks. What I always look forward to at this time of year is the Analogue Hobbies Painting Challenge which starts on the 21st December. And this week, as every year, the excitement is building and the preparation is pretty much complete so I find myself with a few days to relax, to think, to write and to enjoy the building anticipation of the competition to come. 

Swapping the Brush for a Keyboard

If I said I haven't picked up a brush in over a week I would be lying, but while I haven't 'painted' anything I have been busy priming figures ahead of the challenge start on Monday. No doubt my 'plan' for the competition will evolve over the three months it takes place - there is always something unplanned that sneaks in before the finish line appears - but for the time being everything I want to paint is ready and waiting for the starting pistol to fire. So, with a little bit of time on my hands and no painting to do just yet, I have been doing some writing instead. I have three Quarantined Wargamer scripts ready for next year, and several more at the draft stage. Counterintuitively I'm finding that without a deadline breathing down my neck I suddenly find it easy to get my ideas down on paper. I'm definitely not going to waste this flush of creativity and I hope to have several more outlines for future episodes of my silly ramblings prepared by the end of the day. 

I'm also working on several blog posts for the upcoming weeks. As I have mentioned before in one of my videos, I try to have blog posts written well in advance of the publishing date so I can stick to my schedule (today's post is a notable exception to the rule!). As I know what I want to paint in the opening days of the Challenge I have already started drafting some words to accompany the pictures I will take as each project is completed. It saves a lot of valuable painting time once the competition is underway and again, it takes away the pressure to perform and allows me to enjoy the opening days of the competition and still enjoy some much family time over the holiday. 

Sunday 13 December 2020

Winter Painting Challenge

The Analogue Hobbies Painting Challenge is due to start in a little over a week so I thought I would do a video to explain what it is, to those unfamiliar with it, and to talk about my plans for this year's event. 


If you are taking part I look forward to seeing you on the field of battle! If you are just a spectator, get yourself a comfy seat, it's going to be a spectacular event. 

Wednesday 9 December 2020

German 81mm Mortar Teams

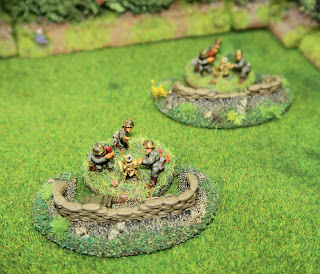
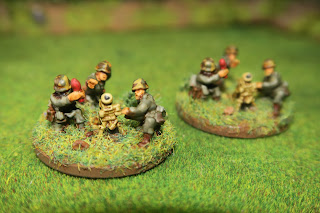
This week I have been finishing off another set of models for my 15mm Germans for Chain of Command. These are from Peter Pig and aren't really suitable for the game, as mortars of this size are usually off-table support and don't require a model. I'd already bought the figures when I realised this so painting these was more a case of "well I've got them now...". Unlike other teams I have painted, I decided to base these on slightly larger round bases to accommodate all three crew. Practical experience has taught me that marking off casualties on these teams is easier than basing them individually. Now that I have finished them it would be a pity not to see them on the games table so I'll have to find an excuse to use them, regardless of what the rules say! 

A simple piece of kit

The 81mm Mortar (the Granatwerfer 34) was designed by Rheinmetall, went into production in 1934 and was used throughout the war with relatively little modification. I think it's fair to say the Mortar is a fairly simple weapon and the design was so elementary it was incredibly similar to the American M1 81mm mortar which saw service in WWII right up to the '50s. I found a great little training manual for US troops which illustrated the similarity perfectly describing to the US serviceman how anyone familiar with the M1 could operate the German equivalent easily, should they capture one and need to use it. 

As with the American version, the Granatenwafer 34 broke down into three parts for ease of transport, with the smoothbore barrel, bipod and baseplate being carried by different members of the team. The aiming mechanism was attached to the bipod and consisted of a traversing handwheel, a cross-levelling handwheel and a panoramic sight for fine adjustments. The weapon had an effective firing range of between 400–1,200 m (440–1,310 yds) and a maximum range of 2.4km (1.5mi) although it lost a lot of accuracy at that range. A well-trained team, with plenty of ammunition, could get a rate of fire of between 15-25 rounds per minute although from what I have read that would rarely be sustained for very long. 

Over 75,000 of these were manufactured so they can often be found in museum displays and I have even seen them for sale at historical reenactment events. I'm not sure if my long-suffering wife would approve if I lugged one of these home. 

Sunday 6 December 2020

My Four Coat Varnish Method

This week The Quarantined Wargamer discusses my uniquely long-winded method for varnishing my miniatures. Over many years I have developed and settled into a routine four coats of varnish on my models. It's an approach that works for me, although it does require a lot of patience. The end result, however, are miniatures that look the way I want them to and are tough enough to survive my ham-fisted handling of them on the games table. 


As always I'd love to hear how you approach the varnishing of your figures. Do you have a preferred brand of varnish that you swear by? Or have you learned to avoid other brands that you want to swear at? Please leave a comment below in the comments, or over on the YouTube Channel. 

Keep safe everyone and until next week, keep rolling high!

Wednesday 2 December 2020

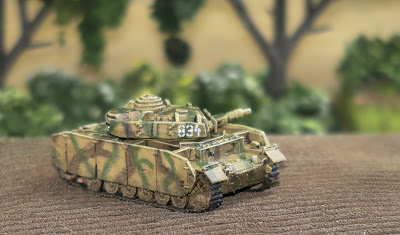
Panzerkampfwagen IV Ausf F2

This week I've decided to paint something slightly different in that today's AFV hasn't been painted for use in my Normandy games. I bought this last year for use with What a Tanker! but never got round to painting it until now. To be honest, over the next few weeks I probably won't be painting much for Chain of Command. Instead, I will be working hard to prepare for the Analogue Hobbies Painting Challenge which starts in a few weeks time. Former participants will know that you can prepare your figures in advance of the start date so long as you don't apply any colour (other than Primer). So for the last week or so and probably the next couple I will be cleaning up and preparing models ready for the start of the challenge on the 21st of December. I booked a couple of weeks off over Christmas (pretty much the only holiday I've had this year) and I'm looking forward to having some family time and getting a bit of painting done. 


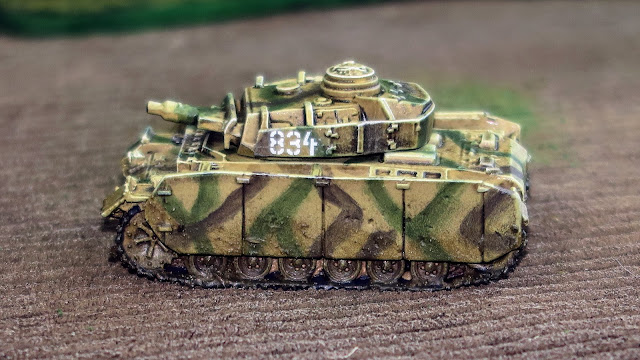
Painting a Panzer IV Ausf F2 gives me a chance to try a different paint scheme. It is a much earlier vehicle than the Normandy tanks I normally do, so I've decided to paint it with one of the many mid-war camo schemes used by the Germans. So this vehicle has a base of German Grey with patches of Middlestone. This model is from Peter Pig and is 'battle-hardened' which basically means it has got some pieces of equipment and stowage on the decks as well as items like track welded on the front and the turret. The model probably won't see the games table in a Chain-of-Command game but will be ideal for some What a Tanker action, which is what I originally bought it for. I have even got a Russian T34 somewhere so it might be fun to paint that up just as a something different. Don't go getting any ideas, I'm not about to switch my interest to the Russian front, at least not in the foreseeable future ... never say never! So on with something about the Panzer IV F2

We're gonna need a bigger gun

The original Ausf F1 version started production in early 1941 but after encountering KV1's & T34's in Russia it was decided that a bigger gun was needed. Krupp was given the task of trying to adapt the existing PAK 40 L/46 gun into the turret and the result was the 75mm KwK 40 L/46. This could penetrate 77 mm of armour at a range of 1,830m and would be very effective against Russian Armour. The downside of this weapon was its significant recoil,  so the barrel was given a muzzle break and this combined with the longer weapon made the tank rather front-heavy, reducing its manoeuvrability. Three months after production started, and with a few minor improvements, the vehicle design was redesignated as the Ausf H. That version came with side Schurzen plates but this model is the slightly earlier F2. 


The Aust F2 had 50 mm of frontal armour and 30 mm of armour on the sides. This wasn't necessarily effective protection from a T34 but the main battle advantage this Panzer brought to the game was its gun and ammo combination. The Panzer IV F2 carried 80 rounds of 7.5cm armour-piercing capped ballistic cap (APCBC-HE). This type of armour-piercing shell has excellent aerodynamics and in guns of sufficient muzzle velocity, over shorter ranges, they are incredibly accurate. Combined with the excellent optics found in all German tanks they were a formidable weapon system. 

I'm probably not going to get anything else painted this week so my next post will be Sunday when the next episode of The Quarantined Wargamer will be discussing my well developed (some would call excessively developed!) four coat varnish method. 

Soft-Edged Camo without an Airbrush

I used a new brush on this model and it has been something of a revelation for me. I have been resisting buying an Airbrush for a long time, partly because I haven't had a suitable 'workshop' to use it in but mainly because it's a whole new skill to learn. So for a long time now I have been trying to perfect a soft-edged camo technique using just brushwork. I have tried a lot of different hair types and shaped heads and I have even had a go at trimming a brush to the desired shape, all without much success. Don't get me wrong, I have been satisfied with the results, and its got models on the tabletop, but I have never been completely happy with them. Now however I think I have found something that works.


I recently picked up a pack of the Army Painter dry brushes to try out because the rounded short hair brushes looked ideal for what I wanted. The pack contains three brushes and the two larger ones are a bit big for what I need, but the smallest brush is just about suitable. The brush head is about 6mm and the short soft domed head is ideal for 'stipple dry-brushing' soft-edged camo. Basically, I dip the brush in the desired colour and rub probably 95% of the paint off the brush. Then, rather than stroking the brush over the surface to highlight the ridges, I dabbed the brush vertically onto the surface. This slowly built up a soft patch of colour with nice graduated edges. In the example of this tank, I then brushed solid colour in the centre, producing something that looks very like it has been airbrushed. 

Needless to say, I am very happy with the result and plan on having a play with this brush/technique combo to see how detailed I can make it. I'm on the lookout for a similar style of brush that's a little bit smaller so I can try the technique out in more detail. I can feel a tutorial video coming out of this discovery, maybe early in the new year, so keep your eyes peeled if you are interested. In the meantime any advice or suggestions are welcome, I can't be the only person to have 'discovered' this technique.

Sunday 29 November 2020

The Eye of the Beholder

Today's video on The Quarantined Wargamer is sort of a response video to a thought-provoking article in the latest issue of Wargames Soldiers and Strategy. I completely agree with the sentiments expressed by the author, Warwick Louth, but couldn't resist adding my tuppence worth! I very much think the internet is a wonderful resource and a terrible place all at the same time. So the question is asked, do the wonderful images seen online and in magazines put people off painting their miniatures? Or should we be considering what it is we want from our hobby and adjusting our personal expectations to fit that outcome? 


As always I'd love to hear from you (respond to my response in fact) either in the comments below or on my YouTube Channel. 

Stay safe everyone, and of course, keep rolling high! 

Friday 27 November 2020

Debris of War - Furniture

I have been working on a lot of little items of late to use as 'scatter terrain' or set dressing for a games table. These are items that probably won't serve any purpose from the point of view of gameplay, but will enhance the look of the table. These models from Peter Pig fit that bill perfectly. 


They can be used in amongst the ruins of buildings or piled into the back of carts. I particularly like the upright piano and the chests of drawers. Simple items of furniture that make a ruined building look a little more realistic I think. 

Wednesday 25 November 2020

A forward Supply Depot

The logistics of warfare is an area that we often overlook when we wargame. Supply lines and lines of communication have always been vital in warfare but as armies became more and more mechanised the needs of fuel and spare parts and other essential items became as important as things like food and medicines. One of the major problems for the allies with invading in the Normandy region was the lack of a significant port. The raid on Dieppe had shown that trying to capture a port in the first wave of an invasion would be extremely costly, if not impossible. They fully expected that Cherbourg would probably be out of action for some time after the Invasion, but more importantly, it was a long way from where the front was going to be in maybe a month or two months time. This knowledge influenced allied backing of the Mulberry harbour construction, providing a port facility much closer to where the fighting was going to be, not just during the Invasion itself, but in the immediate months ahead. 

The harbour served its purpose and by the end of 11th June 104,428 tonnes of supplies had been landed in Northern France. Rough weather hampered the effort and forced the abandonment of Mulberry Harbour A at Omaha Beach. However, Harbour B at Gold Beach was still in use 10 months after the invasion, by which time over 4 million tons of supplies had been landed. The scale of the logistical effort to sustain the invasion was huge. The U.S. military alone had to ship 7 million tons of supplies and replacement vehicles to the staging areas, including 450,000 tons of ammunition. All of this took place in an age before containerisation and required an army of dockhands, drivers and support personnel to keep the flow of material to the fighting troops at the front. 

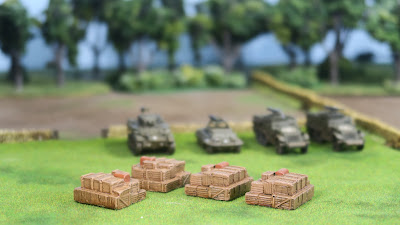
These little models are not particularly good. They are made from a plaster-like resin which soaks up the paint and has lots of bubbles in them. However, I bought these for the silly sum of 50p on a bring and buy stall some years ago, so despite their quality, there were still worth buying. To be honest, when you look at them at arm's-length on the tabletop, the flaws are hardly noticeable, so they will do for most games. I think they are actually meant to be for 28mm wargames because the crates are pretty large for 15mm. However, I think that they'll be ideal for a tank depot where the crates carrying spare gun barrels, engines or sections of track would be pretty large. 

I have a few more 'scatter terrain' items to finish off which should be ready to show off for Friday. Don't get too excited, they are tiny, won't really have much impact on a game but will enhance the look of certain scenes on the games table. 

Sunday 22 November 2020

Are you a Secret Wargamer?

Do you hide your hobby from your non-gamer friends? Would you be embarrassed if your work colleagues knew about your little metal men? Would you acknowledge your pastime on your CV? Many gamers wouldn't, some feel they can't and others (like myself) let the cat out of the bag years ago with the advent of social media. This week's Quarantined Wargamer takes a lighthearted look at a serious subject. 


I'd love to hear from you, what choices have you made and why? Please join the discussion in the comments below or on my YouTube Channel and of course if you enjoyed the video please hit the 'Like' button.  Until next week I hope your all staying safe and of course rolling high! 

Friday 20 November 2020

The Chausey Granite Walls of Normandy

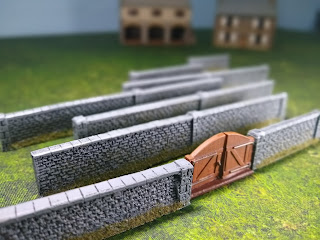
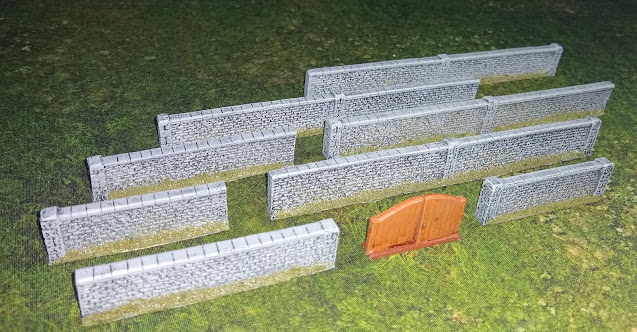
Nothing fancy this Friday, just more walls. I painted up a load of low walls for things like field boundaries a few weeks ago and now its time for some tall walls for courtyards. This small set is from Timecast and I actually bought them to accompany some Landmark buildings that I bought at Salute in 2019. The buildings are very nice but not suitable for my Chain of Command games because they don't have internal spaces for infantry. They're more than ok for What a Tanker games though and these walls could be used in either setting. 

These stand about 18mm tall so will provide complete cover for infantry and concealment for some smaller vehicles. I only have enough for a small courtyard between a few buildings but it least I have that option available to me now. The set includes four long sections 146mm long (just under 6"), two smaller sections 75mm (3") long and two more 55mm (a tad over 2") sections. The set also comes with a large double gate which I mounted on a section of sprue so it would stand up. With the gate, the whole lot comes in a fraction under 3ft. I normally try to write a little historical blurb about what I have painted but honestly what can I say about walls.. well more than one might imagine! 

In Lower Normandy and the area around the Cotentin Peninsula, it is quite common to see buildings built from light granite blocks. When I was much younger I spent a couple of family holidays in the Channel Islands and the use of granite as a building material is common there as well. Most of the Granite apparently came from the island of Chausey - geographically part of the Channel Islands but under French jurisdiction - which is why so much of the archipelago's buildings share the same building material to those of the Cotentin Peninsula. The further east you go in Normandy the more likely you are to encounter buildings (such as the larger ecclesiastical buildings like the Cathedrals) made from a particularly hard limestone known as Caen Stone. Unlike the light grey Granite of Chausey, Caen Stone is a light creamy-yellow so its possible to tell which bit of Normandy you are in from the colour of the buildings. 

Wednesday 18 November 2020

A Quarantined Wargamer Update

A few days ago I recorded my 40th episode of the quarantined wargamer and this minor milestone got me thinking about this whole YouTube thing I have been working on. So I thought it would be a good idea to share a few behind the scenes pictures and have a look at where I am with this project, where I think it's going and ask the all-important question, can I keep it up?! Before I start it's worth saying that for various reasons the next few months are going to be very busy for me. Both professionally and on the hobby front, I have a lot going on and I can see things getting busier, so I need to be very careful not to overload myself. So this bit of self-reflection is probably a good idea (for me at the very least) and a chance to ask for some feedback from regular readers and viewers. 

Sunday 15 November 2020

Conquer the Lead Mountain

Does the presence of your Lead Mountain nag at you and give you stress?  Is the gravitational field of that big pile of metal interfering with your enjoyment of the hobby? Do you need supplemental oxygen to reach the summit? If the answer is yes to any of these, maybe you need to develop a strategy for conquering your lead mountain. Today's episode of The Quarantined Wargamer suggests a simple strategy for dealing with the problem. 


I hope you enjoyed that video and of course if you did please hit the 'Like' button and consider subscribing to my channel. As always I would love to hear from you either here on the blog or in the comments on youtube. How big is your 'lead' mountain and does it worry you. What are your strategies for dealing with it...or have you successfully pushed its existence to the back of your mind?

I hope everyone is staying well and for readers in England, I hope you are coping with Lockdown 2.0! Until next week, stay safe and of course, keep rolling high! 

Friday 13 November 2020

Signposts for Normandy

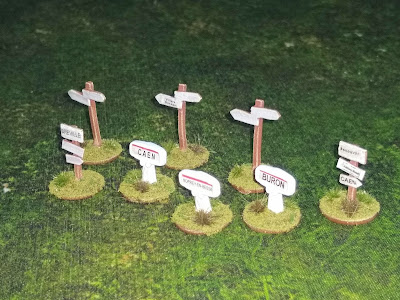
Today I have another small addition for my 15mm Normandy 1944 terrain. These signposts are from Peter Pig and feature some signpost decals that Model Dads released back in 2014 I think. I'm not sure the decals are sold any more which is a great shame because they are pretty good...and I've finally got some signs to put them on! I have kept a few of the signs blank so I can fill them out at a later date when I have a specific game to use them in. 

The Peter Pig set consists of eight metal signposts, some typical roadside signs and some more ad-hoc affairs presumably put up by the military. You may notice that some of the signs feature the names of locations in the British and Canadian sectors around Caen. "But you have American infantry" I hear you say, which is true at the moment... 

I have just bought a load of British Airbourne troops for battles in the eastern end of the Overlord lodgement, which I'll be painting in the Analogue Painting Challenge over the winter. A mix of very nice figures from Peter Pig and Skytrex are sitting on my desk as I type this. I'll be cleaning them up and preparing them for the challenge over the next few weeks... but more on that in a later post, closer to the time. 

Wednesday 11 November 2020

Panzerkampfwagen III Ausf N

The Panzerkampfwagen III Ausf N was the last production model of the Panzer III and the only version to be armed with the 7.5 cm L/24 gun. The gun had been used on earlier versions of the Panzer IV and fired a much more effective high explosive round than the longer barrel guns fitted to earlier versions of the Panzer III. Only 700 Ausf N's were made and all used chassis from earlier versions of the Panzer III, most based on the Ausf J, L and M. 


The Ausf N had frontal armour of 50mm and side armour of 30mm so it wasn't as well protected as its larger cousins. However, it had a maximum road speed of 40 km per hour with an average speed of 20 off-road making it's relatively 'nippy'. Its theoretical range was 155 km on roads and 95 km off-road and like all German armour towards the end of the war was limited mostly by fuel supplies rather than spare parts. As well as the main gun it could carry 64 rounds of a mix of 7.5cm armour piercing and high explosive shells, and 3750 rounds of a 7.92 mm machine gun rounds, belted in 150 round bags. 

It looks fairly small compared to the Mark IV and of course Panthers and Tigers. At just two-and-a-half meters high and weighing in at about 23 metric tons, it was a lightweight compared to the heavy vehicles that we are used to seeing. However, its ability to ford 60cm deep water, cross a 2.3 m wide trench and obstacles up to 60 cm tall (and climb a 30 degrees slope) made it an ideal infantry support vehicle. In the Russian campaigns, they were fitted with Schurzen to protect the sides from anti-tank rifle fire. This practice also provided some limited protection against bazookas and PIATs later in the war. The Ausf  N saw service in Russia, North Africa and Europe and the Germans even gave some to their allies in Hungary. 

Production ended in 1943 but some of these were still in use 1944, albeit in very small numbers, continuing in their role as infantry support tanks. However, by this time most surviving Pzr III's were being taken back to be converted into the turretless Sturmgeschütz III.

Sunday 8 November 2020

Sportsmanship verses Gamesmanship in Wargaming

Today's episode of The Quarantined Wargamer discusses Sportsmanship versus gamesmanship across the wargames table. When does psyching out your opponent become bullying? And does it even belong around the games table? 


As always if you enjoyed the video please hit the Like button and consider subscribing to my channel. I'd love to hear from you so please leave your own thoughts on this issue either on youtube or here on my blog below. 

Next week I'll be discussing how to conquer that Lead Mountain, but until then stay safe and keep rolling high! 

Friday 6 November 2020

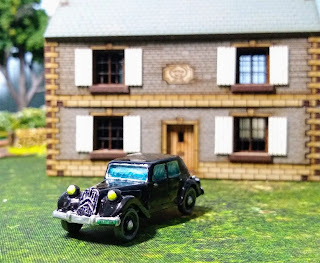
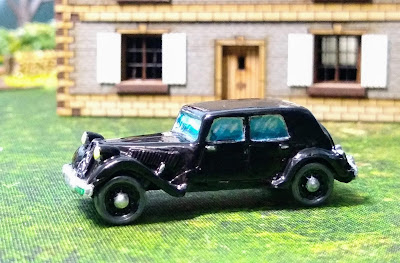
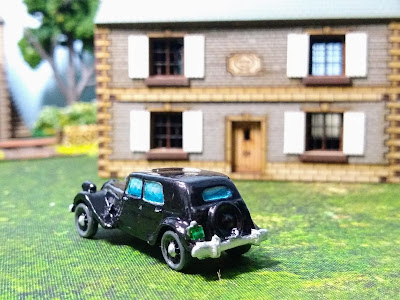
Citroen Traction Avant from Peter Pig

I have been looking for a few small items as 'scatter terrain' for my 15mm Normandy setting and wanted to get myself some civilian vehicles. Peter Pig make this nice looking Citroen and I decided I needed to get it. It's a generic version of the Traction Avant family of cars which began production in 1934 until 1939/40 (resuming again after the war). This Citroen featured front-wheel drive, independent suspension and unlike many of its contemporaries, it avoided the need for a separate chassis (on which the 'coachwork' was built) by adopting a welded unitary body approach. This made the vehicle lighter (70kg lighter than equivalent vehicles) and more fuel-efficient. Its lower profile also gave the vehicle a much sleeker and stylish aesthetic which was quite unique when it first came out. In short its a beautiful looking car. 

Production was temporarily halted during the war but resumed again in 1945 and the series continued in production well into the late '50s. Designed for mass production is was cheap enough that a well off farmer may well have been able to afford one so it won't look out of place parked in front of my 4Ground farmhouse. 


I went for the simple black bodywork because it looks so elegant with its chromed bumpers and fittings. Yellow headlights and green number plates finish the look. As usual, I gave it a couple of coats of gloss varnish but instead of finishing off with a flat matt varnish I only applied Matt varnish to the tires. And unlike my military vehicles, I didn't add any mud splashes...this car has been looked after by its proud owner! 

Wednesday 4 November 2020

Tank Battle at River Cottage

Last week I posted a Batrep for a Chain of Command game set in Normandy 1944 which kept me happily occupied in the early part of the Half Term holiday. I had a few days off work but we weren't going anywhere so I decided to keep myself busy getting in some Solo games. It took me a couple of days to set up the terrain (I'm very fussy!) and I completed a full game of Chain of Command which saw my American Riflemen beat a German Infantry Platoon who were ensconced in a Normandy Farmhouse. When I'd finished the game I packed away the figures but decided I didn't want to break down the terrain set up I'd built instead reusing it for another Too Fat Lardies game, What a Tanker!

The Setup

The action in this game is set earlier in the day before the infantry arrives and sees a Tiger I face off against a Sherman M4 and a Firefly. I've played a few games with the Tiger before and I knew from experience that it's a tough nut to crack so although the Allied tanks came in at more points I didn't feel that this was an unbalanced game. 

The Action

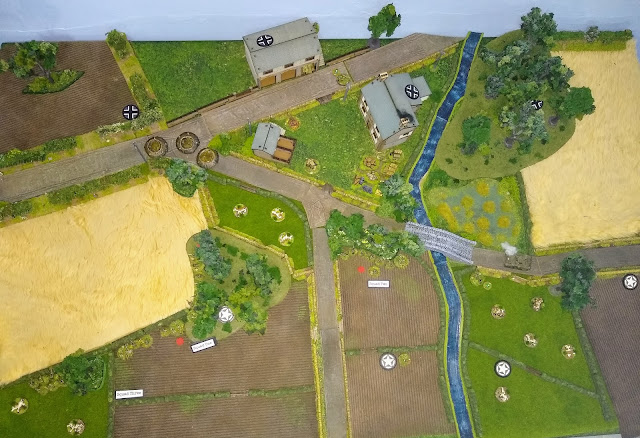
As with my earlier Batrep, here's a picture of the setup, this time showing the Tiger coming in from the left and the M4 and Firefly coming down the lane from the right. 


You may notice that this layout differs only slightly from the Chain of Command game I posted last week. The shell craters at the main road junction are missing...but I'll come to this a bit later! 

As with my previous Batrep, I'll be listing the dice rolls for Command Dice for each tank so you can see how I decided to use the dice. I'll list the dice in order, from one to five. Any 6's are at the end where they belong but I'll try to show what I converted them to by striking them through and listing the conversions afterwards in italics (where I remembered to write it down!). Later in the game, as temporary damage is taken, you'll notice the number of command dice being reduced or increased as the damage is inflicted and repaired. 

You'll also notice that the order in which the tanks go varies because I'm rolling for initiative each turn which occasionally made for some interesting moments! 

Turn 1

Tiger 111345 - The tiger is unbuttoned and remains so throughout the game... partly because that's how I did the model but also to improve its vision and therefore targeting opportunities. The Tiger moves towards the junction but poor movement dice means it doesn't get all the way there. 

Firefly 112345 - The Firefly is in front of the M4 so moves out of its way by driving to the bottom of the hump-backed bridge. Its a tall tank so can still see over the bridge, giving it a 'hull down' position. The commander can't see the Tiger yet so doesn't acquire the target this turn. 

Sherman M4 11136611 - The perfect set of dice to be honest. The Sherman's engine roars to life and the tank surges forward. It makes it to the stream, crosses, and still has enough movement (using the wildcard dice for movement) to get to the field gates in a bold flanking move. If it can get behind the Tiger it can get a rear shot while the Firefly keeps it busy to the front.

Turn 2

Tiger 11256623 - The Tiger moves up to the junction and Acquires the Firefly (converting wildcards to Acquisition dice) but doesn't have enough dice to aim and fire. None the less the Firefly command must be having palpitations as he looks directly down the barrel of that 88!

Sherman  M4 1224461 - The Sherman using its wild dice to get more movement in and is now almost behind the Tiger in a hope to force it to shift position. 

Firefly 2234563 - The Firefly commander is able to Acquire the Tiger (it is VERY visible right now!), orders the gunner to aim and fire. The shot is on target but rather disconcertingly the AP shell impacts uselessly on the Tigers frontal armour. 

Turn 3

Tiger 335666111 - The Tiger goes first again and now the commander has a decision to make. He has the dice to shot at the Firefly but he's about to be flanked by the M4, so instead he decides to shift position. The Tigers engine belches black smoke and it lurches forward down the road to the farmhouse. A 90° turn puts it in front of the Farmhouse with a close-range side view of the Firefly. He's unable to fire this turn but it will force the Firefly to move. 

Sherman M4 1135561 - The Sherman moved across the Wheatfield into the road but can't acquire this turn.

Firefly 1122361 - The Firefly commander is a little perturbed to have the Tiger pointing its huge gun at his side armour to decides to reverse 90° into the field and use the Bridge to obscure itself from the Tiger. Both tanks loose acquisition in this careful games of chess. 

Turn 4

Tiger 2555661 - With the Firefly temporarily retreated the Tiger reverses out of the farmyard back on the road, shielding himself from the Firefly with the building, but now facing the M4 down the main road. The Target is acquired and the gunner is aimed but there are not enough command dice to fire the gun... maybe the mechanism jammed or the gunner wasn't quick enough. The Sherman Commander's life flashes before his eyes! 

Firefly 11246622 - The Firefly commander decides that he needs to change position again. He gets out onto the road and over the bridge and while he can acquire the target again he's not in a position to fire just yet. 

Sherman M4 334562 - The commander has a moment of rash bravery and decided to fire at the Tiger rather than trying to reverse out of trouble. The shot hits but once again the round bounces of the Tigers armour. The commander's heart sinks little knowing that inside the Tiger the German crew are more than a little alarmed at the second resounding strike on them. No one likes being shot at, no matter how thick the armour! 

Turn 5

Sherman M4 1224463 - The Sherman commanders luck holds as he gets to go first. Another round of AP streaks towards the Tiger tank scoring three hits. The Tigers armour should have shrugged this off but with just two saves it takes a point of temporary damage! The Tiger will operate with one fewer command dice until repaired. Having hit its target the Sherman reverses back into the wheatfield and out of view. 

Firefly 23456633 - Now the firefly gets to shoot, converting wild dice to aim dice to improve the shot. It scores three hits on the tiger but with 5 saves the shot impacts harmlessly on German armour. 

Tiger 22345 - No drive dice to move, not enough acquisition dice to see the Sherman through the Bocage and no wildcards to repair the damage. There is little the Tiger can do this turn. 

Turn 6

Tiger ????? - For some reason, I didn't write down the dice roll this turn (sorry) but again little happened and the Tiger is still in the sights of the Firefly. 

Sherman M4 ?????? - Yep still didn't make a note of the dice but with no drive dice amongst them the Sherman can do little this turn. 

Firefly 4566661333 - With some wild dice the Firefly takes very careful aim... scoring 5 hits on the Tiger. Three saves mean the Tiger survives for now but as most of the hits were criticals the damage is permanent so the Tiger lose one command dice which cannot be repaired. The hull is hit damaging the running gear so the tiger will move a little slower in future. 

Turn 7

Firefly 344455 - Perfect timing for the Firefly to win initiative. It takes aim, fires, reloads, fires a second time and reloads again. The first shot impacts harmlessly on the Tigers armour but the second hit does more temporary damage to the already beleaguered Panzer. 

Tiger 16Repair - The Tiger repairs a point of temporary damage but that returned command dice will only be available next turn so, for now, all the Tiger can do it try to get out of the Firefly's view. The Panzer reverses (slowly) behind the farmhouse. 

Sherman M4 14556623- The Sherman commander senses the wounded Tiger and decides to continue shooting at it. The M4 pulls into the road again and fires, but once again its shell impacts harmlessly on the Tigers impressive frontal armour. 

Turn 8

Tiger 336Repair - All the Tiger can do now is repair the temporary damage and hope its armour holds out long enough to give it a chance.

Firefly 1222461 - Having lost acquisition of its target the Firefly decides to change position and box the Tiger into its current position. The Firefly moves up to the junction with ample move to take up a partially concealed position behind the farm's pigsty where it reacquires the Tiger. 

Sherman 12246631 - Once again the Sherman nips out into the lane, acquires its target down the road, aims and fires. However, this time in its haste to shoot it misses its target entirely. Using the last wild dice it reverses back into the field and relative safety. 

Turn 9

Sherman M4 34456611 - Once again it nips out into the road, aims, reloads another AP and fires before darting back into cover. This time the shot is on target but predictably the hit is saved by the Tigers armour. 

Firefly 1244563 - Shifting position slightly the Firefly hits the Tiger once again with its 17pounder gun. The shot is on target but once again the Tigers formidable armour shrugs off the impact. 

Tiger 1344 - The Tiger commander has some wounded (possibly dead) crew, damage to the running gear of his tank, the inter-com is on the blink so he having to shout orders and all the remaining crew are being deafened by the gong-like clang of AP rounds hitting their armour. 

Turn 10

Sherman 1133465 - Another move into the road, aim and shoot again on target but with little effect. The Sherman commander curses orders the gun reloaded and reverses the tank back into the field again to take some concealment from the hedgerow. The fact that the Tiger hasn't fired in a while suggests the enemy is having some trouble. 

Tiger 366Repair x2 - One of the unconscious crewmen is revived and the intercom is fixed (two wild dice used for repair) so the Tiger regains two temporary damage and will be back up to 5 command dice next turn...if it lasts that long! 

Firefly 1122463 - The Firefly moves again but is able to aim and fire once more inflicting two temporary damage on the Tiger once again!! The Tiger crew are now sooner repairing the damage that they are receiving more. If they don't fire back soon this fight will end only one way. 

Turn 11

Tiger 226Repair - The Tiger does the only thing it can, repair some damage and hope to survive long enough to hot back. 

Sherman M4 1133465 - Convinced now that the Tiger is critically damaged in some way the Sherman commander hoves out onto the road and rolls down to stop next to the Firefly. Taking careful aim its shot is on target but once again ineffectual. 

Firefly 1134565 - Aims while reloading from the last turn then fires and reloads again. This shot is critical and deals another point of permanent damage and cripples the Tigers running gear even more.

Turn 12

Tiger 445 -Again the Tiger can do nothing and the crew are too shaken even to make any repairs. 

Firefly 135666445 - The Firefly gunner aims carefully, and prepares to out two rounds into the crippled Tiger. The first hit slices into the Panzers weakened armour, hits some of the rounds inside and with a muffled WHUMP the commanders hatch blows open and flames shoot skyward. 


Analysis

Well, that was a very satisfying game which went on longer than I expected. The Tigers armour is formidable, shrugging off multiple hits from both the Sherman and the Firefly. In the end, it was the 17pdr gun in the Firefly which did the job. Once the Tiger started to take damage and was unable to move out of sight of the Allied tanks it couldn't repair damage as quickly as it was taking it. 

Shortly after this encounter German artillery bombarded the road junction in response to a request from the Tiger commander, radioed in just before he was killed. The Allied tanks skedaddled and German infantry took possession of the Farm as a forward command post. The burning Tiger was recovered and hauled away from the road just before some American infantry arrived to try and take this important position back from the Germans. 

Sunday 1 November 2020

Museums are worth their weight in reference books

It won't come as much surprise to regular readers to hear that I enjoy visiting a museum or two. In normal (pre-covid) times I'll be found visiting museums at weekends and of course on holidays. The reason I enjoy them so much is that I think they are an often-overlooked resource to the wargamer and miniatures painter. In this internet-enabled age of Google and Wikipedia, we tend to think that everything is available at the click of a button. But Museums offer so much more to the history buff and being centres of expertise in their field they often have items on display that just don't feature elsewhere. 


It does seem a little counter-intuitive extolling the virtues of museums at a time when many of us can't visit them, but they need our support if we want them to continue into the post-covid future. They have a lot to offer the Miniature Painter and Wargamer as well as the amateur historian and academics alike. Its probably not difficult to see from this video that I have my favourite museums, but what are yours? Which collections do you find yourself visiting over and over again, and what items have helped and inspired you in your wargaming?  

I hope you found this interesting and, as usual, I'd ask that if you enjoyed the video please hit the 'Like' button and consider subscribing to the channel. 

Friday 30 October 2020

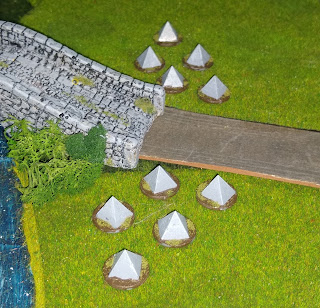
Dragons Teeth for Normandy

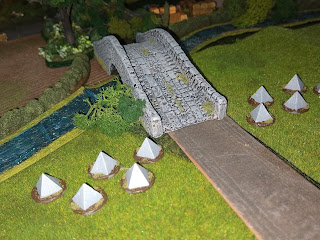
I was supposed to have a Panzer finished for today but I got a little bit sidetracked because a very nice parcel arrived a couple of days ago. I ordered some scenery items from Peter Pig and they turned up quicker than expected, including these rather nice dragons' teeth. I don't know why, but I had it in my head these were going to be hollow, but they're not. A very nice, solid and quite sharp set of teeth, so I'll have to make sure I don't drop them on the floor. These babies will make stepping on LEGO look positively comfy.

Dragons Teeth (or Drachenzähne in German) are a form of static defence that was first deployed in WWII. Their purpose is to restrict the movement of tanks and sometimes (as in the Seigfried Line) funnel those vehicles into preprepared killing zones. Along the Atlantic Wall, they were often used in conjunction with landmines, anti-tank walls and ditches. Although they look like they are individual concrete blocks they were often laid as part of buried concrete 'mats' so they couldn't just be bulldozed out of the way. There were also some 'mobile' versions that could be moved and this sort of obstacle wasn't exclusively pyramidal in shape, although these are the most common. This type was typically 3-4ft tall, enough to ground any tracked vehicle that tried to cross them. 

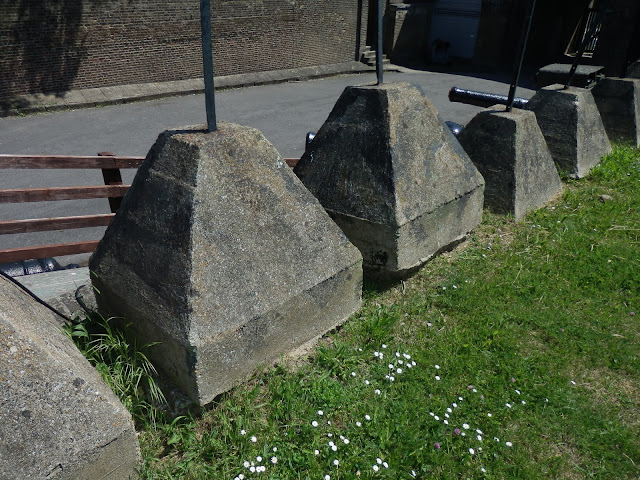
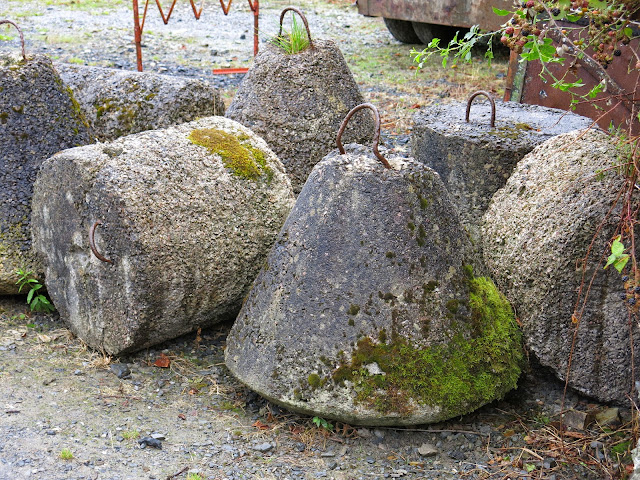
Like other concrete defences from this period, many survive to this day, simply because their removal is too expensive or complicated but also because there are so many of them. Variations on this design were - and still are - a common sight in the south of England. Most were constructed in the summer of 1940 when an invasion was a very real threat. They were used to restrict access to strategic points such as checkpoints, railway junctions and bridges. They are still a common sight around railway embankments and along the south coast, particularly around potential landing grounds. Indeed there are some only mile or so from where I live, along the embankment of a busy rail link into London. These are large pyramidal blocks with flat tops but in other areas of the country there are conical versions sometimes referred to as 'pimples'. Whatever the design, they all serve the same purpose, restricting the movement of vehicles, but in particular tracked vehicles. 

These blocks were used around a Kent railway junction. The Pole in the top was used to hold barbed wide. These examples were relocated to Fort Amherst in Chatham.

These Bouy type blocks were designed to be used on roads and would have been chained together in pairs making them very hard to move. 

This set comes with ten individual teeth and I deliberately kept the bases 'muddy' so they would blend in if I used them with my existing country roads or in the fields either side. Having now taken some pictures I think I'll add some grass to half of them so I can mix and match depending on what terrain I use them. 

Wednesday 28 October 2020

Battle of River Cottage

I have a few days off work this week and decided that I would try to get a couple of solo games in to occupy myself. Back in January the wife and I had been discussing various trips, including some long weekends, to coincide with games shows or exhibitions we wanted to visit. Needless to say, these fell to COVID one by one, leaving just this week as the last possibility for a trip away. Sadly the closer we have got to the week, the more unlikely has seemed a break, and in the end, we decided it just wasn't worth booking anything. Our area has recently entered the High Tier of Covid restrictions and the places we wanted to visit are in the Very High Tier...so unnecessary travel seemed a little foolhardy. The half-term holiday has therefore turned into Groundhog Day again, and we are trying to keep ourselves busy at home. At least I have my little metal men to keep me occupied! 

The Setup

My first game is for Chain of Command and as is my way I created the setting first before looking at scenarios to play. The layout of the table took me a couple of days of tinkering to get it looking how I wanted it and ironically it turned out that I spent more time designing the layout and setting up than it took to play the actual game! (To get more from it I'm going to re-use the layout for a game of What a Tanker). The scene opens on a Normandy farm nestled against the banks of a small stream. Chalet de Riviere was only recently abandoned by its owner Monsieur Hugh as the front got nearer. The recent bombing of the road just outside his property was the final straw so he gathered his family together and they fled in their ageing Citroën. 

With the scene set, I had to pick a Scenario from the rulebook. I picked Scenario 3 'Attack and Defend' so it was clear that someone was going to find themselves in the farmhouse and associated buildings. I rolled a dice to decide if it would be the Americans or Germans, and as in the previous game (here) the Germans found themselves on the defensive. Both sides rolled well and started the game with a Force Morale of 11. Should one or both sides drop below three the game will end. 


The next step was to decide on what support the platoons would have. I rolled 5 for the Americans so I picked the M5 Light Tank which I recently painted. This would give them access to another MG and of course some HE to use against the buildings. The Scenario says that the defenders have half the support of the attackers (rounded down) but because the german platoon has a force rating one below the Americans I can add one point of support giving them 3 points to spend. After a bit of thought, I decided to take another Senior Leader (an experienced NCO) to give the Germans some additional flexibility. I used their last support point on a Medical orderly because I had a feeling they were going to need it.

US Rifle Platoon with an M5 Light Tank as Support

German Infantry Platoon with an additional Senior NCO and a Medical Orderly


The Scenario states that the Germans can place their Patrol Markers up to 18" onto the table edge but because my table is small I made this 12" instead. Then the Americans place their markers on their table edge and roll to see how many patrol moves they can make before the Germans respond. I rolled two moves. As in my previous game, I reduced the patrolling movement to 6" rather than 12" because of the table size but even that brought the Americans within 12" of the enemy, locking them down. The jump-off markers are then placed away from the enemy, in cover, so for the Germans basically inside the buildings, and in the Large Wood on one flank and in the Bocage on the other flank. The Americans were able to set up jump off markers in the small wood and in various fields on their side. All fairly predictable given the constraints of my small table. 

The Action

The Americans go first as they are the aggressor in this scenario. As before I'll list the Command Dice rolled at each stage so you can see how I chose to use them.

Turn One

(A) 66441- Well the Americans keep the Phase but as I don't want to bring on my Bazooka Team or a Senior Leader yet I decide to hold any actions and go straight to rolling the command dice again.
(A) 64421 - Again I had no desire to bring on a Senior leader just yet but I combine the two and one to allow me to bring on a Junior Leader. The M5 Light Tank comes on at the end of Green Lane, but without any clear targets, I decide not to fire the main gun. 

(G) 65321 - The Germans gain one Chain of Command Point and decide to start deploying Squads to defend the Farm. I imagine the site - on the main road and with easy access to the phone lines - would make a good forward command point and is, therefore, worth defending. Squad One deploy to the upper floor of the Farmhouse which not only gives them good all-round visibility from an elevated position but also gives them an advantage if they need to defend in hand to hand fighting. The Second Squad deploy to the upper floor of the Granary, again giving them an elevated position with good forward visibility. Now I decide to take a chance and deploy the Panzershrek Team out in the yard. From here it has line-of-sight on the tank and it is worth the risk of exposure if they can take that out quickly. The range is effective and the target is partially obscured by intervening terrain so I need to roll 8 on 2d6 to hit the target. I roll a nine! Now I roll Thirteen hit dice knowing full well the M5 only has thin armour (he gets to roll just 4 armour dice for a save). Out of 13 dice, only one hit and the M5 saves two...the shot skids off the tanks frontal armour! 

(A) 55432 - The Americans start this phase with two extra Chain of Command Points. They then deploy Squad One into the small woods (marked Les Copes on my earlier map). Unlike the last game, I made sure these deployed more than 4" from the front of the wood so they wouldn't be targeted by any Germans in the Farmhouse. I also deployed the Platoon Sergent with them to give them the flexibility I think they will need for their location. I then deploy Squad Two in the long field between South Lane and the Stream. They are just able to reach the tree line behind what turns out to be a bush covered bank (possibly the remnants of earlier bocage) which will give them some hardcover. 

(G) 66551 - The Germans retain the next Phase and gain two Chain of Command points. This just leaves the Panzershrek team to have another pop at the M5...This time they miss the tank entirely! 
(G) 63222 - It's clear the Americans in the small wood plan on taking up a firing position against the Farm so the German Player (that'll be me of course) decided to try to outflank their position by deploying the third Infantry Squad behind the bocage on the edge of the Upper Wheatfield. It's a strong position in hardcover and in combination with the fire from the farmhouse - both penetrating up to 4" into the wood - means the Americans can't 'hide' in this bit of terrain. They open fire immediately and while no Americans are killed they do take 4 points of shock. Meanwhile, the Squad in the Granary open fire on the infantry in the long field and despite the hardcover manage to inflict one kill on the newly arrived squad. 

(A) 65322 - The Americans gain another Chain of Command Point and sense an opportunity... Squad one was going to move to the front of the wood and take up a position along the wall that separates it from the small pasture (now home to dead cows). However with the Germans on their flank, its clear this plan would be virtual suicide. Instead, they keep the bulk of the woods like a shield between themselves and the farmhouse, and move to the western side of the wood, overlooking the Upper Wheatfield. Moving means that when they open fire it is at half effect this turn, but they still manage to inflict some shock and a kill on the Germans. Then the Americans deploy their last remaining infantry squad to support the position. The BAR team deploys against the wall overlooking the field and opens fire, inflicting another shock and a kill (the Obergefreiter manages to avoid injury...I haven't forgotten to check for leader casualties this time!). I realise that now the German Squad is facing two American Squads and is in an unequal firefight...not the first time I have managed to outwit myself in a solo game!! 
Just when it looked like this was already developing into a significant phase in the game (possibly a decisive one) the American 2nd Squad in the long field opens up on the Granary. These citizen-soldiers must have really been paying attention in their training back in the States because they are deadly accurate. They inflict two kills on the German defenders and one is a hit on the Obergefreiter. I roll on the wound chart and, you guessed it, I roll a one... killed outright! I consult the 'bad things happen' table and the Germans lose their first force moral point. Worse still this squad is now leaderless.

(G) 65541 - Two more Chain of Command points are small comfort after that last phase. I bring on the Senior NCO (one of my support options) and deploy him to the Granary to take command of the Squad in there. I decide not to take any chances and also deploy the Medical Orderly in here. 

(A) 55311 - The American Commander (also me!) is anxious to deal with the German infantry over by the Upper Wheatfield but also wants to use the tank this turn. I could combine the double ones into a two and activate a whole squad but instead, I decided to activate the BAR teams from each squad. The BAR gets to re-roll 1's which may give them an edge when shooting against an enemy in hardcover like bocage. I make the right choice as the re-roll option turns two misses into hits and after rolling for effect the overall result of these teams firing are two kills and point of shock on the German 3rd Squad. 

Then the Junior Leader in charge of the M5 light tank acts. He is getting more than a little rattled by seeing incoming rockets from the Panzerschreck. His tank's armour is no match for a shaped charge designed to breach much tougher vehicles and so far they have been lucky not to be destroyed. The prospect of losing his men, or being burned alive if the tank explodes, galvanizes him to action. He decides not to move forward but instead orders the bow gunner and the main gunner to target that Panzershreck team before they are themselves destroyed. A hail of bullets and a HE shot from the main gun kill one infantryman in the German team and seriously rattle the remaining guy with two shock inflicted.  This unsurprisingly Breaks the team. The remaining man remembers his training and keeps hold of his rocket launcher but quickly flees to the other side of the Farmhouse and relative safety. 

(G) 55421 - Things aren't going well for the Germans but they pick up two more CoC points (giving them one full dice and starting on a second) and ponder their next move. I deploy the Platoons Unterfeldwebel to the Farmhouse to support the Squad in there. He immediately instructs the MG team to open fire on the US infantry in the long field. I needed to use a laser pointer at this stage to check they had line-of-sight between the trees, but they could see the target and opened fire...to absolutely zero effect! Meanwhile, the beleaguered Squad Three (on the main road overlooking the Wheatfield) open fire on the Americans in the small wood, but again with little effect.

(A) 44331 - The Americans bring on their Platoon Leuitenant who orders Squad 2 in the long field to continue to fire on the Granary. This inflicts another kill and point of shock on the occupants. Then the Senior NCO, the Sergent with Squad One, orders them to lay down covering fire against the Germans across the field. The Rifle team provide the covering fire, while the BAR team continues to pick away at the enemy piling on another point of shock. Then the Junior Leader in the tank, still feeling relieved at seeing off the Panzershrek, orders his tank forward. Progress down Green Lane is cautious but as they move they put a HE round into the Farmhouse sending dust and plasterwork flying. None of the Germans inside of the building are killed, but that are shocked by the impact. Then the Americans deploy their Bazooka and, for want of a better target, it also fires at the building. However this time the round hits the outside and aside from shaking free some dust it has no effect on the defenders. 

All Squads, Teams and Leaders have now been deployed by both sides. 

(G) 52221 - Another chain of command point. I decide not to use the full CoC dice to end the turn because the Panzershrek team is still Broken. If I can get the shock reduced I can get them back in the game later after ending the turn. For now, Squad Three is sticking to its position behind the Bocage. They open fire at half effect (due to the suppressing effect of covering fire) but they still manage to inflict two kills on the Americans. Squad two in the Granary continue firing on the Americans in the long field, inflicting more shock. Meanwhile Squad One in the farmhouse has few targets to choose from. Only the MG team has something to shoot at and this turn he goes for the Bazooka team, sensing an easy kill. One of the two-man team is killed but the Bazooka will work as well with one man so it's not out of action yet. 

(A) 64311 - The Americans keep up with their existing targets but fail to hit home or inflict any shock this phase. A welcome, but brief, respite for the Germans. 

(G) 65332 - Another Chain of Command point is added to the collection. The Platoon NCO in the Granary opens the door, pokes his head out and shouts encouragement and orders down to the Panzerschrek team in the road. One point of shock is removed and the team is no longer Broken, 'just' Pinned. Meanwhile, his squad continue to fire down on the Americans in the long field killing another infantryman. The 3rd Squad continue to exchange fire with the GI's across the field but are having a hard time dodging covering fire and taking shock. The squad is looking dangerously tattered and probably ought to withdraw. 

(A) 44432 - The Platoon Seargent with Squad One continues to order his men to lay down covering fire while the BAR team tries to take out anyone it can see. However, the real punch is about to be landed as US Squad three managed to get into position the last turn. The whole squad now opens fire on the Germans across the wheatfield, killing the last of the rifle team. This brings the whole squad down to breaking point and they fall back off the table and are lost. Worse still this precipitates severals rolls on the Bad Things Happen table resulting in the loss of 3 Force Morale points. The Germans are now down to just five morale. 

(G) 65554 - Three more CoC points give the Germans two full dice to use. I decide to activate the Senior NCO in the Granary again and he is once again able to remove a point of shock from the Panzerschrek team. They no longer have equal men and markers but will remain pinned until the end of the turn. The NCO then uses another command initiative to activate squad 2 in the Granary and orders them to continue firing on the Americans in the long field, inflicting another kill and another point of shock. Then I  use one of the Chain-of-Command dice to end the turn. The Panzerschrek team can now remove the Pinned marker and I plan to get them back in the fight if I can. 

Turn 2

There is a brief lull in the shooting. The Germans are shocked at the loss of one of their squads but they know how important this location is and are determined to fight on. Ammunition is passed around, words of encouragement are spoken and men on both sides brace themselves for the fighting to resume. This is the situation at the start of Turn two. 


(A) 53321 - The Americans now have a full Chain of Command dice which is a useful asset to have when the battle is going your way. The Tank moves forward again while pumping another HE round into the Farmhouse. Smoke is coming from the broken windows so it must be having a deleterious effect on the men 'sheltering' inside. 

Meanwhile, the Platoon Seargent orders Squad One to move from the western side of the small wood to the wall that runs along the north. They can't all make the move but a few of then get far enough to shelter behind the wall looking east. The BAR team also doesn't have enough movement to get into position this phase but next time it will be in a strong position and will enable the whole squad to start laying down fire on either the Granary or the Farmhouse. Behind them, Squad three crosses the wall into the wheatfield with the intention of swinging around and supporting the final assault on the farmhouse...if the fight lasts that long. 

(G) 54221 - Yet another Chain of command point is added to the pile. Both Squad one in the Granary and the MG from the Farmhouse train their fire on the Yanks in the Long Field dealing two more points of shock on them. This Squad is close to breaking and the Germans can sense it. 

(A) 44421 - Combining the two and one give the US player (still me!) a chance to utilise all his main assets. The M5 Light Tank stays in position this time, fires another HE round into the Farmhouse increasing the dust and smoke hovering around the building. The bow Gunner targets the windows with his Hull MG. Meanwhile, Squad two, while looking a bit battered still has some fight in it yet. The Platoon's Leuitenant orders them to continue targeting the Granary, dealing another point of shock. Then, over in the small woods, the Platoon Seargent directs Squad One to use the rifle squad to lay down covering fire on the Farmhouse while the BAR team gets into position along the wall. 

(G) 55322 - The Germans get two more Chain of Command points. Looking at options I decide to combine the double 2's to allow them to activate a senior leader. The Senior Leader in question is the NCO in the Granary, who rallies some shock from his squad. Despite coming under covering fire they also manage to inflict two points of shock on the Americans in the long field, finally Pinning them. As this happens the MG in the Farmhouse picks off the Bazooka Team down by the bridge. The remaining riflemen in the Farmhouse, also suppressed by covering fire, still manage to kill one infantryman in the small woods. The German options seem to be dwindling but they still have teeth and are ready to fight on to the bitter end. 

(A) 63321 - Once again the American Player (moi!) combines the two and one to enable activation of all the combatant squads. Starting with the M5  it once again slams a HE round into the farmhouse and opens with the hull MG. This kills one german and inflicts another point of shock on the occupants. Then the Jnr Leader of Squad One in the small woods orders his rifle team to continue covering fire on the farmhouse while the BAR team targets the Granary. This deals another point of shock on the beleaguered occupants. Finally, squad two continues to put down covering fire on the Granary. The Americans are inching towards a position of fire dominance and its just a matter of time before they break the Germans. 

(G) 55331 - The Panzerfaust team has finally moved to a position where it can get a shoot at the American Tank....and he misses again!! This guy needs a job in the Canteen because he's clearly not cut out for combat operations!! Both the Squads in the Granary and the Farmhouse try to fire but both are dodging covering fire and manage to hit nothing this phase. Their morale is flagging and is about to take the final knock. 

(A)  64443 - The American Leuitenat rallies a point of shock off squad two and directs their fire against the Granary. The fire from here has become more and more desultory and he senses the unit inside must have taken significant casualties and is close to breaking. A few dozen yards away Squad one in the woods also targets the Granary. Between them, they manage to inflict another point of shock which finally breaks the unit and kill another German, finishing the rifle team. This is decisive as the unit has now been broken and lost a team so there will be two rolls on the Bad Things Happen table. While the German commander (yep, me) tries to use one of his Chain of Command dice to avoid one Morale check its a bit pointless because the unit flees from the table taking the NCO with it initiating yet another Force Morale test. 

The German Force Morale now has fallen below the threshold for this scenario and the remaining unit in the Farmhouse beat a hasty retreat. 

Analysis

That was a fun game to play out, especially as I managed to surprise myself... quite a feat when playing a solo game! I'm keener than ever to get this game in the Shed-o-War for the Rejects, although that's likely to be some time away. 

Once again I don't think I made any serious errors with the rules, but I'm open to comments if you think I missed something. The only downside to this game was that I spent more time setting up the terrain than it took to actually play the game... Which leads me to an idea. I'm going to keep the table set up but switch to a game of What-a-Tanker later in the week. They can fight over the same ground with a different set of rules by TooFatLardies, so expect another BatRep probably early next week.