Wednesday 31 October 2018

Living Dangerously at Albion Books

Over the weekend I went to Hastings for a short break with the wife and my youngest daughter. We tend to turn these sort of trips into a bit of book hunting exercise and this was no exception. One place I always try to visit when I am in Hastings is Albion Books as they have a lot of military books and magazines for sale. But be warned; a visit to this store is not for the faint of heart! The inside of this knowledge emporium is a Heath and Safety nightmare. And as that happens to be my job at the charity I work for, it does take some mental preparation (and checking of my Will) before I venture through the doors. Death by book avalanche is a very real possibility inside this shop! To the brave go the rewards however and if you are prepared to spend a long time browsing there is probably something for every wargamer in its tumbled and disorganised interior.   

I was too timid to take a picture of the inside (I didn't want to offend the owner) but I found a great photo on Google Maps. Unfortunately I can't download it so go look the shop up and view some of the photo's. Piles of books fill most of the isles and if you can get across the scree slopes of paperbacks and around the hardcover hillocks without starting a chain reaction, you may well find some great purchases. And reasonably priced too. I always enjoy looking through the magazine piles and individual issues can usually be bought for just 50p. My best purchase of the day however was a hardback Zulu Conquered: The March of the Red Soldiers by Ron Lock. I've been looking for this for a while and I bought a new copy here for less than half the cover price. 

We almost didn't get to Hastings as my car ended up being towed home for the second time in a week. Unlike last weekends saga, which cost me a tire and ended my trip to SELWG, this time the repair bill is in the upper half a grand! Fortunately my eldest daughter loaned me her car for a couple of days and we eventually arrived in Hastings, late but in once piece, early on Saturday morning instead of Friday as planned. The first thing we did on arrival was head for the bookshops and we both found plenty to console ourselves after the unpromising start to our weekend away. Hopefully the car will be fixed in a couple of days and I can get back to the important business of planning our next book expedition

Monday 29 October 2018

Toy Soldiers at Colchester

Last week the wife and I went out for the day and after a bit of wandering we ended up at Colchester. We had a very nice afternoon wandering around town, browsing the shops and exploring the Castle Museum and next door at the Hollytrees Museum. The latter is set inside a Georgian Town House in the grounds of the parkland directly adjacent to the Castle Museum. Somehow we have missed this when we visited in the past but this time we decided to make the short diversion inside. The varied collection includes domestic artefacts from across the ages, a modest WWI collection and a small but interesting collection of Toy Soldiers. 

I was of course very interested in these although I have to say their position in a ground floor cabinet did make looking at them difficult. In the end I had to lay on the floor to get a better view (much to the horror of my wife). The undignified position did give me a much better view of the figures although my poor wife's embarrassment was greatly increased when other visitors had to step over me! 
Unlabelled and displayed in a ground level cabinet. 

So what was to be seen? Most of the figures looks like Britons toy soldiers and were of the type that I guess many kids of a certain age probably had in their carpet armies. Some of the models were 'Flats' which have always had a fascination for me. Unfortunately non of the models were labelled in any way so there is nothing more that I can say about these. That being said here are a few larger pictures of the modest collection on display.
  
Marching into action. I think the base shape means these are probably Britons models


A collection of buildings that would probably be suitable for very small 2mm wargames. 


Outside in the grounds of the Castle there was also a very nice WWI commemoration display.


All in all a cold but interesting day out. 

Sunday 21 October 2018

SELWG 2018 - Close, but no cigar

My annual pilgrimage to Crystal Palace show didn't happen this year thanks to a spot of car trouble (more on that in due course) although it shouldn't come as much of a surprise to me as its been something of an on-again off-again affair for months. Initially I though I was going to miss the show because my Teacher wife has just had a numerically significant birthday and we were planning on taking a holiday during the Half Term break. However that plan went out the window several weeks ago and I tried really hard not to show my happiness when I realised I would be able to attend SELWG after all. I guess its Karma therefore that my excitement at attending the show should come to an (almost) crashing halt late last night.

I've never experienced a tire blowout before so I guess I should count myself lucky that it happened at relatively low speed and where I was able to pull into a lay-by. I say lucky because just a few minutes earlier I was travelling at 70 mph on a badly lit road. Not only did the wheel fail but it shredded in a way I hadn't thought possible and when I pulled over there was literally smoke rising from the tattered rubber that used to be a tire. I then attempted to change the wheel for the spare, whereupon I found that even my weight behind the wrench was not enough to get the wheel nuts off. The impossibly tight bolts even stumped the AA who arrived 40 minutes later and that was the point I realised my plans for a day at SELWG had bit the dust for the last time. So rather than writing a long post about one of my favourite shows - with accompanying photo's - I've spent today at home trying to sort out my car.

I've commented on this before but the SELWG show seems to have an almost supernatural effect on the weather. Every year, regardless of the prevailing conditions in October, the day of the show is nearly always a bright crisp and beautiful autumn morning. This year was no exception and when I looked out at the weather today my heart sank even lower. So I guess all that is left to do now is wait to see the pictures posted online by those that were able to attend, and plan my trip to SELWG for next year. Maybe I'll have better luck in October 2019!

Tuesday 16 October 2018

Battle of Tenitsa Pass

Over the weekend Postie unveiled his newly completed Turkish forces for the Crimean War. The Ottoman army was generally considered poor quality (from what I have read) being several years behind in terms of military technology and military thinking. What the Turks were able to do however was muster large resources to support the allied nations against the Russians. Their fighting force may have been small but they had arguable the best looking kit with their distinctive red Fez's and blue jackets. 

Setup
We played a fictional battle with the smaller Turkish army holding key passes in mountains near the Danube. Ottoman engineers have been able to build some redoubts but the work is far from complete with several large gaps in their lines. Then the much larger Russian columns appear and begin to rapidly advance towards them.

Orders of Battle
Ottoman Turkish Army - C/O Omar Pasha
   1st Infantry Division
      1st Brigade
         1st Line Regiment (3)
         2nd Line Regiment (3)
         2x Heavy Gun Batteries
      2nd Brigade
         3rd Line Regiment (3)
         4th Line Regiment (3)
         1x Medium Gun Battery
      3rd Brigade
         5th Line Regiment (3)
         6th Line Regiment (3)
         2x Medium Gun Batteries
      4th Brigade
         7th Line Regiment (3)
      1st cavalry Brigade
         1st and 2nd Regiments Lt Horse
         1 Battery Horse Artillery
      2nd Cavalry Brigade
         3rd Regiment Lt Horse
Attached Engineers - 4 Companies

Russian Army - C/O General Dannenberg
   10th Infantry Division (4th Corps) c/o Maj Gen Vilbon
      1st Brigade
         19th Ykaterenburg Line Regiment (4)
         20th Tobolsk Line Regiment (4)
         3x Medium Gun Batteries
      2nd Brigade
         19th Tomsk Jager Regiment (4)
         20th Kolyvan Jager Reginment (4)
         4th Schutzen Battalion (1)
         3x Heavy Gun Batteries
      4th Light Cavalry Division
         4th Hussar Brigade
         7th Hussars (2)
         8th Hussars (2)
         1st Ural Cossacks
         1x Horse Artillery Battery
     

Action 
I've merged two pictures to show the whole table and all the Brigades in their starting positions. Most of the High ground is impassable to infantry and cavalry. The Turks have built defences across the main pass and sent their cavalry to hold the other small pass. 

The Russian 1st and 2nd Brigades have a straight path laid out for them.With impassable terrain on both flanks they have little choice but to advance into the Turkish defences. 

However the Russian Regiments are much larger than the Turkish regiments and can take a lot of damage and still remain effective. 

The Turkish troops meanwhile are wearing nice blue uniforms and bright red Fez's on their heads!

Their engineers have thrown up some hasty redoubts that will hopefully give them an edge against the massive Russian regiments about to bare down on their position. 

Even the Turkish Cavalry looks very dapper in their smart uniforms.

More redoubts filled with nervous infantry and more importantly their artillery. 

The Russians begin the long advance. 

Forward progress is quick and the Turks look a little worried at first. 

Meanwhile at the smaller pass their Cavalry makes a show of advancing towards the Russians. 

Russian Infantry pushes forward and begins to fan out aiming for the large gaps in the redoubt defences. 

The first Russian casualties are taken but the Russian steamroller continues to advance. This is Marks 1st Brigade which were slightly ahead of my 2nd Brigade so would make contact with the enemy first. 

My 2nd Brigade is on the left and Marks 1st Brigade on the right. We are beginning to fan out away from the strongly held central redoubts. 

Now in charge range the front regiments of the 1st Brigade take fire as they advance in to melee.

Meanwhile Surjit has advanced his infantry towards me in a nice tempting bunch. One of my fighting columns charge into melee. 

The Russian 1st Brigade have breached the defences but the Turks are putting up a hard fight. 

My column wins its melee and goes on to hit another Turkish regiment as well. But meanwhile my other attack against the redoubt has proven less effective. 

Meanwhile the Turks are being sneaky. Having made a show of advancing their cavalry they then turn them around and rush back towards the main pass, leaving a small division of infantry and a Gun to block the narrow route around their flank. Two infantry divisions form square, with a Horse Artillery piece and another infantry unit in life filling the gap between them 

Marks Cavalry division must traverse the pass in column formation as the pass is two narrow for more than one regiment at a time if deployed in line. 

The First Division continue to push across the defences but casualties are mounting and the deeper they get the more Turkish regiments can fire upon them. 

My 2nd Brigade prepare to send in the next wave of columns but every turn sees more casualties. I calculate I have one more opportunity to force a breakthrough. Meanwhile my Schutzen Skirmishers have finally traversed the hill to the right and begin to fire down on the Turkish positions. 

Marks 1st Battalion pushes forward again trying to consolidate its earlier achievements. Yellow disordered markers are beginning to appear and those big Russian regiments are starting to get whittled down. 

Another opportunity. If the Marks infantry can break these Turkish units they may be able to force a Brigade check. 

My 2nd Brigade has lost its momentum. Three regiments have battered themselves against the Turkish Redoubts and taken heavy casualties in the process. I'm not going to force a breakthrough here but maybe I can cause enough casualties to break some Turkish units. 

Meanwhile our guns have regrouped and open fire on any Turkish regiment fool enough to shun the protection of the redoubts. Fortunately Surjit obliges and two regiments take damage and have to pull back to regroup. 

Marks Cavalry have finally been able to get through the small pass, form up and are ready to attack the Turkish infantry squares. Its probably too late however to make a difference to the battle, 

The once impressive and formidable Russian columns have all but disappeared. 

Marks infantry columns have eventually seen off most of the Turkish infantry on the right flank, but now the earlier redeployment of their cavalry pays off. Having moved their cavalry regiments back behind their main infantry position Ray has not only provided rear support for his faltering infantry but is also ready to charge our exhausted infantry. 

Darkness is beginning to fall as the Russian assault finally falters. The Turkish positions have been threatened and even breached but in the end they have held the pass and the Russians have nothing left to exploit any weaknesses that remain. 

Postie added up the points but the Turkish won a clear victory with 26 points to 20 points for the Russians.


Analysis
This was a cracking game with both sides fighting hard right to the end. We were enjoying ourselves so much we didn't notice the time slipping past and in the end our game went on for over eight hours. The redoubts made all the difference to the Turks despite the gaps in the line. Mark and I may have been able to exploit those gaps a bit more but to be honest the dice were just not in our favour. Poor luck aside I think Ray and Surjit played a good defensive game and wholeheartedly deserve their victory. 

Tuesday 9 October 2018

Shaka Zulu - TV Research!

I recently discovered that the 1986 mini-series Shaka Zulu was on Netflix and, although it is largely set some 50-60 years before the Anglo Zulu War of 1879, I was interested enough to take a look at the first episode. I wasn't expecting much from this 1980's South African made TV series but I couldn't have been more wrong and I have been gripped by all 8½ Hours of it. I was a little amazed that I hadn't seen it before but it does have a lot of nudity (entirely culturally authentic) and graphic violence so it's probably not the sort of show that would have got an airing on the BBC!

The film is based on the writings of the first British traders to enter the Zulu Nation during the reign of Shaka. They were sent by the colonial administration of what was then the Cape Colony to discourage Zulu expansion south into British territory. What the 'traders' discovered was a highly organised and vibrant culture full of political intrigue and self confidence on a scale that utterly amazed these white men who had expected to find a bunch of ignorant savages. The first few episodes start from the European/Colonial perspective with the local Governor worrying that Cape Colony could be at risk from the neighbouring Zulu nation. They decide to send a deputation to the Zulu King partly to assess their intentions but also to intimidate Shaka and impress upon him the foolishness of any threats towards the white colony to the South. The British delegation find themselves utterly outplayed by the shrewd and intelligent king in their first meeting.

It has to be said that the series does take some liberties with the known historical facts, although I would argue no more than most movies usually do. The timelines of key characters and events have been moved around with events like the Battle of Ggokli Hill for instance depicted taking place nearly a decade after it actually happened. But in other areas, such as illustrating Zulu culture, I thought were very well done. Shaka's 'madness' at the death of his Mother for instance ties in well with the historical record and his imposition of mass executions and enforced national mourning that followed lead directly to his death at the hands of his his half-brothers Dingane and Mhlangana.

The Wikipedia page on the TV series includes a link to a 1986 LA Times review of the series that was less than flattering. I don't agree with much of the premise of the review but there was one paragraph that had me laughing out loud: 

"In fact, "Shaka Zulu" may be the most violent TV production ever shown nationally in America. It has lots of blood spilling and blood drinking, lots of spearings and grisly impalings, with many of the impaled writhing on long sticks. There are burials of the living and a couple of beheadings, one of which affords close-ups of both the head and headless body. It is probably also the nudest production ever shown on America's non-cable TV. That includes male rear ends and female bare breasts."

Roll forward to 2018 and all I could think was "how quaint". If this series were made today it would be right at home on HBO!

One of the criticisms levelled against this series by the LA Times review was that the story was very violent "There is no interpretation here, no motivation shown beyond savagery. Violence is shown as the product only of barbarism or black magic." I think the reviewer needs to re-watch the series because I thought there was plenty of motivation and backstory and it was clear that this was more than just a story of savagery. It is an often violent history but the motivations of the key players are rich with love, jealousy, pride, arrogance, intrigue, ambition, politics, madness as well as a belief in magic and destiny; indeed everything you would expect in a good Shakespearean history.

There is another side to this TV series though that is less than uplifting. It was made during  a period of international sanctions against the apartheid government in South Africa. The South African Broadcasting Corporation put up the twelve million dollars it cost to make the film but in order to distribute it overseas (and bypass the sanctions) they used an American company. This company, Harmony Gold, ended up taking 80% of the profits from the film which were estimated to be in excess of $500m! Meanwhile many of the black stars of the film were paid a pittance, including Henery Cele who so magnificently portrayed Shaka in the series. 

I thoroughly enjoyed this mini series and my review reflects this, but if you are interested take a look at these two opposing reviews, one positive by the NY Times and the aforementioned LA Times article which was quite negative. There is also a great review on the blog My Two Cents that is worth reading. Even better, go watch the series on Netflix (I think its also on YouTube) and form your own opinion. I don't think you'll be disappointed.

Friday 5 October 2018

Battle of Jacobs Church - Fire and Frustration

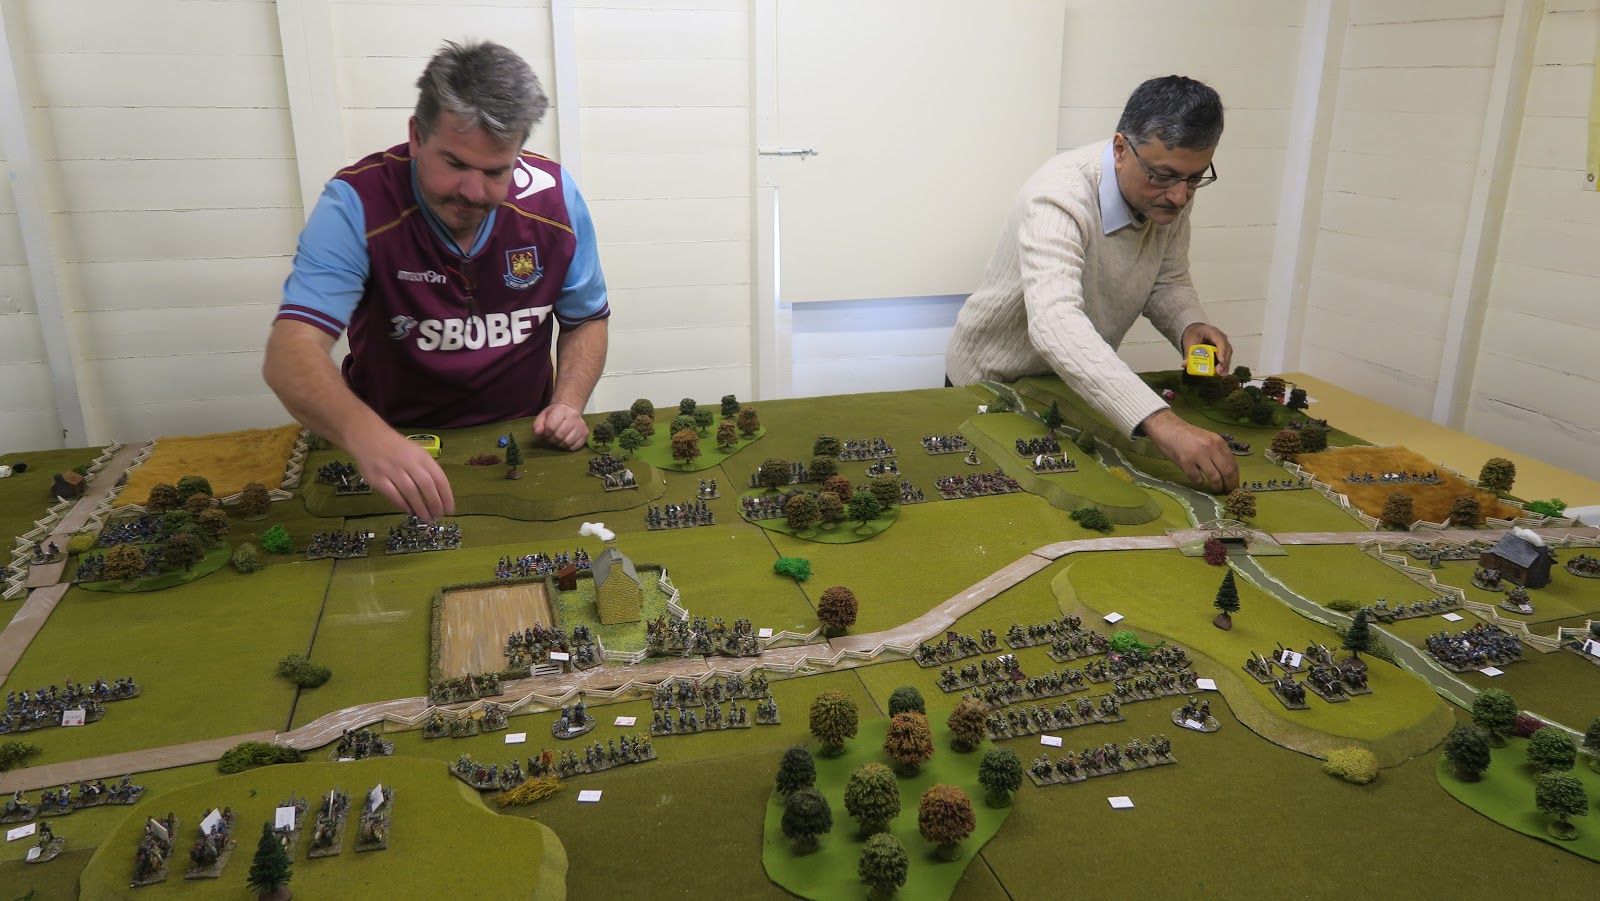
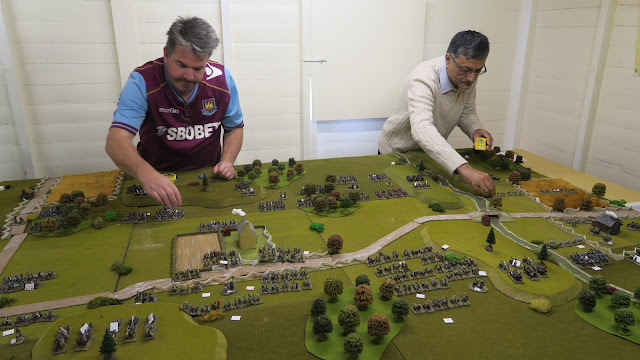
Last Sunday Posties Rejects got together for an American Civil War game using the Fire and Fury rules system. Its been a while since these rules have seen action in the shed-o-war and for me its been nearly two years. However the rules are relatively straight forward to use and we all slipped easily into the game. We started the game remembering how frustrating these rules can be and by the end of the game - after profuse swearing and sympathetic laughter from both sides - I think we all agreed this may be the last time we play these rules (see Rays Batrep for another perspective on the game)

The Setup
Postie arranged our forces on opposite sides of the table as a meeting engagement. The two commanding officers (myself and Mark) were allowed 10 minutes to deploy our forces as we wished. However with the number of models in play this barely gave us time to change formation of our units, let alone shift divisions around to some grand strategy. Indeed Mark still had over a divisions worth of troops in their startup positions when the 10 minutes ended. I used some of my 10 minutes to shift two divisions around and was down to the last couple of brigades when the bell went and deployment was declared over.

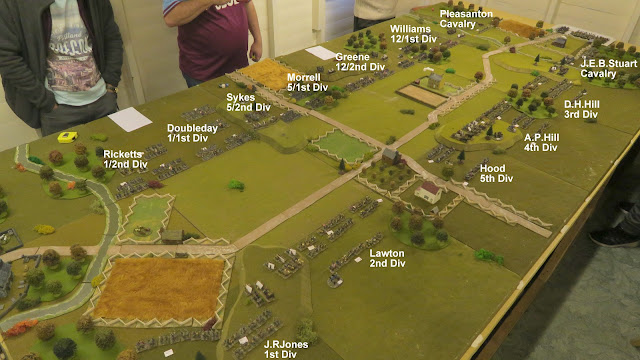
The battle is a simple meeting engagement and pits a veteran Confederate army against numerically superior but greener Union troops.


Order of Battle
Union Forces c/o McClellan (Mark, Richard and Surjit)
1st Corp - Hooker - *
   1st Division - Doubleday
      1st Battalion - 1st Indiana
      2nd Battalion - 3rd Indiana *
      3rd Battalion - 4th Indiana
      4th Battalion - 2nd Indiana
      Gun Batteries x3
   2nd Division - Ricketts
      1st Battalion - 4th New York
      2nd Battalion - 3rd New York
      3rd Battalion - 2nd New York
      Gun Batteries x2
5th Corp - Porter
   1st Division - Morrell
      1st Battalion - 3rd Michigan *
      2nd Battalion - 1st Michigan
      3rd Battalion - 2nd Michigan
      Gun Batteries x2
   2nd Division - Sykes
      1st Battalion - 2nd Maine
      2nd Battalion - 3rd Maine *
      3rd Battalion - 4th Maine
      Gun Batteries x2
12th Corps- Mansfield
   1st Division - Williams
      1st Battalion - 3rd Pennsylvania *
      2nd Battalion - 4th Pennsylvania
      3rd Battalion - 2nd Pennsylvania
      4th Battalion - 1st Pennsylvania
      Gun Batteries x3
   2nd Division - Greene *
      1st Battalion - 2nd Ohio
      2nd Battalion - 1st Ohio
      3rd Battalion - 3rd Ohio
      Gun Batteries x2
   Cavalry Division - Pleasanton
      1st Battalion - Indiana
      2nd Battalion - New York
      Horse Artillery Batteries x1

Confederate Forces c/o Jackson (Lee and Ray)
2nd Corp - Jackson *
   1st Division - J.R.Jones
      1st Battalion - 1st South Carolina *
      2nd Battalion - 5th South Carolina
      Gun Batteries x2
   2nd Division - Lawton
      1st Battalion - 2nd Alabama *
      2nd Battalion - 6th Alabama *
      3rd Battalion - 1st Alabama
      4th Battalion - 4th Alabama
      Gun Batteries x3
   3rd Division - D.H.Hill *
      1st Battalion - 1st Tennessee
      2nd Battalion - 2nd Tennessee
      3rd Battalion - 5th Tennessee *
      4th Battalion - 3rd Tennessee
      5th Battalion - 4th Tennessee
      Gun Batteries x3
   4th Division - A.P.Hill *
      1st Battalion - 1st Virginia
      2nd Battalion - 2nd Virginia *
      3rd Battalion - 4th Virginia
      4th Battalion - 3rd Virginia *
      5th Battalion - 5th Virginia
      Gun Batteries x3
   5th Division - Hood *
      1st Battalion - 1st Texas *
      2nd Battalion - 2nd Texas *
      Gun Batteries x2
   Cavalry Division - J.E.B.Stuart *
      1st Battalion - Virginia *
      2nd Battalion - Texas
      3rd Battalion - North Carolina
      Horse Artillery Batteries x1


Action
I swapped the 5th and 3rd Divisions around in an attempt to group as much weight together, but all I managed to do was move a weak spot down the line towards our centre. I had hoped to fill some of that gap with some of the 2nd Division (Alabama) troops but successive low activation rolls limited the action I could take with the desired units (more on that later). 

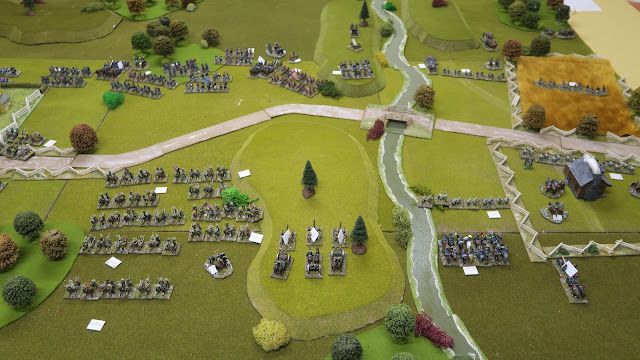
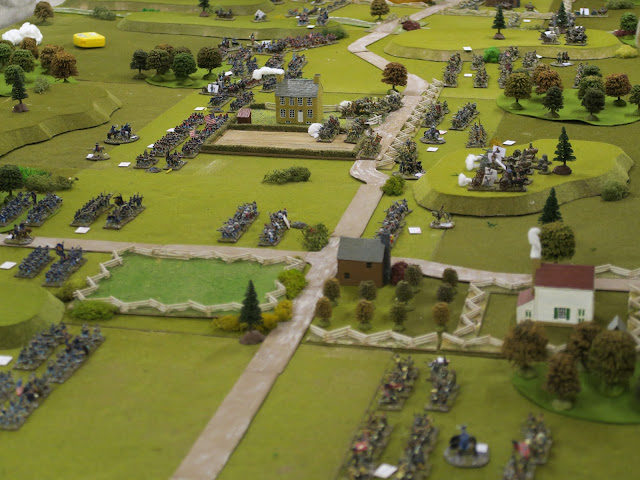
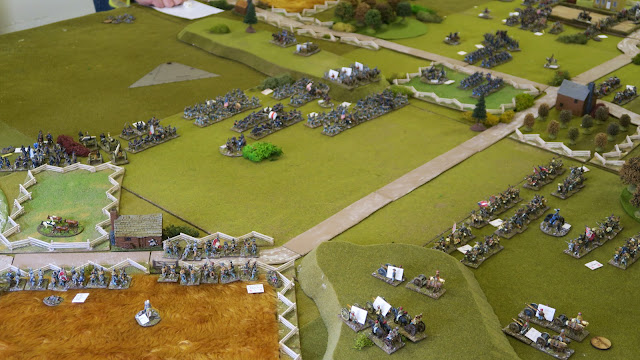
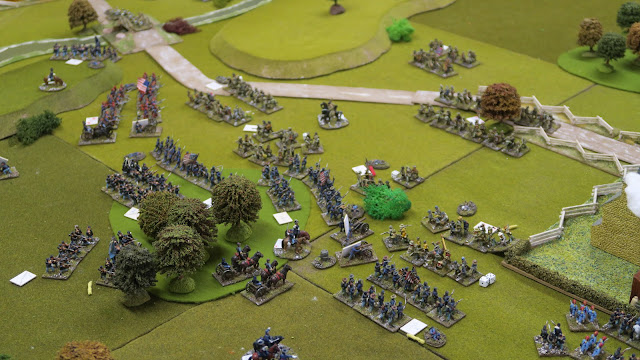
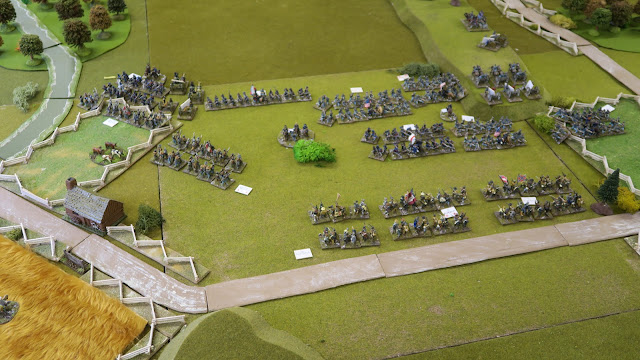
View down the table during the opening Confederate move. 

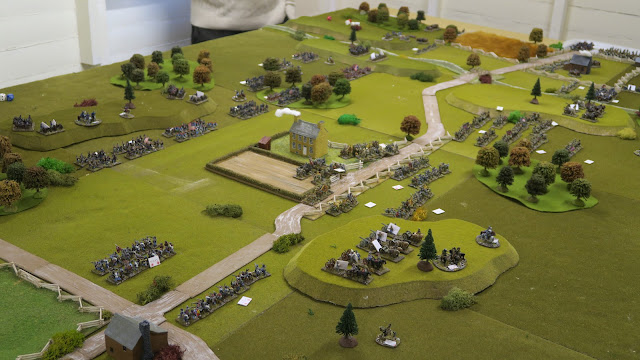
Hood's 5th Division Texans advance (nearest camera) and Ray moves forward D.H.Hill's 3rd Division, Tennessee and the Virginians under A.P.Hill. 

Mark and Surjit advance towards the Confederate thrust. Mark is moving Sykes Maine Division while Surjit is moving his Cavalry (dismounted) under Pleasanton. 

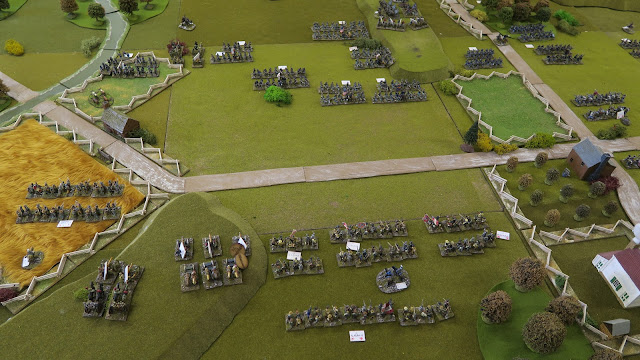
The Confederate left flank (my troops). My Alabamans (2nd Division under Lawton) hold their position for now. I'm at a numerical disadvantage here so I want my gun batteries to soften up the Union troops. In particular I target everything against the end of the Union line, and the New York troops under Ricketts. I'm in a position her to flank the Union troops if I can see off the New Yorkers...however my first couple of turns of firing couldn't hit the broad side of a barn, let alone their target. 

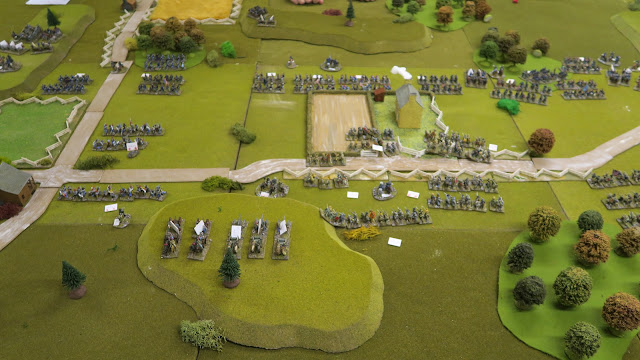
In the centre my Texans have advanced on the left and begun to take casualties from much more accurate Union artillery fire. Ray has moved his Virginians and Tennessee infantry forward and the first rifle volleys begin to take a toll on both sides. 

On the right flank of the battlefield, across the river, Ray has moved his dismounted cavalry forward and begun exchanging rifle fire with Union troops from Indiana and New York. 

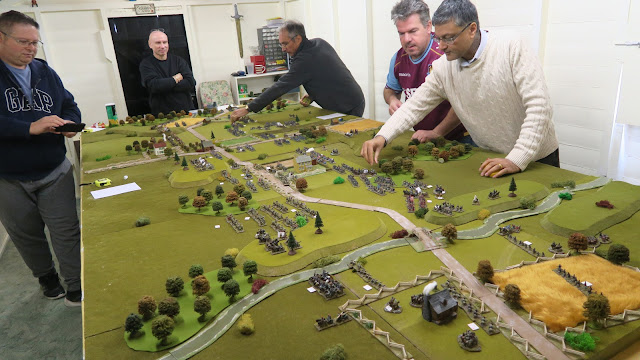
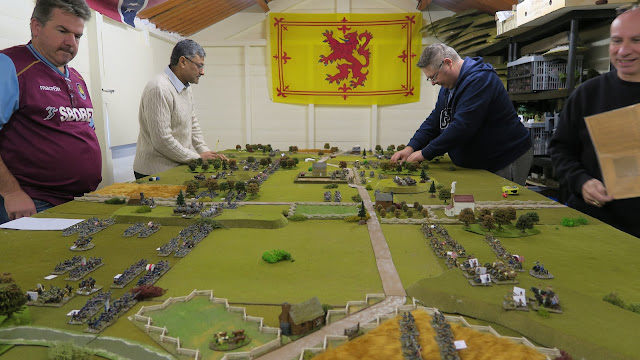
Looking down the table. From left to right is Ray, Postie, Richard, Mark and Surjit. We are only one turn into the game and we are already starting to curse the dice gods!

Neither side has made contact yet but both have exchanged rifle and artillery fire. The Confederates are loosing more men though because we are attacking more aggressively and suffering in the Defensive fire phase as a result.  

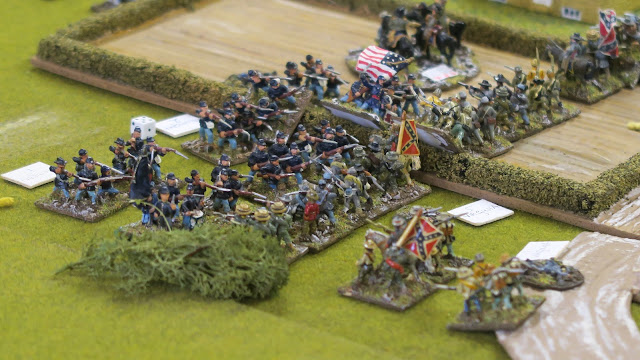
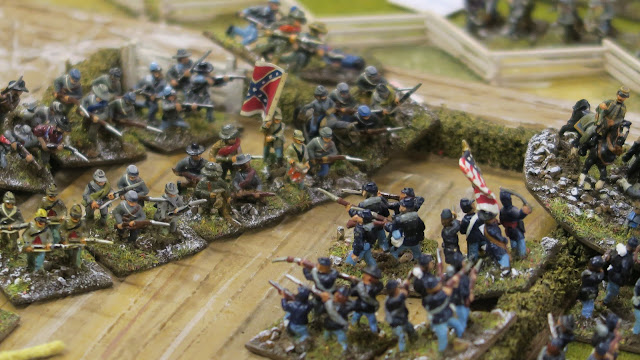
Contact at last. Rays Virginians an Tennessee boys charge into the Union troops from Pennsylvania and Ohio. 

More troops pile into a massive melee that covers a third of the battlefield. Both sides are mauled but neither land a knockout blow. Our frustration with the rules is starting to show as we try to pile as much support into a melee as possible, but int the end it comes down to a single dice. Roll poorly (or even just average) and all that effort and bloodshed is for nought. 

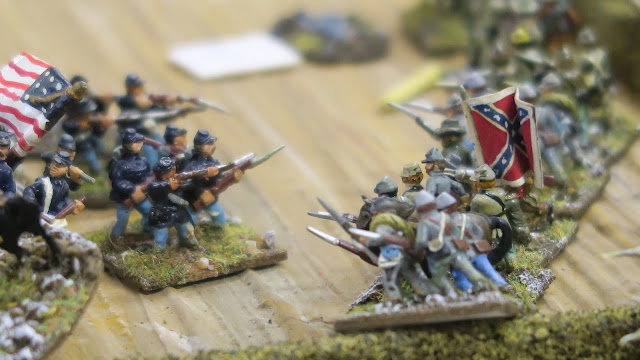
View from the Union side of the table. The lines have separated, reformed and prepare for another round of charge and counter charge. 

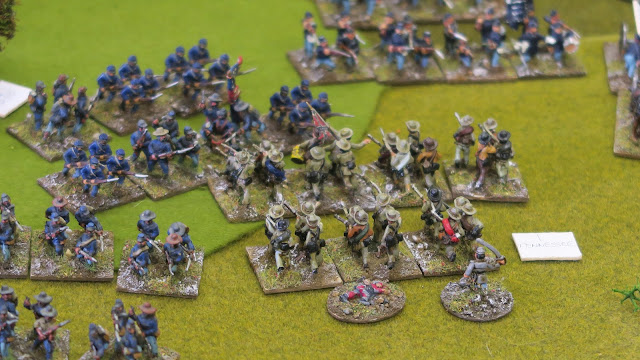
The 1st Tennessee charge in once again. They win their first Melee and get a breakthrough charge at another Union Brigade, only to be stopped and repulsed. 

Meanwhile, over on the quiet side of the battlefield.... I'm still waiting opposite the Union troops. My Artillery has thus far hit absolutely nothing. The only good thing I can say is that Richards troops are being held in position by the threat of my troops opposite them. But that frankly is clutching at straws and he has already started to edge units to his left. If I don't get any result from the artillery soon I'm going to have to send the infantry in. I need to strop Richard from shifting his units towards the centre. 

Another view down the line.In the foreground my Texans have been forced back. I have two weak and battered units covering a big area and unless I put pressure on the advancing Union troops (Maine troops under Sykes) they could threaten Rays Virginians attacking around the farmhouse. 

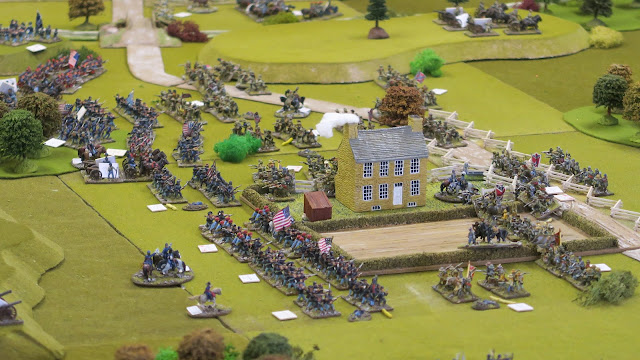
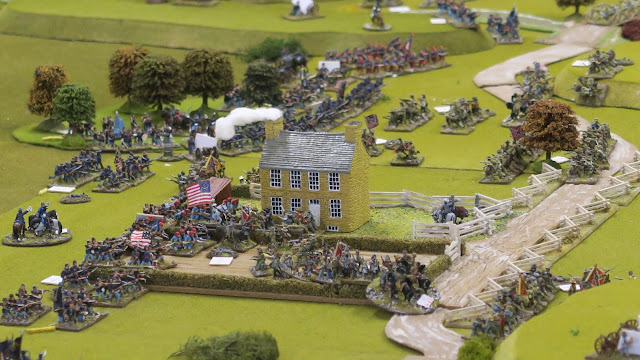
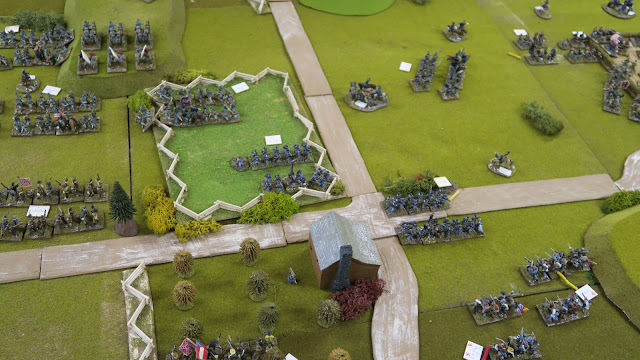
The Virginians clash with Morrells Michigan troops in the fields surrounding the Farmhouse. 

Hand to hand fighting is taking place along the whole length of the centre. Casualties are mounting on both sides but so far it is the Confederates who have suffered the most. Given they started the battle outnumbered, this isn't a good position to be in. Neither side seems able to land a decisive blow. 
The battle in the ploughed field ebbs and flows. The Virginians have soaked a lot of their blood into the soil here and aren't giving ground easily. 

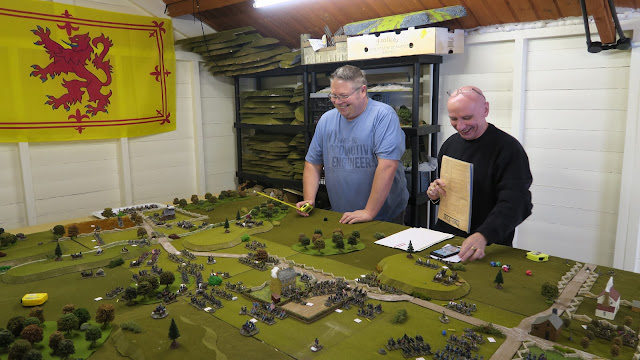
Ray my be laughing but the Confederate situation is becoming critical. We have taken double the casualties of our opponents, brigades are disordered and a couple of key Brigades are now so badly mauled they are spent. 

Another Confederate charge against the blue line of the Pennsylvanians and Ohioans. 

Back in the Ploughed field the Virginians are fighting hard but they can't break the Union line.

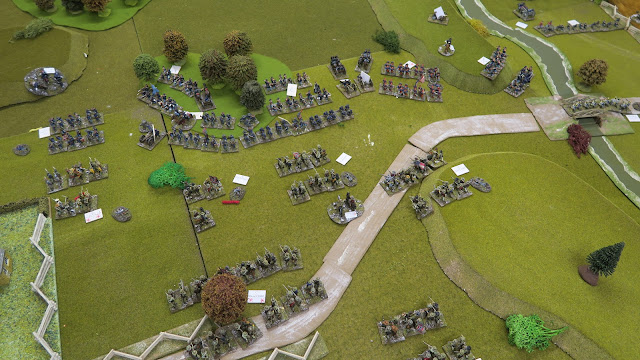
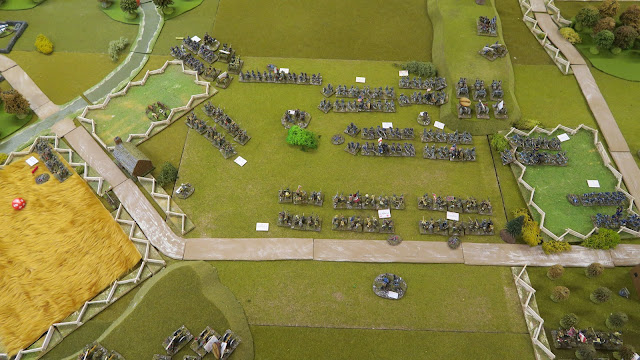
Despite hours and several rounds of combat the front lines are pretty much in the same place they were from early on in the game. Little ground has been taken at a great cost in lives. 

The Tennessee boys (3rd Division) are looking very weak now, with every unit significantly reduced in numbers. 

Over on my side of the table I finally get into melee on the extreme left and as expected my South Carolina troops don't fare well. I failed to damage their target (the New Yorkers) with any artillery fire and the resultant combat see's my only chance to turn the enemy's flank repulsed. I should have attacked much earlier in the game and now its probably too late to make any significant contribution to the battle.  

In the centre my Texans have been mauled and have fallen back. They are still in the field but are next to useless now as an effective force. In a last insult from the dice I had earlier moved one of my Alabama Brigades into the Orchard at the bottom of this picture. I was ready to charge the advancing Indianan units but rolled so poorly for activation they wouldn't move at all! 
 
My advance with the South Carolinan and Alabama troops has stalled almost as soon as it began. All I have in return are casualties our side can ill afford. 

Our centre (well my bit of it) has effectively collapsed and Ray is unable to break the Union line opposing him. We could play this game out another couple of turns but the result in no longer in doubt. The confederates have lost the battle (and the will to fight on). 

Analysis
I think its fair to say that everyone enjoyed the game (we love this period) but not the way the rules worked. We have experienced this frustration before with this rule set, but this particular game really highlighted the 'weakness'of these rules for a group like ours. There is a lot of work for the umpire to do calculating modifiers and the outcomes of firing and melee. This slowed down play as we were often waiting for Postie to check outcomes, especially with things like unit activation's so we couldn't even get on with movement without his constant intervention. 

For the players I think the main thing with these rules is frustration at not being able to achieve results with our troops. Essentially I think it comes down to the d10 based system for all dice rolls which seems to produce an 'all or nothing' result, with the 'all' being virtually unattainable! Achieving a significant outcome in Melee for instance relies more on the dice roll than on what forces are committed to a given fight. So one side could pile in loads of regiments against a much smaller opponent but still lose massively if the opposing dice rolls are opposite ends of the spectrum. And achieving that elusive 10-1 dice roll is just pure luck, no generalship involved. As Ray said (and I agree), a player with the skill of a Mushroom could win this game if he's lucky with the dice. 

We have requested that our glorious leader Postie closet himself away and write some suitable rules for this period, as he has with nearly every other period we play. It would be fun to replay this same scenario with the same forces but a different rule set as a comparison with Fire and Fury.
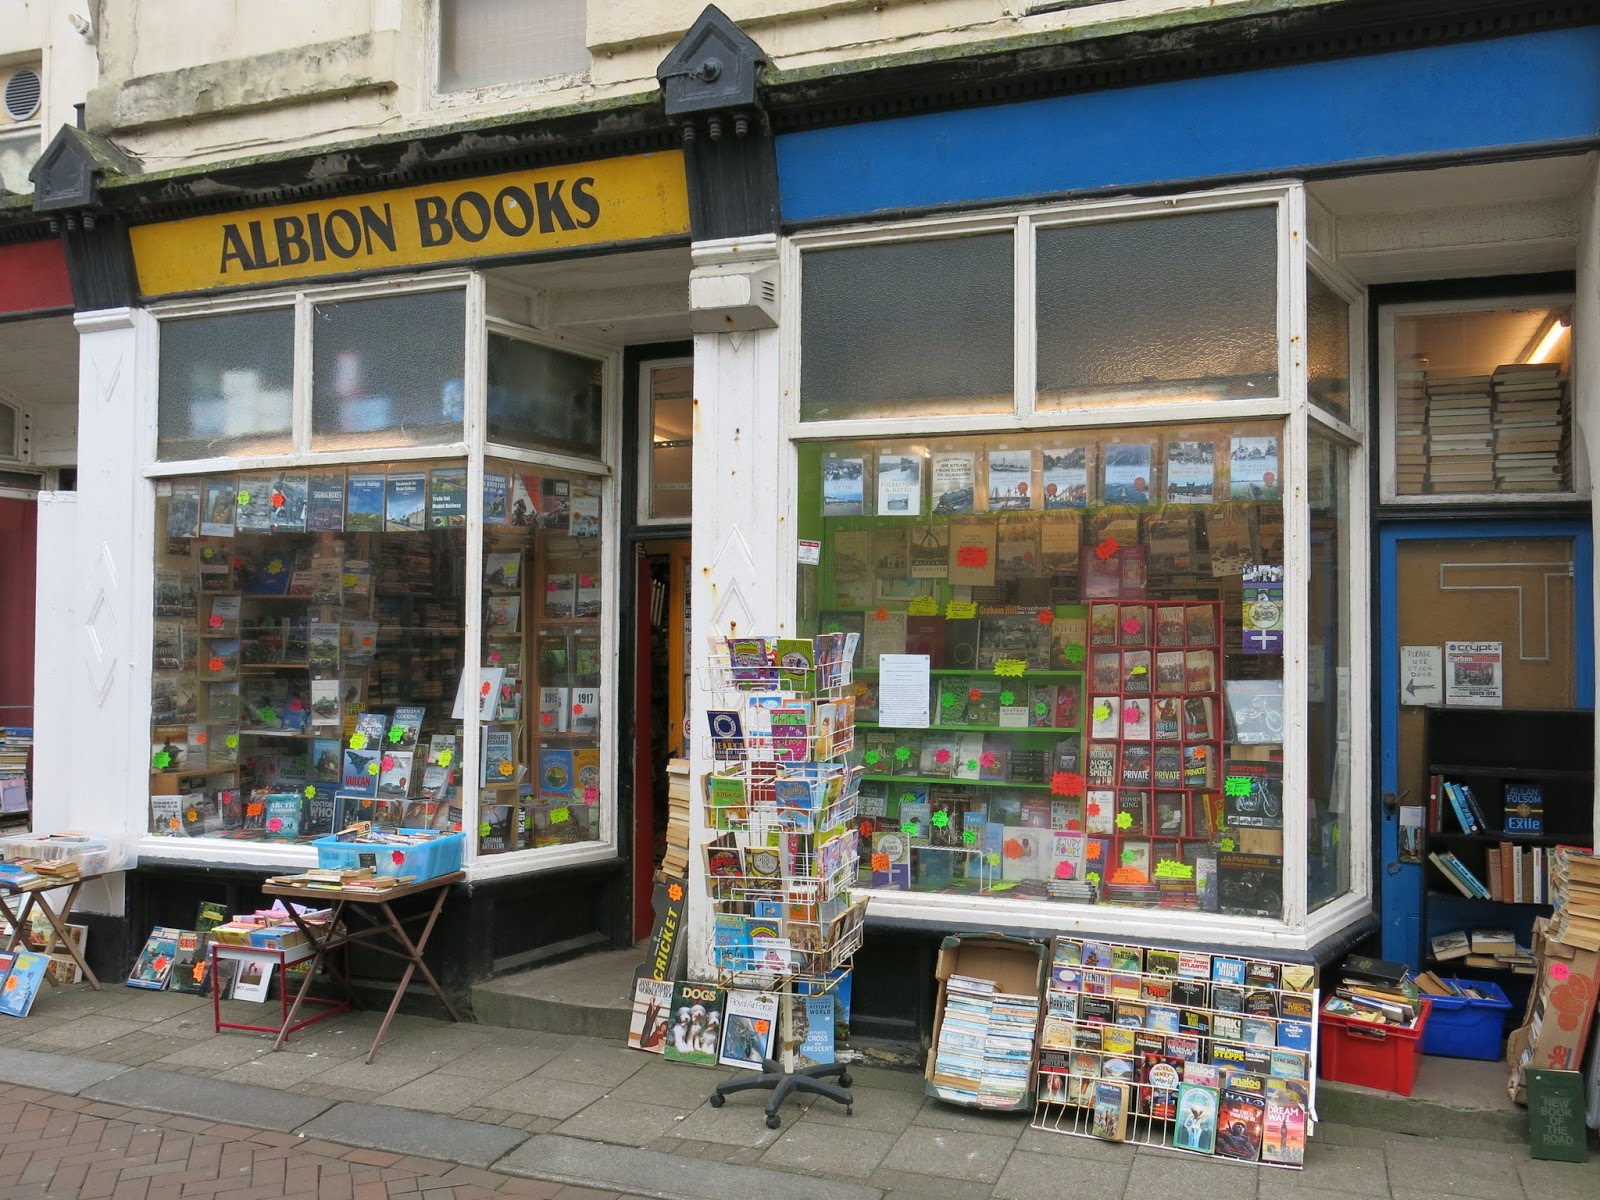