Monday 28 March 2016

Miniature Wargames with Battlegames 396

I subscribe to Miniature Wargames with Battlegames (MWBG) and always look forward to receiving it in the post before it hits the shops. I subscribe to several magazines electronically but there is something quite enjoyable about getting a real life magazine in your hands to read and enjoy. In fact my copy is part of my holiday reading material, and means that internet connection or not I can keep up with the latest goings on in the hobby.

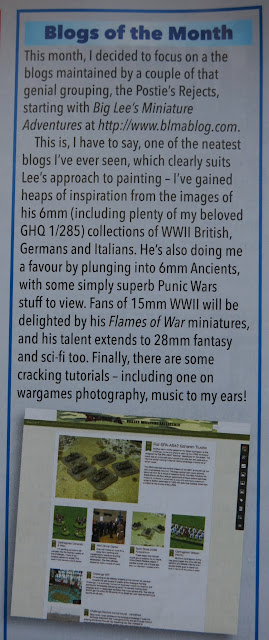
This month I opened my copy and was amazed and thrilled to see my Blog reviewed in the Blogs of the Month column. The write up was very complimentary and most unexpected. Fellow Reject Ray Rousell also had his blog Don't Throw a One reviewed so we are both 'tickled pink' by the recognition from the editor Henry Hyde. Henry is a very well respected luminary in our hobby and I consider it high praise indeed when he gives you the thumbs up! 

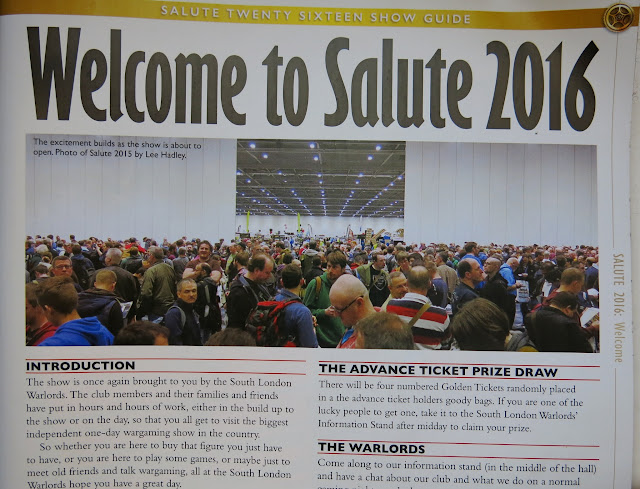
While still on a high from this surprise I turned to the Salute Show guide that is included in this issue. I have just bought my eTicket for Salute and am looking forward to the biggest event in my hobby calender. For those that don't know the whole centre section of the magazine is a pull out guide to this years event. Copies are also given out to all the visitors to the show so the circulation is not insignificant. So it was with great surprise (and, I admit, a childish squeal of delight) that I discovered an attributed copy of one of my pictures from last years event featuring in the introduction. 

To say that I am 'well chuffed' at getting two mentions in the hobbies premier wargaming magazine would be an understatement. Of course this means that when I get back from my holiday I'll have to redouble my efforts to keep up with the painting... especially now that BLMA is heading rapidly towards 2 million pageviews sometime over the summer!
Saturday 26 March 2016

BLMA on Tour

The Hadley family are heading off to the Jurassic Coast today for a much needed and long overdue holiday. En route I will be making my annual pilgrimage to the best museum in the world, the Tank Museum at Bovington. I'm looking forward to seeing their new exhibition Tank Men about the soldiers that crewed the first tanks between 1916 and 1918.


We are away for two weeks so updates and new posts on BLMABlog.com may well be a bit erratic. I'm taking my tablet with me and in theory I can use my phone as a mobile hotspot for Internet access, but in practice I expect writing posts while away will be quite difficult. As always I'll try and shoehorn some military museums into our schedule and of course I will be taking photos and writing reviews to post here either while we are away or soon after our return. In the meantime I wish you all a relaxing Easter holiday and I'll see you on the other side! 

Wednesday 23 March 2016

The Battle of Ludford Bridge 1459

This was a War of the Roses Battle that actually never happened...until now. After the battle of Blore Heath, the Yorkist factions regrouped at Ludford bridge near the town of Ludlow. They soon encountered a much larger enemy army led by Henry VI. The two sides took up positions either side of the Teme river and prepared to do battle the following day. However over night there were significant Yorkist desertions - most notable of which was Andrew Trollope captain of the Calais troops who was offered the Kings Pardon if he switched sides - which prompted a full scale retreat the next morning. Following this 'defeat' Richard returned to Ireland and the earl of Salisbury fled to Calais.

Our game assumed that Trollope's defection was as yet undecided and that Richard had therefore elected to fight rather than flee. Ray has already posted his review of the game here and its worth checking out for a different perspective on the same action.

Order of Battle
Yorkists
     Richard Duke of York (Rich)
       1.Dismounted Men at Arms
       2.Retinue Billmen
       3.Retinue Billmen
       4.Shire Billmen
       5.Retinue Archers
       6.Light gun
   Richard Earl of Warwick (Me)
       7.Dismounted Men at Arms
       8.German Pikemen
       9.Shire Billmen
       10.Retinue Archers
       11.Light Gun
   Richard Earl of Salisbury (Ray)
      12.Mounted Men at Arms
      13.Retinue Billmen
      14.Shire Billmen
      15.Shire Archers
       16.German Handgunners
     17.Light Gun

Lancastrian
   HenryVI (John)
      1.Dismounted Men at Arms
      2.Retinue Billmen
      3.Retinue Billmen
      4.Shire Billmen
      5.Retinue Archers
   Duke of Somerset (Ian)
      6.Dismounted Men at Arms
      7.Retinue Billmen
      8.Shire Billmen
      9.Retinue Archers
      10.Light Gun
   Earl of Wiltshire (Surjit)
      11.Mounted Men at Arms
      12.Retinue Billmen
      13.Shire Billmen
      14.Shire Archers
      15.French Crossbowmen
      16.Light Gun
   Sir Andrew Trollope - Turncoat (Postie/Surjit)
      A.Men at Arms
      B.Shire Billmen
      C.Retinue Archers

The Action
The Lancastrians are Surjit, John and Ian while the Yorkists are Ray, Richard and myself (postie is standing in my position)

A closer view of the Lancastrian army

...and across the river the Yorkists.

Meanwhile Trollopes Calais troops appear indecisive.

Richard Duke of York gives a rousing eave of battle speech.

Richard decides to get his dismounted men-at-arms ready to try and force the bridge

Both side surge forwards towards the river. The Yorkists left flank is protected by the bend of the river and by a marsh,.

Yorkist troops reach the river and prepare to fight their way across. It will take two turns to wade across. 

All around the bridge Yorkist troops push forwards eager to do battle with the Lancastrians

Meanwhile the Duke of Somersets troops (commanded by Ian) seem reluctant to join in. Eventually they do move forward but maybe this has given the Earl of Salisburys troops (under Ray) a chance to cross the river?

Several units clash in hand to hand fighting while waist deep in water but Lancastrian archery reduces some units to ragged bands.
  Dammit! Sir Andrew Trollope turns for the Lancastrian's and his archers unleash a hail of arrows on my Yorkist troops on the left flank. 

Luckily the bend of the river and the marsh means my flank is safe from direct assault but only if I stay my side of the river. Meanwhile the archers on the hill exact a heavy toll on my troops down below them. 

Richards Men-at-Arms fight hard to cross that bridge but without the direct support of their commander (by attaching him to the unit) they can't win the melee with a formed unit on the other side. The Yorkist unit is forced back. 

Despite a hail of arrows from two Lancastrian units my men-at-arms make it across the river. In a gamble I decide to attach my leader, the earl of Warwick in anticipation of melee the next round. 

Meanwhile at the other end of the battle Ray's cannon tries to open fire on the Lancastrians but instead blows up killing all the crew! Its not our day. 

Action all along the River Teme as the Yorkists try to force their way across.

With casualties mounting, some units utterly destroyer and now the left outflanked by the turncoat Trollope, our leader,  Richard Duke of York decides enough is enough and concedes victory to the Lancastrians. 


Analysis
Well that was a disappointing game. Both sides were equally matched across the river so this was going to be a test of nerve and luck right up to the point when the Calais troops threw in their lot with the Lancastrians. Even if we had managed to force our way across the river my troops in particular would have been left badly outnumbered and outflanked. In short there was a good reason why this battle never took place historically and forcing us to play the scenario just showed that Richard made the right call back in 1459. With the loyalty of key units like those under Trollope in the balance this was just too risky a battle to undertake. 

My first loss of the year but I am consoling myself by saying this was an unwinnable scenario from the outset. Maybe I'll have better luck (and a better scenario) next time. 

Tuesday 22 March 2016

My Analogue Painting Challenge

Now that the Analogue Painting Challenge is over I thought I would do a quick round-up of all my entries...and gathering it all together like this makes me appreciate just how much I got done. My normal painting output over the same period would probably have been about a quarter or less so in that respect the Challenges mission to get us all painting has certainly worked for me. My initial points target was a modest 300 but I quickly reached that and decided to stretch myself to 500 points. I reached that a week before the deadline but not a moment too soon...real life edged in and I wouldn't have had time to paint anything else in the last week even if I had wanted to.

So without further ado (and unnecessary wordage from me) here are my submissions - in no particular order - and what I scored for them 

SAS Raiding Jeeps - 7 Points

Republican Roman Triarii - 48 Points

Roman Generals - 9 Points

Punic Cavalry - 90 Points

Punic Citizen Infantry - 108 Points

2 Carthaginian War Elephants - 6 Points

Carthaginian Veteran Infantry - 21 Points

Italian Breda Autocanon - 6 Points

Carthaginian Generals and Hero's - 13 Points

Balaeric Slingers - 8 Points
Nautical Bonus Round - Landships! British Mk IV tanks - 54 Points

British Cruiser Tanks - 16 Points

Numidian Skirmishers - 16 Points

Italian AS42 Scout Vehicles - 10 Points

Curtgeld and Risk Taker Bonus Round Entry - Rommel - 75 Points

Numidian Light Cavalry - 32 Points

M3A1 Stuart Tanks - 20 Points

German Flak 88 Battery - 20 Points

I picked up a few bonus points along the way which helped but overall I'm rather pleased with my output, especially considering I joined the fight a month late! Now theoretically if I had been part of the Challenge from Dec 20th along with everyone else I could also have counted three more submissions in the challenge - this is stuff I painted between the start of the Challenge and the 16th Jan when I was officially brought in from the cold. These included some Roman Equites (45 points), Balistari (9 points) and four units of Hastati (48 Points) so my actual points output for the duration of the challenge was 651 points! Pretty good for a self proclaimed snails pace painter. 

So given my output has shot through the roof the question is, will I be in next years Challenge...hell yes! I should have signed up from the beginning and I'm determined not to make the same mistake again. One thing I will do though is avoid the Bonus rounds if at all possible. I have thoroughly enjoyed these side challenges but they were a distraction from my main objective of painting figures to game with. And besides the quality of the entries is in a whole other league and I feel like a charlatan throwing in my roughly painted entries. Better to leave the bonus rounds to the professionals. 

Saturday 19 March 2016

A Pair of 88's

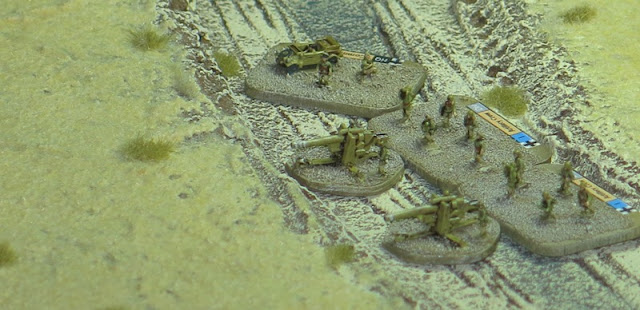
This was my last official submission to the Analogue Painting Challenge and for me it was something of a 'belt and braces' entry as I have already reached my target (or I will when the bonus round points are added). I have literally run out of units to paint both for my WWII North Africa project and my Punic War project...I guess I'll just have to get online and treat myself! My last entry is something of a mish-mash of vehicles and guns from different manufacturers that sort of makes a cohesive unit but frankly doesn't conform to any army list.


First up are two Flak 88 Anti-Aircraft guns deployed in an anti tank role. The Germans were quick to realise that their powerful Flak gun could not only hit aircraft at high altitude but it also gave them incredible hitting power over very long distances horizontally. High velocity combined with flat trajectory and a wide flat landscape made these guns absolutely lethal in the desert. The preferred tactic was to set up the guns in prepared positions and draw British tanks into range by using their own tanks as bait. These guns have a few 'kill rings' painted on their barrels to show that they have already been effective in a previous battle. 


Supporting the 88's are two groups of additional Artillery crew. I couldn't fit the guns and crew on my normal sized base (at this scale I use small FOW bases) so I decided to mount the crews separately. The 88's are from Heroics and Ros while all the Artillerymen are by GHQ. 


I have also painted a command stand consisting of a commander and radio operator next to a Kubelwagon. Also present are two Kfz15's, a Kfz 17 radio car and an SdKfz 7 half-tracked truck.

Five Vehicles, two artillery pieces and sixteen infantry figures netted me a final 20 points to add to my total. And that's me done for this years Challenge. Its been great fun but utterly exhausting! 

M3A1 Stuart Tanks in British Service

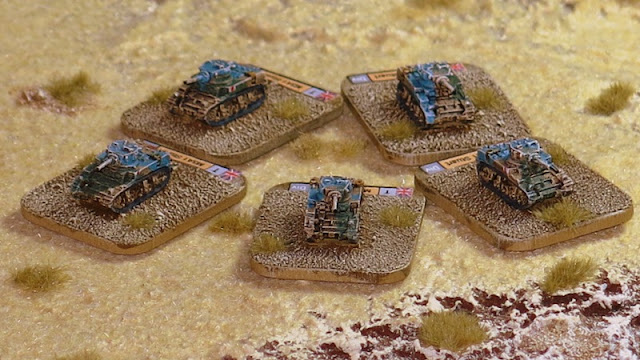
One of my last submissions to the Analogue Painting Challenge were sent in earlier in the week. My entry was some M3A1 Stuart tanks for my North Africa project. Once again I have used models from the GHQ range and the fine crisp detailing more than justifies the higher price tag.

Five M3A1 Stuart Tanks in British colours

Over four and a half thousand M3A1's were produced between May 1942 to February 1943 and a significant number saw service with the British in North Africa. The British army designated the vehicle the Stuart III and IV (the Diesel version) but by now the vehicle was known to British tank crews as the 'Honey' because of its smooth ride and good performance, particularly in prolonged desert operations. Popular it may have been but its relatively small 37mm gun was no match for the latest German tanks now arriving on the continent and it would soon be superseded by the M3 Grant and later the M5 Sherman.

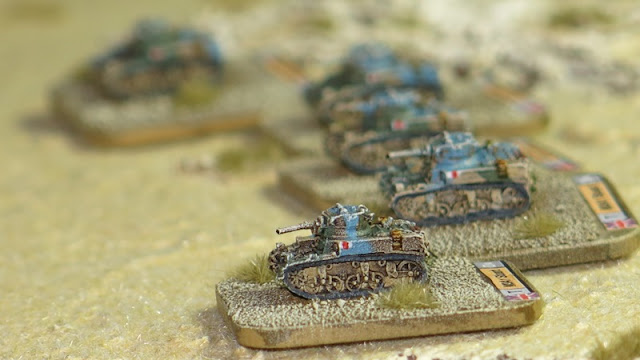
Racing across the desert

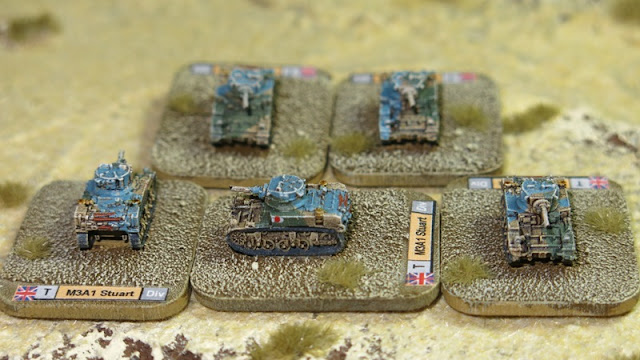
I have been wanting to paint these for some time and particularly wanted to try out a type of British desert camouflage that I have not tried until now. I'm really happy with how these turned out, particularly the camouflage pattern. I mixed the blue myself and think I have achieved the slightly grey blue colour that looks very similar to pictures I have seen from the period.

All round view showing the camouflage pattern, rusty exhausts and tools
stowed at the rear.

Five 6mm vehicles should earn me another 10 points in my quest to beat my challenge points 'personal best'.

Friday 18 March 2016

Analogue Challenge 'Curtgeld' - Rommel

Over the weekend I finished painting my submission for the Gambler/Risk Taker bonus round of the Analogue Painting Challenge. Given that I am collecting figures for WWII North Africa and the Second Punic War my entry was only ever going to be one of two characters; Rommel or Hannibal. Way back in 2009 I painted the Hannibal miniature that was given out at Salute that year but I have never yet painted Rommel, and it just so happened that I had a figure sitting neglected in my lead mountain. Actually the model I have used isn't lead at all, its a plastic 1/48th scale figure from the Tamiya WWII Famous Generals set.


As the title suggest I'll be sending this figure all the way to the cold wastes of Canada as my 'Curtgeld'. I just hope the plastic figure makes it there in one piece. I sense a bit of custom made packaging in my near future. I bought this set of models while on Holiday last year. It was an impulse purchase while we wandered through the high street of a random Devon village and having chanced upon the only model shop for 50 miles (or so it felt) I simply had to buy something. Actually I think the shop owner was a bit startled by this wild eyed city wargamer wandering into his rural shop but I was still happy to push a little money his way in return for a kit that includes figures of Montgomery and Patton as well as Eisenhower and Rommel.


I have to admit that I struggled to paint this figure. its been a long time since I have painted a 28mm figure - having long ago abandoned it for 15mm and 6mm - and it seems I have unlearned a lot of the skill and technique required for this scale. I'm not as happy with how this model turned out as I am with my 6mm submissions to the challenge but in the end I just had to draw a line under it and says "its done, walk away"!. Fortunately the Tamiya set I got this figure from contains two of each General so I have another Rommel to work on at another time. Maybe when I have less time pressure to work on this I can produce a better result second time around. 

Thursday 17 March 2016

6mm Numidian Light Cavalry

Earlier in the week I submitted one of my last few entries to this years Analogue Painting Challenge. The end of the Challenge is bearing down upon us like an express train and the panic was starting to well up...despite the fact that I had done the math and was confident that I would hit my target of 500 points. I have been very happy with my progress throughout the event and my painting output has been significantly higher than it would have been without the imperative of the competition. My latest submission is very likely my last Punic War entry and nicely rounds off my Carthaginian army (for the time being at least).


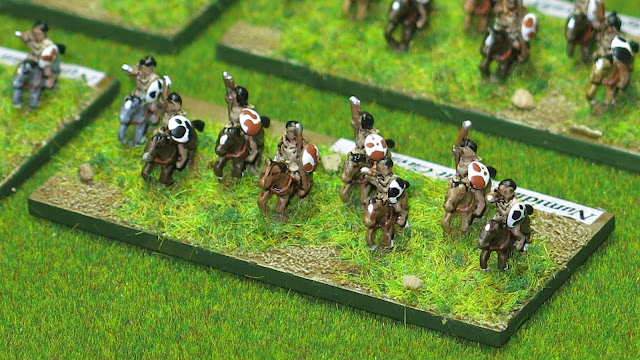
The Numidian Light Cavalry have often been described as the best of their type in the ancient world at that time. Certainly they played a significant part in the victories of Hannibal and, ironically, in his eventual defeat at Zama. The Numidian horseman rode bareback and controlled his mount with a rope around the horses neck rather than with a Bit as did regular cavalry. Despite this the Numidian's were famed for their horsemanship and ability to harass their enemies with fast movement and manoeuvre. Riders didn't wear armour and generally were only protected by small round leather shields. They were armed with javelins but some also carried swords for personal defence.


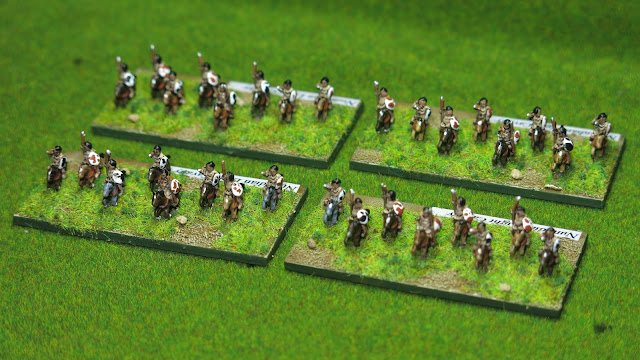
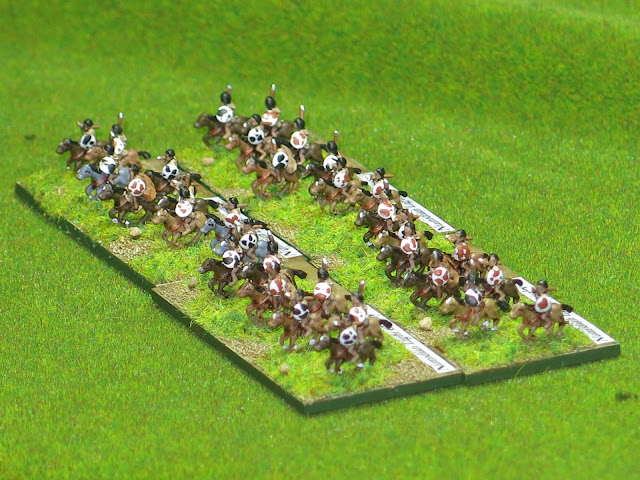
I have painted these in fairly plain colours but have given them an assortment of hand painted animal hide shields.