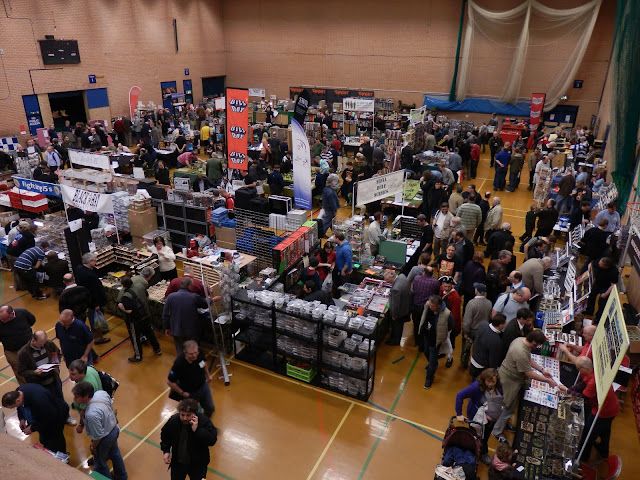
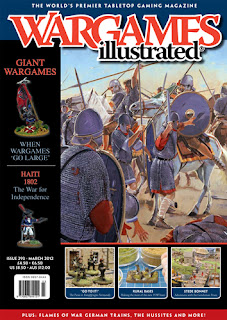
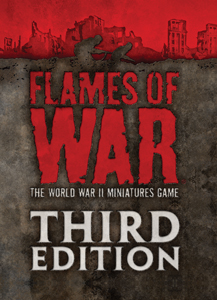
Yesterday I realised that my Blogroll wasn't working properly and that some of the Blog's I thought I was following weren't appearing in my reading list. If you have had the faith to become a follower of BLMA then its the least I can do to return the favour*. My preferred method for linking to a Blog has usually been by clicking the Follow link in the header bar (there's one at the top of this page). But it now looks as if this link doesn't always work and even if it says I am now following a site, this isn't always the case.
So I need to apologise - If you have followed BLMA and I haven't returned the compliment then its probably down to this apparently broken link button. Assuming you still want me as a Follower, drop me a line in the comments below and I'll make sure I follow through and link to your Blog. Which leads on to the second problem I have noticed...
Several fellow Blogger's have mentioned problems with the Blogroll gadget. I suspect the problem is largely due to the number of existing Blog's exceeding the gadgets ability to list them all. Whatever the issue my Blogroll wasn't working properly and wouldn't allow me to make any changes or add new sites to the list. In the end I did what other users have done and deleted the gadget entirely. I've now reinstalled it and am rebuilding it from the ground up. As I have over 400 Blog's in my following list it will take a while to get this back up to scratch. Please bare with me in the interim, I'm working hard to correct the problem.
[*Of course I reserve the right not to follow a Blog if it isn't Wargames or Roleplaying related].
Wednesday, 29 February 2012
Tuesday, 28 February 2012
Compact Camera Flash Diffuser
Flash Diffusers are vital for softening harsh shadows during flash photography but there are few examples available to buy that can be used with compact digital cameras. Here's my simple home made flash diffuser that can easily be adapted to fit almost any camera, and all it will cost you is a tube of crisps!
I've written before about the benefits of using a flash diffuser when photographing miniatures. Simply put, a flash diffuser spreads the light from the flash of a camera so that the light does not come from one concentrated source. The nett result is that the light is 'softened', hard shadows are reduced and colours are slightly warmer. Diffuser's also block some of the light from the flash thereby reducing the range of the flashgun or built in flash head. This is a boon to the miniatures photographer as it means that built in flash can be used for macro photography at much closer ranges than non diffused flash. With a little bit of experimentation it won't take you long to work out the effective range of your softened flash and begin to get much better pictures as a result.
I bought myself a great diffuser for use with my SLR and carry it with me whenever I take that kit out. But carrying a full SLR kitbag around a convention can be heavy and cumbersome, and recently I have found it much easier to use my compact Olympus SZ-30MR instead. Small, light and with a wide range of features it is ideal for show photography in every respect bar one - the flash is too harsh for macro Photography. There are few commercial flash diffuser's on the market for compact cameras so I had to fall back on a bit of creative ingenuity and DIY to make one.
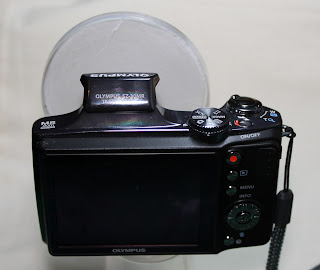 As already stated the single purpose of a diffuser is to soften the flash by creating a larger light source (the surface of the diffuser being several times the surface of the flash). So all that I needed was an opaque surface through which the light could travel, held slightly in front of the flash head. I experimented with various options eventually settling on what I call The Pringle's Solution. I love those round plastic lids from Pringle crisp tins. I use them to mix paint or glue in, they get used as coasters for my coffee cup and now as the basis of a simple and cheap flash diffuser.
Hold the lid over the extended lens of your camera and on the reverse side of the lid use a pencil to draw a circle that matches the lens diameter. Make sure the hole you create is on the edge of the lid so that the majority of the opaque plastic sits in front of the flash. Use a sharp blade to cut the hole out so that it is just a fraction smaller than the lens it will fit over. Some small amount of trimming may be needed to get the fit right - Too loose and the diffuser will fall off. Don't cut through the edge of the lid as this plastic rim give the finished item its rigidity. Next stick tissue paper to the inside of the lid and allow to dry.
That's it, your home-made flash diffuser is now complete and ready to be used! Here's a pictures I took at the weekend on the diffuser's first proper test run. There are still some shadows but the outlines are softer and the color's of the models are richer and properly exposed.
Warning: You will get lots of odd looks when you use this contraption, but you'll also get lots of good photo's and your diffuser will fit easily in a pocket until needed.
I've written before about the benefits of using a flash diffuser when photographing miniatures. Simply put, a flash diffuser spreads the light from the flash of a camera so that the light does not come from one concentrated source. The nett result is that the light is 'softened', hard shadows are reduced and colours are slightly warmer. Diffuser's also block some of the light from the flash thereby reducing the range of the flashgun or built in flash head. This is a boon to the miniatures photographer as it means that built in flash can be used for macro photography at much closer ranges than non diffused flash. With a little bit of experimentation it won't take you long to work out the effective range of your softened flash and begin to get much better pictures as a result.
 |
| My Pringle lid Flash Diffuser in use |
 As already stated the single purpose of a diffuser is to soften the flash by creating a larger light source (the surface of the diffuser being several times the surface of the flash). So all that I needed was an opaque surface through which the light could travel, held slightly in front of the flash head. I experimented with various options eventually settling on what I call The Pringle's Solution. I love those round plastic lids from Pringle crisp tins. I use them to mix paint or glue in, they get used as coasters for my coffee cup and now as the basis of a simple and cheap flash diffuser.
Hold the lid over the extended lens of your camera and on the reverse side of the lid use a pencil to draw a circle that matches the lens diameter. Make sure the hole you create is on the edge of the lid so that the majority of the opaque plastic sits in front of the flash. Use a sharp blade to cut the hole out so that it is just a fraction smaller than the lens it will fit over. Some small amount of trimming may be needed to get the fit right - Too loose and the diffuser will fall off. Don't cut through the edge of the lid as this plastic rim give the finished item its rigidity. Next stick tissue paper to the inside of the lid and allow to dry.
That's it, your home-made flash diffuser is now complete and ready to be used! Here's a pictures I took at the weekend on the diffuser's first proper test run. There are still some shadows but the outlines are softer and the color's of the models are richer and properly exposed.
 |
| Picture taken at Cavalier 2012 using my DIY diffuser |
Warning: You will get lots of odd looks when you use this contraption, but you'll also get lots of good photo's and your diffuser will fit easily in a pocket until needed.
Sunday, 26 February 2012
Cavalier 2012 - Photo's
I got back a little earlier than expected from Cavalier so I had tome to work through my pictures in double quick time to get them posted here. Its was a good show with plenty of excellent stand-out display games that caught the eye. The Rejects were in attendance and did our collective best to alleviate the recession with our spending. We also had a chance to talk to lots of the traders and those clubs running games. We are planning on running a game (our first display game) later in the year at broadside and as newbies to the art of running a display we have lots to learn.
I have posted my pictures as a slide show below but first I have to mention a couple of the outstanding display games being run at the show. For me the best game was The Alamo by Loughton Strike Force. The sheer number of figures on the table was a sight to behold, as were the masses of casualty markers as the battle progressed. It was a visual feast and it certainly hit the spot.
Here's the slideshow with the full collection of pictures.
I have posted my pictures as a slide show below but first I have to mention a couple of the outstanding display games being run at the show. For me the best game was The Alamo by Loughton Strike Force. The sheer number of figures on the table was a sight to behold, as were the masses of casualty markers as the battle progressed. It was a visual feast and it certainly hit the spot.
Another beautifully prepared game with some excellently painted miniatures was Defendiing the Bridge at Obourg (1914) by Gravesend Gamers Guild. This WWI battle table was full of character and detailed terrain. But it was the quality of the painted miniatures that made this game stand out.
Here's the slideshow with the full collection of pictures.
Labels:
15mm,
28mm,
6mm,
Cavalier,
Conventions,
Fire and Fury,
Posties Rejects,
Slideshow,
WWI,
WWII
Saturday, 25 February 2012
Rejects on Tour - Cavalier 2012
 |
| The Laughing Cavalier (1624) by Frans Hals |
Both One Lover Ray and the Angry Lurker have already posted about this trip but this is my opportunity to say, see you there! Keep an eye out for us, come say hello and please don't feel intimidated by our collective tonnage!
As usual I'll be bringing my camera along and no doubt will be shooting pictures like a man possessed throughout the day, so expect to see them posted here early next week.
Friday, 24 February 2012
Wargames Illustrated 293
The March Issue of Wargames Illustrated arrived on my doorstep last week and I'd almost forgotten to write about it because I have been so absorbed with the FOW 3rd Edition rules (more on this later). The gods of fate are cruel and both the new rulebook and WI 293 arrived within an hour of my leaving on a business trip to Southampton. My wife texted me to say they had been delivered, by which time I was 50 miles away negotiating traffic on the world largest car park (the M25).
This months Theme are large wargames fought on giant tables. So we get three articles covering different periods but each played out on the sort of games table that most of us would kill to own. The first article looks at Dettingen, Jun 1743 which occurred during the War of the Austrian Succession. The game was played by Worcester Wargames Club and featured thousands of miniatures over a huge L shaped table. The level of work and detail that went onto this game made the article fun to read and certainly made me wish I'd been in on it!
The second game was The Empire Cracks, 406AD and recreates a section of the Rhine near Mainz which is being crossed by a mixed band of Barbarian tribes. This marked a significant moment in the decline of Roman power in Northern Gaul. The table fought over is 8 foot wide and a huge 22 foot long and covered from one end to the next with detailed terrain including a Roman Fort guarding the river crossing and a former roman town now in the hands of the Barbarians.
The third and final game featured was Chancellorsville, May 1863 and was fought across several tables each representing a different section of the battlefield. The game used the Black Powder rules and featured two umpires, 15 players and over 6000 figures. A truly spectacular game and the article is full of mouth watering pictures.
I still have several articles left to read but this is proving to be an issue that has plenty for everyone and is sure to whet the appetite of any wargamer.
Thursday, 23 February 2012
Dot Com
Right, some background. Three years ago when I started this Blog it had a different name; BigLee's Mini Painting Blog. Aside from being a bit of a mouthful (it doesn't exactly trip off the tongue) this also translated into an awful URL address that even I found hard to remember. As the Blog developed I realised that the Blog's name didn't represent everything that I wanted to write about. So after about six months I changed it to BigLee's Miniature Adventures. Of course changing the name alone couldn't undo the old URL address which remained incomprehensible and seemed even less relevant to the site it represented.
 About 18 months ago I began another planned revamp of the Blog starting with a layout and colour scheme redesign and culminating in my introducing readers to a shortened version of the blogname - BLMA. The idea was to slowly migrate readers towards using this short name to refer to my Blog before making the final change, purchasing a suitable domain name. So here we are, new personal domain name in place and ready to be unleashed on an unsuspecting world....bwahaha.
Will it make much of a difference? Er, probably not. All the old links on other sites and on blogrolls will still work, the old address will still point to the new domain and my Blog is still hosted by Blogger so it won't even look different. But the new address does look a lot better (which satisfies my sick need for tidiness and order) and is a lot easier to remember. Its also short enough to fit on a T-shirt (more on this at a later date!) and will make promoting my blog easier. So there you go, something of a non-event for visitors to the site but a big event for me because it's one more step in my plan for global domination.
Monday, 20 February 2012
National Army Museum
Last week I posted pictures from my recent trip to the War Horse Exhibition at the National Army Museum in Chelsea. I've now had a chance to work through the pictures I took of the rest of the museum and these are shown as a slideshow at the bottom of this post. I've never been to this museum before but I have to say I was very impressed. Its very family friendly without loosing interest for the older visitor or history buff. There are lots of models and hands on displays throughout the building that will keep children of all ages (and I count myself amongst them) happy and engaged.
One of my favorite exhibits was William Siborne's famous model of the Battle of Waterloo. In 1830 Siborne was commissioned to construct a model of the Battle of Waterloo and thus began an extensive period of research during which Siborne contacted many of the surviving allied officers for their recollections of the day. The model was not completed until 1838 and nearly bankrupted him in the process. He also earned the enmity of the Duke of Wellington as his research appeared to contradict the Dukes own account of the battle.
On the top floor there is also an art gallery with several famous works in it that I didn't realize were held here. One is the well known 1879 painting by Charles Fripp of the Battle of Isandlwana. This image has been reproduced so many times it has become iconic and instantly recognisable. Although Fripp was not a witness to the battle he was able to visit the scene a few weeks later where the bodies of the fallen still remained.
Here's the rest of my pictures from the museum. I hope you like them. As always if you see any errors with the labeling please let me know and I'll make any necessary corrections.
I was also very impressed with the museum shop. Most of the stuff you find in these sort of shops is usually just overpriced 'tat'. By here there was an excellent selection of books and gifts, with a range of prices to suit all pockets. If you can get a chance to visit this Museum I think you'll be impressed both with its accessibility and the comprehensive collection they have on display.
One of my favorite exhibits was William Siborne's famous model of the Battle of Waterloo. In 1830 Siborne was commissioned to construct a model of the Battle of Waterloo and thus began an extensive period of research during which Siborne contacted many of the surviving allied officers for their recollections of the day. The model was not completed until 1838 and nearly bankrupted him in the process. He also earned the enmity of the Duke of Wellington as his research appeared to contradict the Dukes own account of the battle.
On the top floor there is also an art gallery with several famous works in it that I didn't realize were held here. One is the well known 1879 painting by Charles Fripp of the Battle of Isandlwana. This image has been reproduced so many times it has become iconic and instantly recognisable. Although Fripp was not a witness to the battle he was able to visit the scene a few weeks later where the bodies of the fallen still remained.
 |
| Detail of 1879 painting, "Battle of Isandlwana" by Charles Fripp |
Here's the rest of my pictures from the museum. I hope you like them. As always if you see any errors with the labeling please let me know and I'll make any necessary corrections.
I was also very impressed with the museum shop. Most of the stuff you find in these sort of shops is usually just overpriced 'tat'. By here there was an excellent selection of books and gifts, with a range of prices to suit all pockets. If you can get a chance to visit this Museum I think you'll be impressed both with its accessibility and the comprehensive collection they have on display.
Saturday, 18 February 2012
My 3rd Edition Arrived
Just a quick note to say I don't expect to get much painting or gaming done this weekend. My copy of the 3rd Edition Flames of War rules arrived in the post on Thursday (while I was away on company business... Typical!) and I'll be reading it over the next few days.
This little paperback is a hefty tome in its own right being almost double the thickness of the 2nd Edition paperback rules. My first impressions are good. I like the simple look and easy layout of the book, and a quick scan of the diagrams/illustrations inside reassures me that the rules will be explained much better than in 2nd Edition. For me this is a vital element as I'll be training my Brother-in-Law Ray to play the new rules. As a complete n00b with no background in wargaming at all, I consider him the ultimate test of the new rulebook, which claims to be easier to read and understand.
Right, that's enough Blogging, I'm off to my Bunker to read the rules.
Thursday, 16 February 2012
War Horse Exhibition
On Wednesday I took a day off work to visit the National Army Museum in Chelsea. Mrs BigLee and my youngest daughter Emily accompanied me (my other daughter is 'roughing it' on a Ski Holiday to America poor dear) as we all wanted to see the War Horse Exhibition being held there. Entry to the museum and the special exhibition is free and despite this being the winter Half Term holiday it wasn't too busy.
The Exhibition was very good and looked at the role of the War Horse throughout the history of the British Army (from the New Model Army onwards) although of course there are lots of references to the book, play and film that inspired this display.
I really enjoyed this exhibition and thought that the mix of items on display and the information provided would appeal to a wide range of visitors. There was no 'dumbing down' in the way this was done but it remained relevant and interesting to an old Grognard such as myself and a young whipper snapper such as my 6 year old daughter.
I took a lot of pictures of the rest of the museum but I'll post these over the next few days as I work my way through them. In the meantime I hope you like the pictures of this exhibition.
Monday, 13 February 2012
Chatham Military Collectors Fair
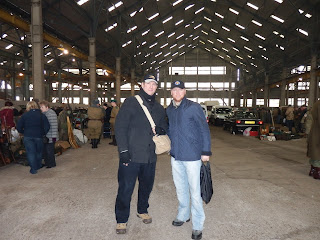
On Sunday I went to a Military Collectors Fair in Chatham with my Brother-in-Law. It was a very interesting event (I've not been before) but boy was it c-c-c-cold.
The traders were a bit thin on the ground at this show, presumably because the frigid conditions had driven most of them away! It actually felt colder inside the building known as Slip 5, possibly because of its concrete floor and iron framework. This is actually a Grade I Listed building built between 1847-8 and is quite a sight to behold once you are inside.
I restricted my purchases to a couple of replica tank regiment badges and stuck for the most part to taking photo's. Ray on the other hand is a dedicated collector. He bought a few original insignia and a couple of Mills Grenades to add to his growing collection in his Man Cave.
I'll have to come to one of these events again (they are held every month) but I think next time I'll do it in the summer!
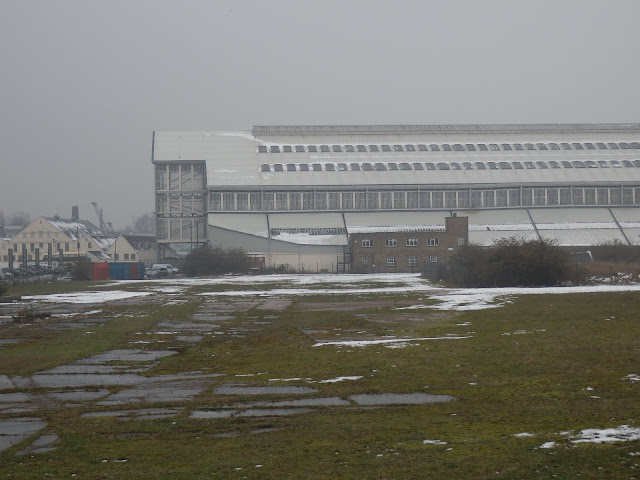 |
| The venue was one of the massive shipbuilding warehouses in Chatham Dockyard |
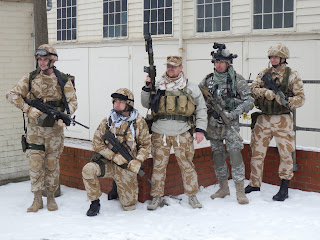 |
| Desert Forces in the Snow! |
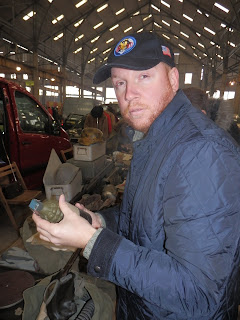 |
| Ray's first purchase - A Mills Grenade |
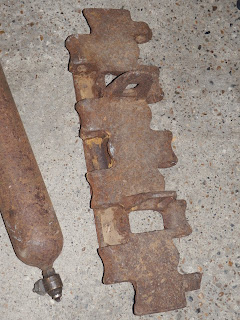 |
| Panther Track - Just £165 each! |
 |
| Inside the |
I restricted my purchases to a couple of replica tank regiment badges and stuck for the most part to taking photo's. Ray on the other hand is a dedicated collector. He bought a few original insignia and a couple of Mills Grenades to add to his growing collection in his Man Cave.
I'll have to come to one of these events again (they are held every month) but I think next time I'll do it in the summer!
Sunday, 12 February 2012
Big Picture - The Hochwald Gap
I haven't done a Big Picture feature in a while so here's one from the 2010 SELWG show at Crystal Palace in South London. This is a scene from a display game called The Hochwald Gap run by the Shepway Wargames Club.
Operation Veritable which was designed to bring the 21st Army Group to the west bank of the Rhine River. The operation was delayed by the German Ardennes Offensive but eventually began in February 1945. The plan's second phase called for the 2nd and 3rd Divisions to take the Hochwald Forest. The 4th Canadian Armoured would then sweep through the Hochwald Gap towards Wesel, followed by 2nd Division towards Xanten. Operation Blockbuster as it was known was scheduled for 27 February, but stubborn German resistance prolonged the battle for six days. It was not until 3rd March that the forest was finally cleared.
This display game - done in 20mm - evocatively captured the bleak February landscape of the area. It stood out as one of the best tables at the show and was full of little details such as this military ambulance struggling through the mud.
Operation Veritable which was designed to bring the 21st Army Group to the west bank of the Rhine River. The operation was delayed by the German Ardennes Offensive but eventually began in February 1945. The plan's second phase called for the 2nd and 3rd Divisions to take the Hochwald Forest. The 4th Canadian Armoured would then sweep through the Hochwald Gap towards Wesel, followed by 2nd Division towards Xanten. Operation Blockbuster as it was known was scheduled for 27 February, but stubborn German resistance prolonged the battle for six days. It was not until 3rd March that the forest was finally cleared.
 |
| Shepway Wargames - The Hochwald Gap |
Wednesday, 8 February 2012
RIP Joe Ekins

On Monday the Mail and other newspapers reported the sad death of Joe Ekins. On the 8th
You can hear Joe in a Veteran Podcast describing his encounter with Wittmann on the Tank Museum website.
I never had the pleasure to meet Joe but in all the TV interviews he gave he always seems to be an especially self effacing and humble man. Another hero has gone and we are left just a little bit poorer for his passing.
*[Apologies folks, a typo got through the net! Wittmann was killed on 8 August 1944 while taking part in a counterattack ordered by Kurt Meyer of the 12th SS Panzer Division, to retake the tactically important high ground near the town of Saint-Aignan-de-Cramesnil.]
Sunday, 5 February 2012
The Battle of Mackenzie Ridge
On Saturday I had the pleasure to get together with the other Rejects for a 15mm Crimean War game. It's 1854 and the British around Sevastopol learn that the Russians have occupied and are beginning to fortify Mackenzie Ridge on the road into the city. The British send out a small exploratory force and thereby set the scene for the Battle to come. Once again I tried to make more detailed notes as the game progressed but at the end realised that they made little sense. I've tried to recreate the action in this series of pictures but I'm sure I've missed many more smaller details.
By this stage of the Battle the Russians were still winning on points, but only just. However with the arrival of the British heavy Cavalry and the loss of both Russian Cavalry Divisions there was little that the Russians could now do to hold back the British. There was some debate about whether to play on but in the end two of the three Russian players decided to concede defeat. With their cavalry destroyed (or about to be) the British superiority in weapons and quality would increasingly swing the battle their way. In fact there was little need for them to actually assault Mackenzie ridge when all they needed to do was sit back and use their longer ranged rifled muskets to whittle away the Russian Infantry until they were destroyed or broke.
Keep an eye out for more pictures UPDATE: Fran and Ray have now posted their Battle Reports for this game at the Angry Lurker's Blog and at Don't Throw a One.
 |
| Mackenzie Ridge with the Russian redoubts still under construction. |
 |
| Russian Cossack cavalry prepare to charge (those lances are sharp!) |
 |
| British 1st Division advance towards the Russian left flank |
 |
| With the Russian guns gone the British 2nd Division advances towards the Ridge |
 |
| Russian reinforcements arrive |
 |
| ...as do British reinforcements. |
 |
| The Cossack cavalry outflank the British 1st Division and move into the over of woodland to act as a threat to the British advance. |
 |
| Meanwhile the Russians continue to build their redoubts and redeploy their infantry to face the British 2nd Division which continues to advance. |
 |
| More Russian cavalry arrive on their left flank and immediately charge the British cavalry who didn't stand a chance against the massive Russian formations. |
 |
| The British halt their advance just beyond Russian musketry range and use their superior weapons to wear down the men behind the redoubts. |
 |
| The Russian infantry stand firm in their redoubts but continue to be ground down in a battle of attrition they cannot win |
 |
| Meanwhile the Cossack's charge out of the woods into the British flank. They defeat the unit of Coldstream Guards and overrun an artillery battery. |
 |
| The Cossack's continue their charge but run dead into British Square. This is too much for them and the surviving Cossack's flee the field. |
 |
| British Heavy Cavalry now reach the battlefield and the remaining Russian Cavalry decide that discretion is the better part of valor and leave the field. |
By this stage of the Battle the Russians were still winning on points, but only just. However with the arrival of the British heavy Cavalry and the loss of both Russian Cavalry Divisions there was little that the Russians could now do to hold back the British. There was some debate about whether to play on but in the end two of the three Russian players decided to concede defeat. With their cavalry destroyed (or about to be) the British superiority in weapons and quality would increasingly swing the battle their way. In fact there was little need for them to actually assault Mackenzie ridge when all they needed to do was sit back and use their longer ranged rifled muskets to whittle away the Russian Infantry until they were destroyed or broke.
Friday, 3 February 2012
Churchill's War Lab
 Before Christmas I revealed that one of the Dagenham Delvers, and fellow Blogger, Derek bought me a couple of books. I've just finished one of these and it was a darn good read. Churchill's War Lab by Taylor Downing looks at the circle of experts and scientists that Churchill brought into the inner circles of government during the war.
The book starts as most of these do with a broad biography of Churchill's early years and those formative events that would shape the war leader of the future. Most of this is standard stuff but it is written in a fast and energetic way that I think will appeal to even the well read Churchill fan. Most importantly it sets the scene for this most unlikely of leaders whose career went through many ups and downs before he claimed the Premiership.
Downing then goes on to looks at the various groups of adviser's that Churchill gathered together and relied upon during the six long years of WWII. These included - unusually for the time - key scientists and engineers who found in the Prime minister and willing and eager audience for their ideas. Churchill is portrayed very much as someone for whom new technology and new discoveries were endlessly fascinating.
Two facts in particular caught my attention. The first was the fact that the younger Churchill was bad at maths. He struggled with this discipline and indeed all academic subjects other than History and the Classics which means that he was far from being a scientific person himself. However he was able to see the application and value of scientific discoveries that some of his contemporaries were not able to do. The second interesting fact that leaped off the page to me was that Churchill liked to get his hands on new weapons (hence the cover picture shown above) and was almost childlike in his enjoyment of new technology. Having said that the author doesn't gloss over Winston's very conservative (with a small 'c') attitudes to Britain's place in the world.
This section of the book, looking at the power-play that developed between Britain and America as the war progressed was for me the most interesting. Churchill and Roosevelt appear to have developed a genuinely close friendship in which the British Prime Minister initially had the most influence. But as America joined the war and its commitment to defeating Hitler increased, so England's negotiating advantage as the brave-underdog was slowly and irrevocably eroded.
Its now a generally agreed fact that it was largely America that benefited from the fruits of British scientific and engineering developments in that period - development's so carefully fostered during Churchill's premiership. The Jet Engine and early work on splitting the atom are the most notable examples but there are many more. Similarly control of many colonial investments passed to the US in one form or another by the end of the war. Britain was on the verge of bankruptcy and it was only through deals like the Lend Lease programme that Britain was able to continue in the fight to the very end.
Reading this book it is clear that although Churchill tried to mitigate the decline of the British Empire he also understood that if this was the price that had to be paid for victory, then it was a price he was willing to pay. When he first became Prime Minister has was asked in the house of Commons what his policy towards Germany would be. His answer not only roused the fighting spirit of a nation but it also foreshadowed the sacrifices to come.
"You ask, what is our aim? I can answer in one word: It is victory, victory at all costs, victory in spite of all terror, victory, however long and hard the road may be; for without victory, there is no survival." (Winston Churchill -13 May 1940)I thoroughly enjoyed this book, even though it wasn't quite the book I thought it would be when I started reading it. It looks in great detail at all the great and influential people that Churchill surrounded himself with - Scientists, Mathematicians, Engineers and Military men. He pushed them all hard, sometimes too hard, but he also relied upon their advice and ideas probably more than any Prime Minister before him. Above all this book is about Leadership and the ability of one man to galvanise a whole nation to extraordinary effort.
Subscribe to:
Posts (Atom)

