I've been working on some more terrain items, this time specifically for playing 6mm wargames using the
To the Strongest! rules. My game mat is divided into a 3" grid so when I'm building terrain elements for use with these rules I try to make them fit comfortable inside those dimensions or multiples thereof. My current set of hills is rather limited, especially now that I have expanded my games surface to 3x4', so I have started to build a set of extra hills that allow for a bit more variety.
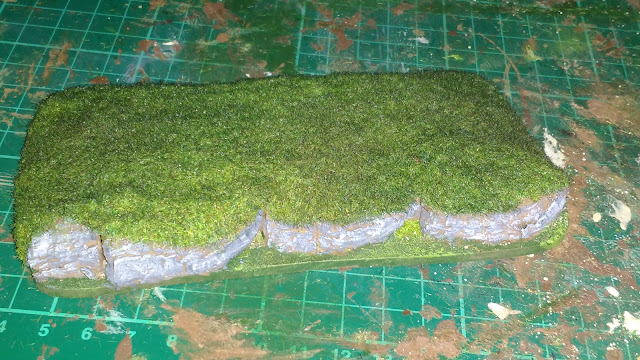
The following pictures illustrate the technique I have used and show some of the variety of hills I have managed to create using it.
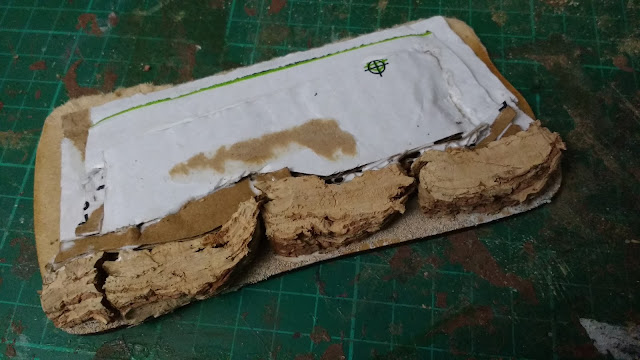 |
| I cut slices of cork bark with a model saw and lays then along one edge of the base to make a line of cliffs. Then I built up the hill behind the cliffs using layers of corrugated cardboard cut to fit. I filled any gaps with little offcuts of the card until I had the rough shape of the hill. The whole thing was glued together with lashings of PVA glue and then left overnight to dry thoroughly. |
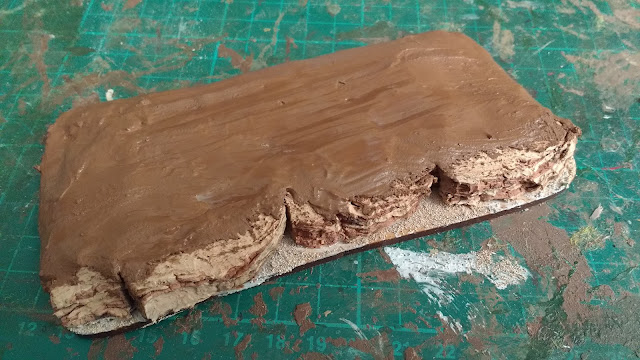 |
| The next morning I used a wood filler to shape the hill slopes and of course to fill any gaps. Left again for several hours to dry and the result is a hard but lightweight terrain item ready to be base coated and painted. Building up from an MDF base means the whole model is nicely rigid and doesn't warp. My base was 3mm thick but thinner MDF or foamboard would work just as well. |
 |
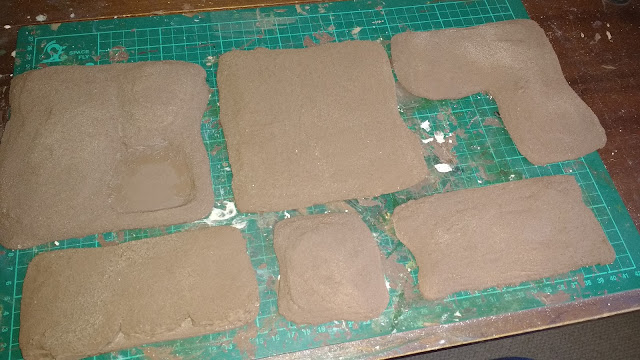
| Some of the other hills I have created using layers of corrugated Cardboard to 'sculpt' the general shape before adding plaster to round the edges. |
 |
| I added a layer of sand to the ground to add a little texture. Once this was dry I base coated the whole model. My preferred method is spray paint with Army Painter Brown Leather. |
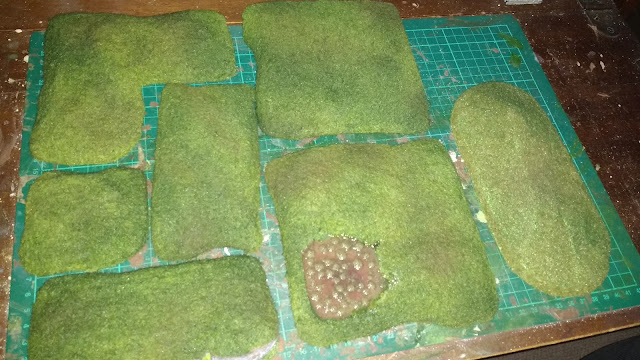 |
| The final stage was to paint the model and add turf and flocking. I tried to match my existing hills and got them pretty close in colour (an old hill is shown on the right for comparison). |
 |
| The finished escarpment model. I may do more of these in the future. |
One model included a depression to add a marshy lake. I painted the bed of the lake with darker colours in the centre and then used a thin layer of Vallejo Liquid Water. This self-leveling liquid takes several hours to set so I took the time to partially submerge grass tufts in it to make the end result look like a marsh.
With my old hills I now have more than enough for my modest 3x4' table.


The Hills look good. And good you have enough for a game now, well enough for a 3'x4' table! All the best mate.
ReplyDeleteThanks Clint, I'm rather pleased with them.
DeleteVery effective and nice to see how you approached making them.
ReplyDeleteI will be making more at some point...I just need to restock my static grass pots!
DeleteYou can never have enough terrain. It's always one of the projects you don't do enough but satisfies so well. These are very nice and thank you for sharing the technique.
ReplyDeleteThanks. I have been meaning to do this for months and when I finally started it took just a few days. Most of the time is waiting for stuff to dry, so if you have access to a boiler cupboard or hot room it will speed things up significantly.
DeleteThese hills turned out nicely, and the escarpment in particular looks quite nice. Would be a great place to park a battery of warmachines.
ReplyDeleteI was thinking that myself.
DeleteA nice and useful collection oh hills, well done!
ReplyDeleteThanks. I'm going to make some more, but first I need to restock on the static grass and plaster as I'm running low.
DeleteGreat work Lee.
ReplyDeleteThanks Ray. My kids thought I'd cracked when I came home with a load of corrugated cardboard and said I was making hills. Mind you, they think I'm a few crisps short of a packet anyway, so what the hell.
DeleteGreat stuff. I will give your method a go at some point this year.
ReplyDelete